Installing Tidio on your website is a quick and easy process. You have two options to install Tidio: by adding the Tidio plugin to your web platform or by inserting the JavaScript code into your website's code.
In this article, you'll learn:
- How to install Tidio using the plugin installation
- How to install Tidio using the JavaScript code installation
Tidio Plugin Installation
Tidio has its own app or plugin for four platforms: Shopify, WordPress, WooCommerce (through the Tidio plugin for WordPress) and BigCommerce. Simply search for Tidio in your platform's app market, install it, and sign in with your Tidio account - you can create a new project or choose one you already have. If you prefer step-by-step instructions, follow the guide for your platform:
 |
 |
 |
WooCommerce |
On other platforms, you install Tidio by pasting your Tidio code (or, on a few platforms, your Public Key) in your platform's settings. Our guides show you exactly where:
 |
 |
 |
 |
 |
 |
 |
 |
 |
 |
 |
 |
 |
Weebly | Ecwid (by Lightspeed) |
Please note: the Tidio app for Wix is no longer supported since September 30, 2024, and the Tidio plugin for OpenCart is being sunset. On both platforms, you install Tidio with the JavaScript code - their guides above show you how.
If you can't find your platform, don't worry! You can still install Tidio by following the javascript code installation method.
Javascript Code Installation
To install Tidio using the javascript code method on your website, you'll need to create a Tidio account. To create a Tidio account, go to our website, tidio.com, and click on the Get Started button to create a new Tidio account. You can also use the Log In option to use your existing account.

The installation process is easy as it only requires you to paste one line of code in the proper place of your website code.
To install Tidio via the javascript method:
1. Locate the installation code
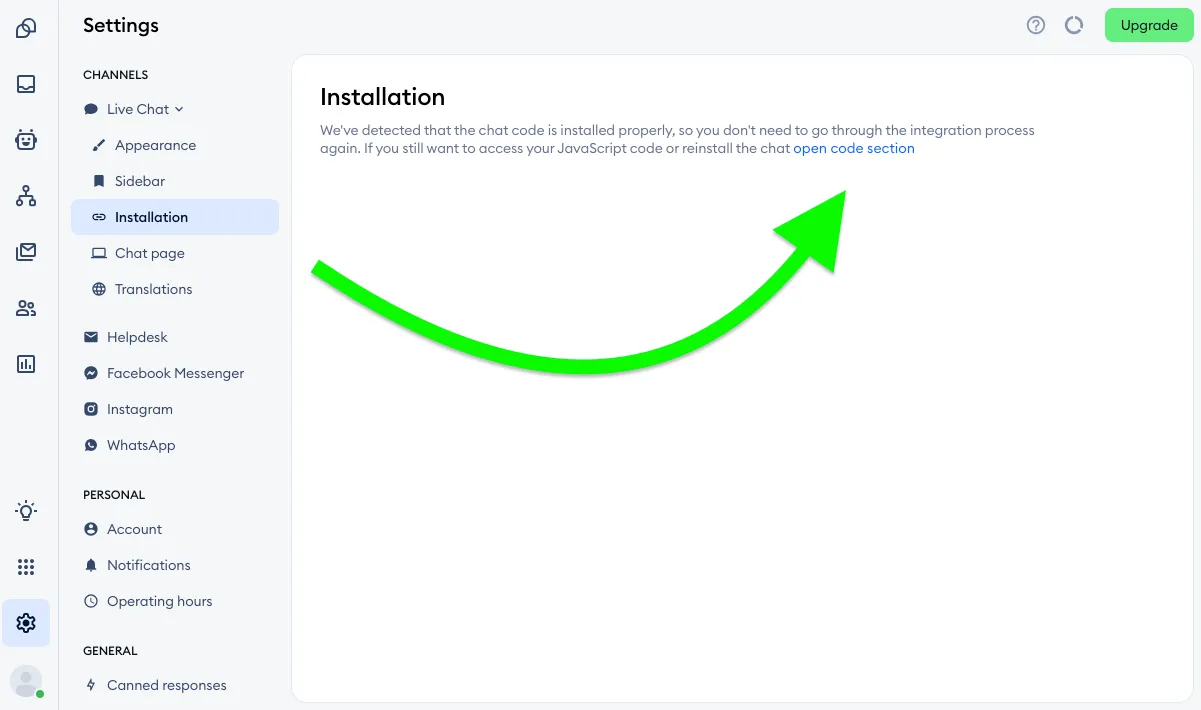
You can find your unique Tidio javascript code by heading to Settings > Live Chat > Installation section. If you do not immediately see the code, click on the open code section link:
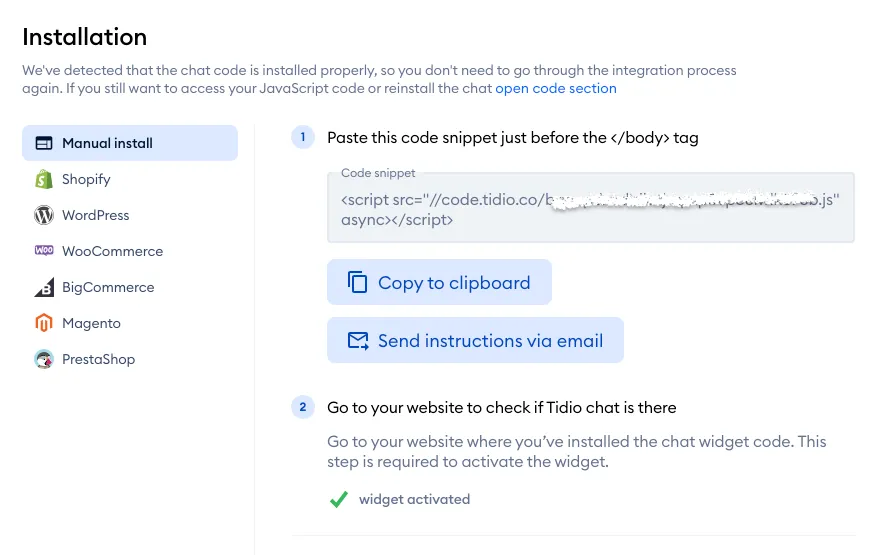
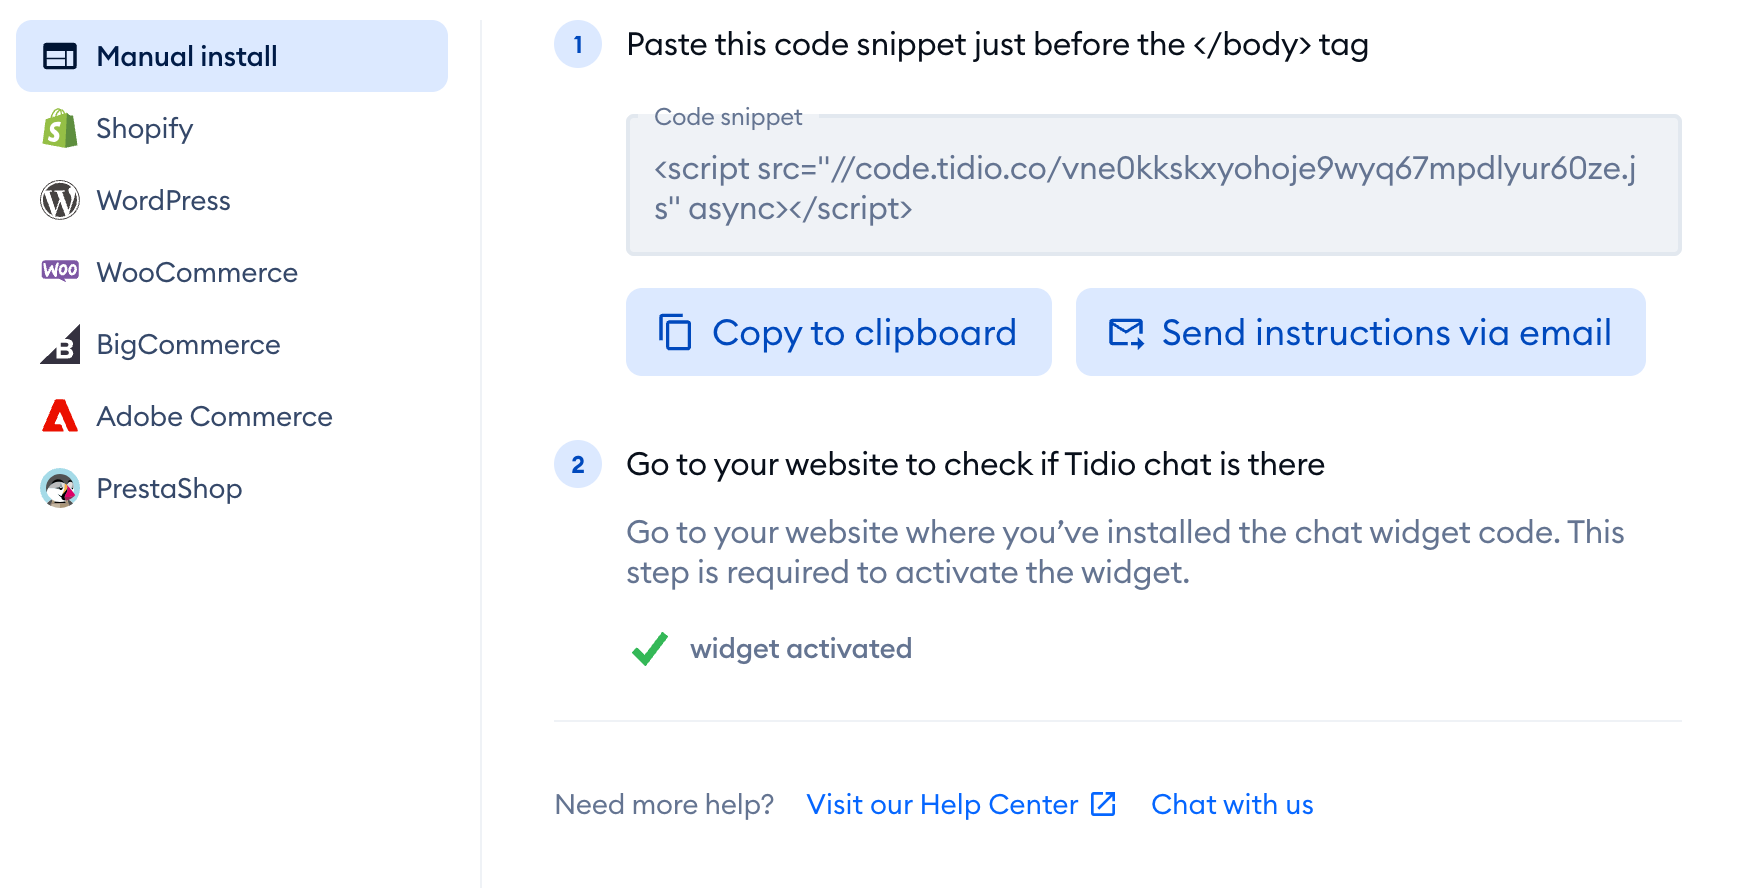
Under the Manual install tab, you will see your unique Tidio installation code:
You'll also find the same code in the Install Chat Widget window. Open it with Install widget on the Chat card of the Getting started page, or with Install Chat Widget in the bar at the top of your panel, if you see it. First, adjust your widget's look and hit Continue. Then, in Install your Chat Widget, pick Manual install from the list of platforms:

2. Copy the Tidio Javascript code to your clipboard
Click on the Copy to clipboard button to add the JavaScript code.
Is someone else taking care of your website's code? Click on Send instructions via email instead, type your developer's Email address, and hit Send instruction - we'll email them the installation instructions.
3. Open your website's backend
Access the server on which your website is hosted with the tool allowing you to modify the files or log in to your respective platform Dashboard and find the code editor.
4. Locate the file that contains the </body> tag
While it might differ depending on how your website is built, the rule of thumb would be to search for the files with .html or .php extension. Usually, it will be either index.html or index.php, but there might also be some additional subpages files.
5. Find the </body> tag & add the javascript code to your website's code
Use the search tool of your ftp client, or scroll down to the very bottom of the file to locate the closing </body> tag. Then, paste the copied JavaScript code snippet above the closing </body> tag of your website's source code.
6. Remember to save the changes
Save the changes, and that's it! Now, check your website and enjoy using Tidio :)
7. Check your website
Go to your website, and check if you can see the Tidio chat widget. Please don't skip this step - visiting your website is what activates the widget. Under the code, the Manual install tab shows checking widget activation until Tidio detects the widget on your site, and then widget activated:
From then on, Settings > Live Chat > Installation says Chat Widget is installed properly. If it says The chat code is not installed properly, check that you pasted the code just before the closing </body> tag and saved your changes.
Great! You have successfully integrated Tidio Chat with your website! :)

Next steps:
- Customize your chat widget - Adjust the look and feel of the widget to your branding to create a seamless experience.
- Adjust your flow message - Use flows to welcome visitors or offer promo codes to catch their attention.
- Get to know your live chat Inbox - Tidio's Inbox is a powerful interface for managing tickets & conversations. See how it can help you manage your customer service.
- Install the same Tidio chat on two or more websites - Use one chat, one team and one Inbox on all your websites.
