See how easy it is to install Tidio on your Drupal website. The chat will need to be installed manually, but the process is pretty simple.
In this article, you'll learn:
Installation Code
Log into your Tidio panel at www.tidio.com and go to the Settings > Live Chat section on the left. In there, look for Installation (inside the Live Chat category).
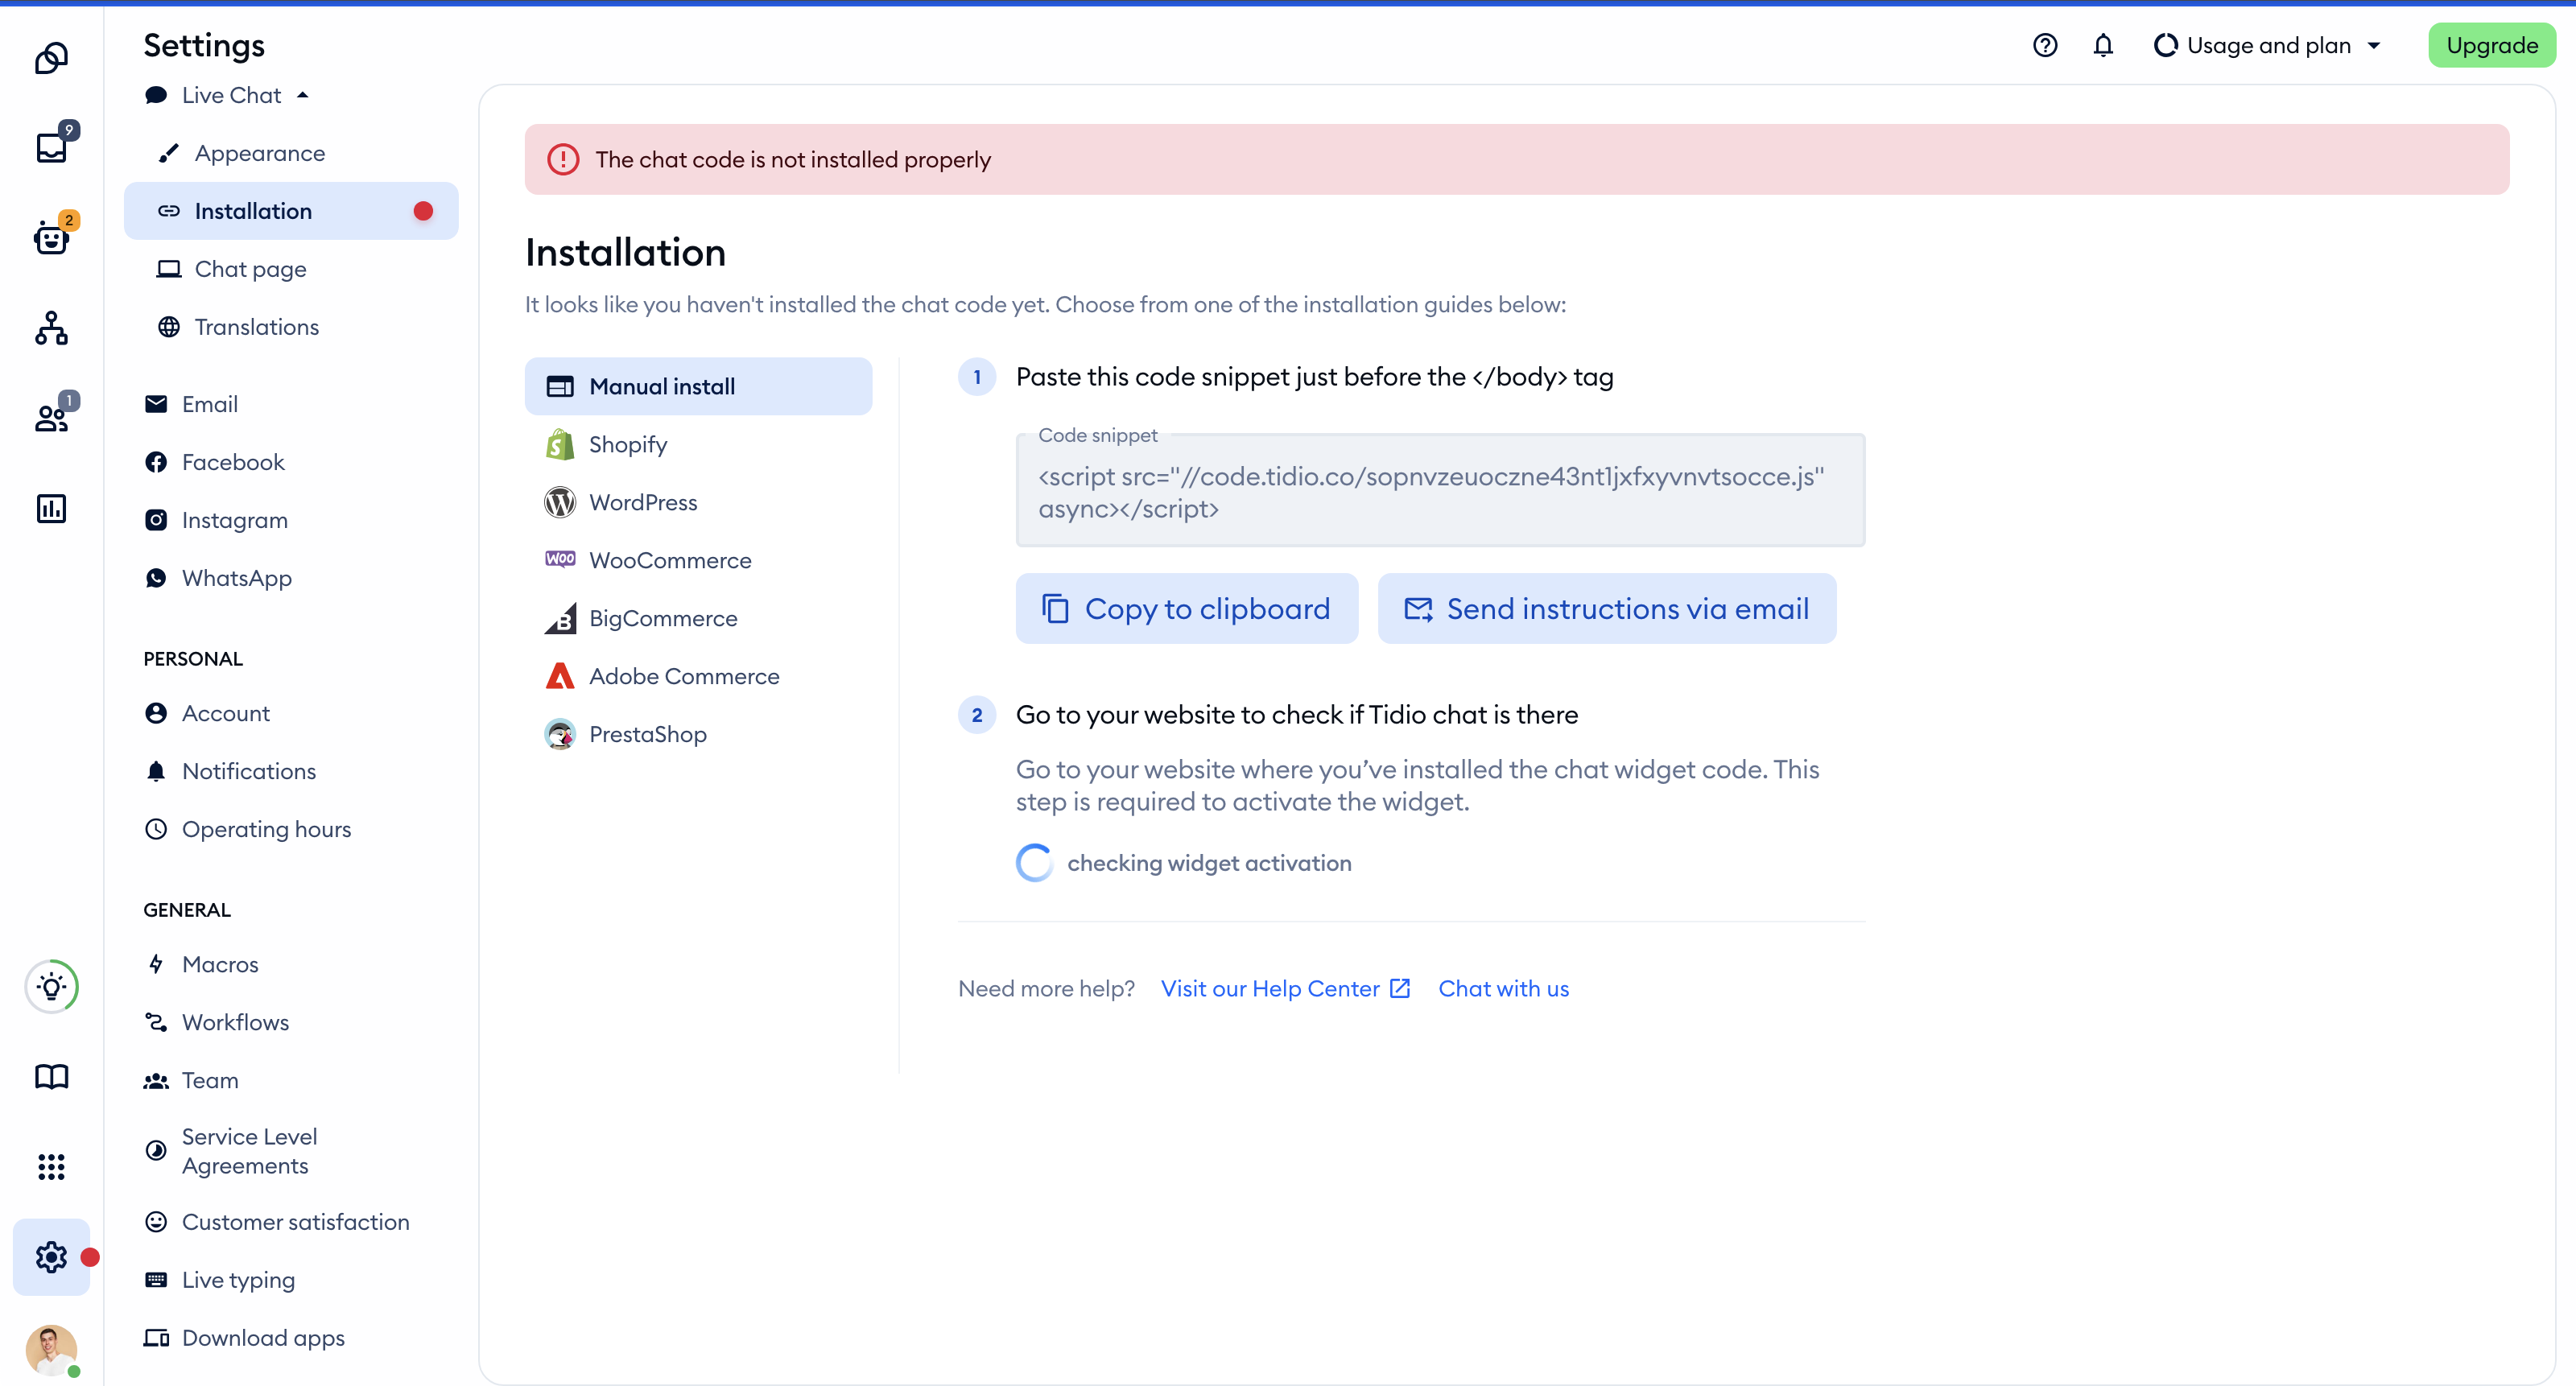
Choose the Manual install tab and click on Copy to clipboard to copy the JavaScript code from the box on the page. If Tidio has already detected the chat widget on your website, click on open code section first.
Next, log into your server using an FTP client, e.g., Filezilla (https://filezilla-project.org/) & find the location of your theme in the server.
To do so, you can check the name of your theme in the Drupal panel and look for a catalog with a similar name in catalogs/themes/name_of_your_theme, sites/all/themes/name_of_your_theme, or sites/default/themes/.
Check if there is a header.tpl.php or html.tpl.php file in your theme catalog. Download this file to your computer and open it in the text editor. Next, find the closing tag (such as </head>) and paste the Tidio Chat javascript code right before it.
If there is no header, copy the file from /modules/system/html.tpl.php to catalogues_themes/templates.
Save your changes and send them back to the server (overwriting the old file).
Done! Tidio Chat will now appear on your website. Now you can go back to your Tidio Chat panel and customize chat to your preferences.
Please note: before integration, make sure you are working on the correct project. To switch projects, click on your avatar in the bottom left corner of your Tidio panel and point to your current project's URL under Project - see Switch Between Projects.
