Add the Tidio widget to a website you build in Replit by giving Agent a focused installation request. Replit supports different frameworks, including Angular, Vue, and Svelte, so let Agent use your existing app structure rather than assume a fixed file path.
In this article, you'll learn:
- How to find your Public key
- How to ask Replit to add the widget
- How to add the script yourself
- How to give Replit the Tidio documentation
- How to check the installation
- How to troubleshoot the widget
Find your Public key
Log in to your Tidio panel and go to Settings > Developer > Project data. Click the Public key field to select its value, then copy it.
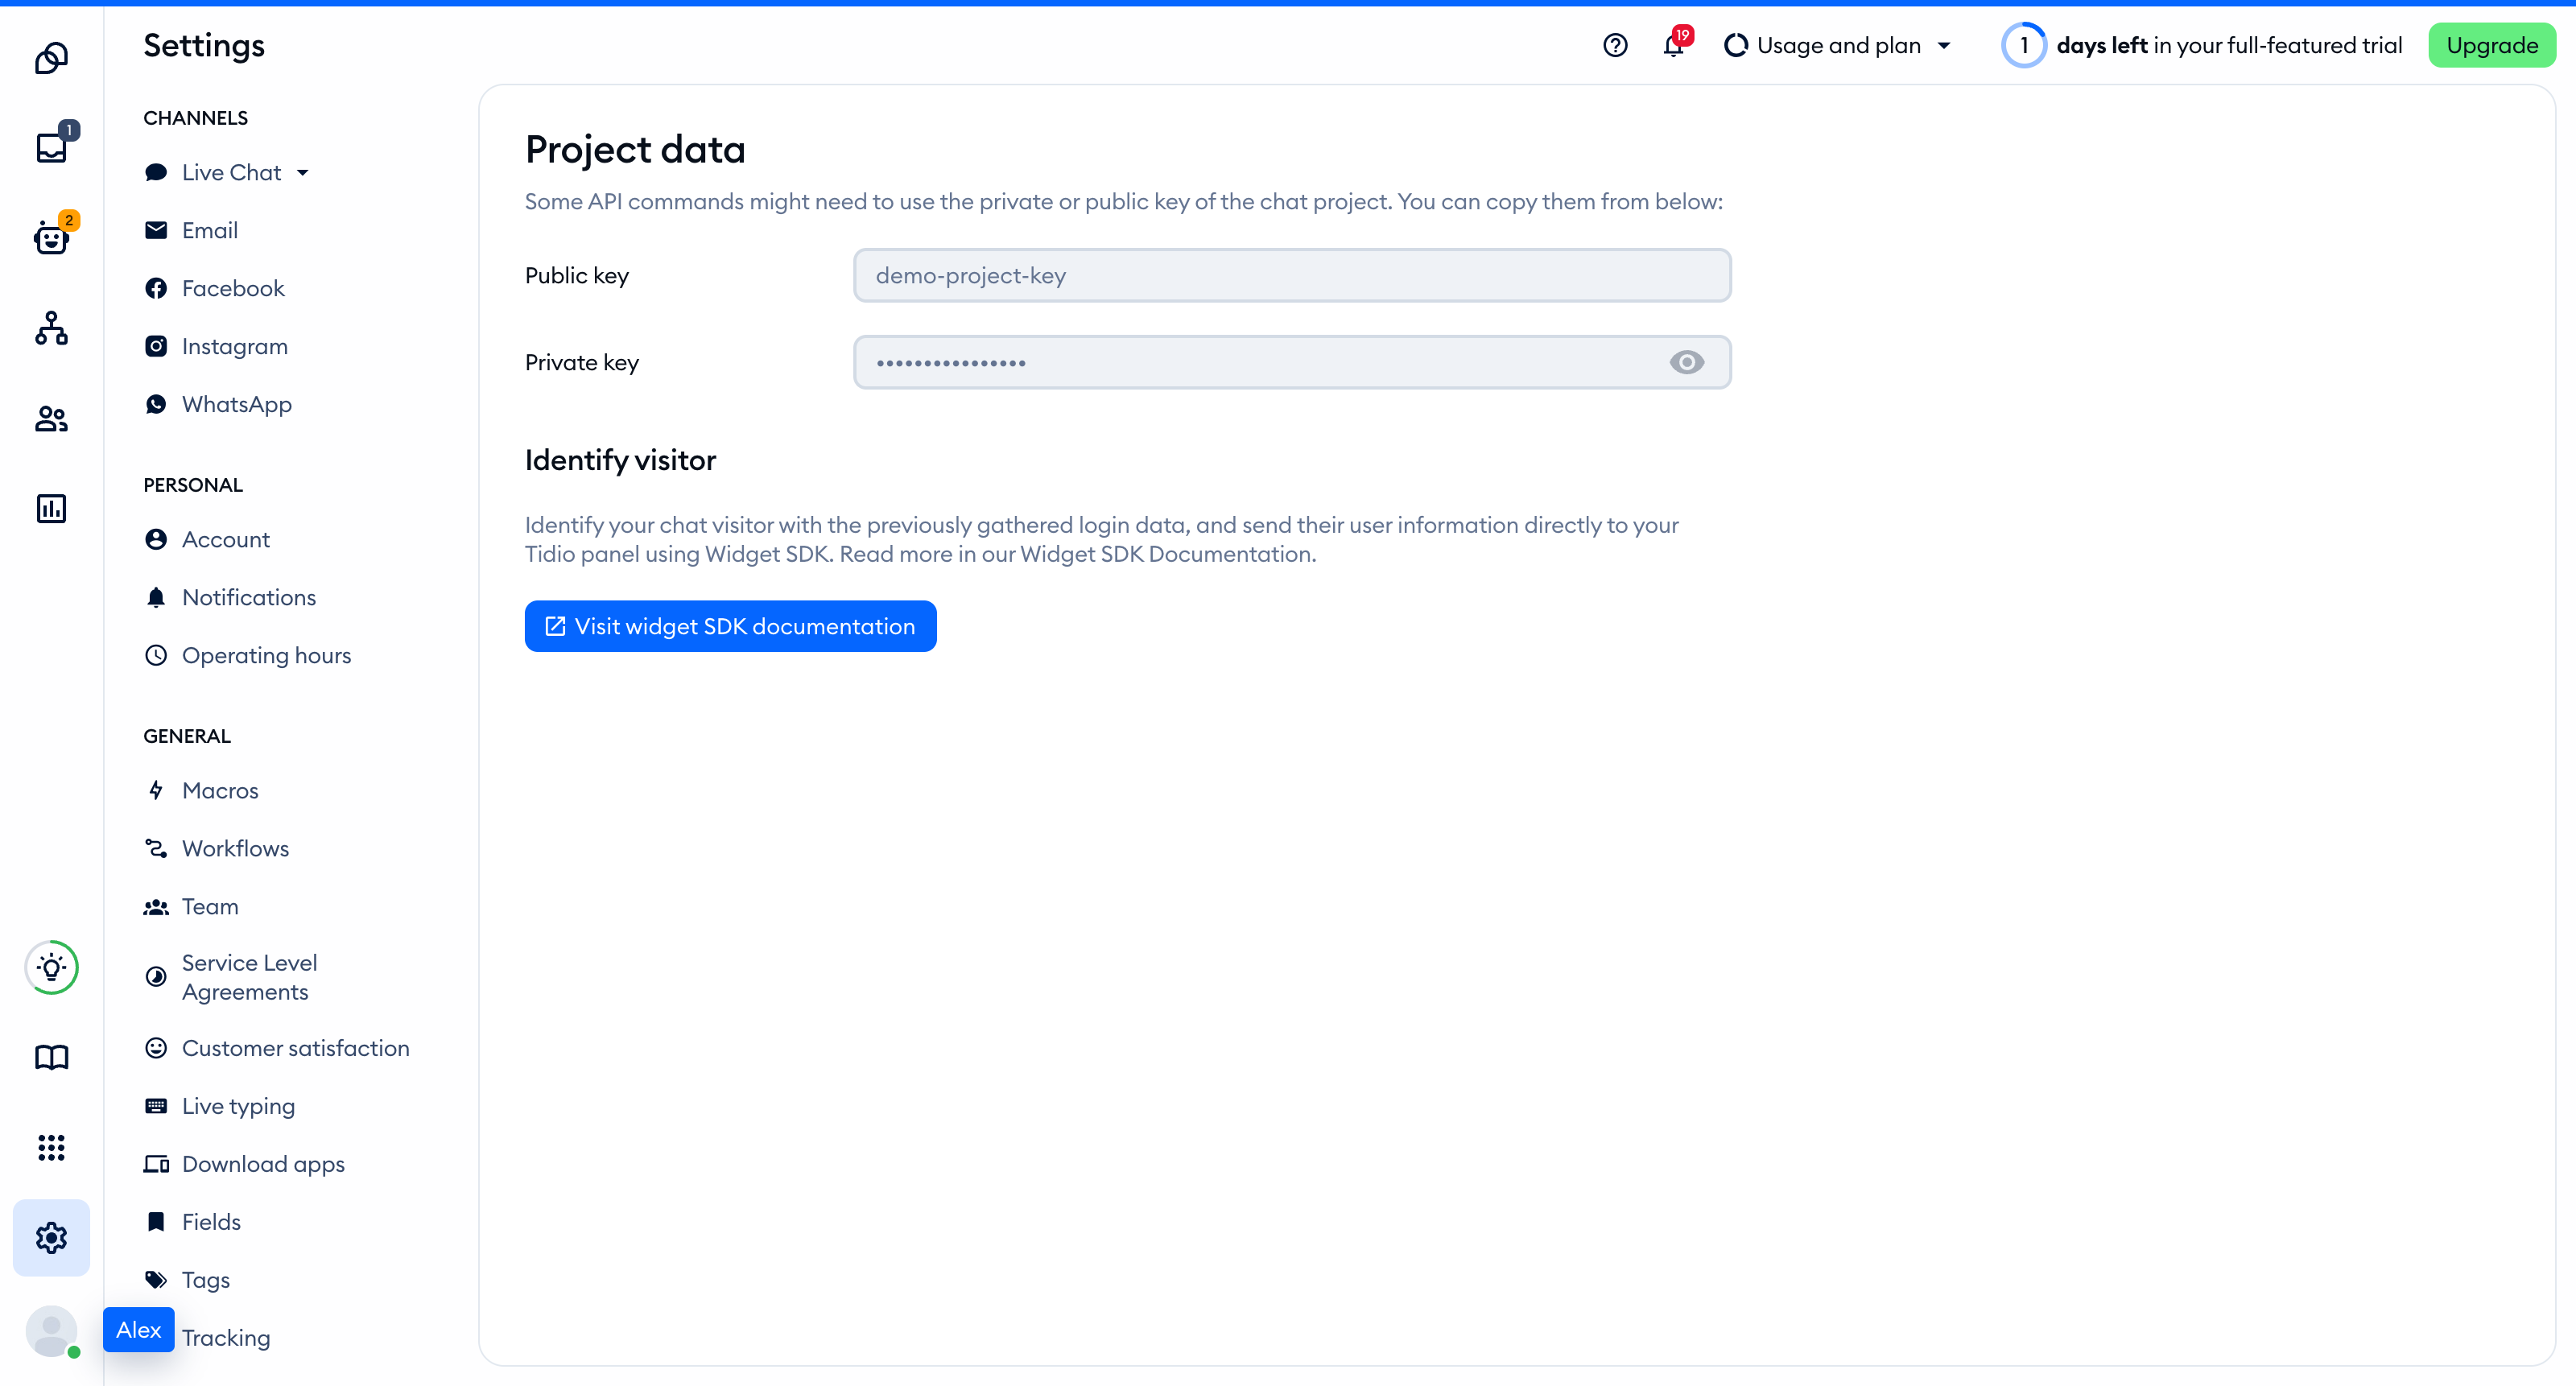
The Public key is part of the script address that every visitor's browser loads, so you can keep it in front-end code. The private key on the same page is different: never put it in your website.
You'll find the same key inside the installation code in Settings > Live Chat > Installation, under Manual install:
<script src="//code.tidio.co/YOUR_PUBLIC_KEY.js" async></script>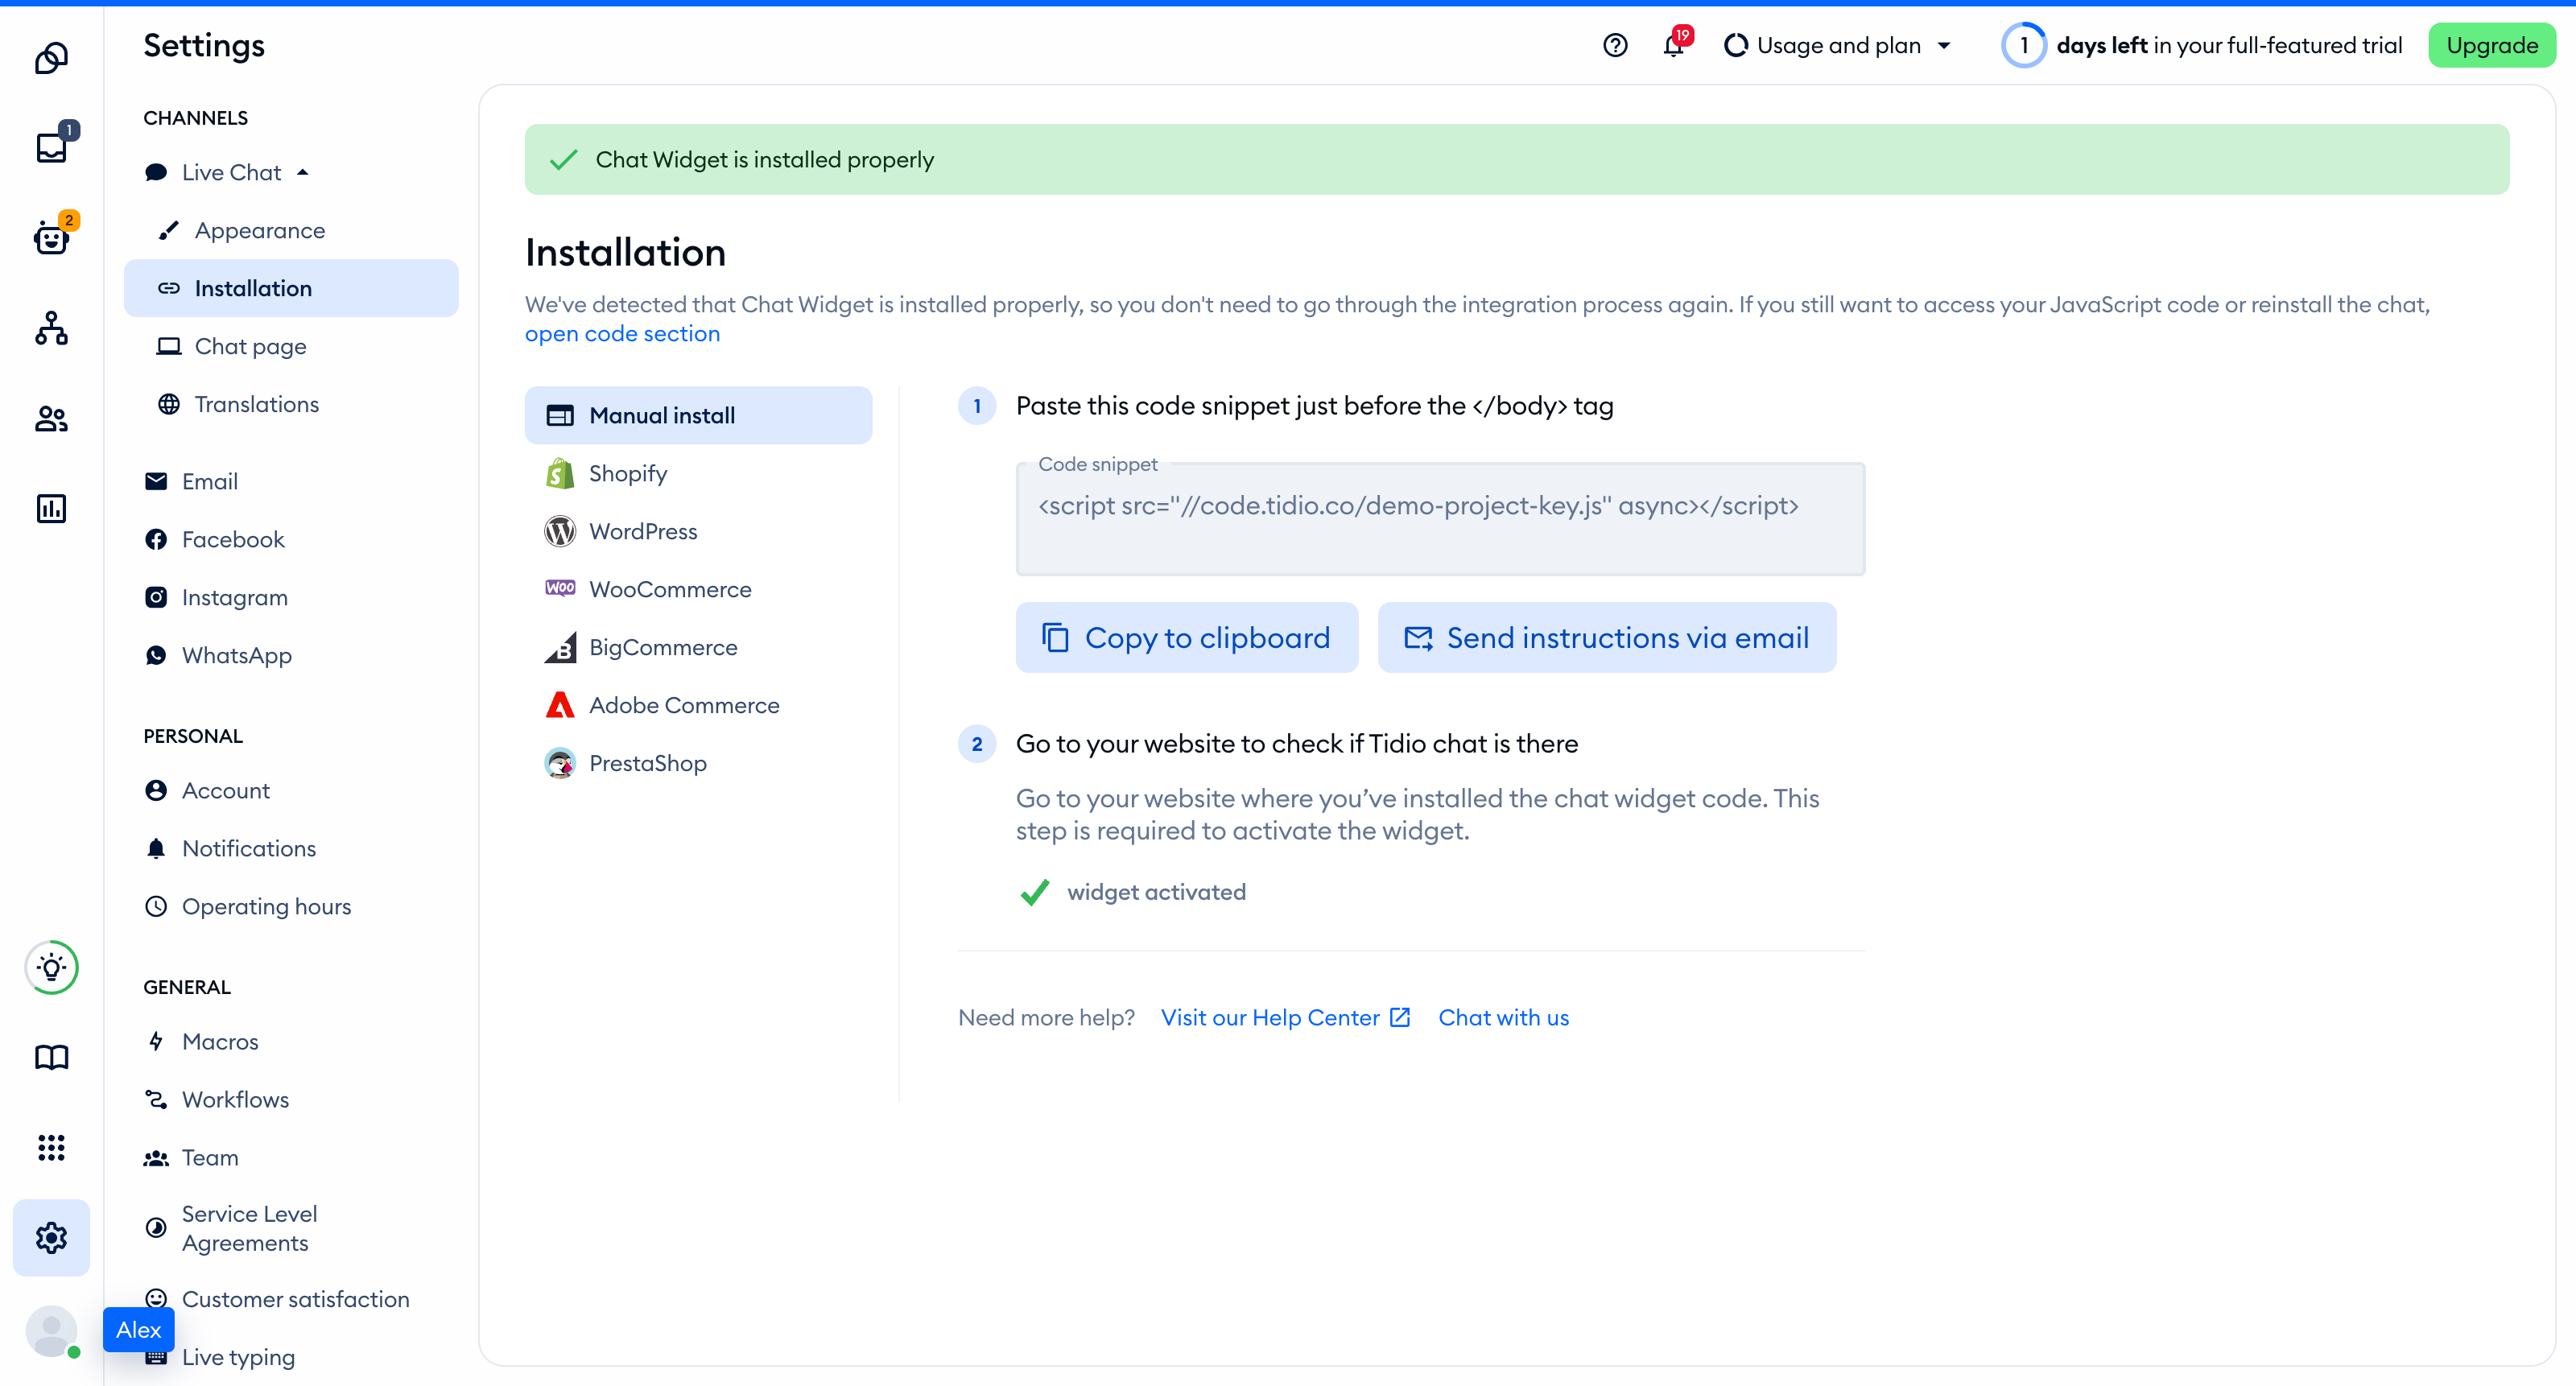
Ask Replit to add the widget
Open the existing project and send this request to Agent in the chat. Replace YOUR_PUBLIC_KEY with your Tidio Public key before sending it.
Add the Tidio live chat widget to this project.

1. Load this script once on every page, at the end of the body, with async:
   <script src="//code.tidio.co/YOUR_PUBLIC_KEY.js" async></script>
2. Put it in the root HTML document or the root layout, so it loads once and stays loaded during client-side navigation. Do not add it to single pages or to a component that mounts more than once.
3. Do not install an npm package for Tidio. The script tag is the whole installation.
4. Do not use window.tidioChatApi on the server. Use it only in the browser, after the "tidioChat-ready" event fires on document.
5. Change nothing else, then tell me which file you edited.

Reference: https://help.tidio.com/articles/install-ai-coding-agents/
Ask Agent to identify the framework and show you the changed file. This guide covers a browser-based website, not a native mobile app or command-line project.
If you know your stack, use the guide for Next.js, React, React Router and Remix, TanStack Start, Vue, Nuxt, SvelteKit, Astro, Angular, Gatsby, SolidStart, Qwik, or Eleventy.
Add the script yourself
Replit's Project Editor has a file tree and file editor. Select the folder icon on the left to show the file tree, then open your site's root HTML document or shared layout.
For a plain HTML document, add this script just before </body>, replacing the placeholder with your Public key:
<script src="https://code.tidio.co/YOUR_PUBLIC_KEY.js" async></script>If the project uses a framework layout, use the matching framework guide above instead of pasting HTML into an arbitrary component. Keep only one installation if Agent already added the widget.
The Replit editor guide explains how to open files in the file editor.
Give Replit the Tidio documentation
Connect Tidio's read-only MCP server to let Agent search the help center. The server uses Streamable HTTP and needs no login.
- Open Settings, then Integrations and Your integrations.
- Select Add custom, then Add personal MCP server.
- Set Display name to Tidio documentation and MCP Server URL to
https://help.tidio.com/mcp. Do not add authentication headers. - Click Test & save.
- Ask Agent to use Tidio documentation to find your framework's guide with
search_articlesand read it withget_article.
If the custom MCP option is missing, ask your workspace administrator to check feature availability and permissions. Replit documents this in its MCP setup guide.
For standing project guidance, append the following text to replit.md at the project root. Agent reads this file when processing requests, and you can edit it yourself.
Keep one Tidio script in the site's root HTML document or shared layout. Do not install a Tidio npm package. Use the Tidio documentation MCP server before changing the integration.
Documentation index: https://help.tidio.com/llms.txt
Widget SDK documentation: https://developers.tidio.com/llms.txt
Replit's replit.md guide also supports referencing external documentation in this file. Keep your existing project guidance when adding these lines.
Check the installation
Open your site in a regular browser window. The chat widget appears in the corner of the page and stays there when you move between pages. Headless and automated browsers may not show the widget, so do not rely on them for this check.
Loading a page with the widget is what activates it. After that, Settings > Live Chat > Installation in your Tidio panel says Chat Widget is installed properly.
In Build, click Publish at the upper right of the Project Editor. Review the domain and access settings, then publish and open the production URL for the widget check.
Changes in the editor do not automatically update the live site. Use Republish to release the Tidio installation on an already published app. See Replit's publishing guide for the full workflow.
Troubleshooting
- If the widget does not load, check that you replaced
YOUR_PUBLIC_KEYwith the Public key from your Tidio project. - If you see two widgets or duplicate script requests, remove the extra installation. Keep one loader in the root document or layout.
- If server rendering reports that
windowordocumentis not defined, move that code into the framework's browser-only lifecycle. - If your Content Security Policy blocks the widget, allow
code.tidio.coinscript-srcand follow the full Tidio CSP host list. - If an automated check cannot see the widget, repeat the check in a regular browser window on the published site.