Installing a live chat widget like Tidio can greatly enhance customer engagement on your WIX website. This article provides step-by-step instructions on installing and activating Tidio to improve communication with your website visitors.
In this article, you'll learn:
Install Tidio to your Wix website (for new users)
In order to install Tidio into your Wix website, it's necessary to have a Wix plan that supports connecting a custom domain and a Tidio account. To create a Tidio account, go to our website, tidio.com, and click on the Get Started button to create a new Tidio account. You'll also need to have your domain connected, using a custom domain rather than a free Wix site address.
Start by navigating to Settings > Development & integrations > Custom Code within your WIX dashboard:
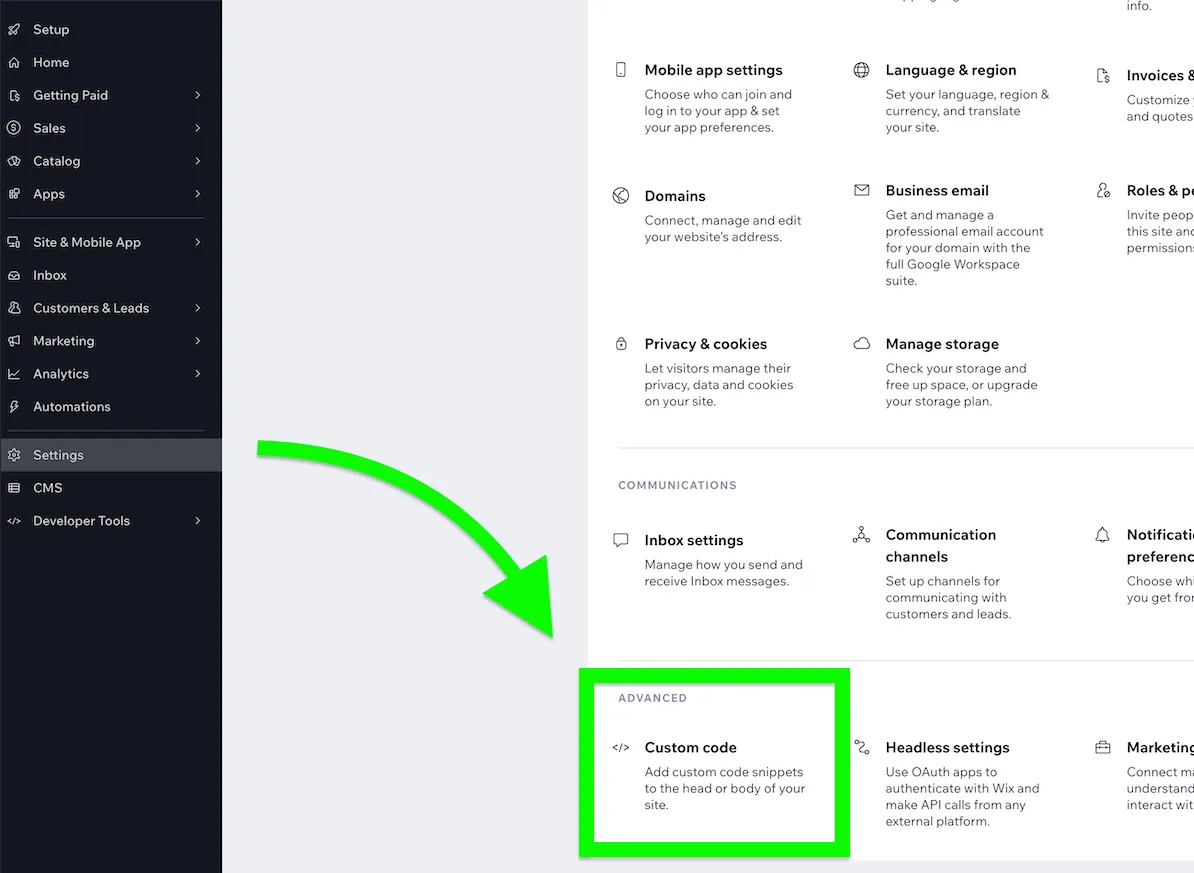
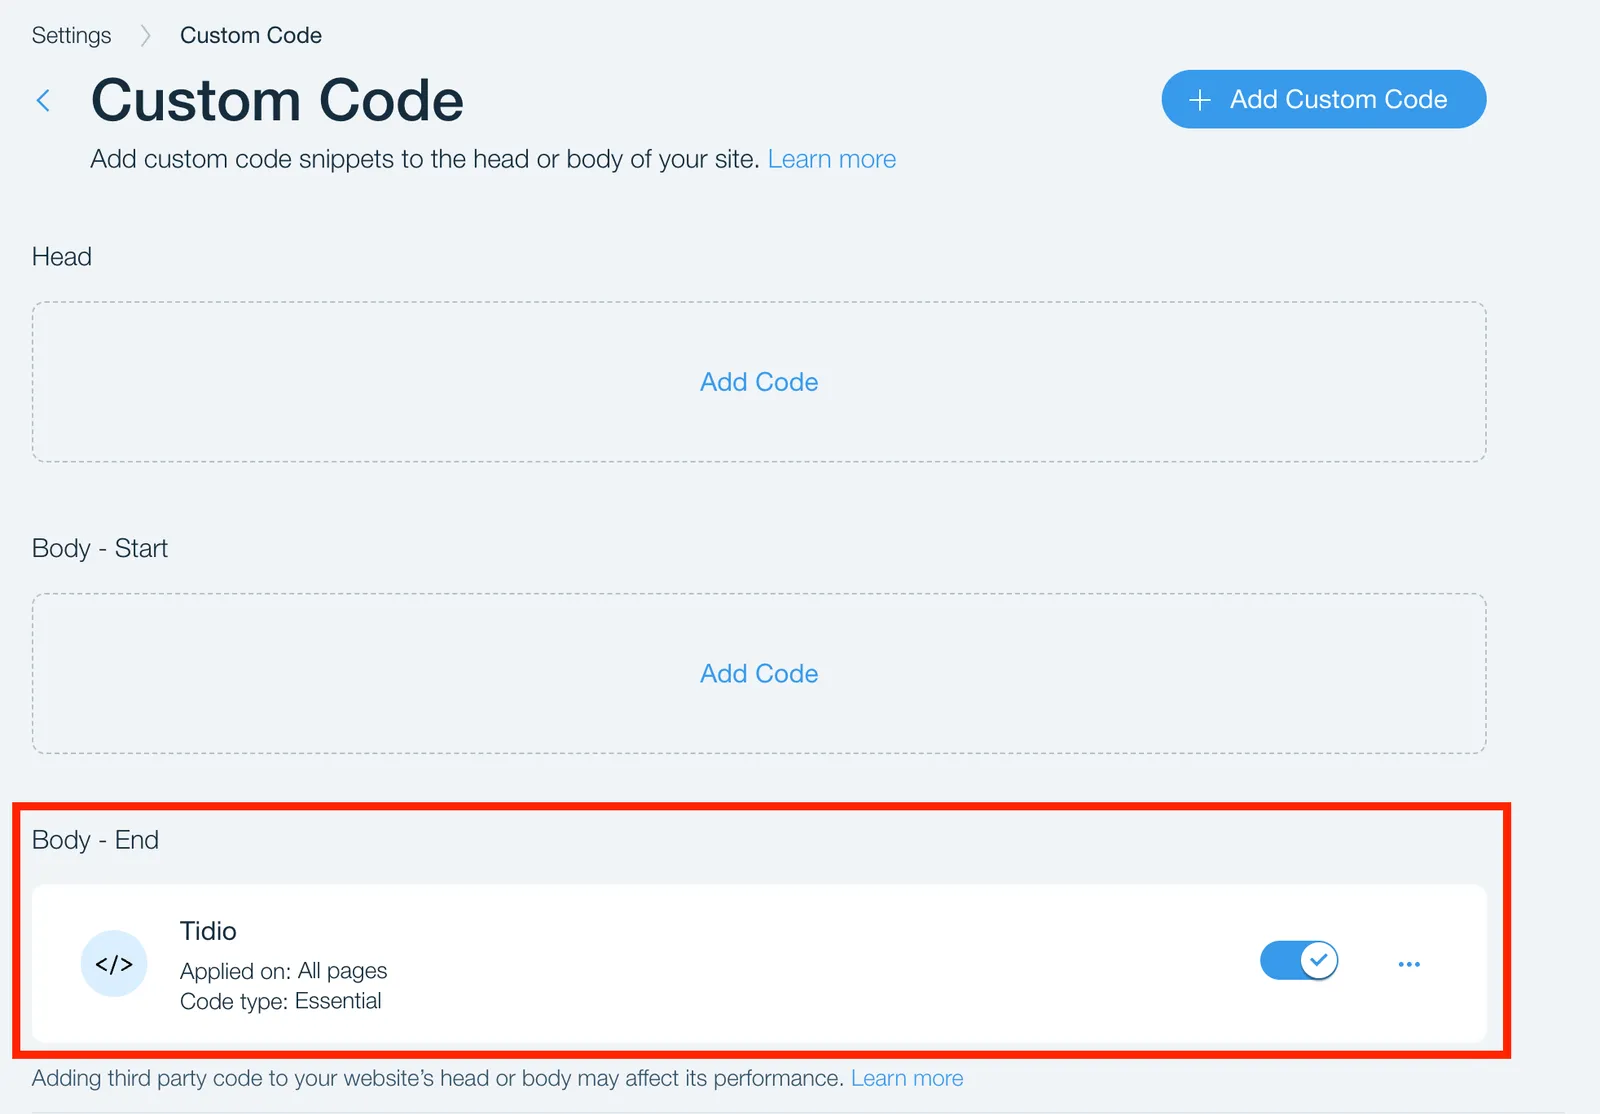
Click + Add Custom Code. There, you'll paste your manual installation custom code. You can find it by heading to Settings > Live Chat > Installation section inside your Tidio project. If you do not immediately see the code, click on the open code section link.
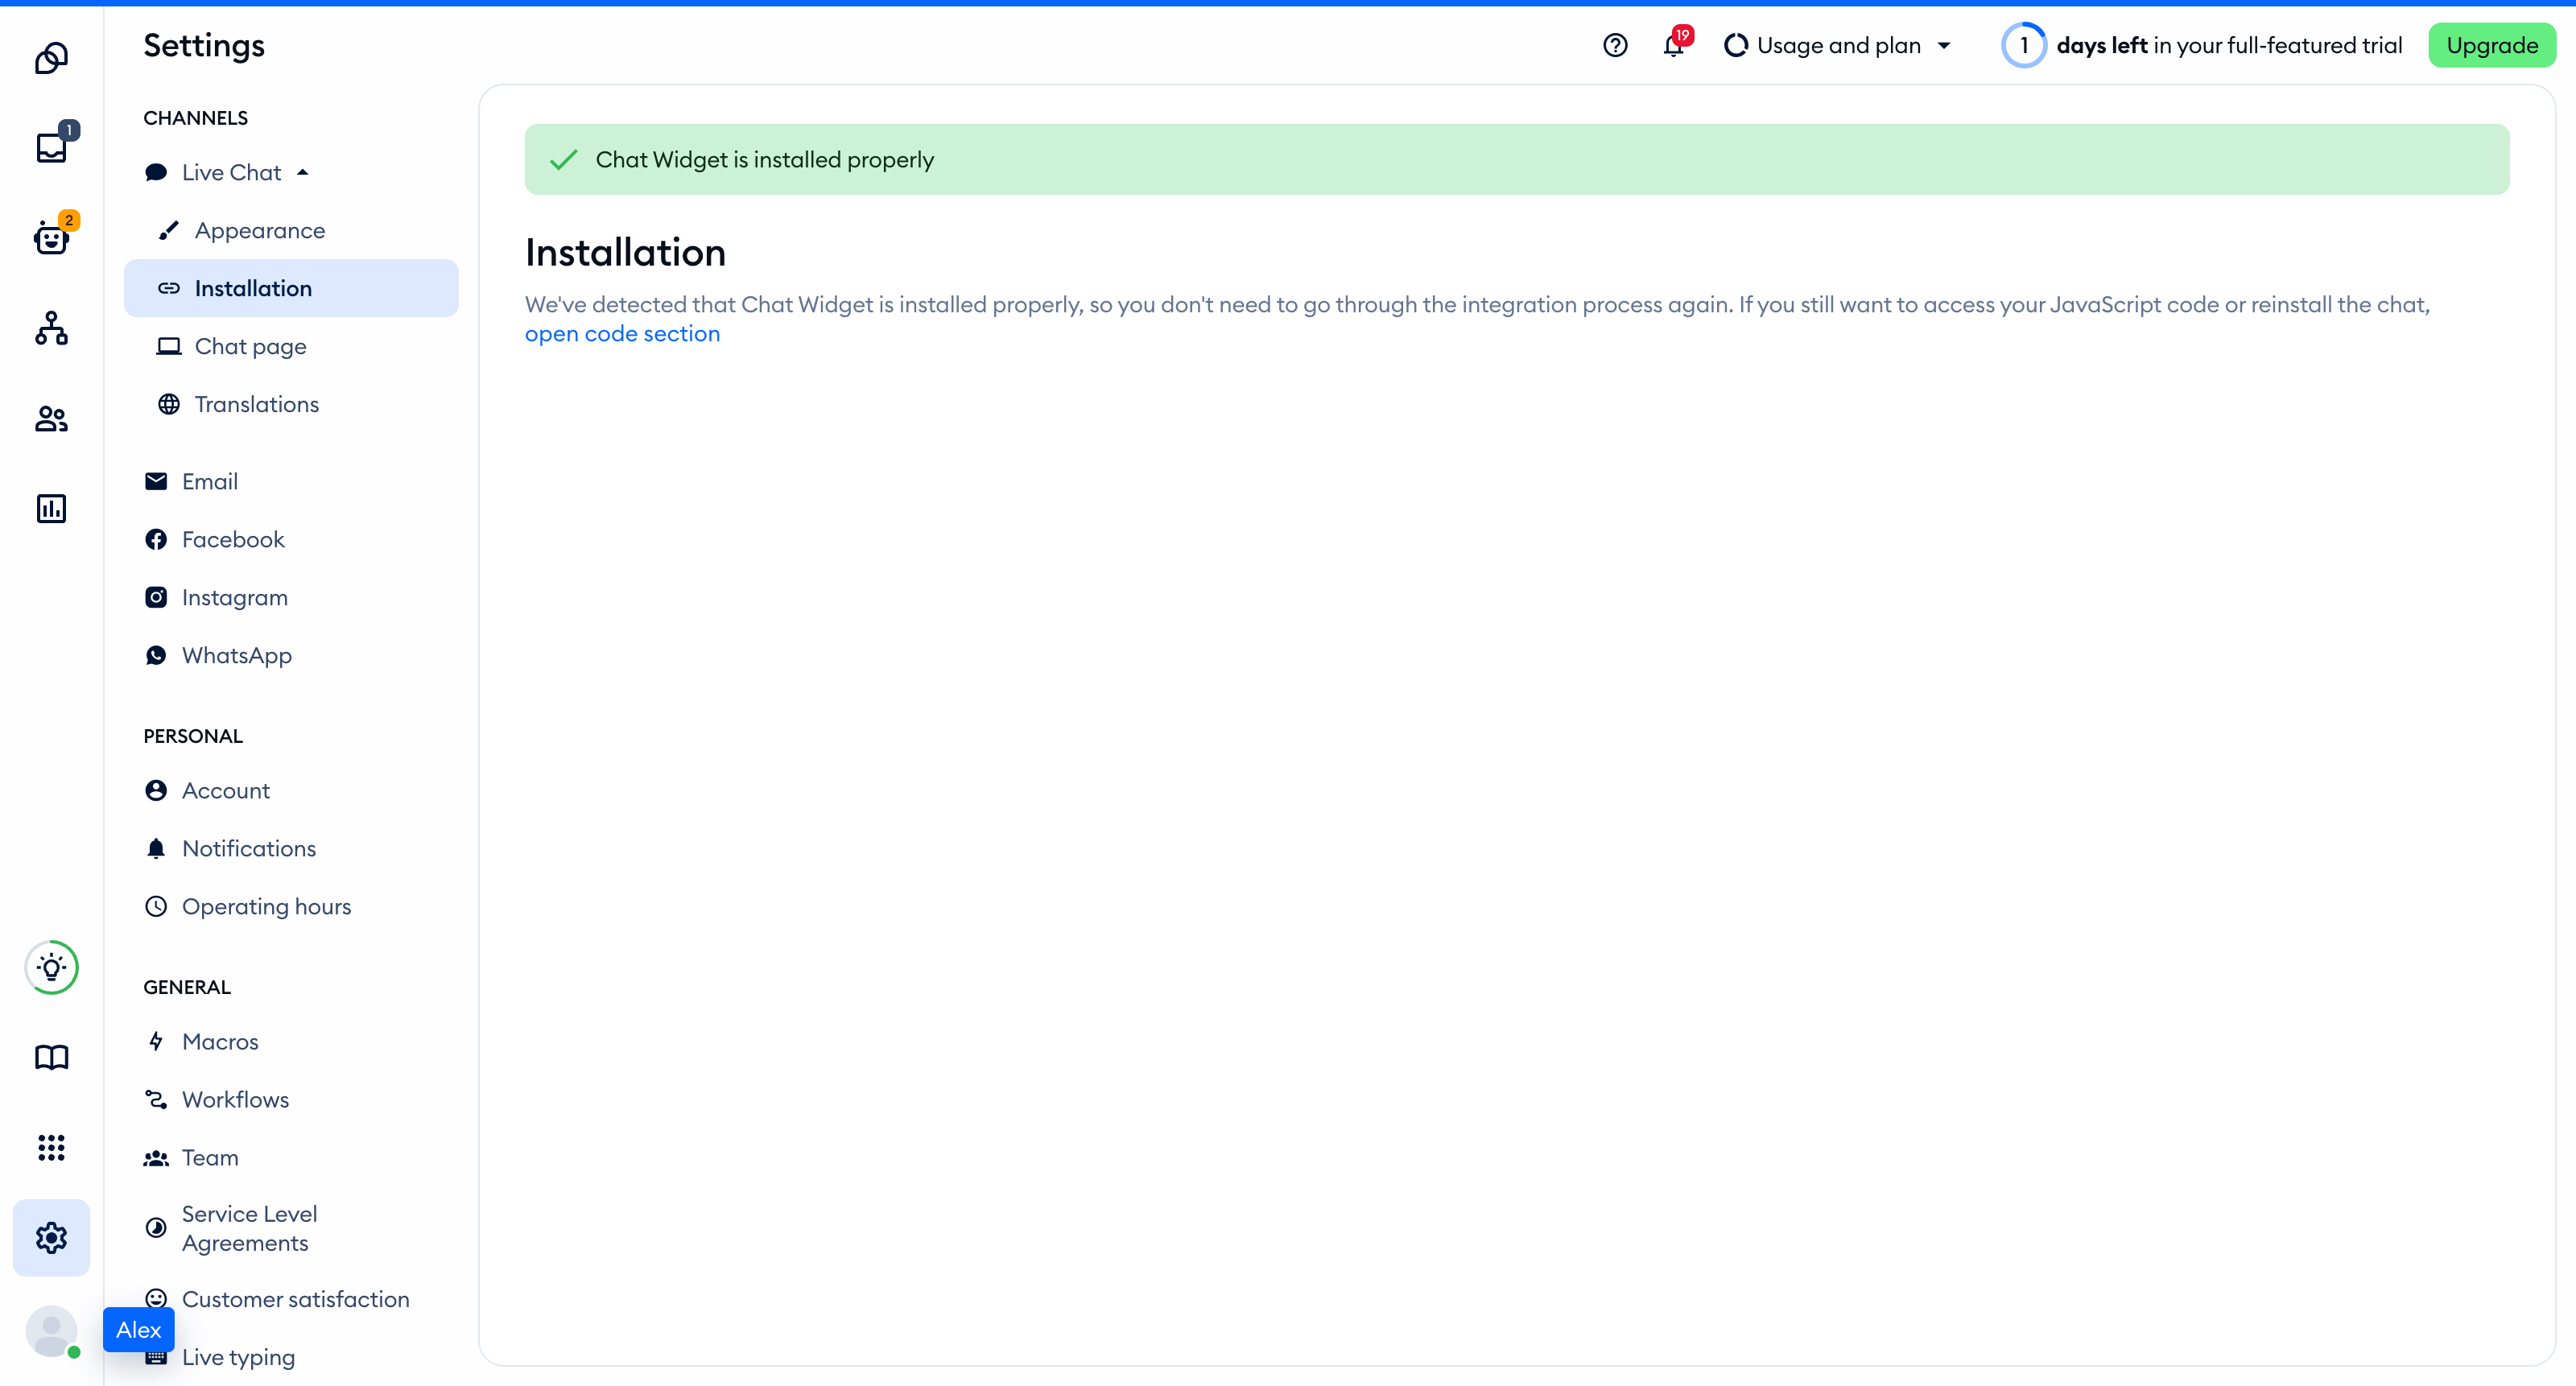
Make sure your site is published and has a connected domain before adding custom code.
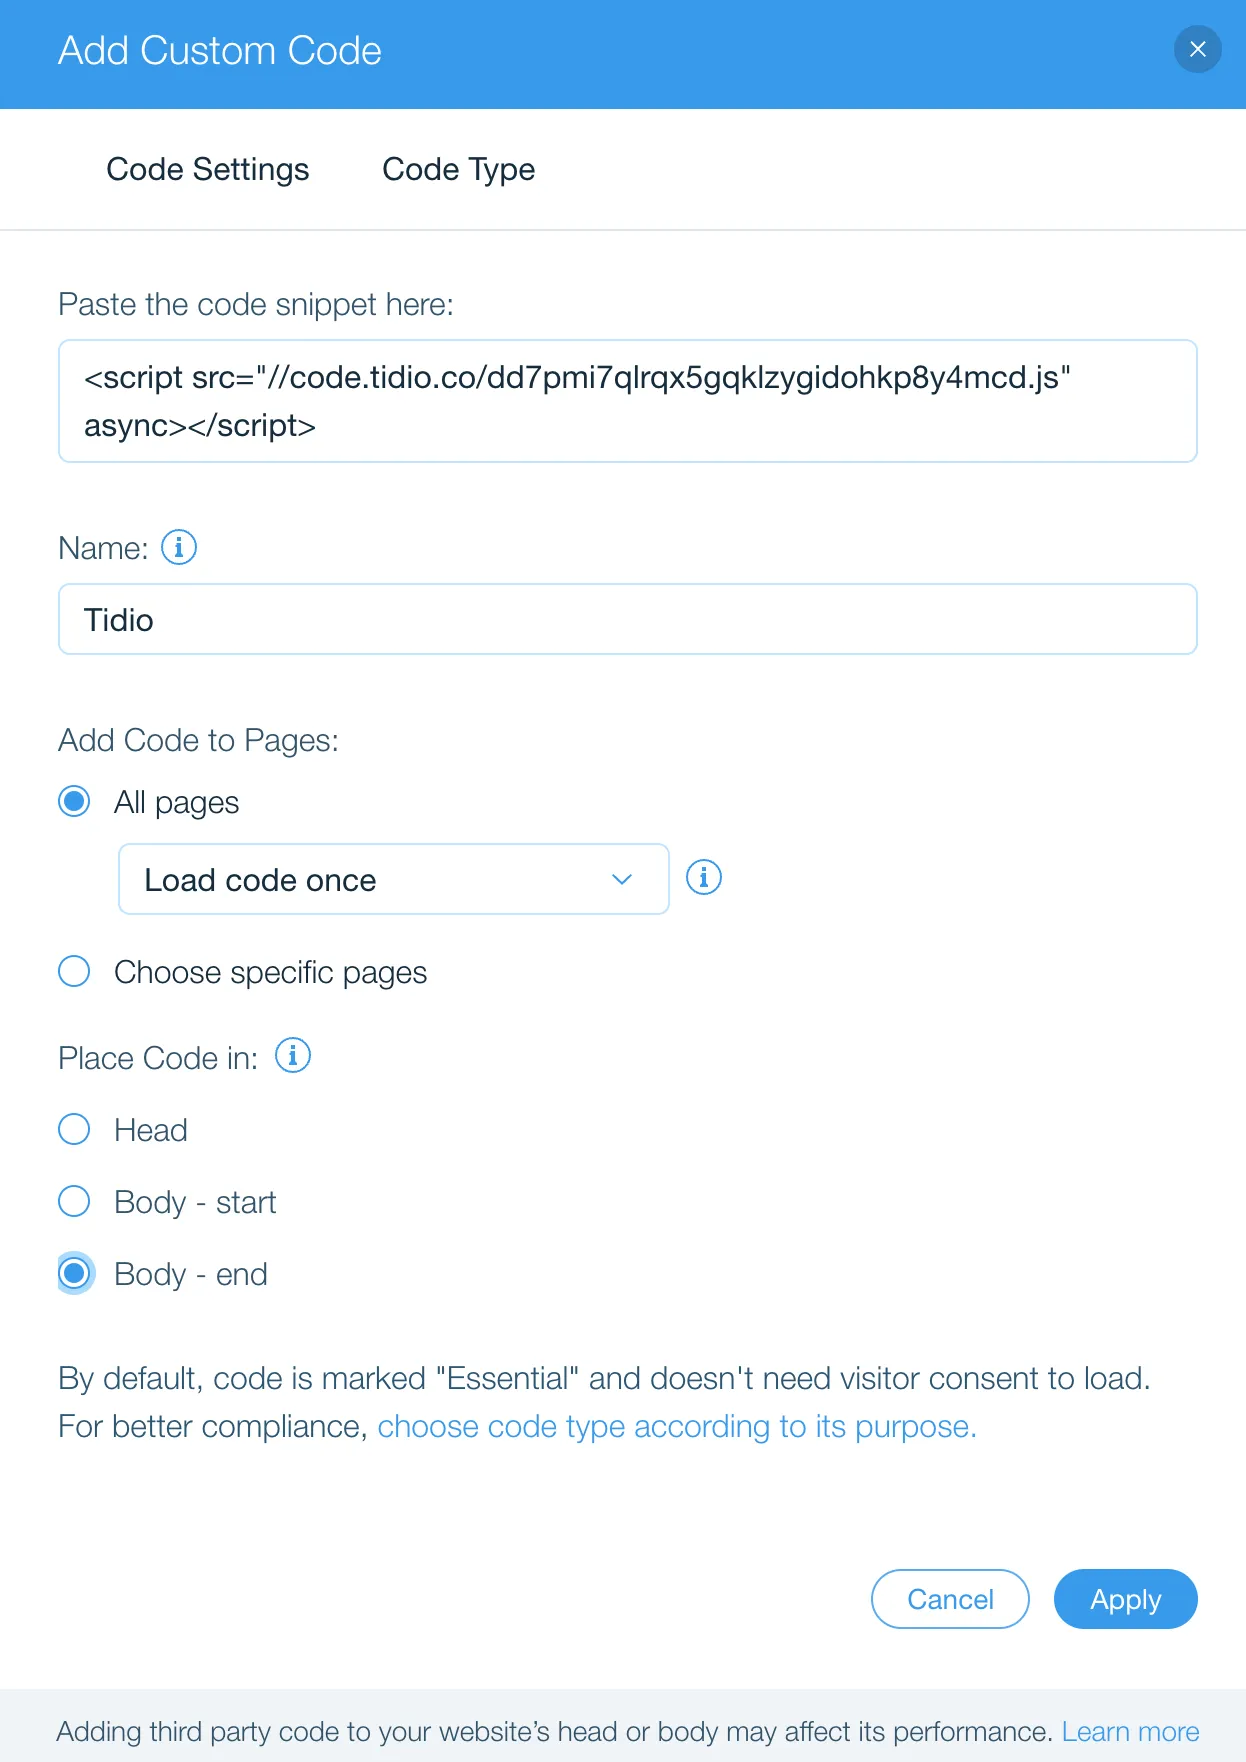
Name the code and select all pages or specific pages under Add Code to Pages. Under Place Code in, choose the body-end option, then click Apply.
By following these instructions, you'll have Tidio integrated into your Wix website!
Install Tidio to your Wix website (for plugin users)
If you created your Tidio account through the Tidio plugin on Wix before October 2024 and want access to premium plans, consider migrating to a new Tidio account via our registration page. If you currently have a Tidio subscription, remember to cancel it through Wix. Any refunds will also be handled by them.
If you had a previous setup, you will be able to transfer your existing flows by following these steps. You'll also be able to transfer your contacts and import them into the new account.
