Tidio gives you the option to import your contact data from other CRMs in CSV files. You can upload those files in the Contacts list, inside the Customers section located on the left of your admin panel. Each file can hold up to 100,000 contacts and weigh up to 50 MB.
Running a Shopify store? You can also import your store's customers in one go - more on that below.
How to import your own contacts to Tidio
Please note: your CSV file must be encoded in UTF-8. If your file is using any other system, it might not import correctly into Tidio. Tidio accepts .csv files only - if your data is in a TXT or Excel file, save it as CSV first.
Prepare the CSV file
To make the import procedure go smoothly - you need to organize your data before uploading it into your Tidio panel. Every piece of information should be placed in a separate column in your file. We advise adding a header row and matching each piece of data with the correct header. Your file needs a column with email addresses - Tidio uses the email to tell new contacts from existing ones.
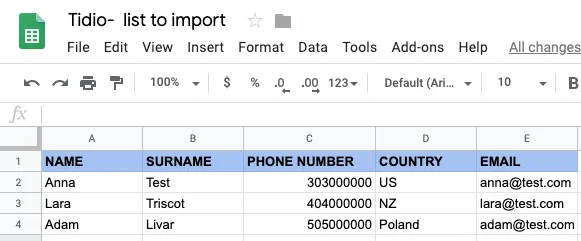
You can match the columns in your file with these contact attributes:
- ID
- First Name and Last Name
- Email (required)
- Email consent (subscribed or unsubscribed)
- Phone
- City
- Country
- Browser language
- Tags
- any of your own Contact Properties - create them in Settings > Fields before you import
Upload the document
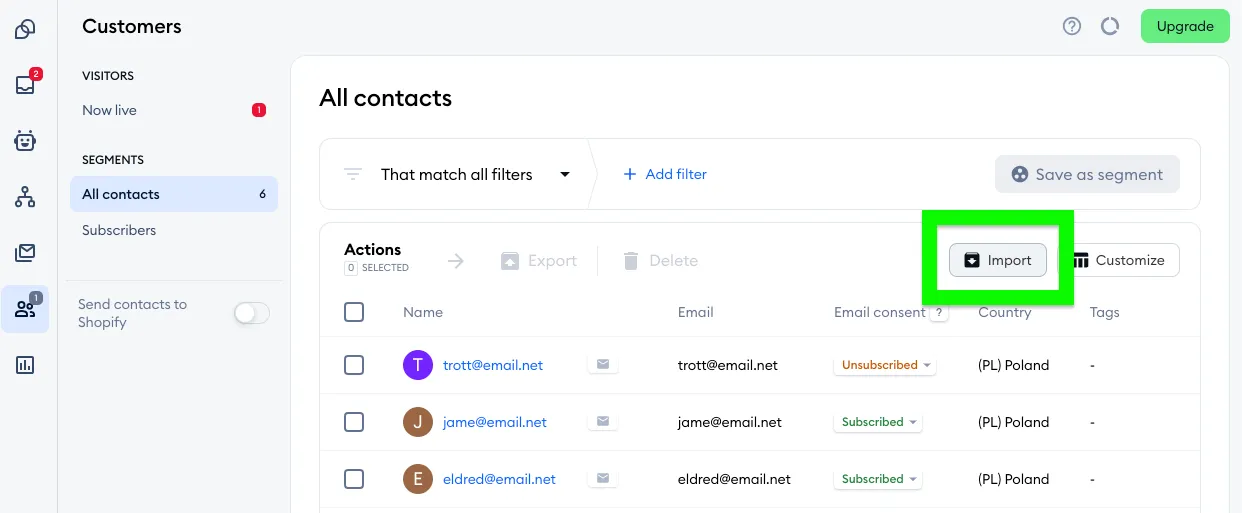
You can upload your file inside the Customers section on the left in your Tidio panel. Once you're there, access the All contacts segment, and click on the Import from file button above your current contacts list. If your project is connected to a Shopify store, the button is called Import:
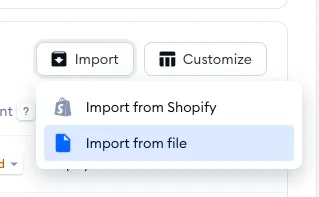
On a Shopify store, use the Import from file option (please note that Import from Shopify is also available, as long as you're integrated with a Shopify store!):
The Import your contacts window will pop up, asking you to upload your CSV file. You can do that by clicking on the blue Click here link or just dragging and dropping the file into the window.
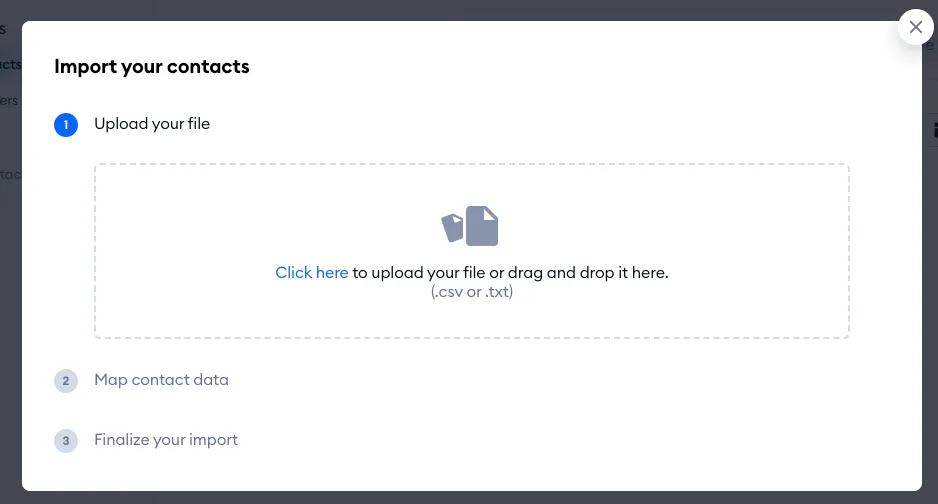
If something's wrong with the file, you'll see why in the same window - e.g. Sorry, this file is too large. The maximum file size is 50MB. or Oops, wrong file format! Make sure your list is in .csv format. Simply fix the file and click Try again.
Match your data with the attributes displayed in your contacts list
The import window will take you to the second step, Map contact data, after uploading the file. You will then match your data with the right attributes from your contacts list. You will see the header row names on the left (File header), your data in the middle (Data), and the attribute to which the data will be assigned on the right (Contact attribute).
To match your data with the attributes - click on the drop-down menu under the Contact attribute column and choose the correct attribute from the list. Your own Contact Properties are in the list too. Each attribute can be used for one column only, and columns left on Do not import are skipped:
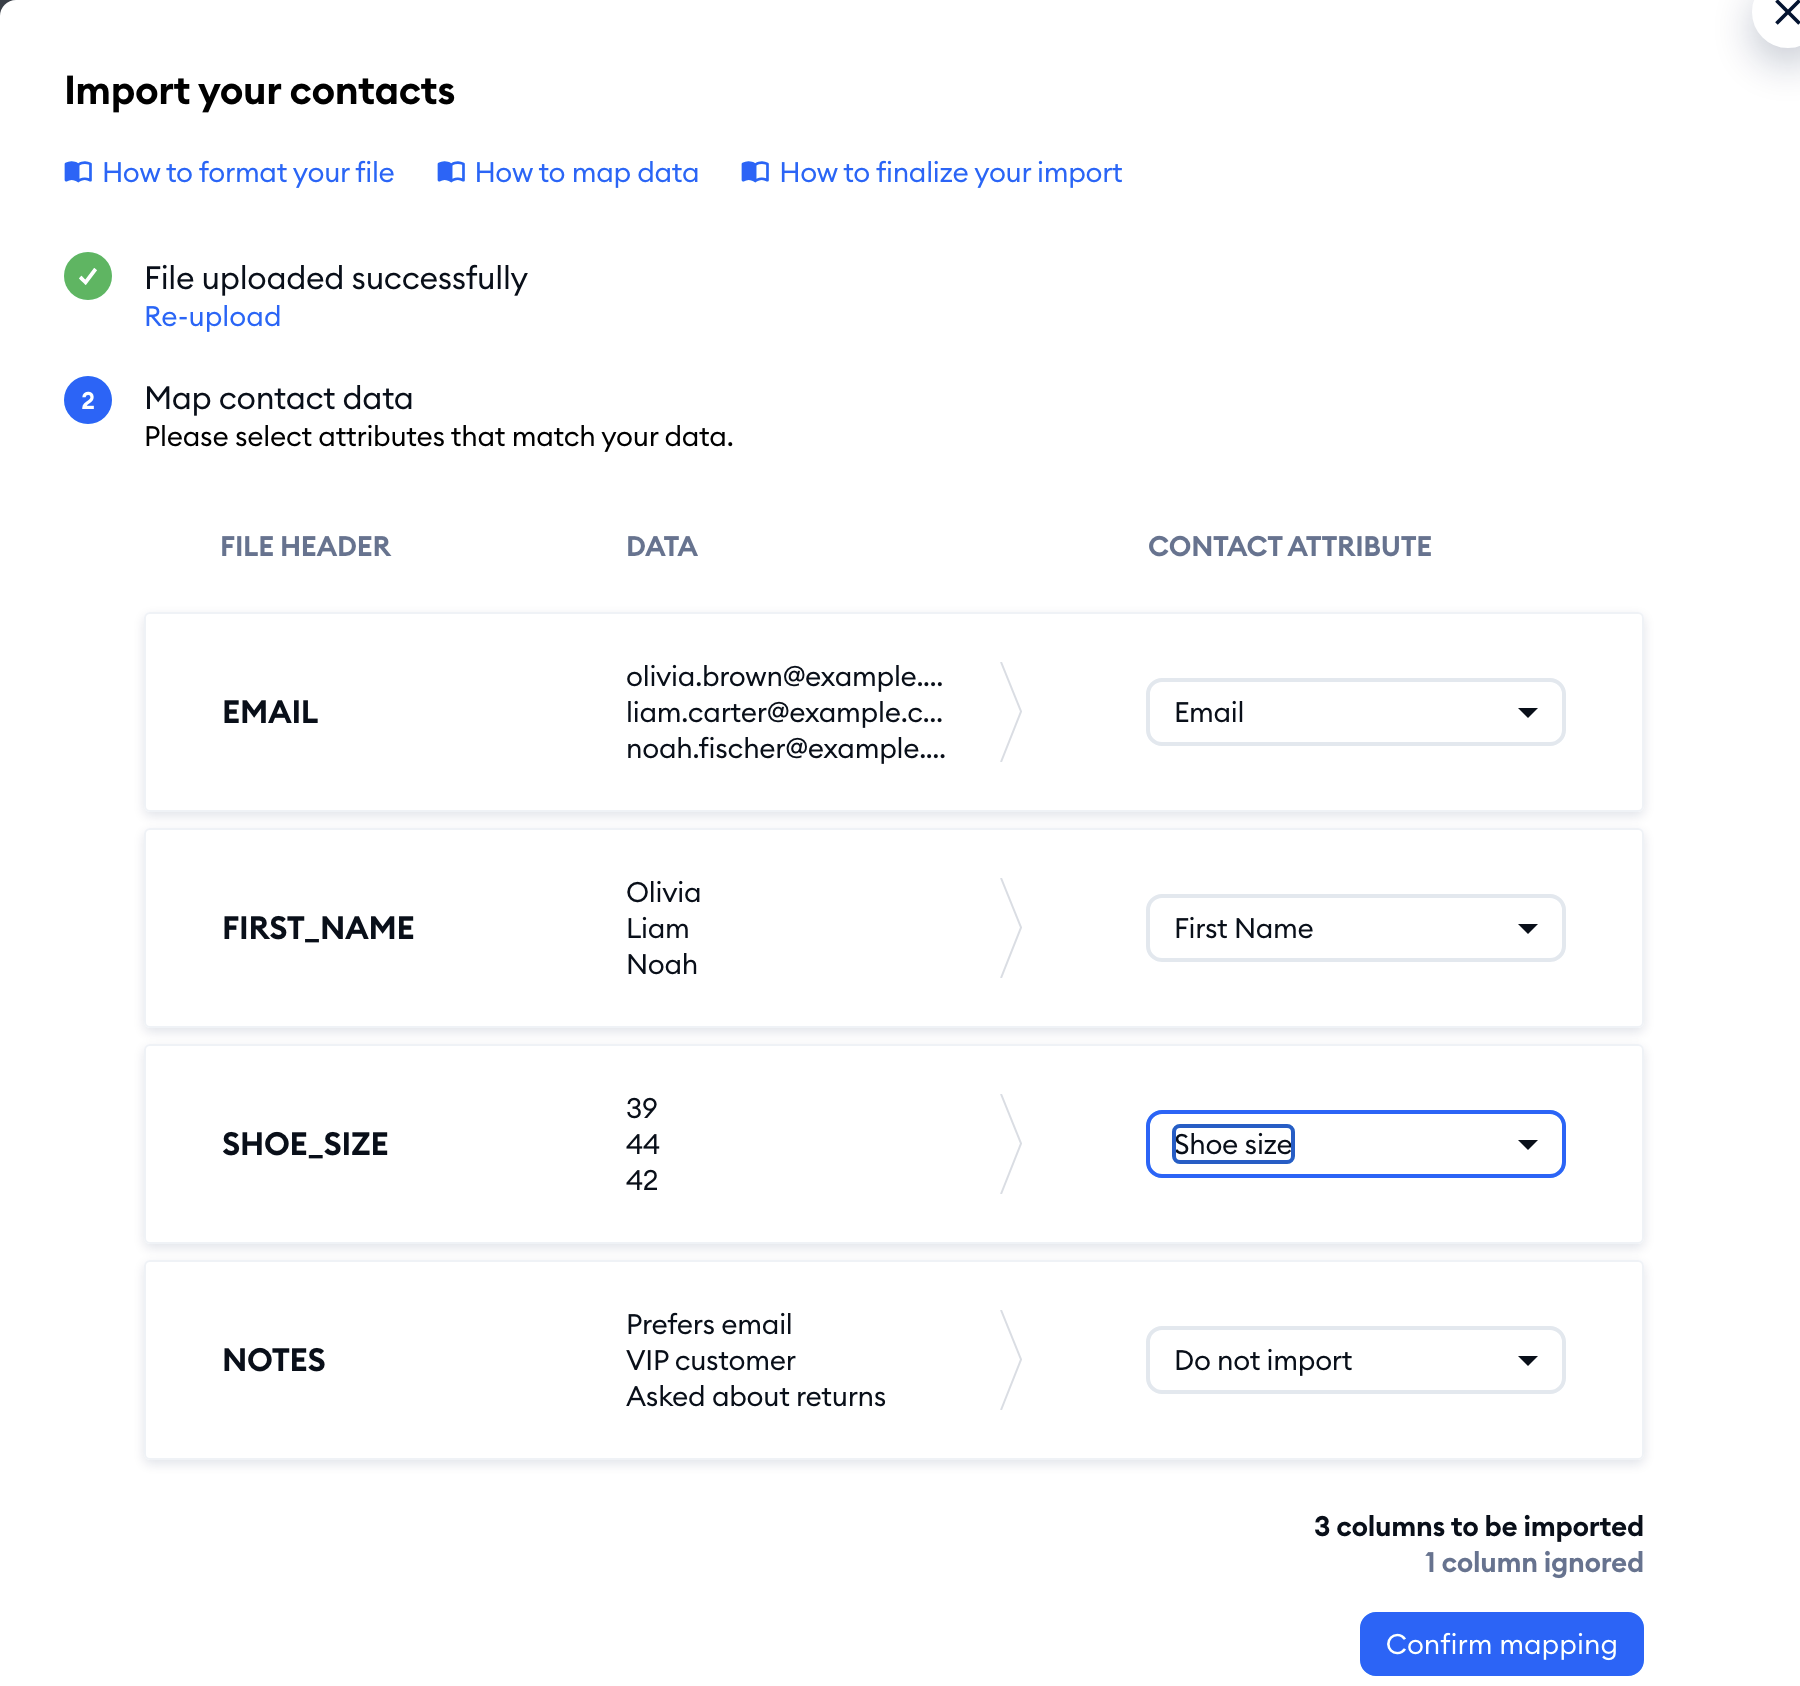
Once all the data have their attributes - click on the blue Confirm mapping button under the columns. Right above it, you'll see how many columns will be imported and how many will be ignored. Please note: one of your columns must be mapped to Email - otherwise you'll see a reminder and won't be able to move on.

Finalize your import
While finalizing the import procedure, you can decide what to do with your existing contacts. An existing contact is one that already has an email address assigned to it.
Under What would you like to do with existing contacts?, you will have two options to choose from:
- Import new and update existing contacts (selected by default). This option will import all of your new contacts and update the ones who already have emails in your Contacts list;
- Import new and skip existing contacts. This option will import all the new contacts without updating the ones you already have in your Contacts list.
Next, decide whether to put the imported contacts in a new segment - a saved list you'll find on the left of your contacts list. Under Would you like to create a new segment from the imported contacts?, Yes is selected by default: type in a name for the segment, or choose No.
Finally, there's the marketing consent. If your file has no Email consent column, you'll see a checkbox: I confirm that imported contacts have given me their explicit consent to email them. Tick it only if that's true - all the imported contacts will then be set as Subscribed. Leave it blank, and they'll be imported as Unsubscribed. If you mapped an Email consent column, each contact gets the consent from your file, and the checkbox doesn't show.
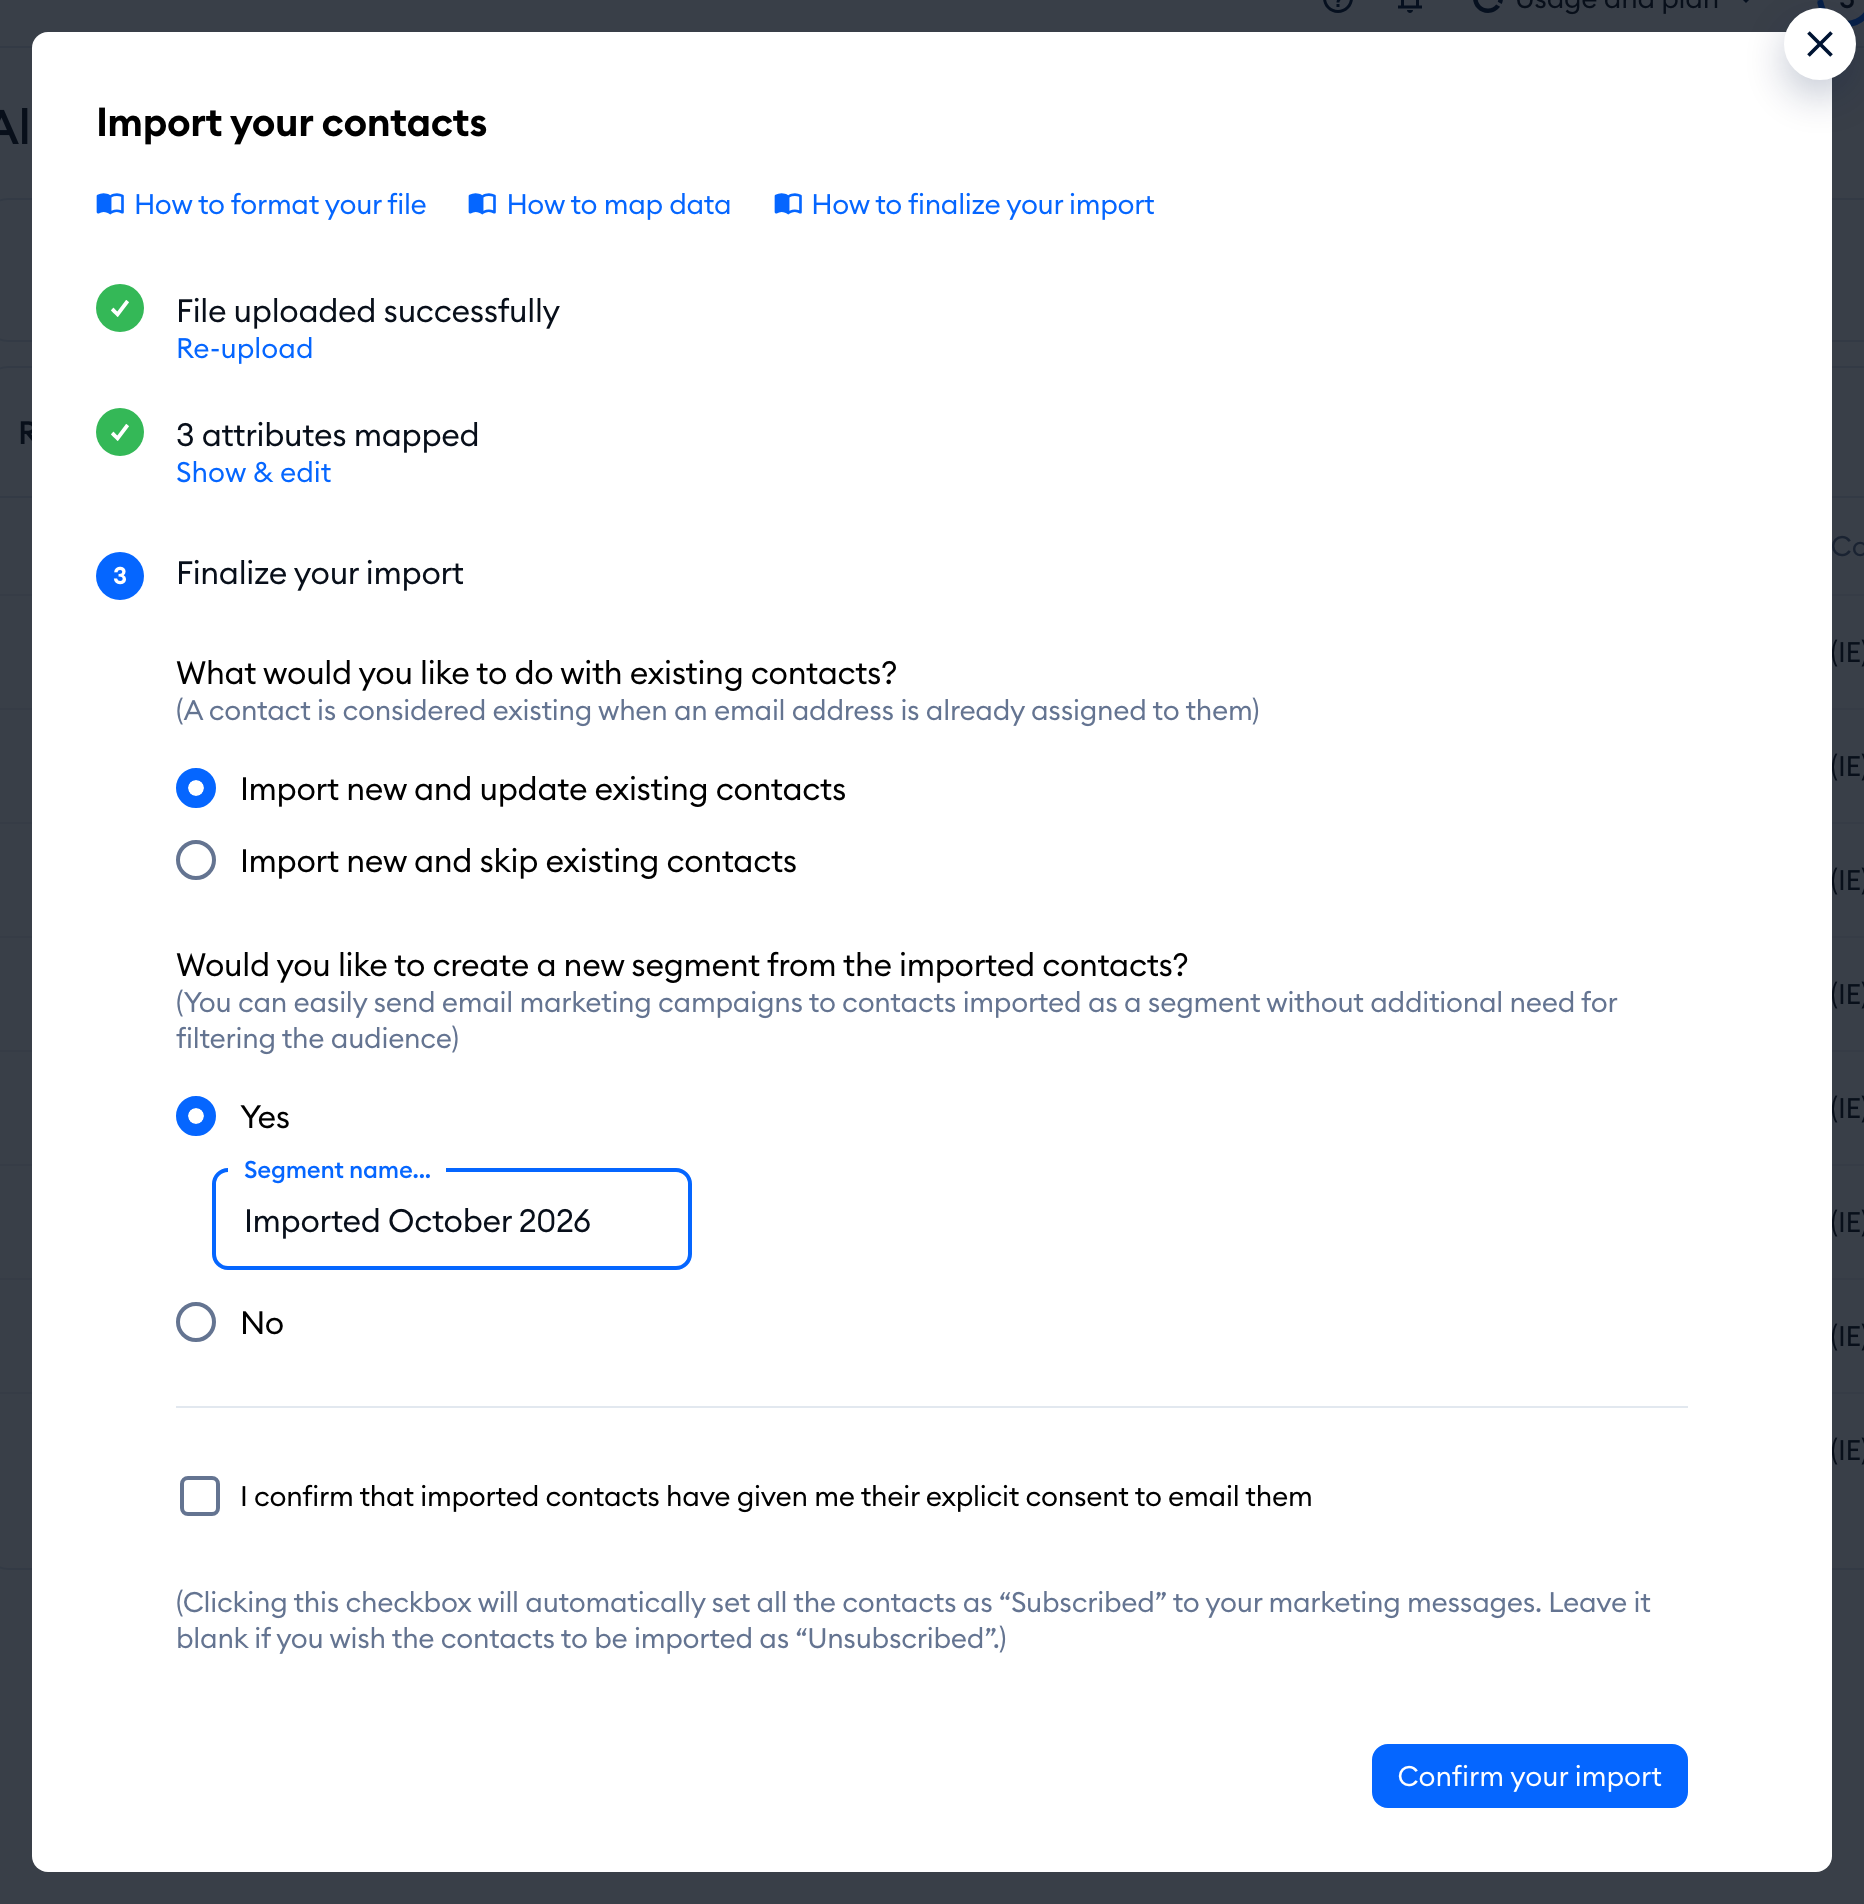
Click on Confirm your import to start.
While the import is running, you'll see We're importing your contacts above your contacts list. Once it's finished, the same bar sums it up: how many records were processed, how many new contacts were imported, and how many existing ones were updated or skipped - along with any duplicated or invalid records.
All done! Now you can see all of your imported contacts in the Contacts list.
Importing customers from Shopify
If your Tidio project is connected to a Shopify store, click on Import above your contacts list and choose Import from Shopify. Decide what to do with the contacts you already have (Import new and update existing contacts or Import new and skip existing contacts), and click on Import from Shopify to bring in your store's customers - no file needed.
