Add Tidio to your v0 app with a prompt, then check the widget on the deployed site. v0 defaults to Next.js, so this guide uses a Next.js root layout rather than adding the script to individual pages.
In this article, you'll learn:
- How to find your Public key
- How to ask v0 to add the widget
- How to add the script yourself
- How to give v0 the Tidio documentation
- How to check the installation
- How to troubleshoot the widget
Find your Public key
Log in to your Tidio panel and go to Settings > Developer > Project data. Click the Public key field to select its value, then copy it.
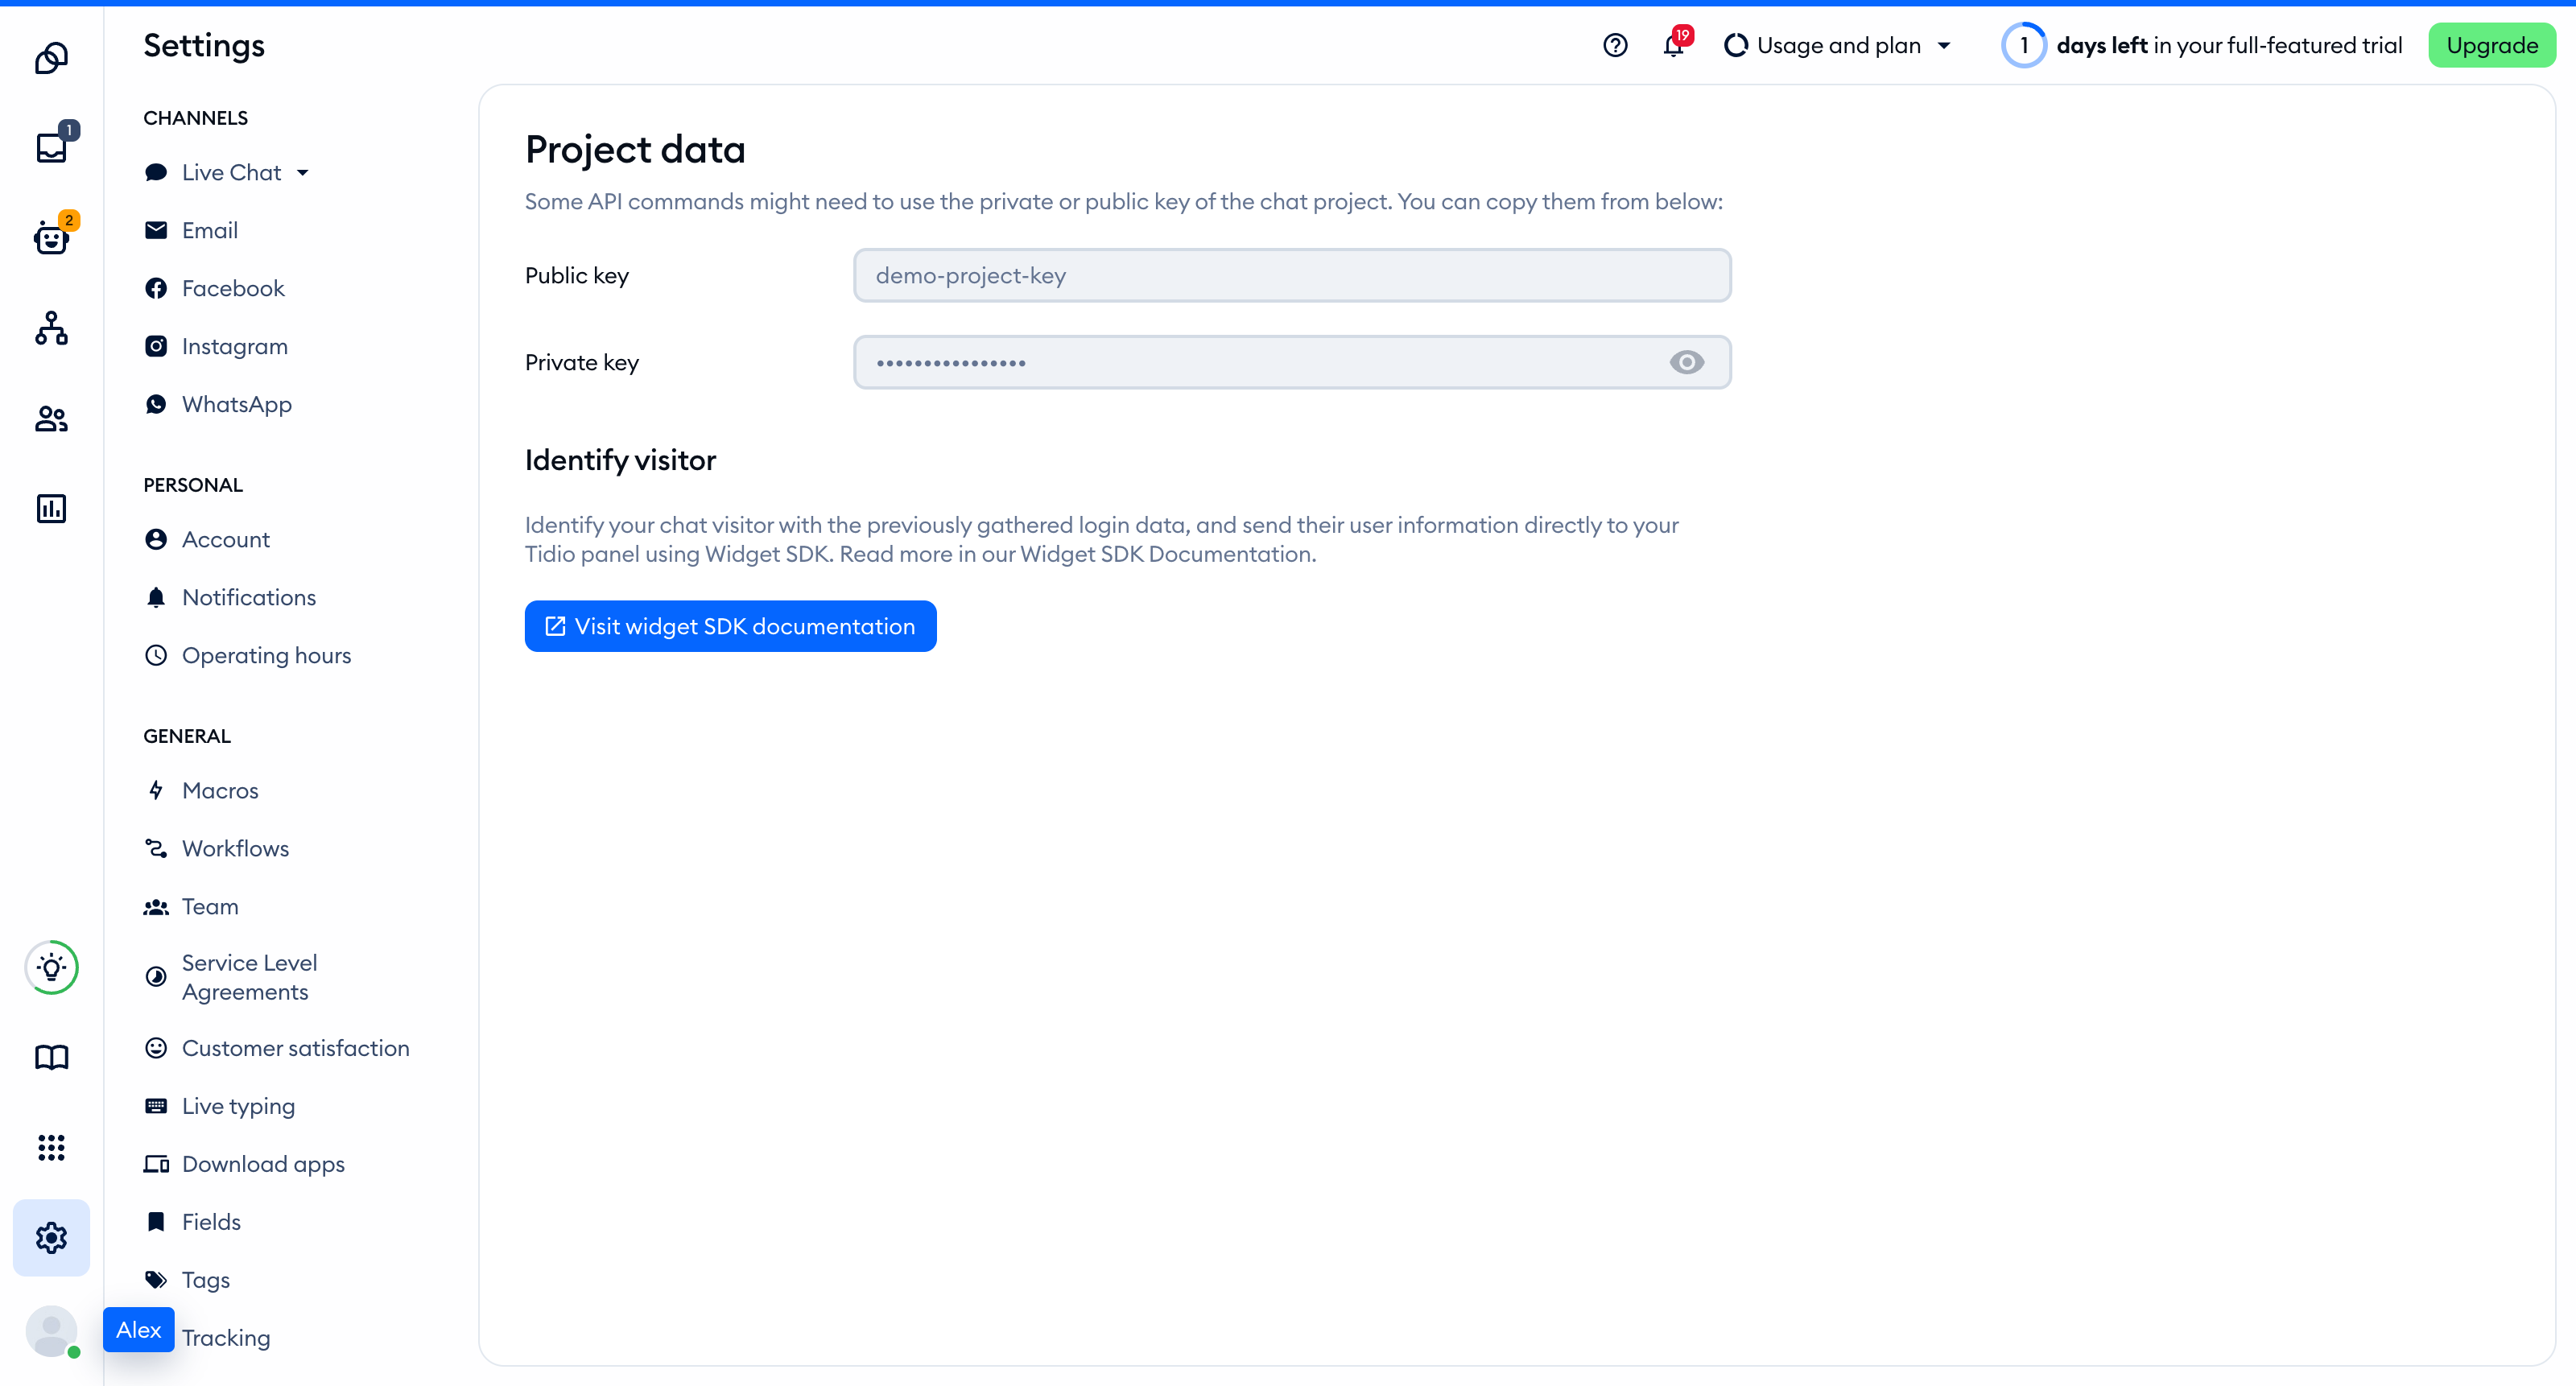
The Public key is part of the script address that every visitor's browser loads, so you can keep it in front-end code. The private key on the same page is different: never put it in your website.
You'll find the same key inside the installation code in Settings > Live Chat > Installation, under Manual install:
<script src="//code.tidio.co/YOUR_PUBLIC_KEY.js" async></script>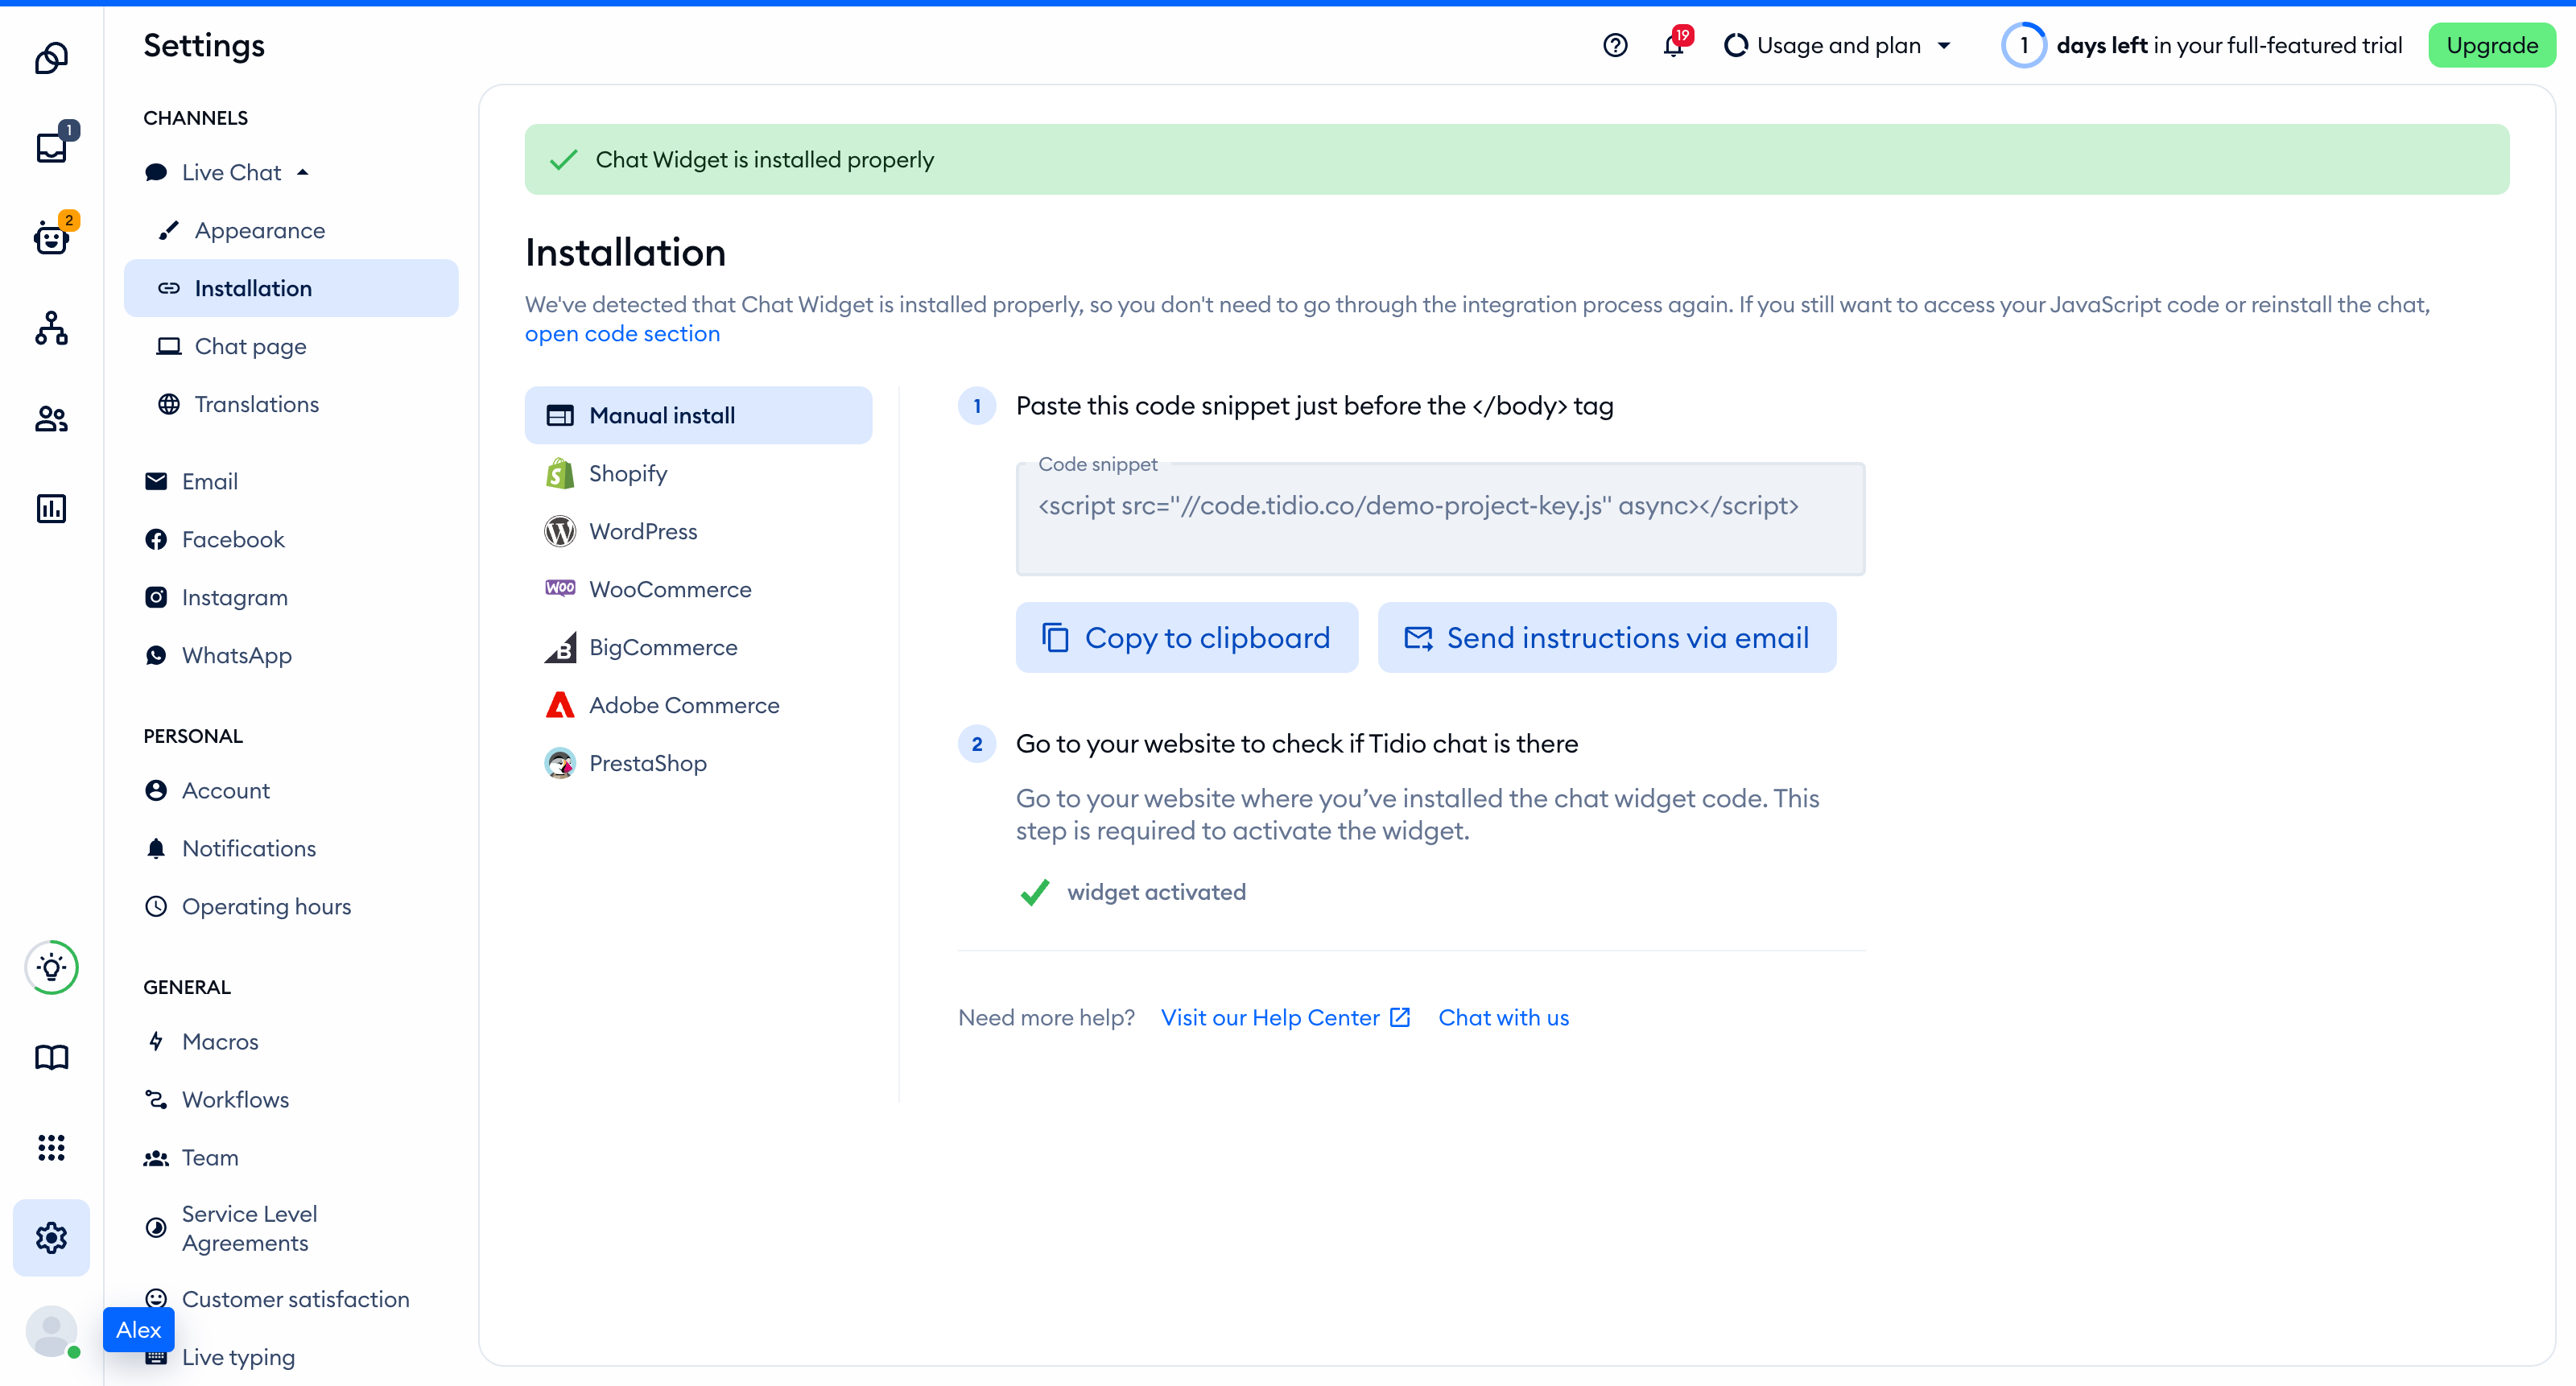
Ask v0 to add the widget
Open the chat for your existing app. Replace YOUR_PUBLIC_KEY in this prompt with your Tidio Public key, then send it to v0.
Add the Tidio live chat widget to this project.

1. Load this script once on every page, at the end of the body, with async:
   <script src="//code.tidio.co/YOUR_PUBLIC_KEY.js" async></script>
2. Put it in the root layout app/layout.tsx with next/script, so it loads once and stays loaded during client-side navigation. Do not add it to single pages or to a component that mounts more than once.
3. Do not install an npm package for Tidio. The script tag is the whole installation.
4. Do not use window.tidioChatApi on the server. Use it only in the browser, after the "tidioChat-ready" event fires on document.
5. Change nothing else, then tell me which file you edited.

Reference: https://help.tidio.com/articles/install-nextjs/
v0 can also work with other frameworks. If your project does not use Next.js, use the generic installation prompt instead.
Open the Code tab to review the file v0 changed. Keep the script in the shared layout, not in each generated page.
Add the script yourself
You can edit files directly in v0 if you have edit access to the chat. Manual editing pauses while the agent is working.
- Open Code in the preview toolbar.
- Select
app/layout.tsxin the file tree for a Next.js App Router project. - Follow Install Tidio on Next.js for the complete
next/scriptinstallation and public environment variable setup. - Use Save in the Unsaved Changes bar to persist your changes.
Do not add another script if v0 already installed one through the prompt. The v0 code viewer guide explains file editing and saving.
Give v0 the Tidio documentation
v0 supports custom MCP servers in its prompt form. Tidio's documentation MCP server is read-only and requires no login.
- Open the + menu in the prompt form and select MCPs.
- Configure a custom server with the address
https://help.tidio.com/mcp. - Choose No Auth.
- Ask v0 to use the connected server to find and read the Next.js installation guide before editing your app.
The server provides search_articles and get_article for finding and reading Tidio instructions. Connecting it gives v0 documentation tools during generation, not a widget installation in your website.
Save a reusable instruction through +, Instructions, then New Instruction. Enter a Title, paste the following text into Rule, and click Add:
Keep one Tidio loader in the Next.js root layout. Do not install a Tidio npm package. Consult the Tidio documentation MCP server before changing the widget integration.Check the saved instruction in the prompt bar's + menu when working on this app. v0 saves instructions to your account, not to a project-only settings file. Checked instructions apply to messages until you uncheck them.
See v0's MCP documentation and instructions guide for these controls.
Check the installation
Open your site in a regular browser window. The chat widget appears in the corner of the page and stays there when you move between pages. Headless and automated browsers may not show the widget, so do not rely on them for this check.
Loading a page with the widget is what activates it. After that, Settings > Live Chat > Installation in your Tidio panel says Chat Widget is installed properly.
Use Publish in the chat header to deploy to Vercel. Review the project name, visibility, and domain, then select Publish. Open the resulting production URL to check Tidio, not only the v0 preview.
For later changes, open Publish and select Publish Changes. If you connected GitHub, review v0's publishing workflow before proceeding: publishing creates or reuses a pull request, merges it into the base branch, and deploys the result subject to repository rules.
Troubleshooting
- If the widget does not load, check that you replaced
YOUR_PUBLIC_KEYwith the Public key from your Tidio project. - If you see two widgets or duplicate script requests, remove the extra installation. Keep one loader in the root document or layout.
- If server rendering reports that
windowordocumentis not defined, move that code into the framework's browser-only lifecycle. - If your Content Security Policy blocks the widget, allow
code.tidio.coinscript-srcand follow the full Tidio CSP host list. - If an automated check cannot see the widget, repeat the check in a regular browser window on the published site.