Add Tidio to your website through a Google Tag Manager web container. Use one custom HTML tag to load the widget once per page load.
In this article, you'll learn:
- How to copy your Tidio code
- How to add the Tidio tag in Google Tag Manager
- How to check the installation
- How to exclude the checkout page
- How to troubleshoot the installation
Copy your Tidio code
- Log in to your Tidio panel.
- Go to Settings > Live Chat > Installation.
- Choose Manual install.
- Click Copy to clipboard.
Your code has this form. Use the code you copied, or replace YOUR_PUBLIC_KEY with your project's Public key:
<script src="//code.tidio.co/YOUR_PUBLIC_KEY.js" async></script>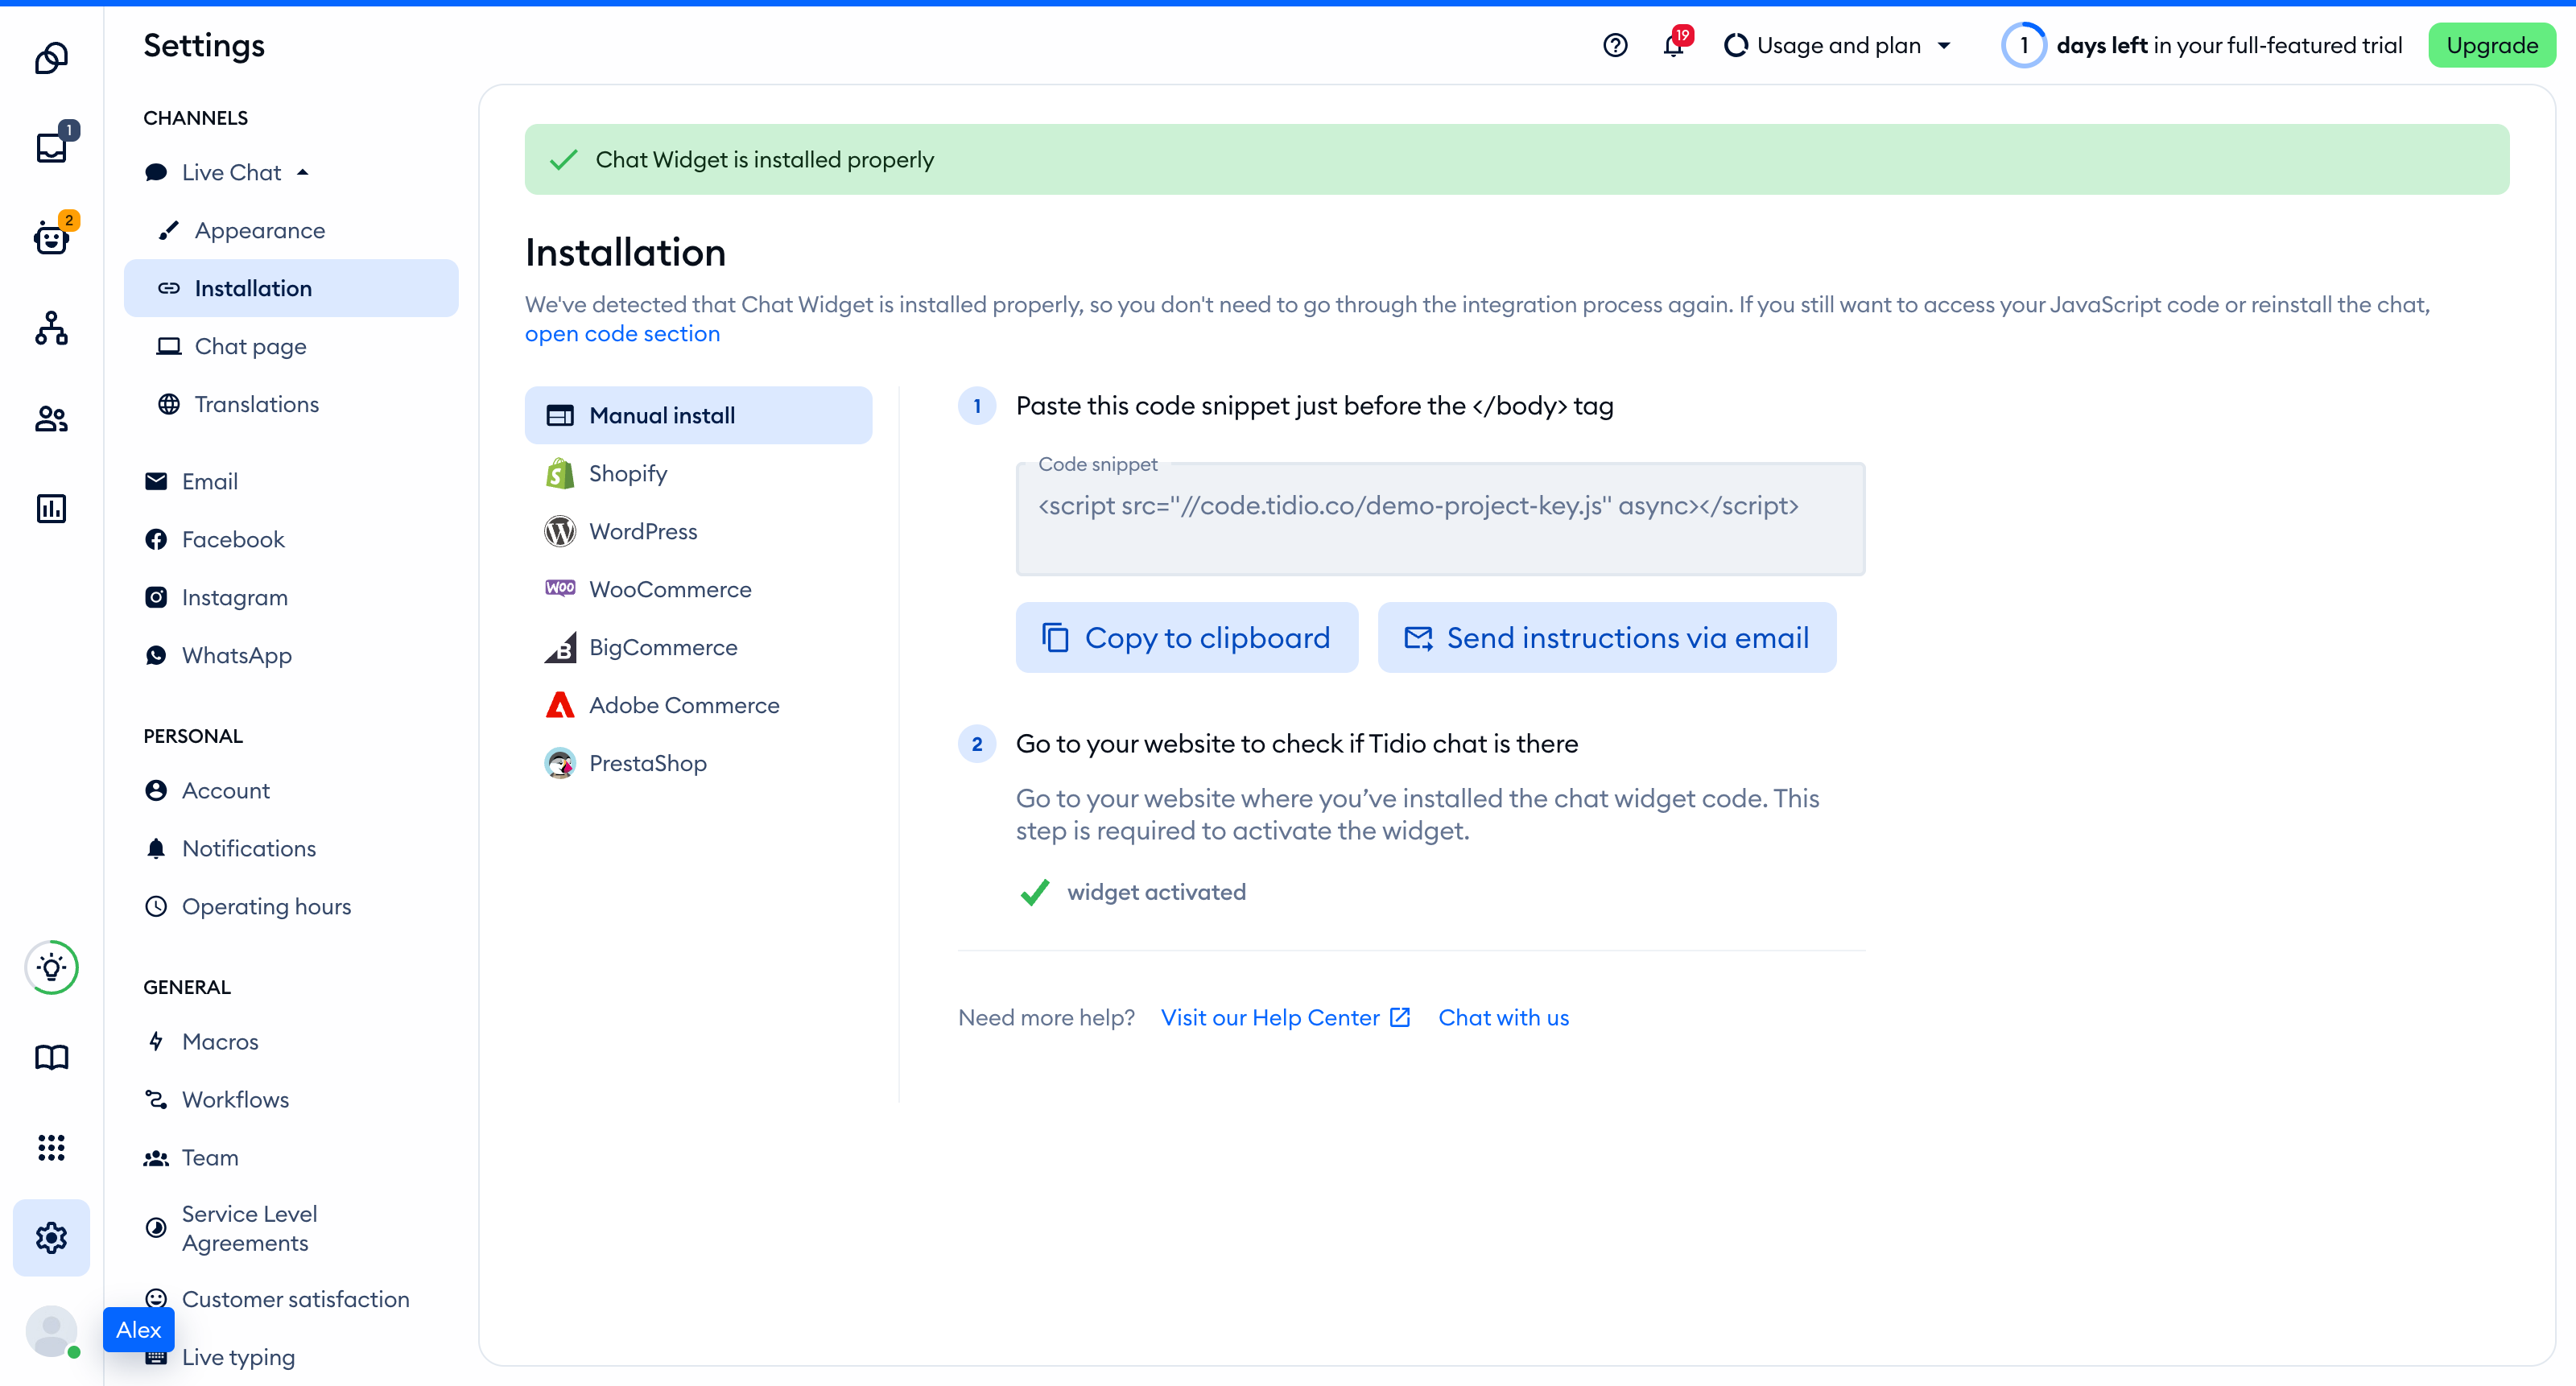
Add the Tidio tag in Google Tag Manager
Start with a Google Tag Manager web container already installed on your website. If you do not have one, follow Google's container installation guide first.
- Open your site's container in Google Tag Manager.
- Select Tags, then New. Give the tag a name such as Tidio chat widget.
- Click Tag Configuration and choose Custom HTML.
- Paste the complete Tidio script into the HTML field, including its opening and closing tags.
- Click Triggering and select Initialization - All Pages as the only firing trigger.
- Click Save.
- In Workspace, click Preview. Enter your website URL and click Connect.
- Return to Tag Assistant and click Continue. Complete the checks below before publishing.
- Return to Workspace and click Submit. Select Publish and Create Version, enter a version name and description, then click Publish.
With this setup, the Tidio script loads once per page load through the container. In a single-page app, use the initial-load trigger only. Do not add a History Change trigger to the installation tag. The widget stays loaded as visitors move between routes.
Keep only one Tidio installation. Remove any existing copy from your website code, plugin or another container before publishing this tag.
Google documents custom HTML tags, page-load triggers and previewing and publishing.
Check the installation
Open your site in a regular browser window. The chat widget appears in the corner of the page and stays there when you move between pages. Headless and automated browsers may not show the widget, so do not rely on them for this check.
Loading a page with the widget is what activates it. After that, Settings > Live Chat > Installation in your Tidio panel says Chat Widget is installed properly.
Check the live site after publishing your Google Tag Manager container.
In GTM Preview, use Tag Assistant to confirm that your Tidio tag fires once for each full page load. In a single-page app, navigate to another route and check that the installation tag does not fire again. Google explains how to inspect tag firing in preview and debug mode.
Exclude the checkout page
To prevent the tag from loading on a direct visit to /checkout, add a trigger exception. Match the exception's event type to your installation trigger.
- Open Triggers and click New. Name the trigger Exclude checkout.
- Click Trigger Configuration and choose Initialization.
- Under This trigger fires on, restrict the trigger to matching events. Set the filter to Page Path, the equals operator and the value
/checkout. - Save the trigger. Open your Tidio tag and click Triggering.
- In Exceptions, click Add and select the checkout trigger. Save the tag.
- Preview a direct visit to
/checkoutand confirm that the tag does not fire. Check another page to confirm that it still fires there, then submit and publish the changes.
This exact match covers /checkout, not /checkout/ or checkout subpages. Add matching exceptions for any other checkout paths your site uses.
A trigger exception prevents loading. It does not hide a widget that already loaded on another route in a single-page app. It also does not load the widget when you leave an excluded route without a full page load. For route-aware control, see the Widget SDK.
To load the widget only on a list of addresses instead, see Show the widget only on specific pages.
Google documents trigger exceptions and page-path filters.
Troubleshooting
- If the tag works in preview but not on the live site, publish the container. Saving a tag or creating a version without publishing does not make the changes live.
- If the tag fires again during navigation in a single-page app, remove any History Change trigger from the installation tag. That trigger responds to history changes, not just full page loads.
- If you see duplicate widget requests, check for a second installation tag or container. Also check your page source and website plugins for an existing Tidio script. Keep one installation.
- If consent blocks the tag, review Advanced Settings > Consent Settings and Additional Consent Checks. With Require additional consent for tag to fire, all specified consent types must be granted when the trigger runs. Keep your site's consent requirements and test the intended consent flow rather than disabling those checks.
- If the tag never fires, confirm that the container is installed on that page and inspect its triggers and exceptions in preview.
- If the tag fires but the widget does not appear, check that the script uses your project's Public key rather than
YOUR_PUBLIC_KEY.
See Google's documentation for history change triggers and tag consent settings.
Further reading
Integrate Tidio with Google Tag Manager covers sending Tidio events to the dataLayer, which is different from installing the widget.