In this article, we're sharing the most important information and highlights on using Tidio. By reading this, you'll know how to get the most out of your project.
In this article, you'll learn:
- How to navigate the Tidio user interface
- What information about visitors you can find
- How the Customers section works
- How to manage the conversations
- How to add new agents
- How to transfer chats to different agents
- What communication channels Tidio supports
- How to change your avatar
- How to go offline
- How to use offline email notifications
- How Operating Hours work
- What the Chat Page is
User interface basics
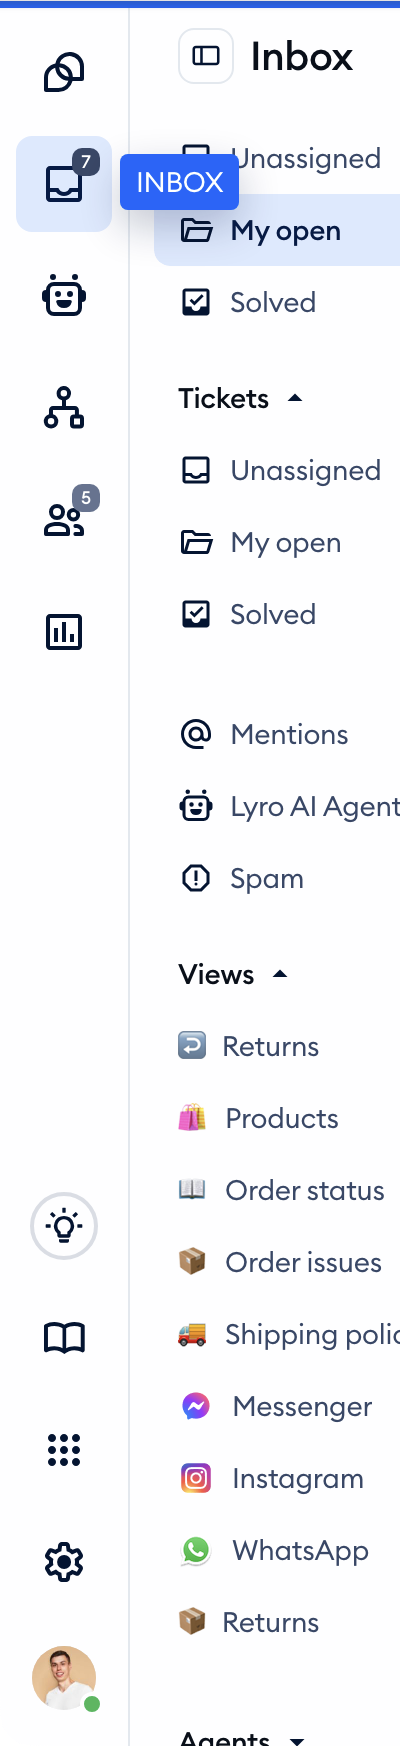
Everything in Tidio starts from the main menu on the left of your panel: Dashboard, Inbox, Lyro AI Agent, Flows, Customers, Analytics, Getting started, Help Center, Integrations and Settings. Depending on your permissions, you may see fewer of them. New to Tidio? The Getting started page (the light bulb icon) walks you through your first steps:
Receiving and replying to visitors' messages is easy! This is what the widget looks like from your visitor's point of view:

When a visitor sends you a message, you will get a pop-up and a sound notification:

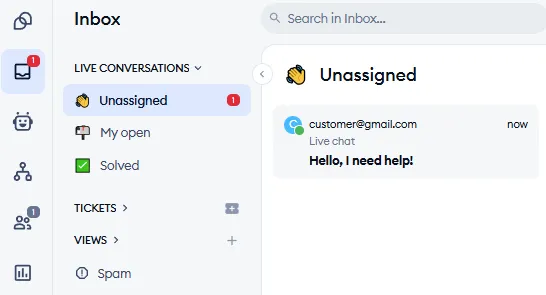
The new conversation will appear in the Unassigned folder, under Live conversations in your Inbox:
Please note: if Lyro (the AI agent) is active on your live chat, it answers your visitors first and passes the conversation to your team when needed. You decide when Lyro steps in: go to Lyro AI Agent > Channels, open the Live conversations tab, and under Lyro responds, choose Always or Only when human agents are offline. See Lyro - a quick setup for more.
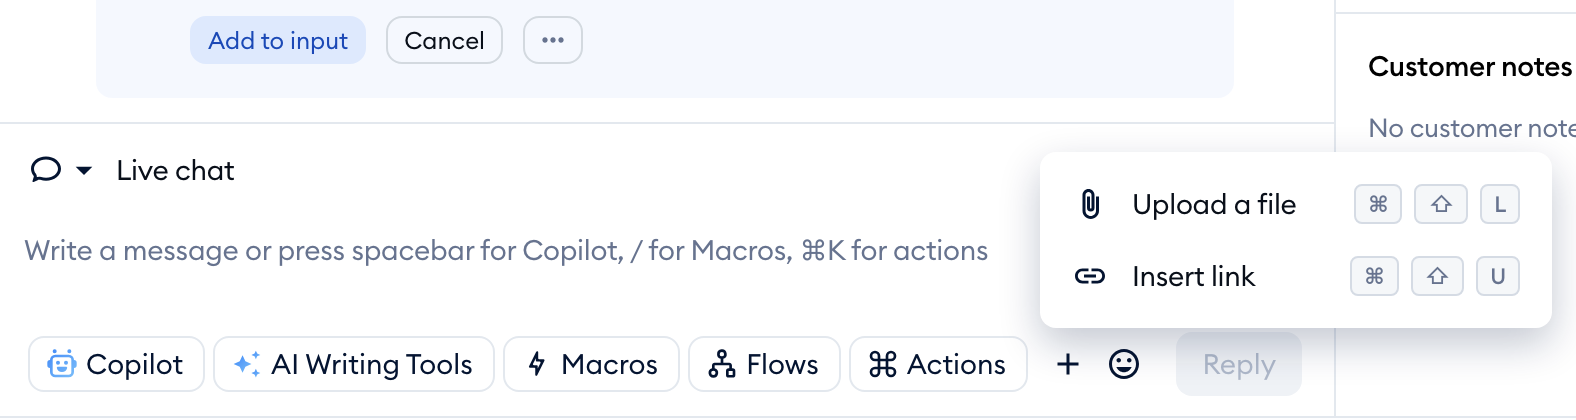
You can respond to visitors by typing your message in the conversation window and hitting Enter on your keyboard (or the Reply button). If you would like to send a file or a picture during a conversation, click on the + icon (Add to message) and choose Upload a file, or drag and drop the image inside the chat's conversation window (your customers can do that from their end too!). In the same menu, you'll find Insert link, to add a hyperlink to your message before sending it.
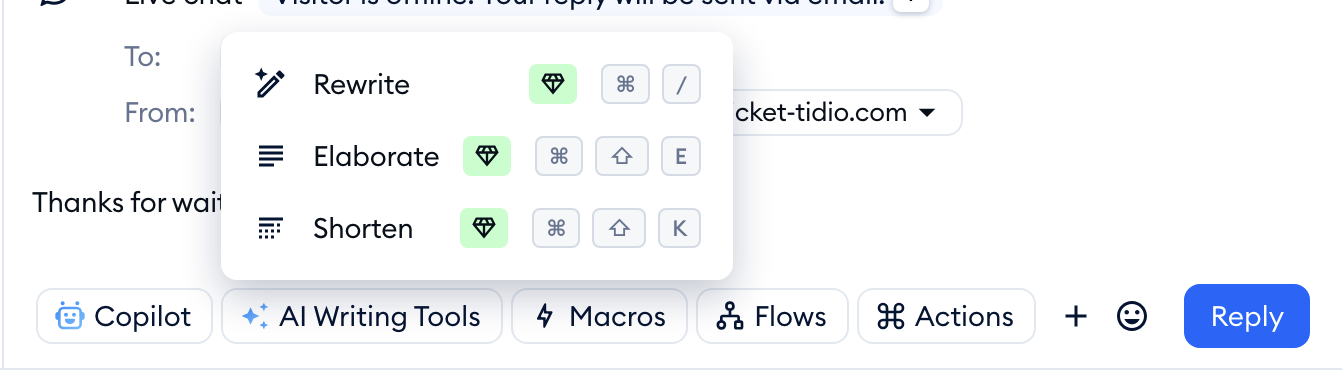
To enhance your messages, try the AI Writing Tools - a reply assistant designed to help customer service agents deliver high-quality, well-composed replies to customers faster. You can access them by clicking on AI Writing Tools at the bottom of your reply box.
With the power of AI, these tools can generate good-looking responses from the input provided by the agent. The available options allow you to Rewrite, Elaborate or Shorten your text. For tickets, you'll also see an AI summary of the whole thread at the top. In the panel, AI Writing Tools are part of the Inbox AI add-on - if they aren't included in your subscription, choosing an option shows you how to unlock them.
An additional tool is also available under the Actions button next to it (or press Cmd + K on a Mac, Ctrl + K on Windows) - it allows you to quickly search for different features and commands while chatting, e.g. for managing the conversation or performing basic actions:
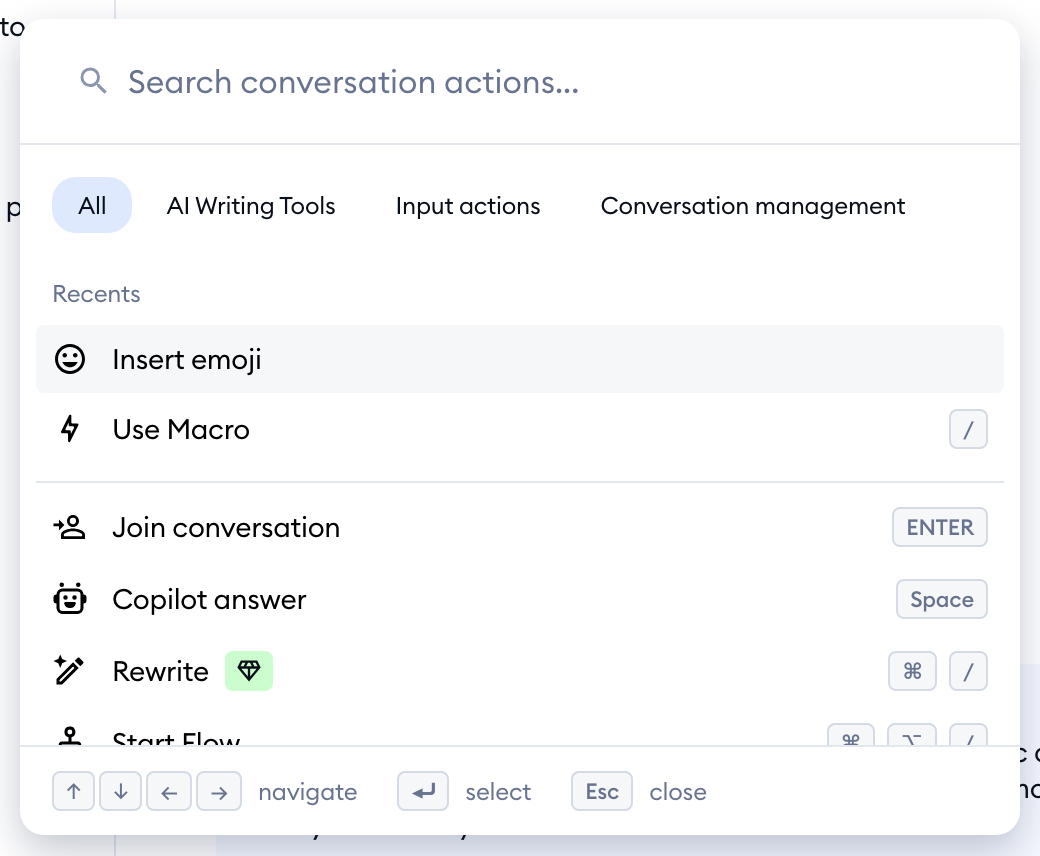
Please note that the Actions menu is best used when you're already familiar with Tidio's basic functions, so don't worry about it if you're new to all this!
Information on the visitor
You will see the details of your visitor in the panel on the right of your conversation window (if it's hidden, click on Show details in the top-right). This part will display the visitor's name or ID, their location (with a link to the map), browser and operating system, IP address, email and phone number, tags and contact properties, as well as the visitor's last viewed page. If the Pre-chat survey is enabled, all information that the survey collected will display there too (e.g., a phone number).
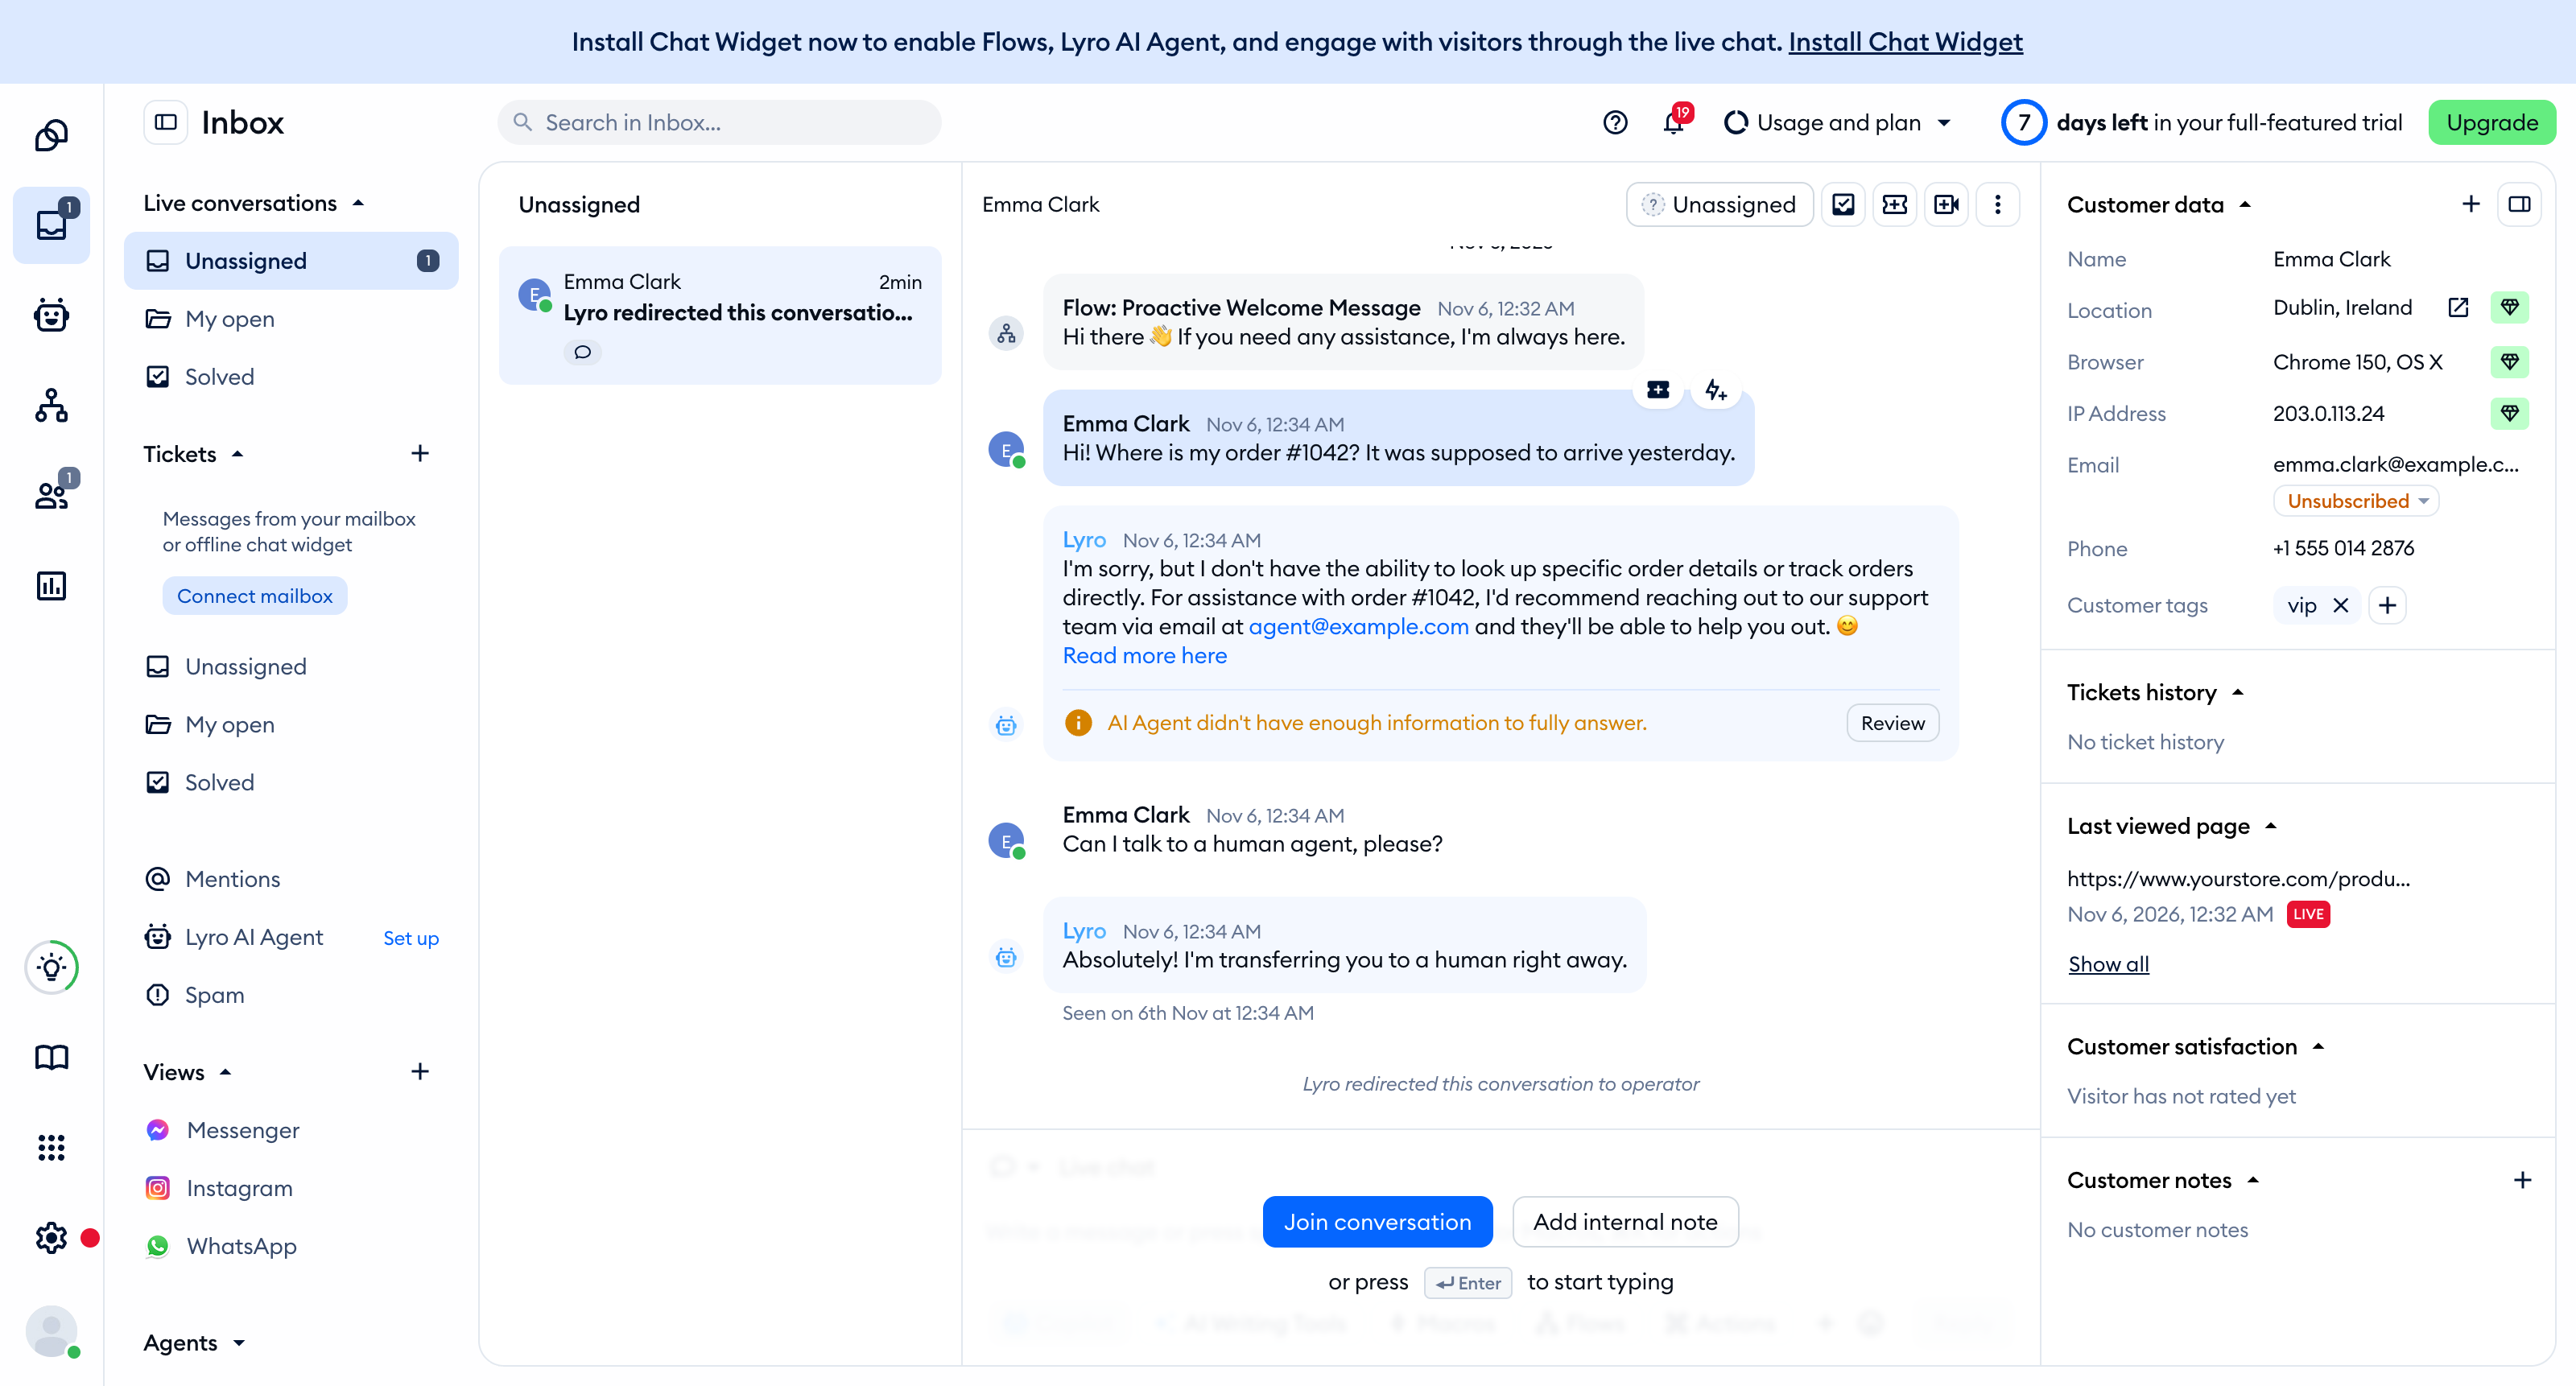
Please note: the full history of Viewed pages is available on the Growth plan and above. If your plan doesn't include detailed visitor information, details like the location and IP address are blurred - click on them to see how to unlock them.
Any visitor currently on your website will also appear in the Customers section.
The Customers section
In the Customers section, you can also see some additional information about your current website visitors, listed under Visitors, in Now live:
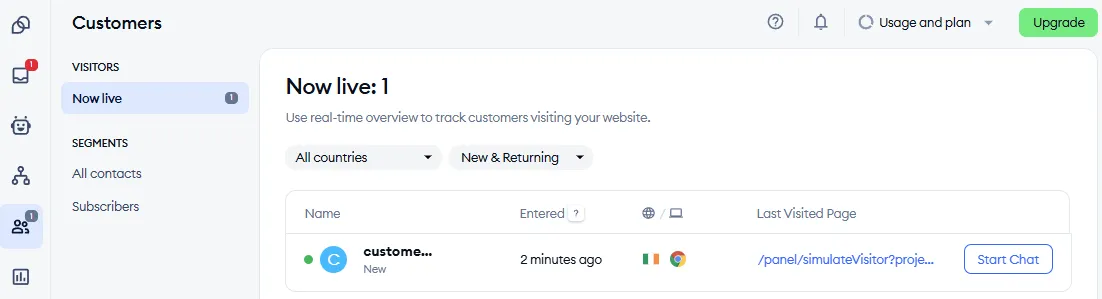
Please note: the full live Visitors list is available on the Starter plan and above. See The Visitors List for everything it can do.
Visitor's name
Displays a randomly generated unique Visitor ID (e.g., #2ftg9, #5mff3, or #lg0ku), an email address, or an actual name. The email will display if you have the Pre-chat survey enabled (which you can find in Settings > Live Chat > Appearance > Content, on the Pre-chat survey tab) or if the visitor provided their email during the conversation.
Name of the agent handling the conversation
Displays as a grey, horizontal bar next to the visitor's name, e.g., @you). If you do not see it there, no one is chatting with the visitor at the time.
Entry time
Indicating how long ago the visitor entered your website.
Flag
Indicating the country your visitor is typing from. This data is gathered based on the visitor's IP.
Browser icon
Representing the browser your visitor is currently using to contact you.
URL
A live preview of the particular URL your visitor is currently visiting.
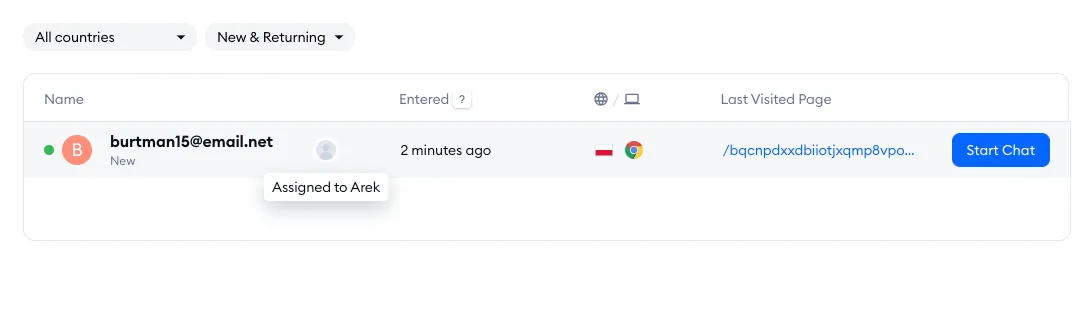
Now, how to engage your visitor in a conversation? It's effortless - click on the Start Chat button next to the visitor. Doing so will take you to the chat window.
Managing your conversations
For a more detailed guide on live chat conversations and managing chats, please see Live chat conversations.
If you would like to pick up the conversation - click on the system notification or choose a chat from the Unassigned folder under Live conversations in your Inbox. The agent who assigned themselves to it is responsible for that chat. The next step is simply reading the visitor's message, typing in your reply, and letting the conversation take its course.
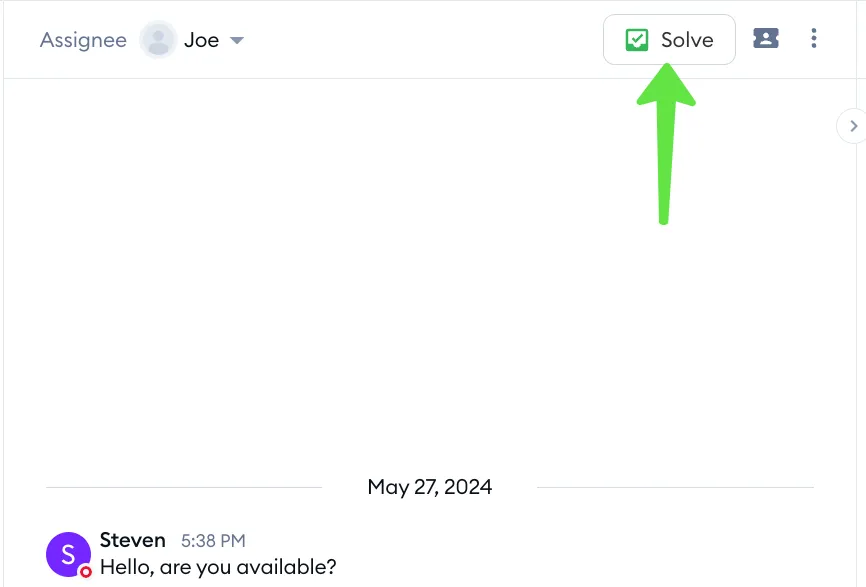
Whenever a visitor considers the chat finished, it's enough to minimize the widget. When they open the chat widget again, the conversation will be visible to them right where you left off. The chat will stay in your open conversations until it's solved. To mark it as solved - click the Solve button in the top bar of the conversation:
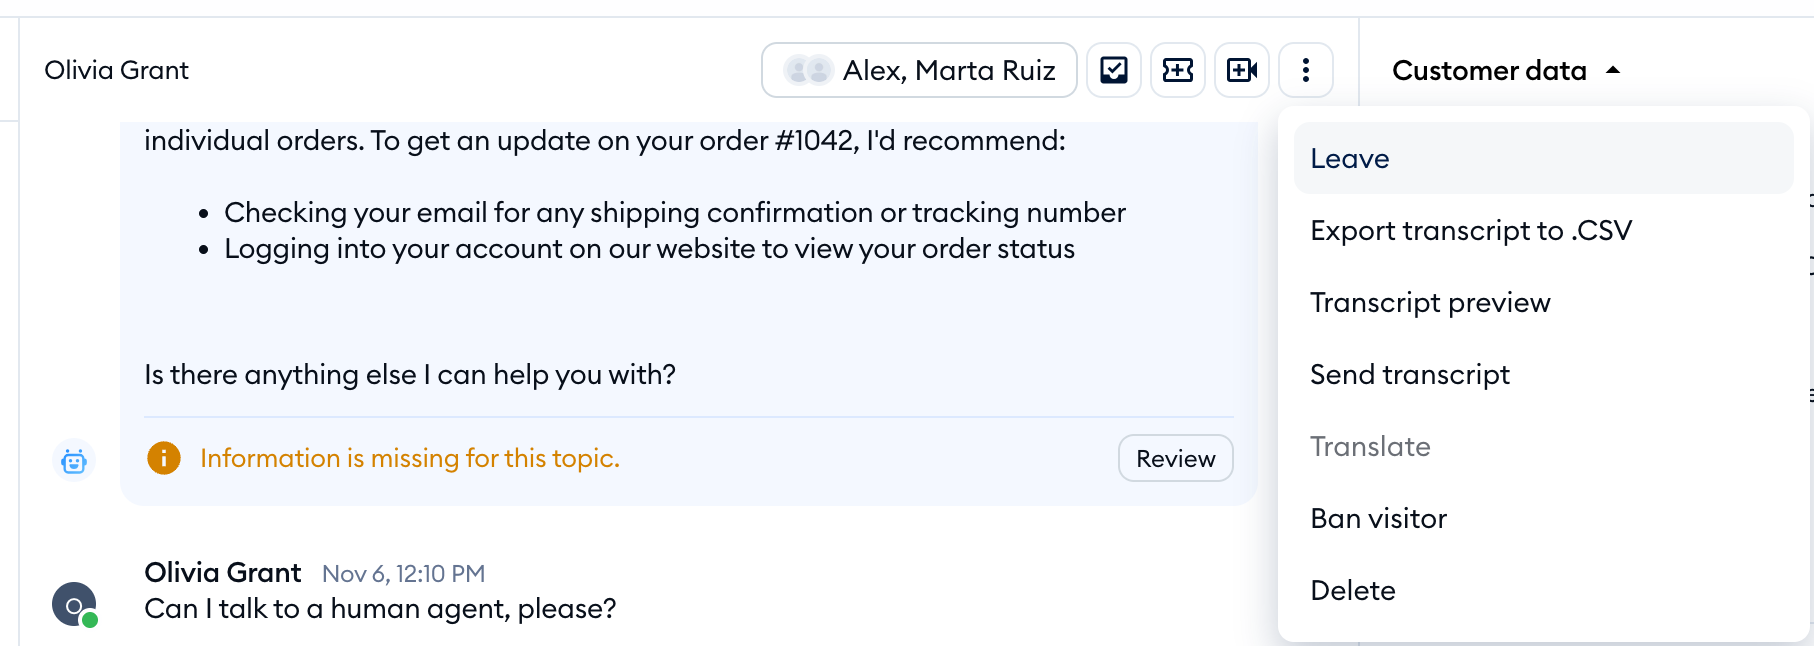
Sometimes, when there's more than one agent assigned to a conversation, you may want to leave it instead. Click on the three-dots menu (More options) in the top bar and choose Leave. This allows you to leave the chat when there are multiple agents assigned to it. Another agent can later mark the chat as solved when the conversation is finished and resolved.
Add new agents
As the person who set up a Tidio account, you are its Project Owner - the first (and most important) agent. You can add other team members, however!
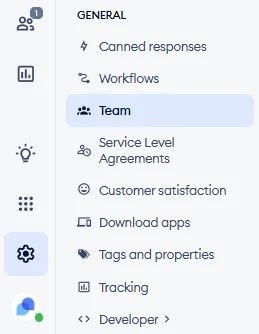
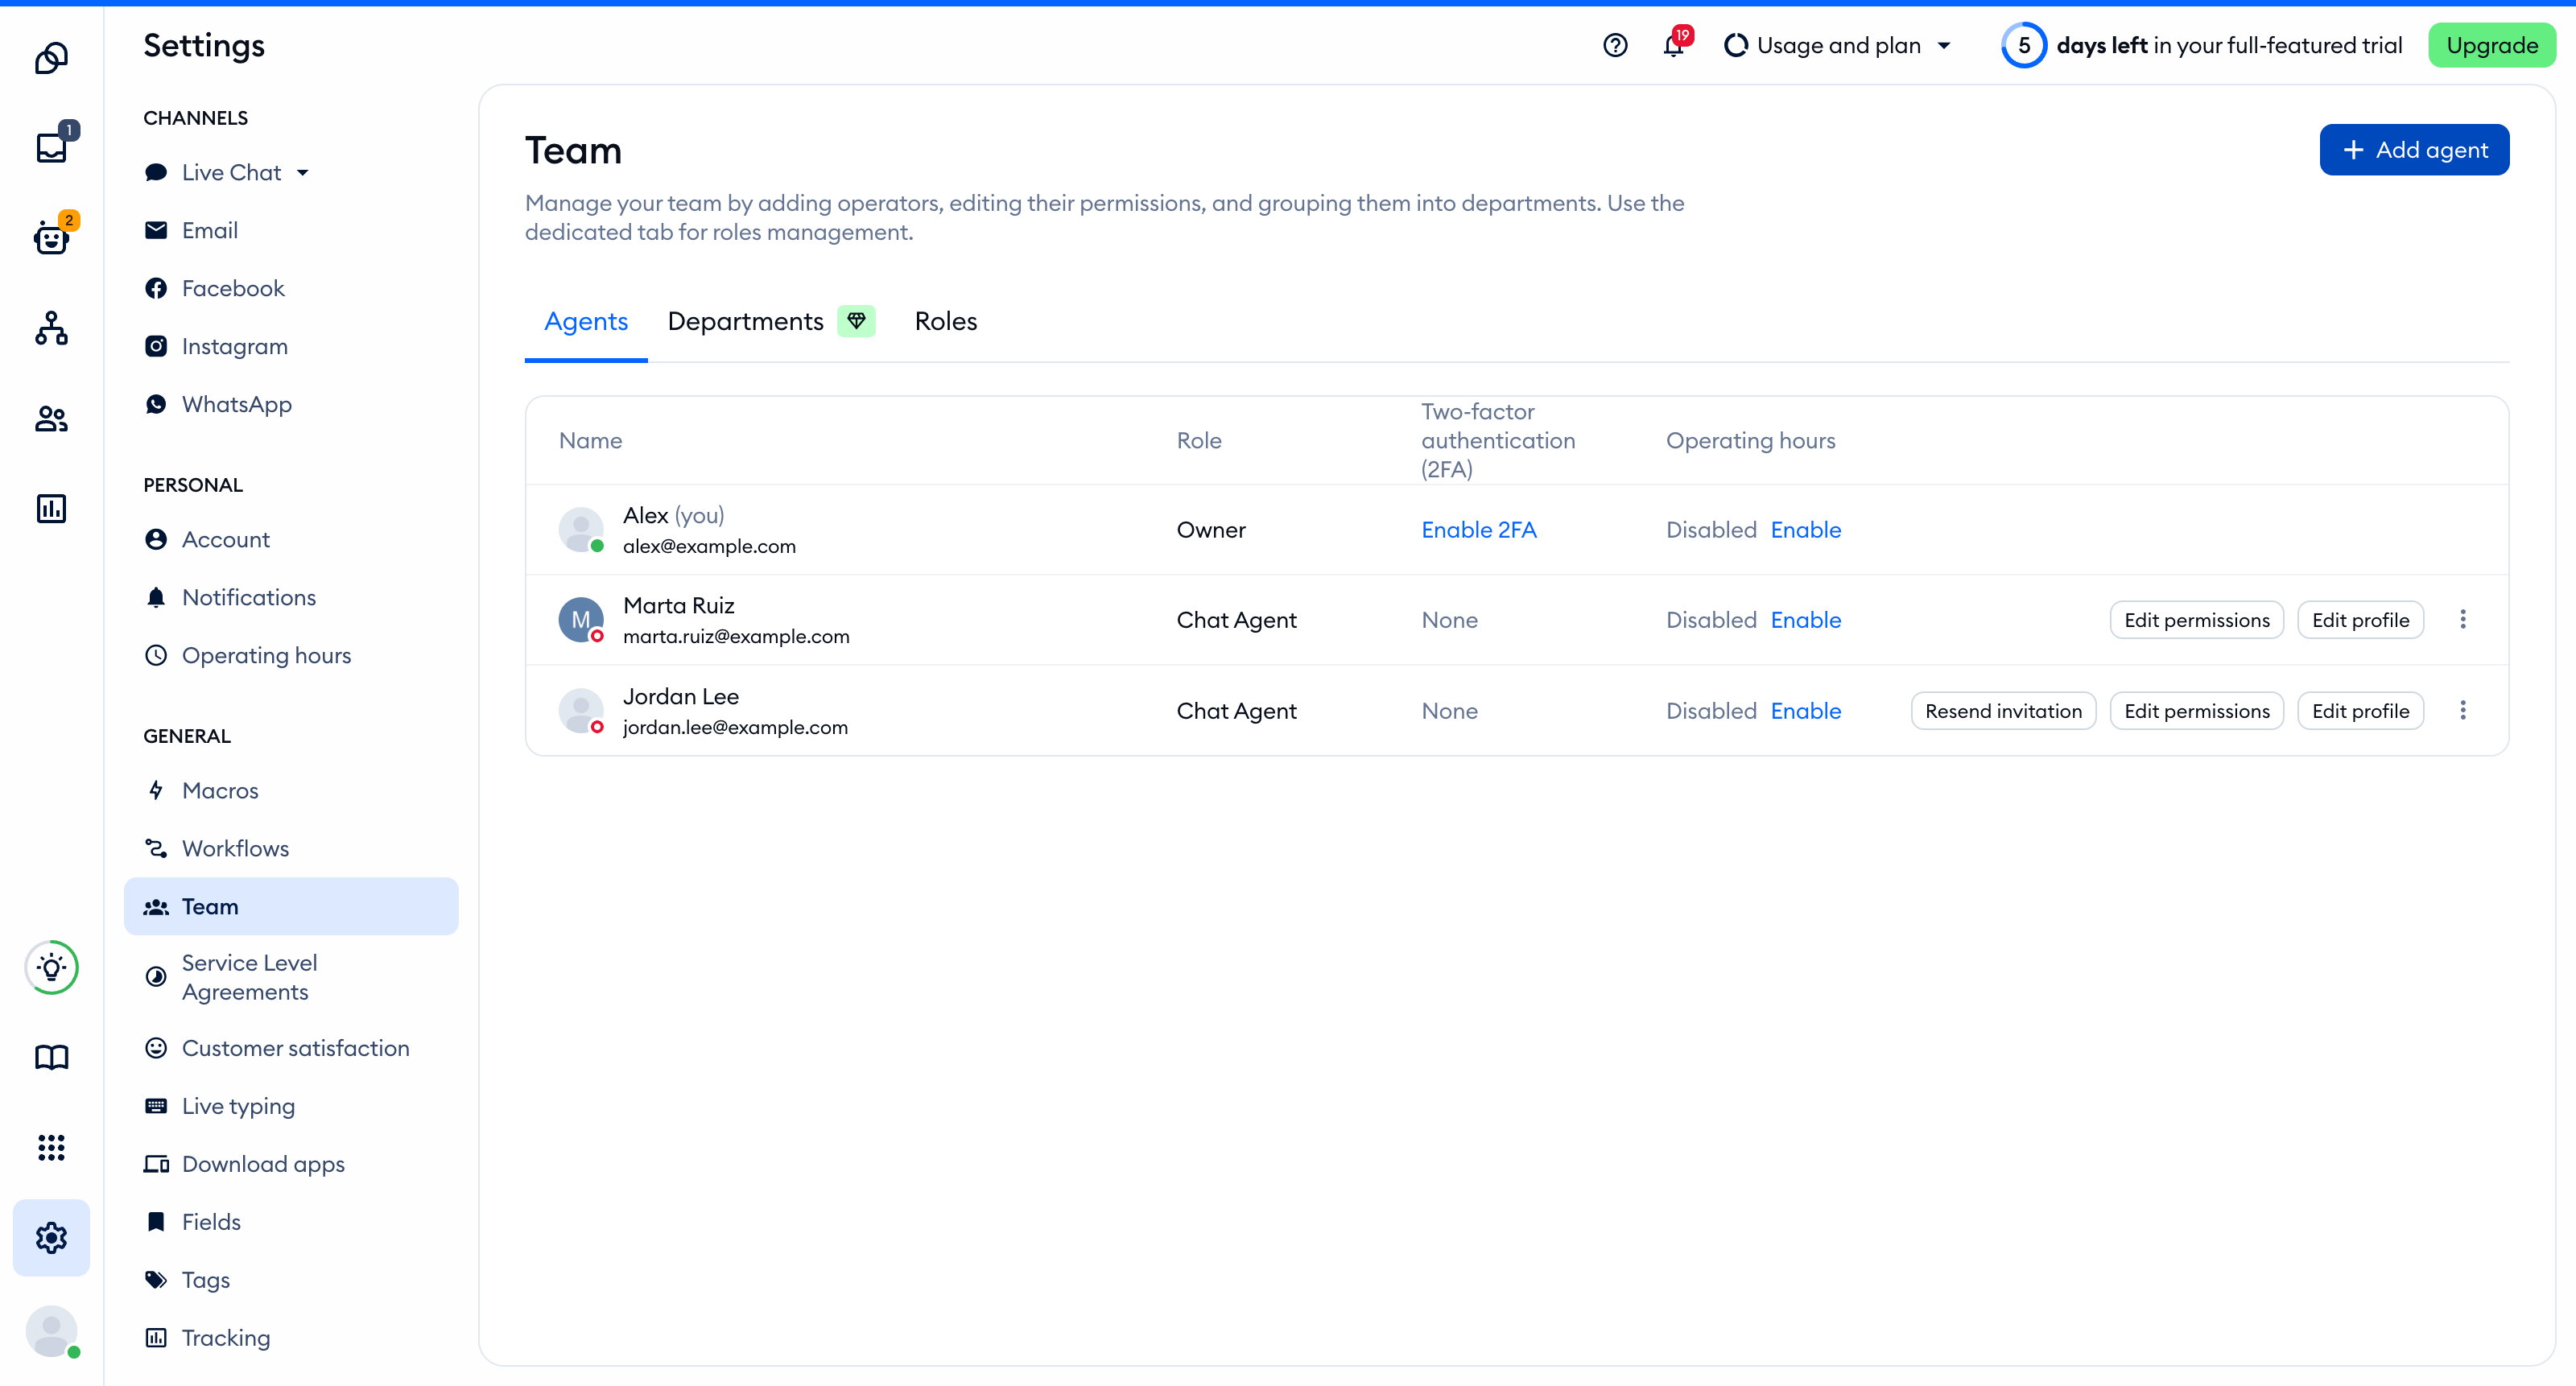
To add a new agent, please go to Settings > Team, on the Agents tab:
... and click on the Add agent button in the top-right:
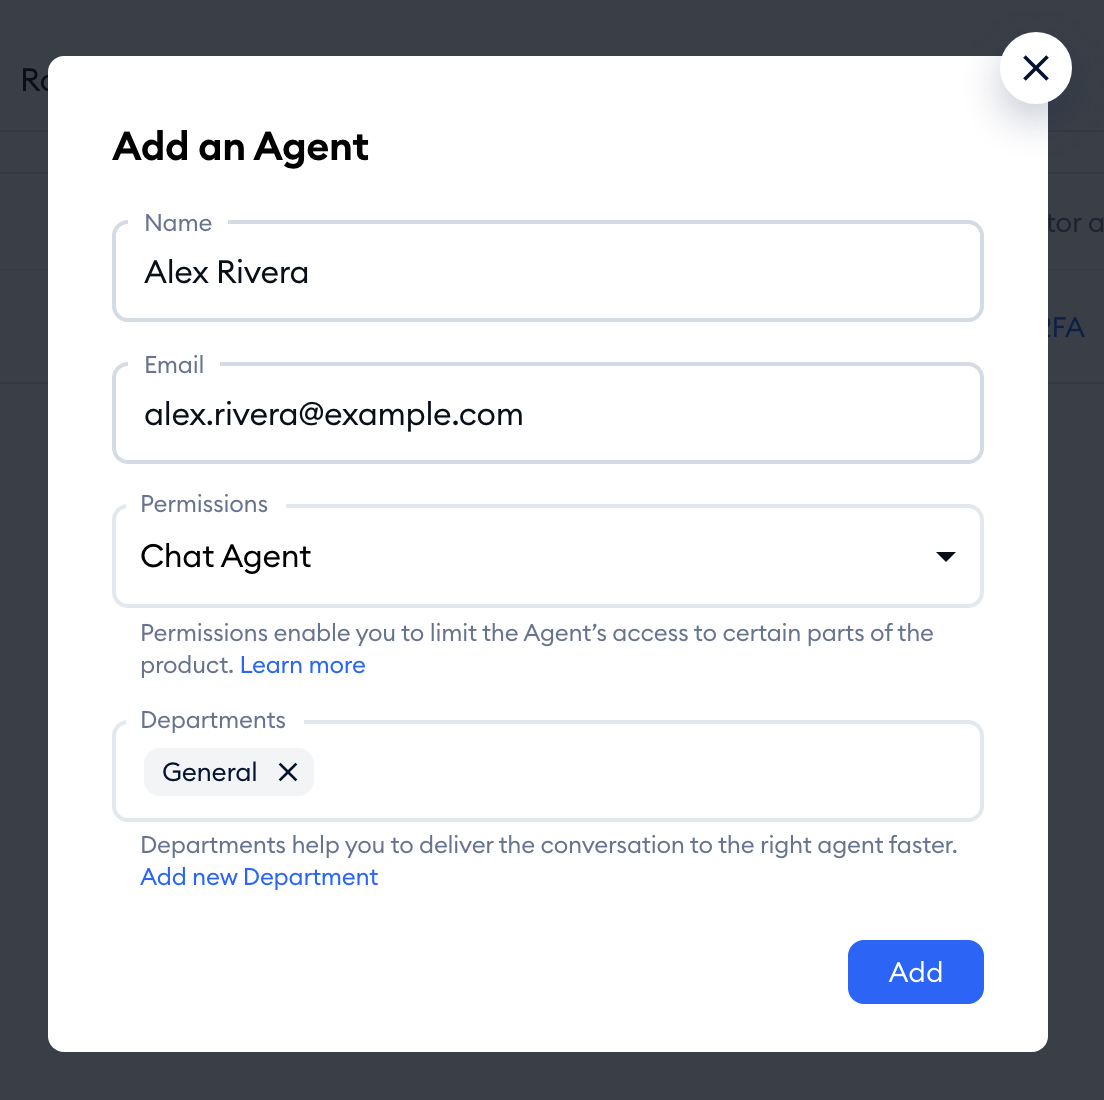
Once clicked, the Add an Agent window will open, and you will be asked to enter your new agent's Name and Email, and choose their Permissions and Departments. Then, click on the Add button to complete the process.
Please note: agent permissions are available on the Growth plan and above, and Departments on the Plus plan and above. If all the seats on your plan are taken, you'll see Upgrade your plan to add more agents instead of the Add agent button.
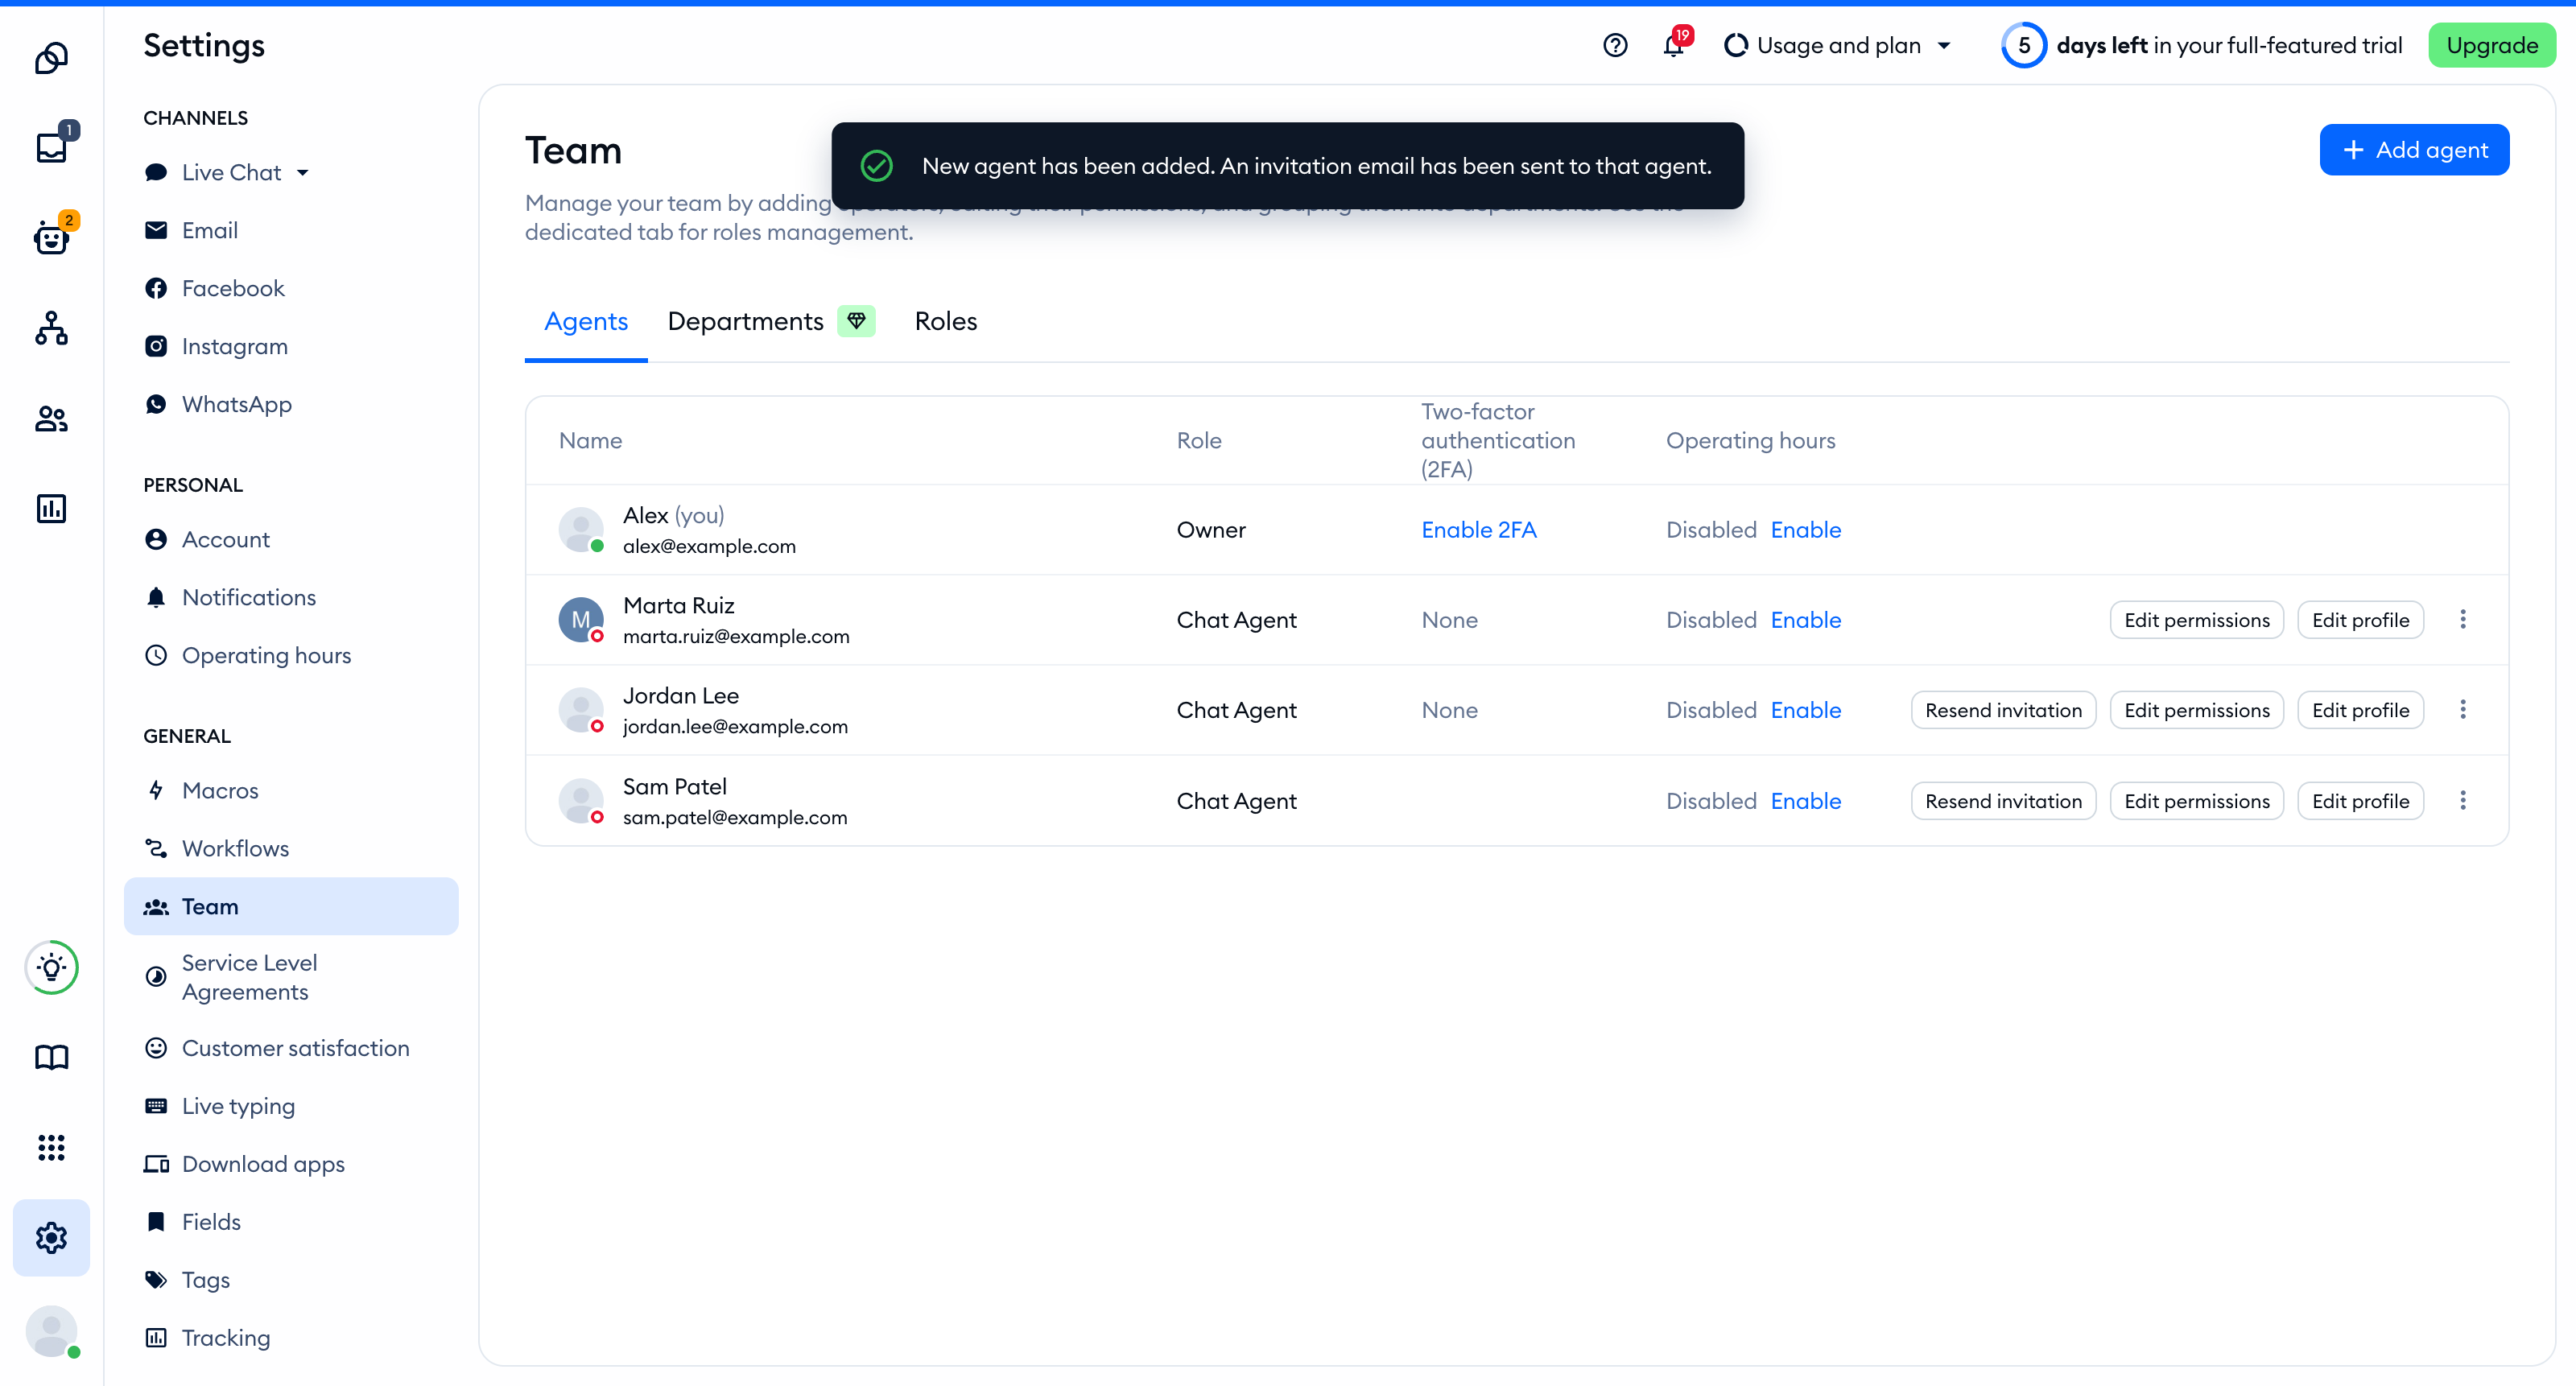
You'll see the message New agent has been added. An invitation email has been sent to that agent. Your new agent simply follows the link in the invitation email to join your project - no password is sent by email. From that moment, your agent is free to log in via www.tidio.com or the desktop/mobile app to access the panel. If the invitation got lost, use the Resend invitation button next to the agent in the list. For more, see Managing agents.
Transfer to another agent
At any point, the conversation can be transferred to another agent if you need to step out for a minute or your workload is too heavy at the moment. To transfer a conversation, click on the three-dots menu next to it in your conversation list and select the Reassign option (or Assign, if nobody is assigned yet):
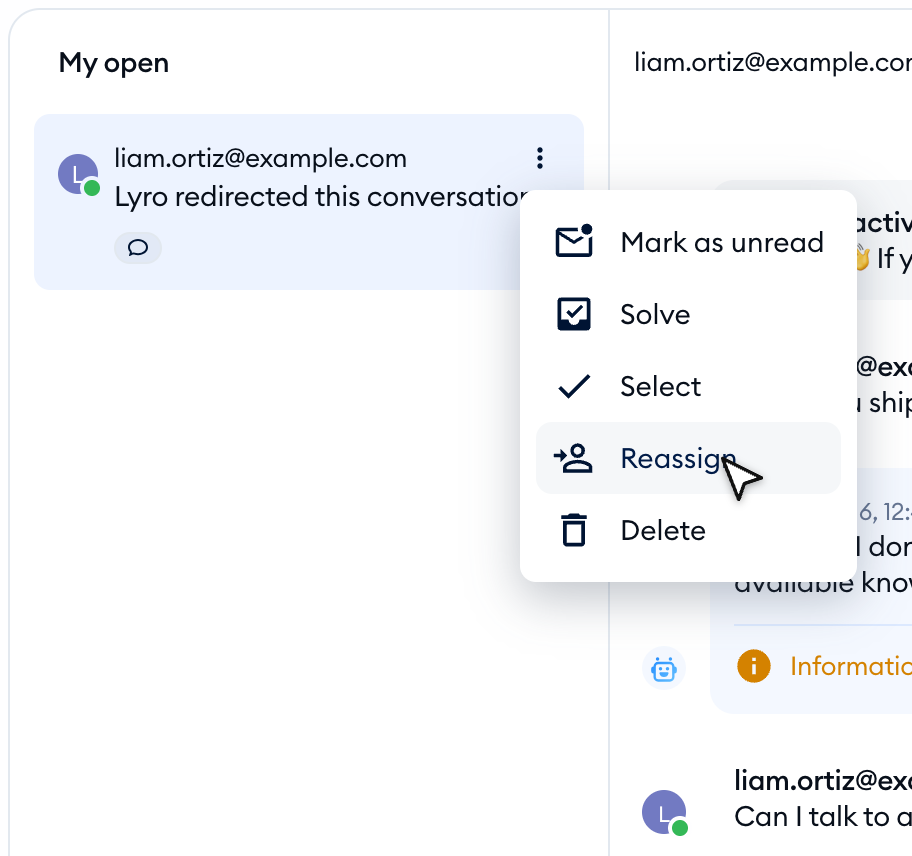
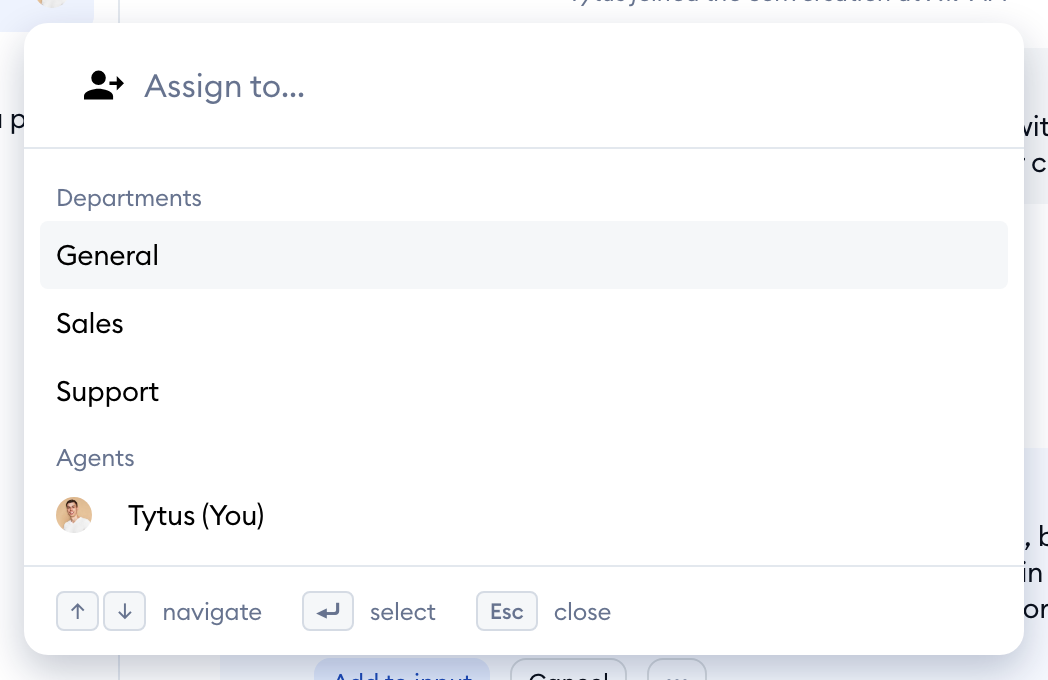
From there, select the appropriate person or department in the Assign to... panel:
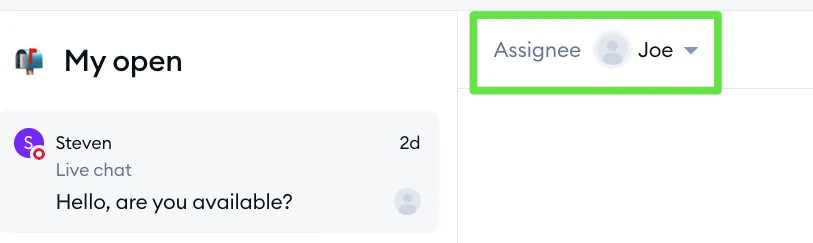
You also have the option to reassign a chat by selecting another agent from the assignee dropdown in the conversation's top bar, next to the Solve button.
And it's done! The chat window on the other agent's side will display the message that the chat has been transferred.
Finally, when you consider the conversation finished, you can un-assign yourself from it with Solve in the top bar, or Leave in the More options menu (see Live chat conversations).
If all agents have left the conversation, the next time the same visitor sends you a message, it will display in the Unassigned folder, just like any other incoming chat. All agents who are currently online will see the notification and will be able to jump right into the conversation.
Communication channels
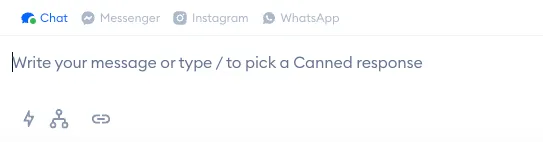
At Tidio, you can receive messages from several channels in the Live conversations part of your Inbox: a normal chat message, a Facebook Messenger message, an Instagram message or a WhatsApp message. They all appear differently, and that is how you will be able to recognize them. Emails from your connected mailbox arrive as tickets, in the Tickets part of your Inbox.
Chat
Every chat message will always have the ID assigned based on the first letter/email of the user's name. While responding to the chat, you should always respond via the 'chat message.' This should be automatically set to reply via chat if the visitor is on your website.
Messenger
Integrating your Facebook Fan Page with Tidio will make any messages sent to your Facebook page accessible in Tidio. These messages may display the sender's profile picture instead of a letter or number and will include a Messenger icon to show they originated from Messenger.
Once your Instagram Business Account is connected to Tidio, messages sent to your Instagram account will also appear in Tidio. These messages might show the sender's profile picture instead of a letter or number and will feature an Instagram icon to indicate they came from Instagram.
When your WhatsApp number is linked to Tidio, your incoming WhatsApp messages will show up in Tidio as well. These messages may include the sender's profile picture rather than a letter or number and will display a WhatsApp icon to denote their source.
Avatar
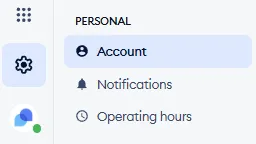
You can upload your own avatar in the Settings > Account section:
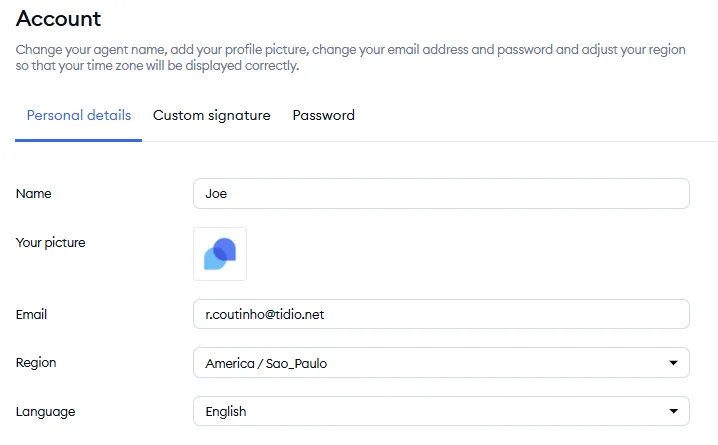
Once inside, on the Personal details tab, you will see the option to upload a new avatar (Your picture), and modify other details for your agent profile. See Set your profile picture for the details:
Going offline
Please see Using your widget's online/offline status for more details on using your online/offline status in Tidio.
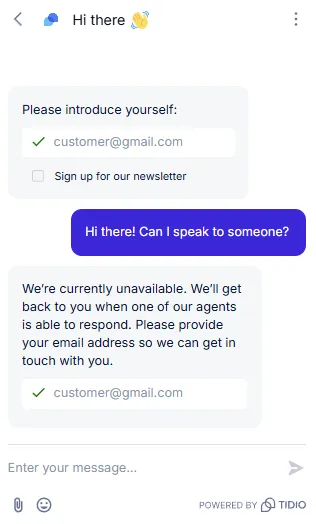
When you feel your work is done for the day, you can change your status from online to offline. This will cause your widget to notify your visitors when they can expect a reply from you. They will still be able to send you a message along with their contact email, which you can forward directly to your email inbox. Here's what the widget looks like:
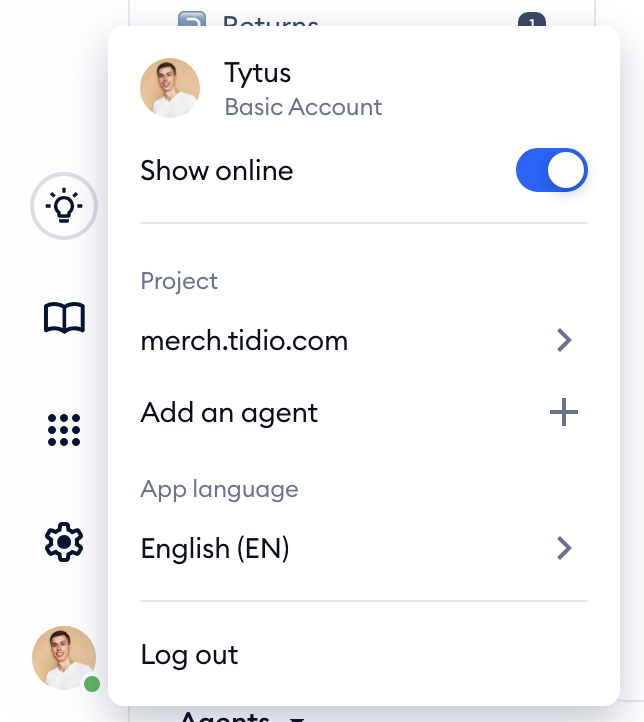
Changing your status and logging out of the panel can be done from a dedicated menu. Click on your avatar in the bottom-left corner of your panel (if you haven't uploaded a picture yet, you will see a placeholder image). There, you can turn the Show online switch on or off, or Log out:
Offline email notifications
If you would like to receive email notifications for messages that come in while your team is offline, you can configure that under Settings > Notifications. As the tooltip in the Email column says, You will receive email notifications only when your whole team is offline. You can read all about it in Offline email notifications.
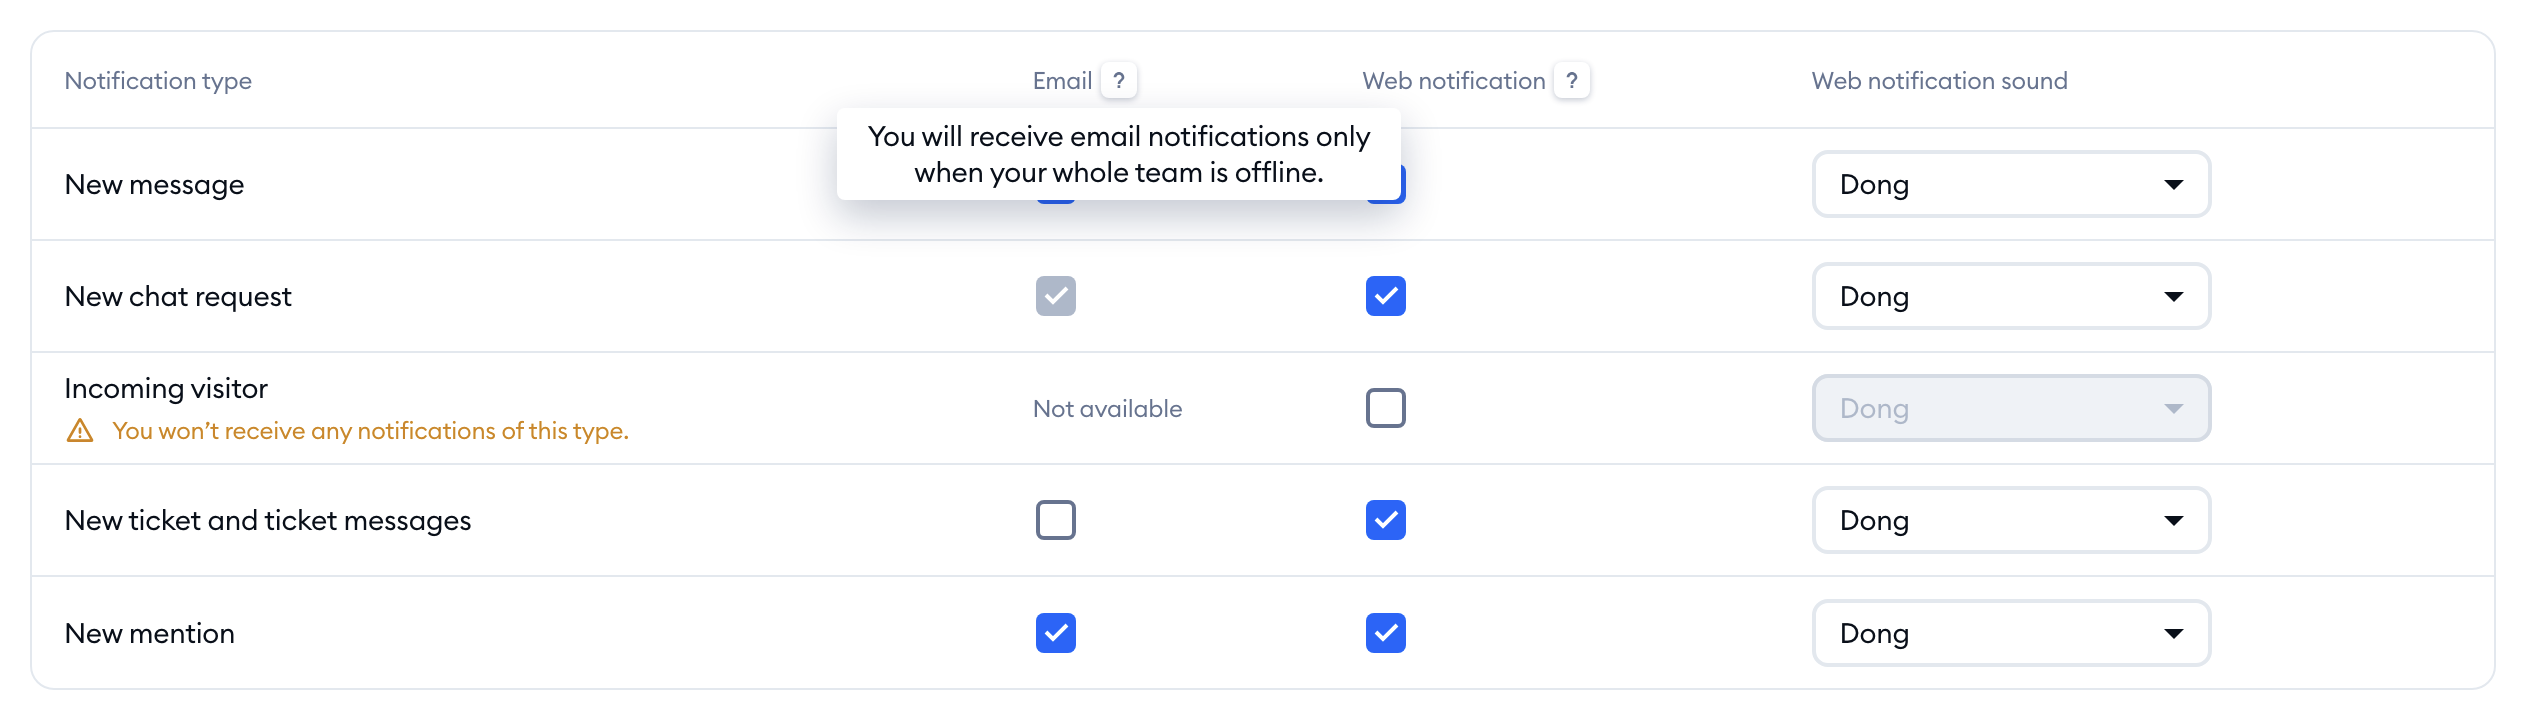
To set up the offline email notifications - make sure the box in the Email column is checked for New message. The New chat request email box follows it automatically, to ensure you will receive both - the new chat requests and messages from the conversations you're already assigned to.
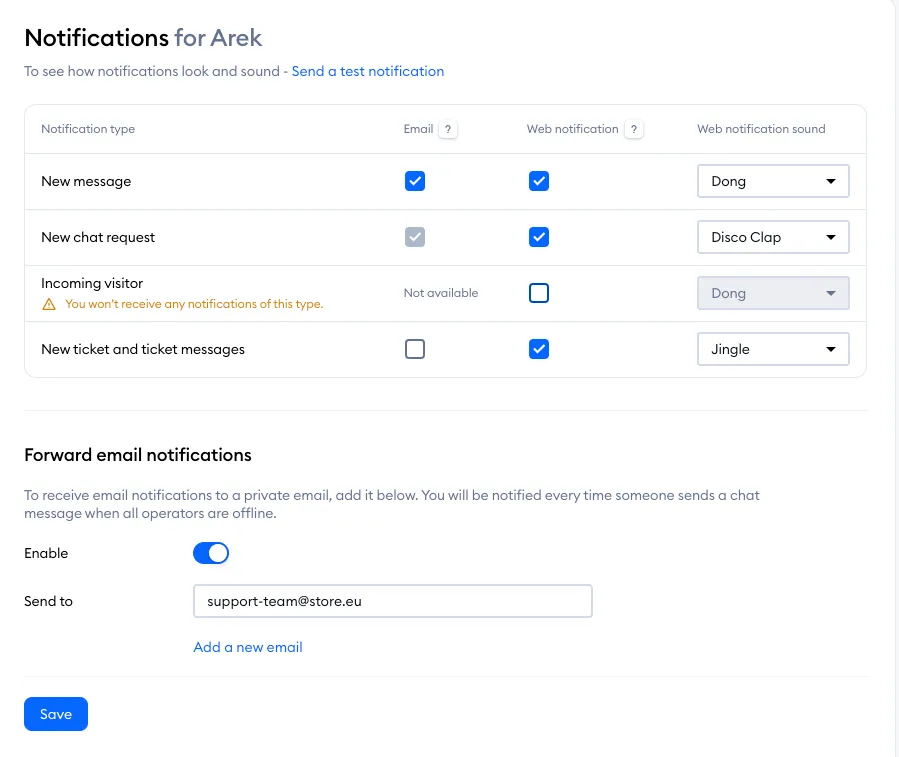
The email notifications are always sent to the email address you used to create a Tidio account. If you would like to receive them at another email address too, turn on Forward email notifications below the table and add that address.
Operating Hours
Your offline & online hours. You can use the Operating hours option within your Tidio Panel. That way, your status will switch between offline and online automatically at the hours of your choosing. You will find that option by going to Settings > Operating hours:
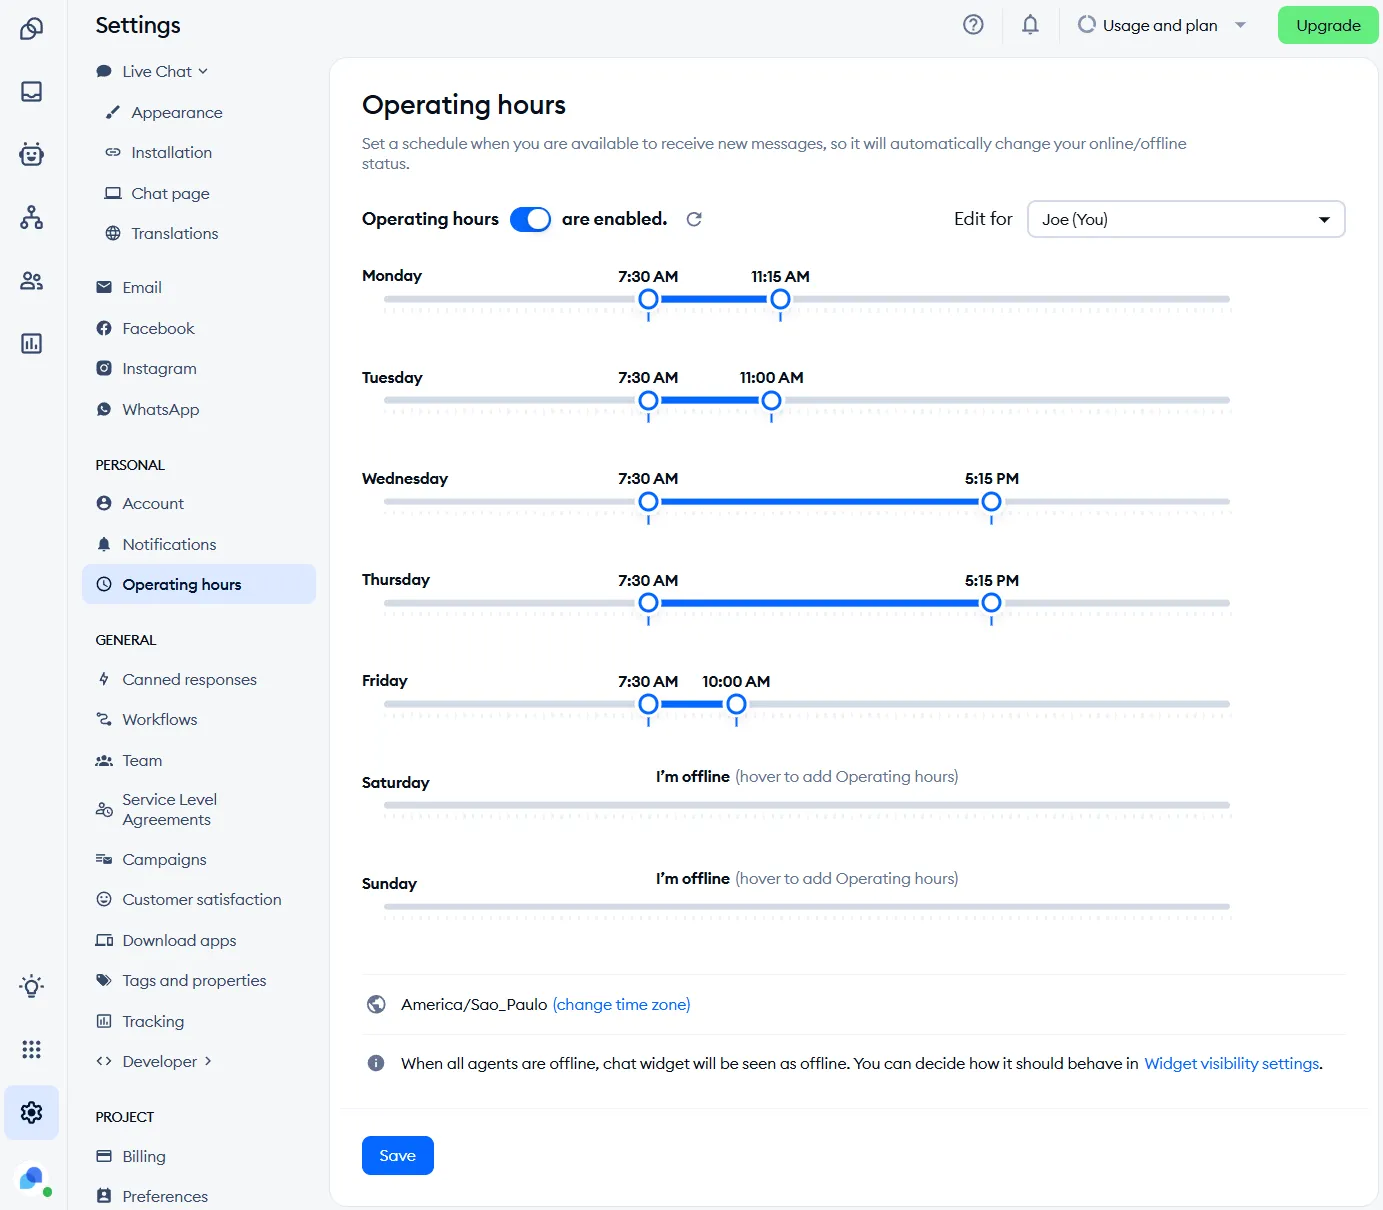
Please note: Operating hours are available on the Starter plan and above.
Chat Page
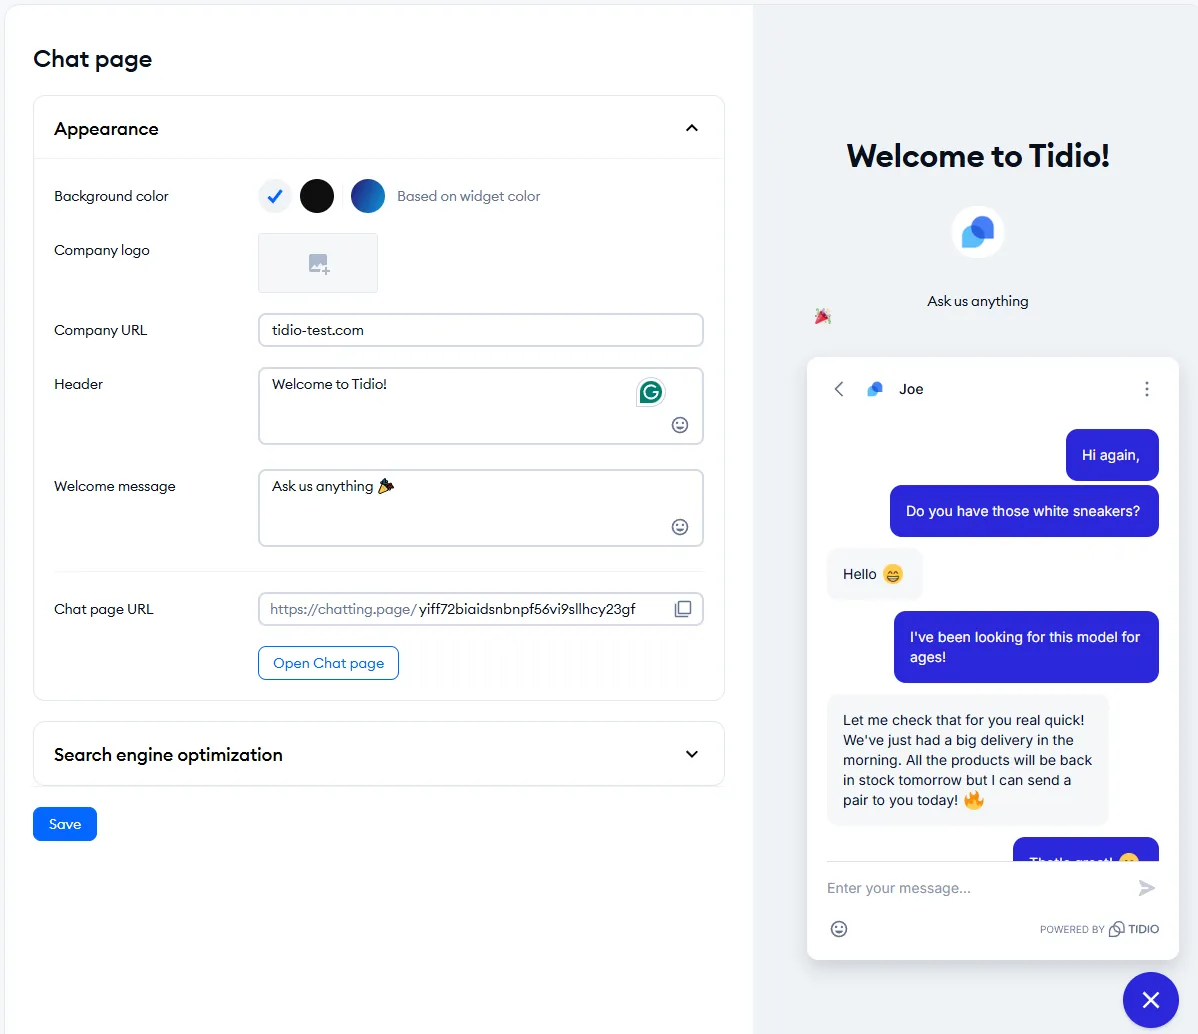
Please note: the Chat page is available on the Starter plan and above, and it also needs a verification by the Tidio Support Team. Until then, the panel shows: Additional verification is required before Chat page can be enabled. Contact support to complete verification.
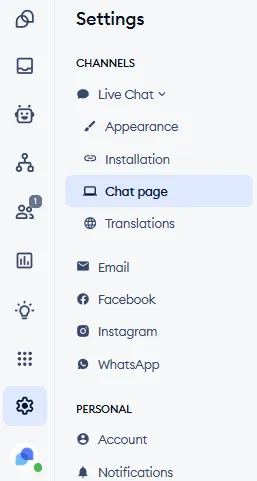
You can locate the Chat page feature in the Settings > Live Chat > Chat page section on the left side of your Tidio panel.