Deliver conversations and tickets to the right agents faster by enabling Departments in your Tidio project.
In this article, you'll learn:
- The benefits of using departments
- How to add agents to departments
- How to assign chats to departments via the Pre-Chat Survey
- How to assign chats to departments via flows
- How to route emails from a mailbox to a department
- How to reassign conversations to departments
Benefits
Save agents' time
Answer your customers more quickly by focusing only on the relevant chats. No more unnecessary reassigning of chats or tickets.
Relevant conversations only
No more interruptions during your work. Let your visitors find the right agent and enjoy fewer notifications and a lighter workload.
Keep your inbox organized
See only those chats and emails that fit into the scope of your expertise. Let other departments handle the rest of the conversations.
Adding Departments
To start using Departments, go to the Settings > Team section:
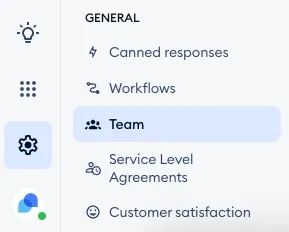
Once inside, you will see three tabs: Agents, Departments, and Roles. This is where you manage your team of agents and their permissions, and you can also create departments if that feature is available on your Tidio project.
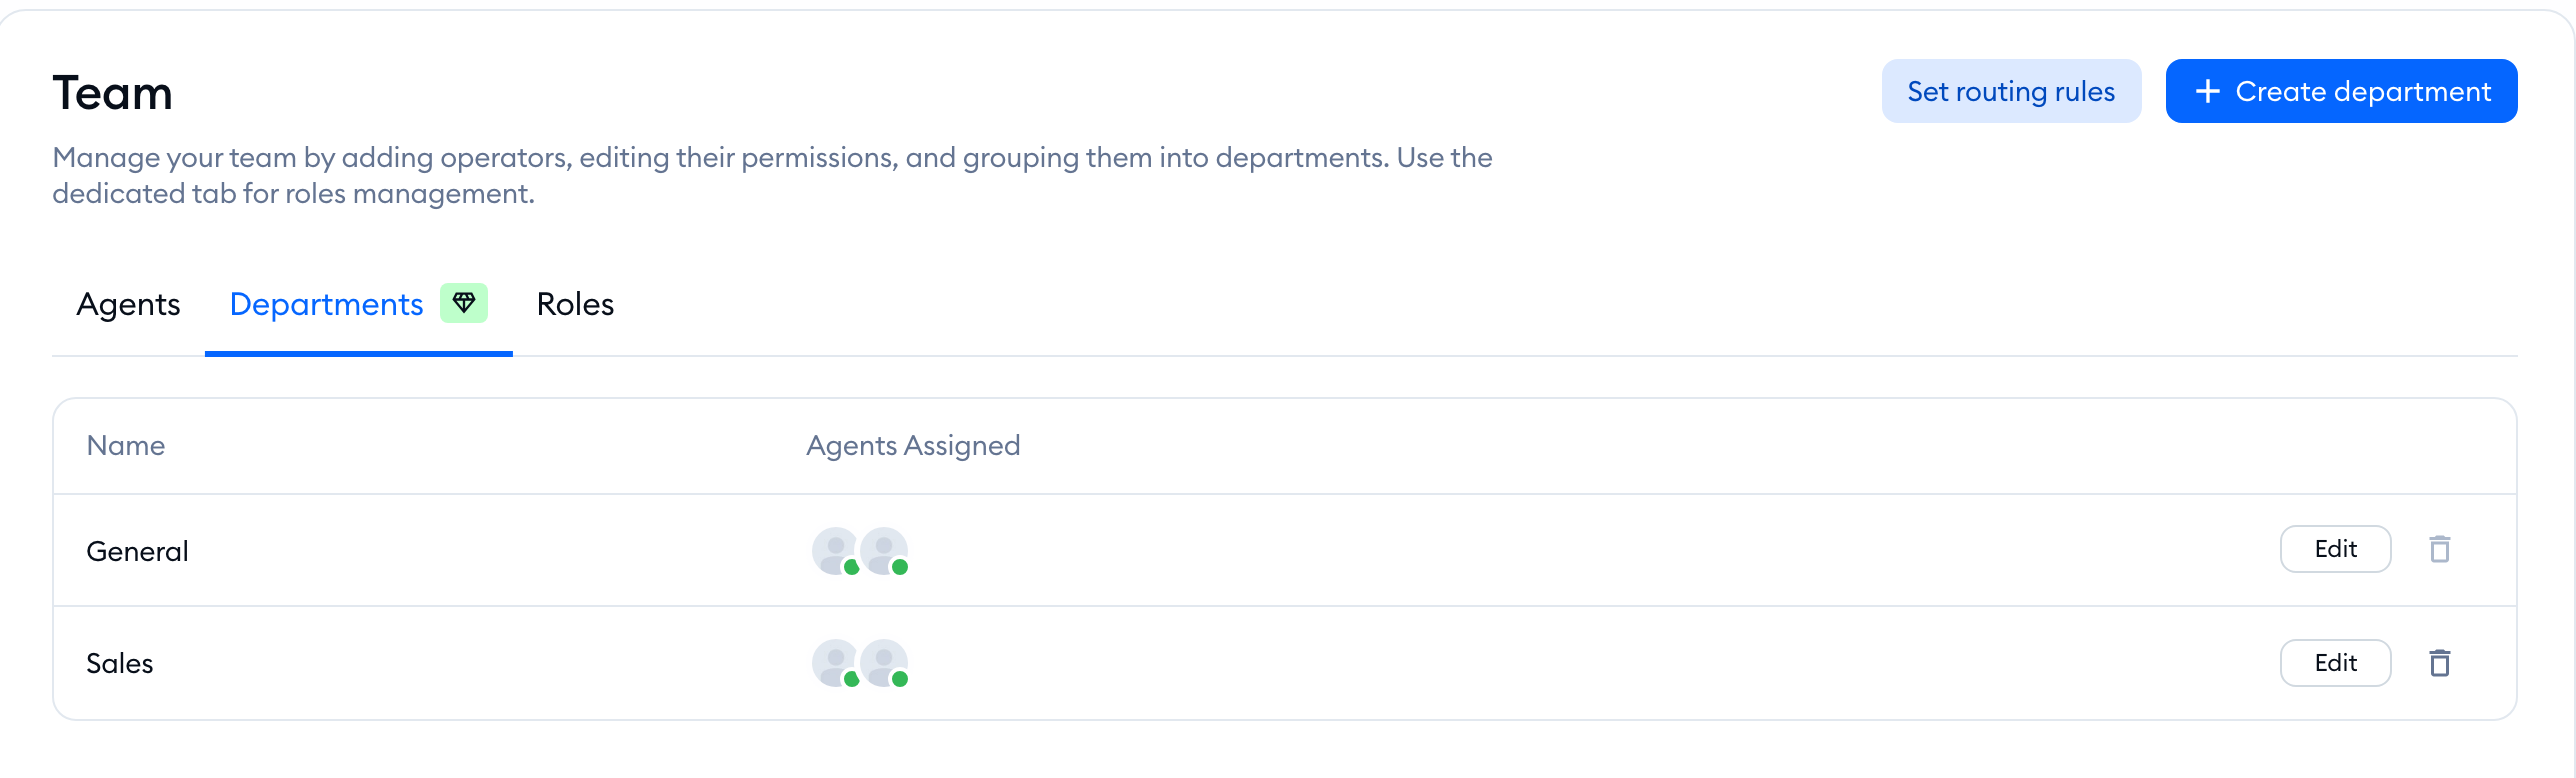
Please note: Departments are available on the Plus plan and above (see Which upgrades do I need?). On a lower plan, the Departments tab is marked with a paid badge.
Click on Create department in the top-right, and in the Add a new department window, set the Department name and pick the right agents under Add agents. You can add as many agents to the department as you need; one agent can be added to multiple departments as well.
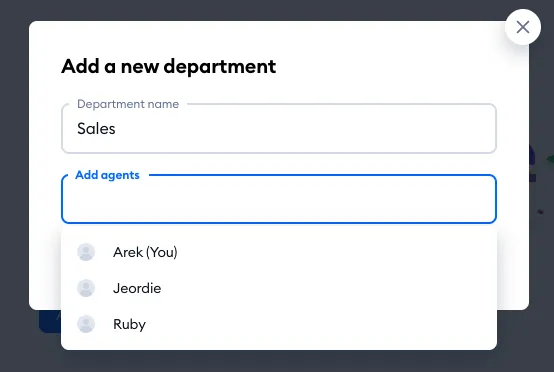
Save the settings, and your new department will be created. The first time you do this, Tidio will suggest routing messages to it right away: click on Set routing rules to jump to the routing rules of your pre-chat survey (covered below), or on Add another department. You can get to the routing rules anytime with the Set routing rules button in the top-right of the Departments tab.
You can see all your current departments listed along with the associated agents:
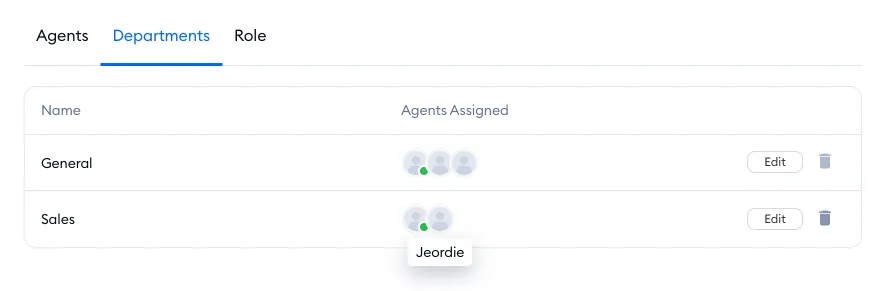
You can come back to the Departments tab and modify your departments anytime. To edit a specific department - click the Edit button on the right. You'll be able to add agents and change the department's name. To delete the department - click on the trash can icon, and confirm with Yes, delete it.
There is no limit on the number of departments your project can have.
If you delete a department, all of its unassigned chats (and tickets) will be automatically transferred to the General department as well. All of the open threads will show the old (deleted) department name. No chats or tickets are deleted during this process.
Deleting a department also deletes all routing rules linked to it, so your customers won't be able to choose it anymore, and any agent who was only in that department is moved to the General department. Flows that transfer conversations to the deleted department will route new conversations to General instead.
If you deactivate all agents assigned to a department, it's marked as Deactivated (no active agents inside) in the Departments tab. A routing rule that points to it shows a warning, and incoming messages are redirected to the General department until the department has an active agent again.
Getting notifications
If your Tidio project has Departments enabled, you will be notified only about the conversations from the department to which you are assigned. You'll receive push notifications from the Tidio panel and offline email notifications as well.
Please keep in mind that if your email address is added manually in the Forward email notifications section - you will also receive offline email notifications about all conversations from all departments.
Assigning live conversations to departments
You can decide about how your live chat visitors reach specific departments; this can be done either in the Pre-Chat Survey (where the visitor selects a department manually) or via flows (where the visitor is assigned automatically, based on your flow setup). Of course, you can also assign departments manually.
Assigning via Pre-Chat Survey
The Pre-Chat Survey pops up for any visitor who tries to message you via chat for the first time, and it's mandatory to complete then. One of the fields you can add to the survey is the Department field - allowing the visitor to select a department they'd like to contact.
You can modify the Pre-Chat Survey in Settings > Live Chat > Appearance. Access the Content section there to find the survey settings:
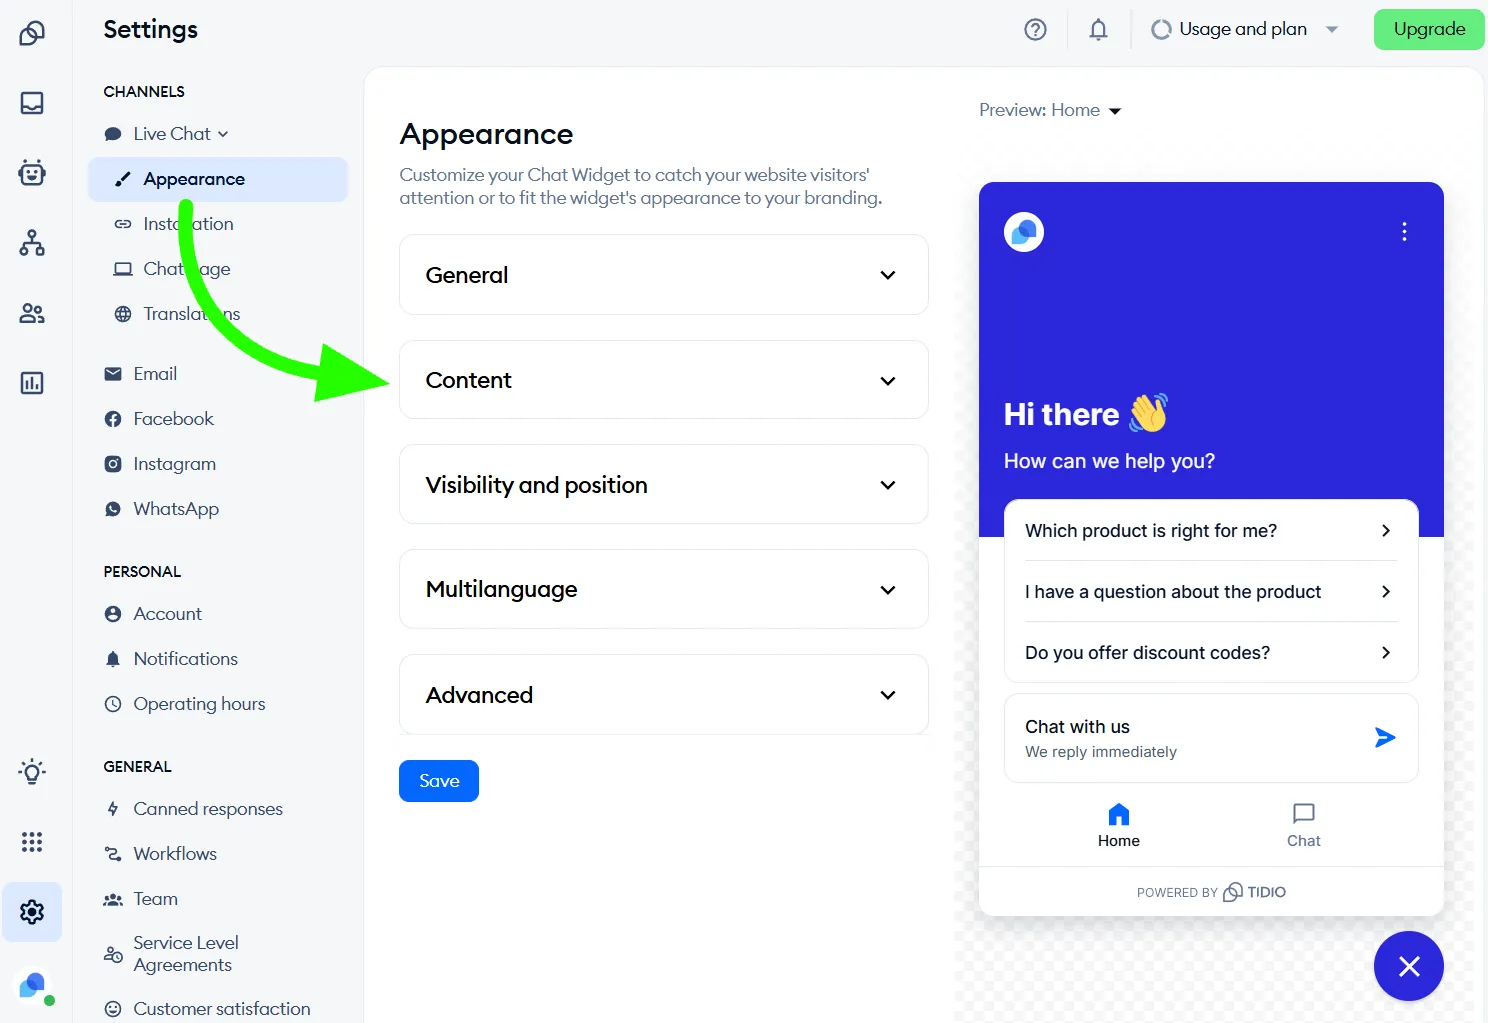
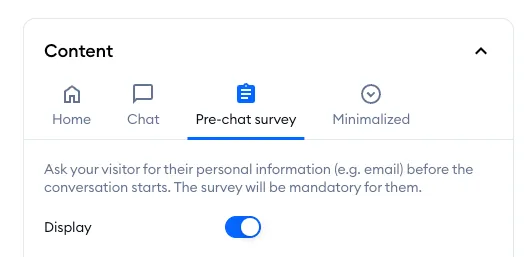
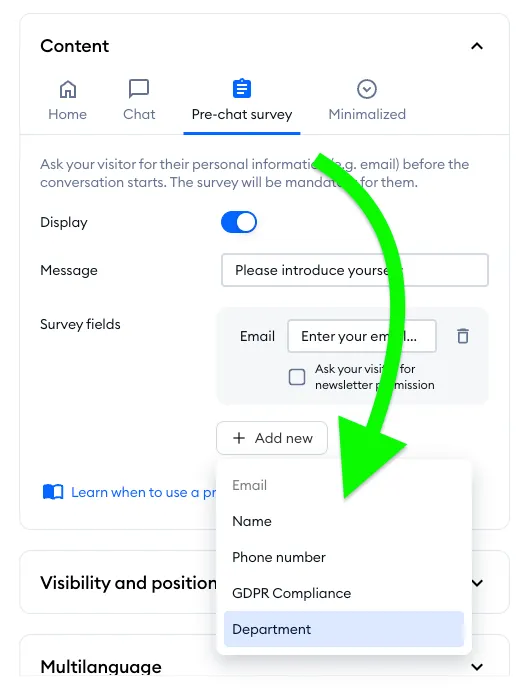
In the Pre-Chat Survey tab, use the Add new button. This will allow you to add a new field to your survey, and in this case - you want to add the Department field:
You will see the new field appear, and you can modify the text that accompanies it:
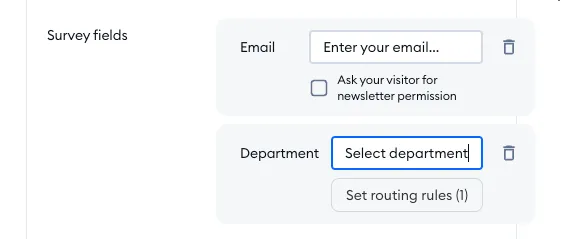
By clicking on the Set routing rules button, you will be able to configure what departments are available to select, and how they are named in the Pre-Chat Survey. Set these aliases and departments the way you'd like your visitors to see them displayed in the list:
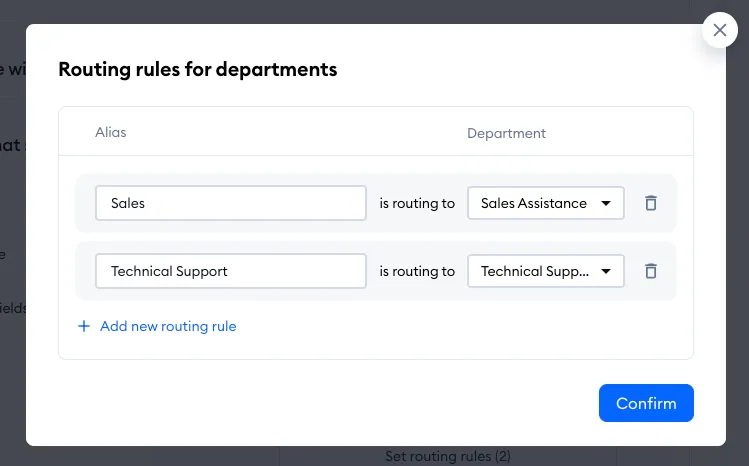
Hit the Confirm button to save your routing rules for the Pre-Chat Survey. In the Appearance section (where you've been configuring the Pre-Chat Survey), don't forget to save your changes in order for them to take effect!
From now on, your visitors will be able to select a department when they try to send you a chat message:
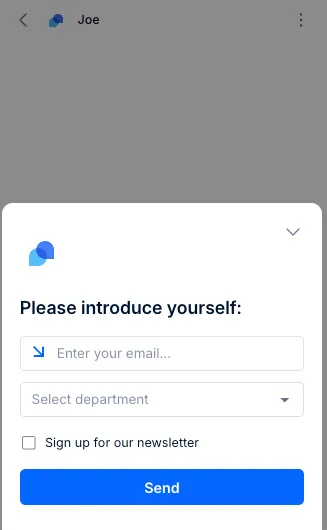
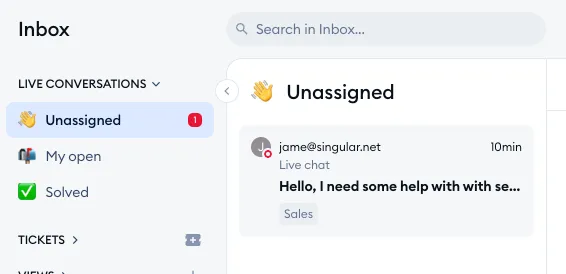
Now, you'll see the chats and get notified only from the departments you are assigned to. When a visitor is transferred, the agents assigned to the department will see the incoming chat in the Unassigned folder (while other departments will not be notified):
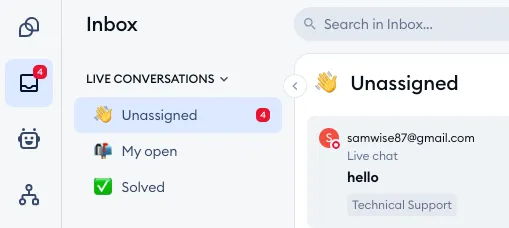
You'll also see a label under each incoming chat, with the department name on it. The department transfer details will also be included in the conversation itself, along with timestamps:

Assigning via flows
If you feel like your visitors can use a help of a human agent - you can also assign your visitors' conversations with the flow to specific departments by using the Reassign to a Department node inside your flow. Your visitors can still continue with the flow, but the agent will be notified and can join the conversation.
The Reassign to a Department node allows you to specify the department to which the chat will be transferred to continue the conversation with an agent.
Inside the node, you can select an already existing department or add a completely new department.
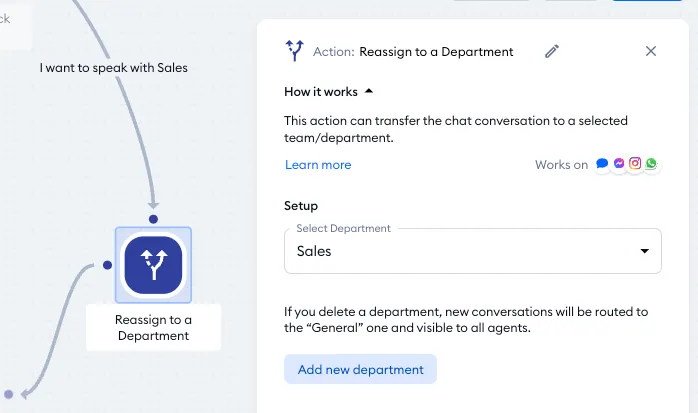
Let’s see how it works on an example.
Example
Imagine a user coming to your website with a particular goal in mind. You can let the visitors choose a topic they would like to discuss by using one of the decision nodes, and thanks to the Reassign to a Department node, it will be transferred to the correct department with the agents knowledgeable in the chosen subject.
Take a look at how the flow looks in our flow editor:
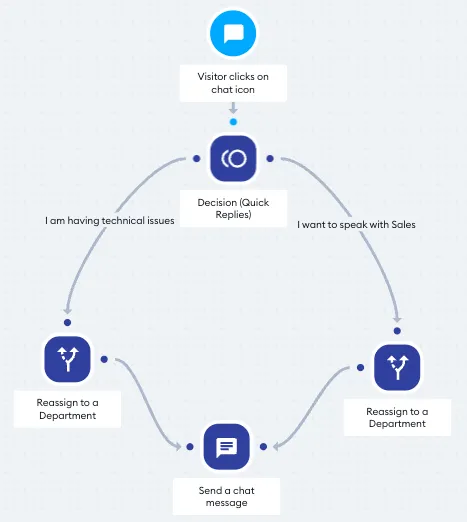
In this example, the visitor gets two options: "I am having technical issues" (which transfers them to the Technical Support department) and "I want to speak with Sales" (which transfers them to Sales Assistance).
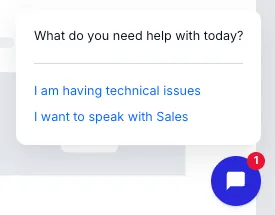
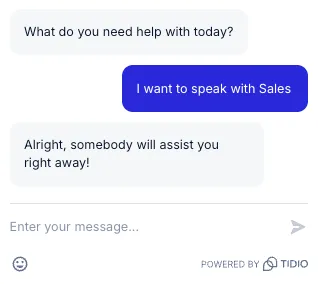
Once they select what they need, the flow will continue to the next action (transferring to the correct department, followed by a simple message):
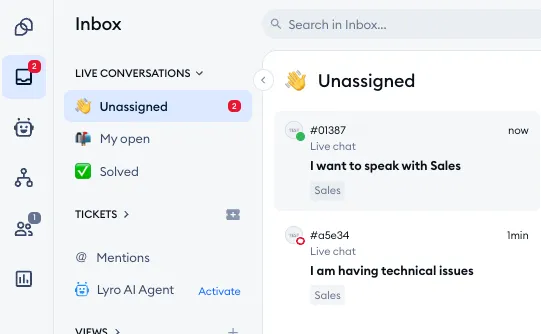
The department will be notified by the flow, which will be visible for them in the Unassigned folder, along with the visitor's choice:
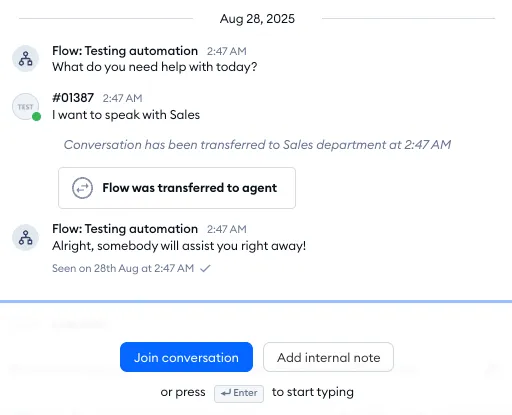
As always, the flow interaction and transfer details will be included in the conversation itself, along with timestamps:
Departments work in your flows in two more ways: the Visitor selects department trigger starts a flow when a visitor chooses a department in the pre-chat survey, and the Department status condition checks whether any agents in the selected department are online - so the flow can follow a different path when nobody from that team is available.
Routing emails from a mailbox
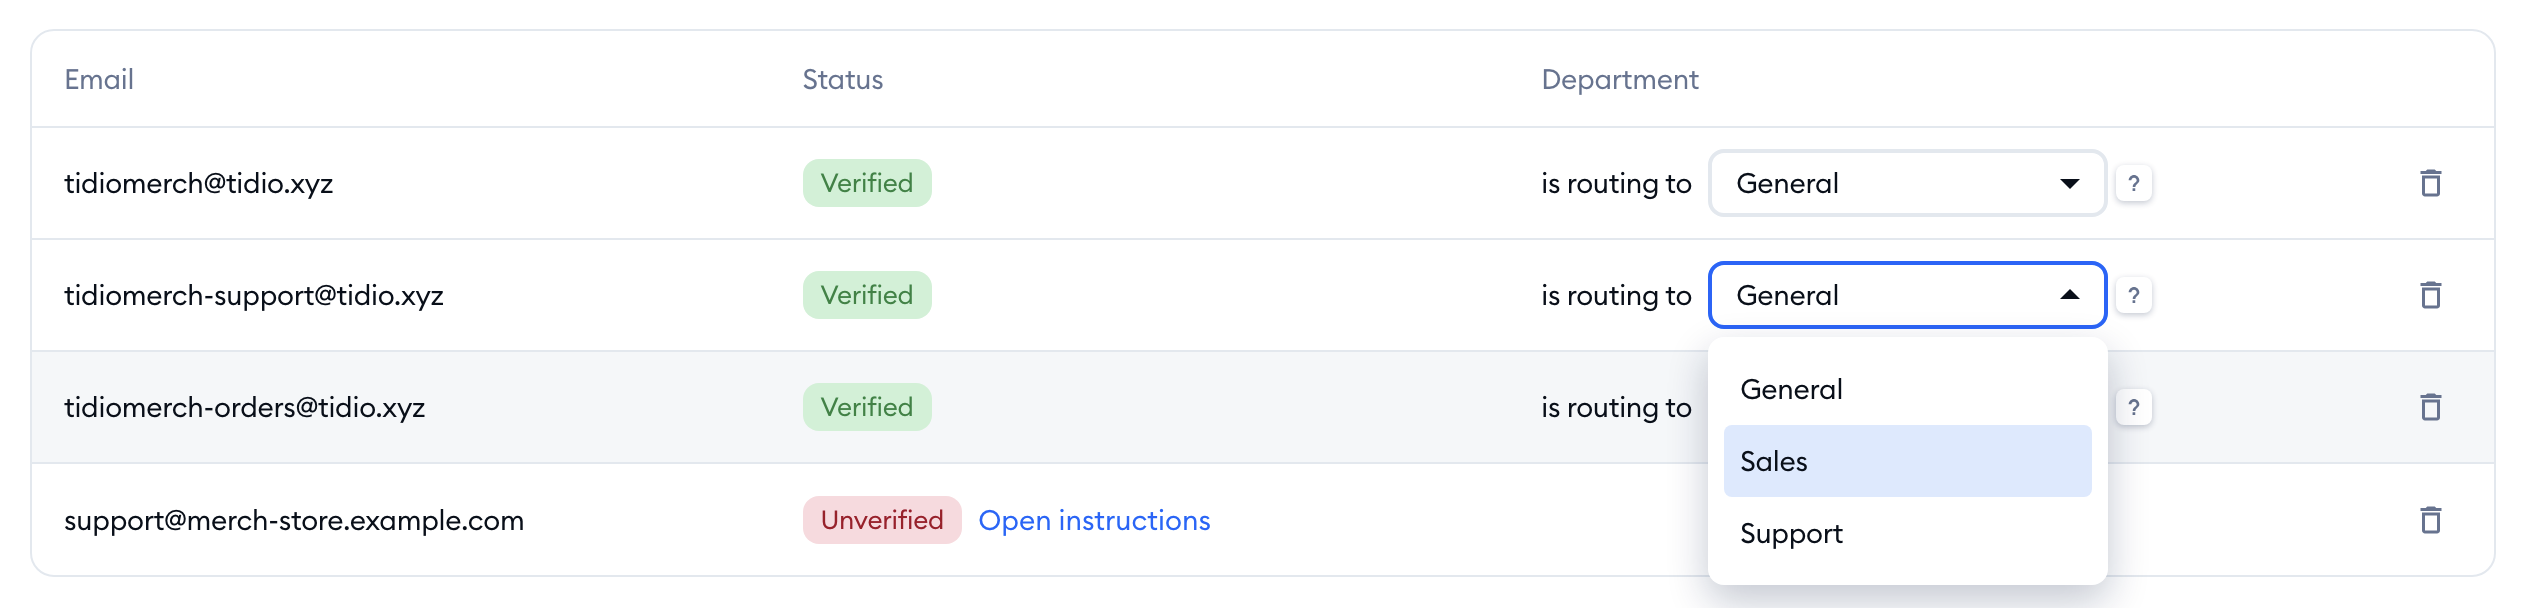
Emails can reach the right team, too. Once you have at least one department besides General, head over to Settings > Email > Mailbox. Next to each verified mailbox, you'll find the Department column - choose the department the mailbox is routing to. Agents from the selected department will have access to email messages from this mailbox:
Assigning manually
As an agent, you can reassign your chats, emails, Instagram, Messenger, and WhatsApp conversations to another department - similarly as you would reassign a chat to a different agent. This also applies to any tickets (emails) in your Tidio inbox.
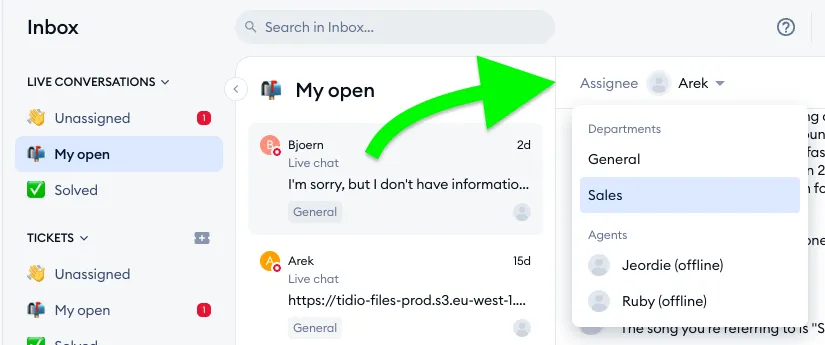
To reassign the conversation (or ticket) to another department, click on the Assignee button at the top of the conversation. You will see the available departments listed above the available agents:
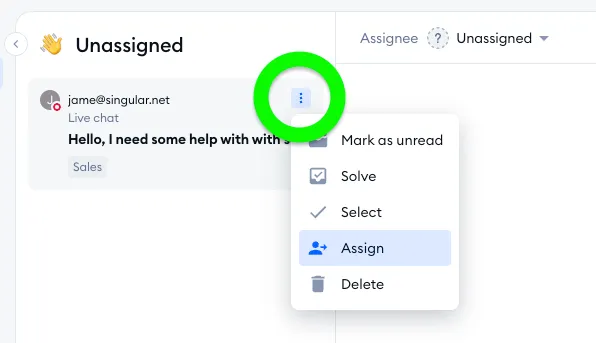
Alternatively, you can click on the three dots to the right of the conversation itself, inside the folder - and use the Assign (or Reassign, if the chat/ticket is already assigned somewhere) option there:
You’ll then see a new window where you can select the department (or agent) which the conversation should be transferred to:
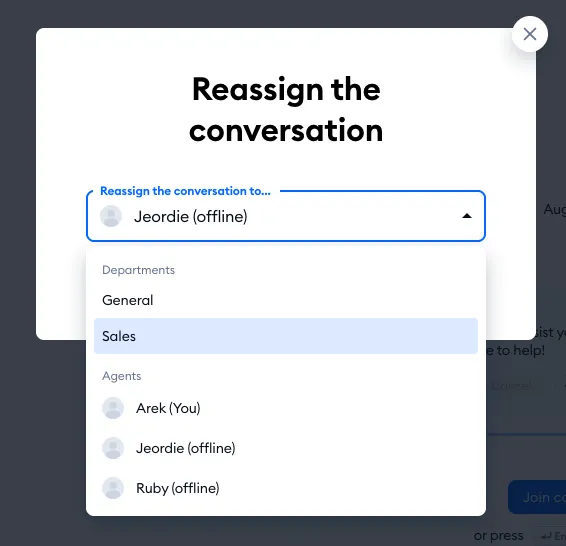
As with other transfer methods, the conversation (or ticket) assigned to a chosen department will be displayed in the Unassigned folder. Only agents from that specific department will see the message and will be able to assign it to themselves.
For more on assigning and reassigning, see Assigning conversations to agents.
Further reading
- Assigning conversations to agents
- Start collecting leads
- Flow editor: Actions
- Permissions
- Which upgrades do I need?
