Tidio's live chat feature ensures smooth chat handling by assigning conversations to agents. In this article, we'll explore how chat conversations are initially assigned to agents and how you can easily reassign chats to different agents as needed. This functionality streamlines chat management and ensures efficient customer support.
In this article, you'll learn:
- How to assign a chat to yourself
- How to reassign a chat to another agent
- How to reassign several conversations or tickets at once
- How to assign chats automatically
Assigning a chat to yourself
A chat is assigned to any agent who first picks it up from the Unassigned folder:
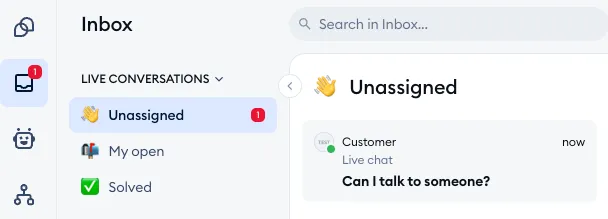
... and clicks on the blue Join conversation button:
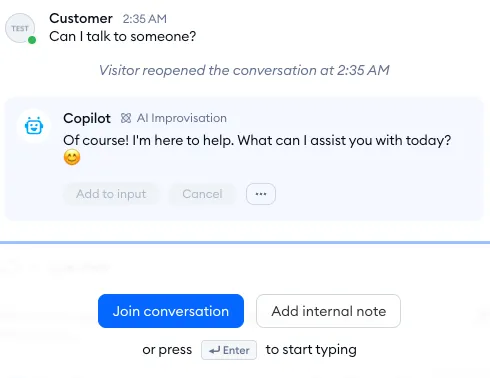
You can also join the conversation by clicking on the popup/push notification sent from your web browser (or operating system), or by enabling the automatic chat assignment feature.
Once an agent is assigned to a chat, notifications related to that chat will only be sent to that specific agent, ensuring uninterrupted communication between the agent and the visitor.
Re-assigning a chat to another agent
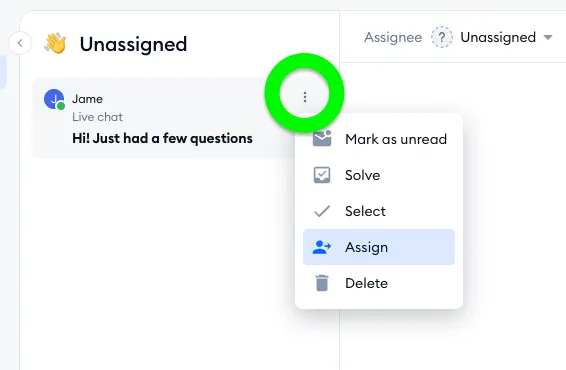
Agents have the ability to transfer a chat to other agents using the Assign option (called Reassign outside the Unassigned folder). You can access this option by clicking on the three dots menu located next to the conversation. The Assign to... panel will open, where you can search for an agent (or a department) and click on their name:
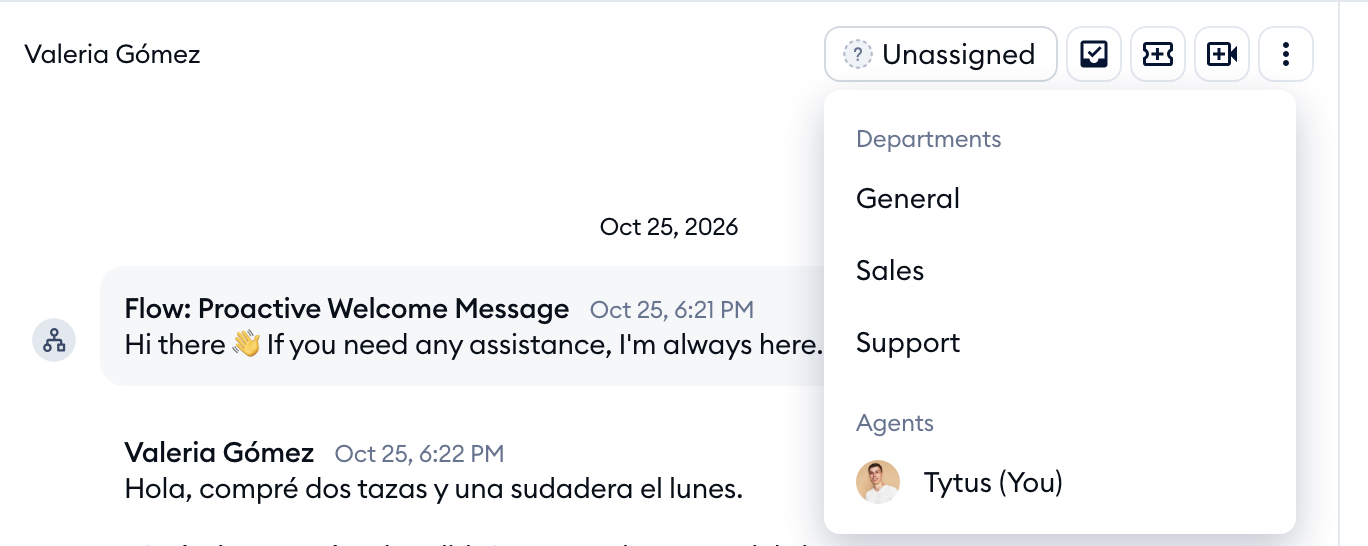
In the upper-left of the conversation itself, you can also see the Assignee label - which shows the agent who's currently assigned to the conversation. By clicking on it, you can re-assign the conversation to someone else (or to a department, if you use Departments). The list shows each agent's photo and name, with (You) next to your own name:
You can also open the Assign to... panel with a keyboard shortcut: Ctrl + Shift + A (Cmd + Shift + A on a Mac). If you reassign a conversation that's already solved, it will be reopened for the new assignee.
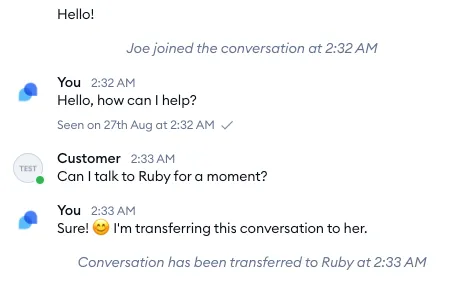
This flexibility allows an efficient delegation and ensures that chats are seamlessly transferred to the most suitable agent or department. Any assignments or transfers will be described (along with timestamps) in the conversation itself as well, for easier tracking:
Please note: Departments are available on the Plus plan and above, and they appear in the list once you have more than one department. To learn more, read our article about enabling Departments in Tidio.
Reassigning several conversations or tickets at once
Need to hand over a whole batch of chats - for example, when a teammate's shift ends? You can reassign several conversations in one go.
Hover your cursor over a conversation in the list, and tick the checkbox that appears in place of the visitor's avatar (or use Select in the conversation's three dots menu). Select all the conversations you need, and click on the Reassign icon in the bar at the top of the list:
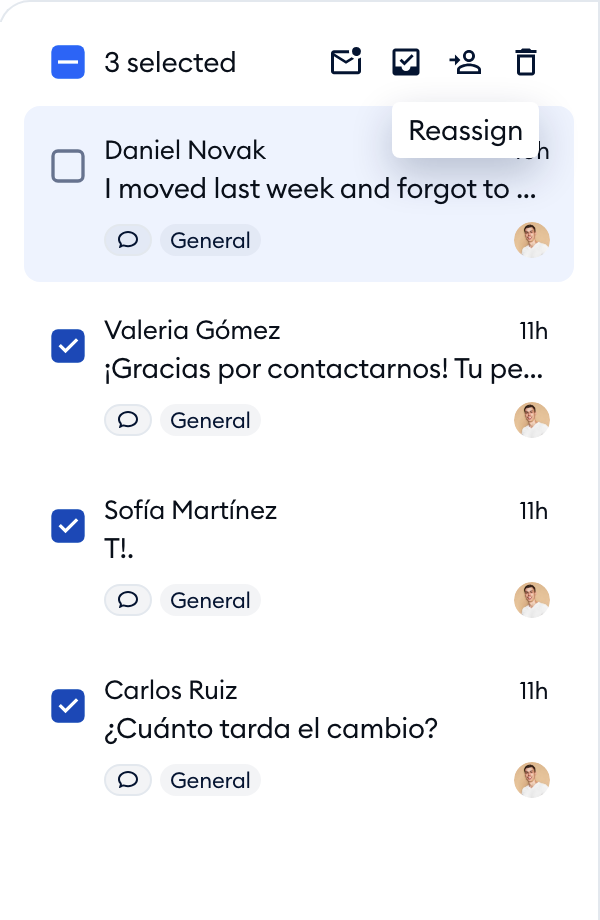
The same Assign to... panel will open - pick an agent or a department, and all the selected conversations will be transferred.
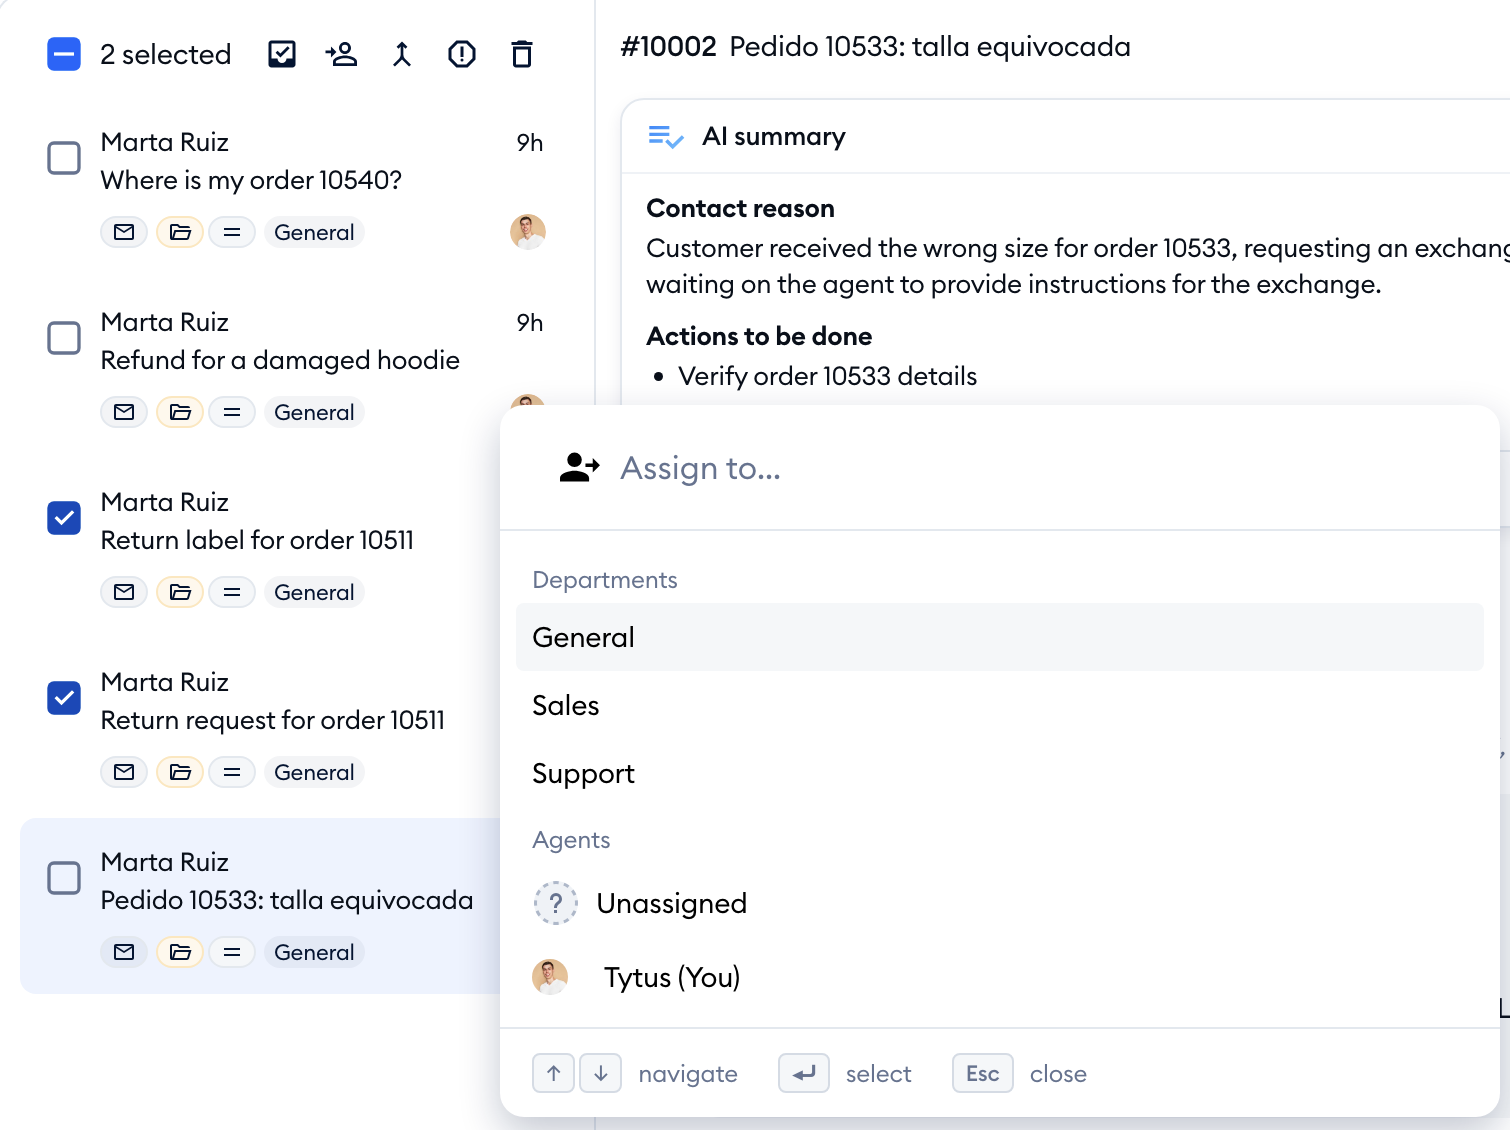
Naturally, the same works for tickets: select them in a ticket folder or view, and use the Reassign icon in the bar at the top of the list. For tickets, you can also choose Unassigned, to send them back to the Unassigned folder:
Automatic chat assignment
You also have the option to decide whether your chats are assigned manually (which is the default, described above), or automatically - immediately when they arrive in your Tidio inbox. Please see this guide for more details on these options. Automatic chat assignment is available on the Growth plan and above.
