At Tidio, an action is a flow node instructing the flow to perform a specific task, enabling you to create an interactive and automated conversation. Discover how to utilize actions effectively and explore the extensive range of actions.
In this article, you'll learn:
How to use actions
Each flow in Tidio starts with a trigger, indicating when the flow should start, and an action, defining what the flow should do. With over 20 different actions to choose from, you can tailor your flow to meet the specific needs of your business.
Available actions
You can build your flow with the following actions:
- Send a chat message
- Send an email
- Ask a question
- Send a form
- Decision (Quick Replies)
- Decision (Buttons)
- Decision (Card Messages)
- Delay
- Randomize
- Update contact property
- Update session variable
- Add a tag
- Remove a tag
- Data transformation
- Send to Zapier
- Open website in modal
- Flow ended message
- Subscribe for Mailing
- Disable text input
- Enable text input
- Send notification
- Assign to an agent
- Reassign to a Department
- Create ticket
- To another Flow
- Send an event to Google Analytics
- API call
- Send a coupon code
- Check order status (Shopify only)
- Check product availability (Shopify only)
- Check shipping details (Shopify only)
- Recommend products (Shopify only)
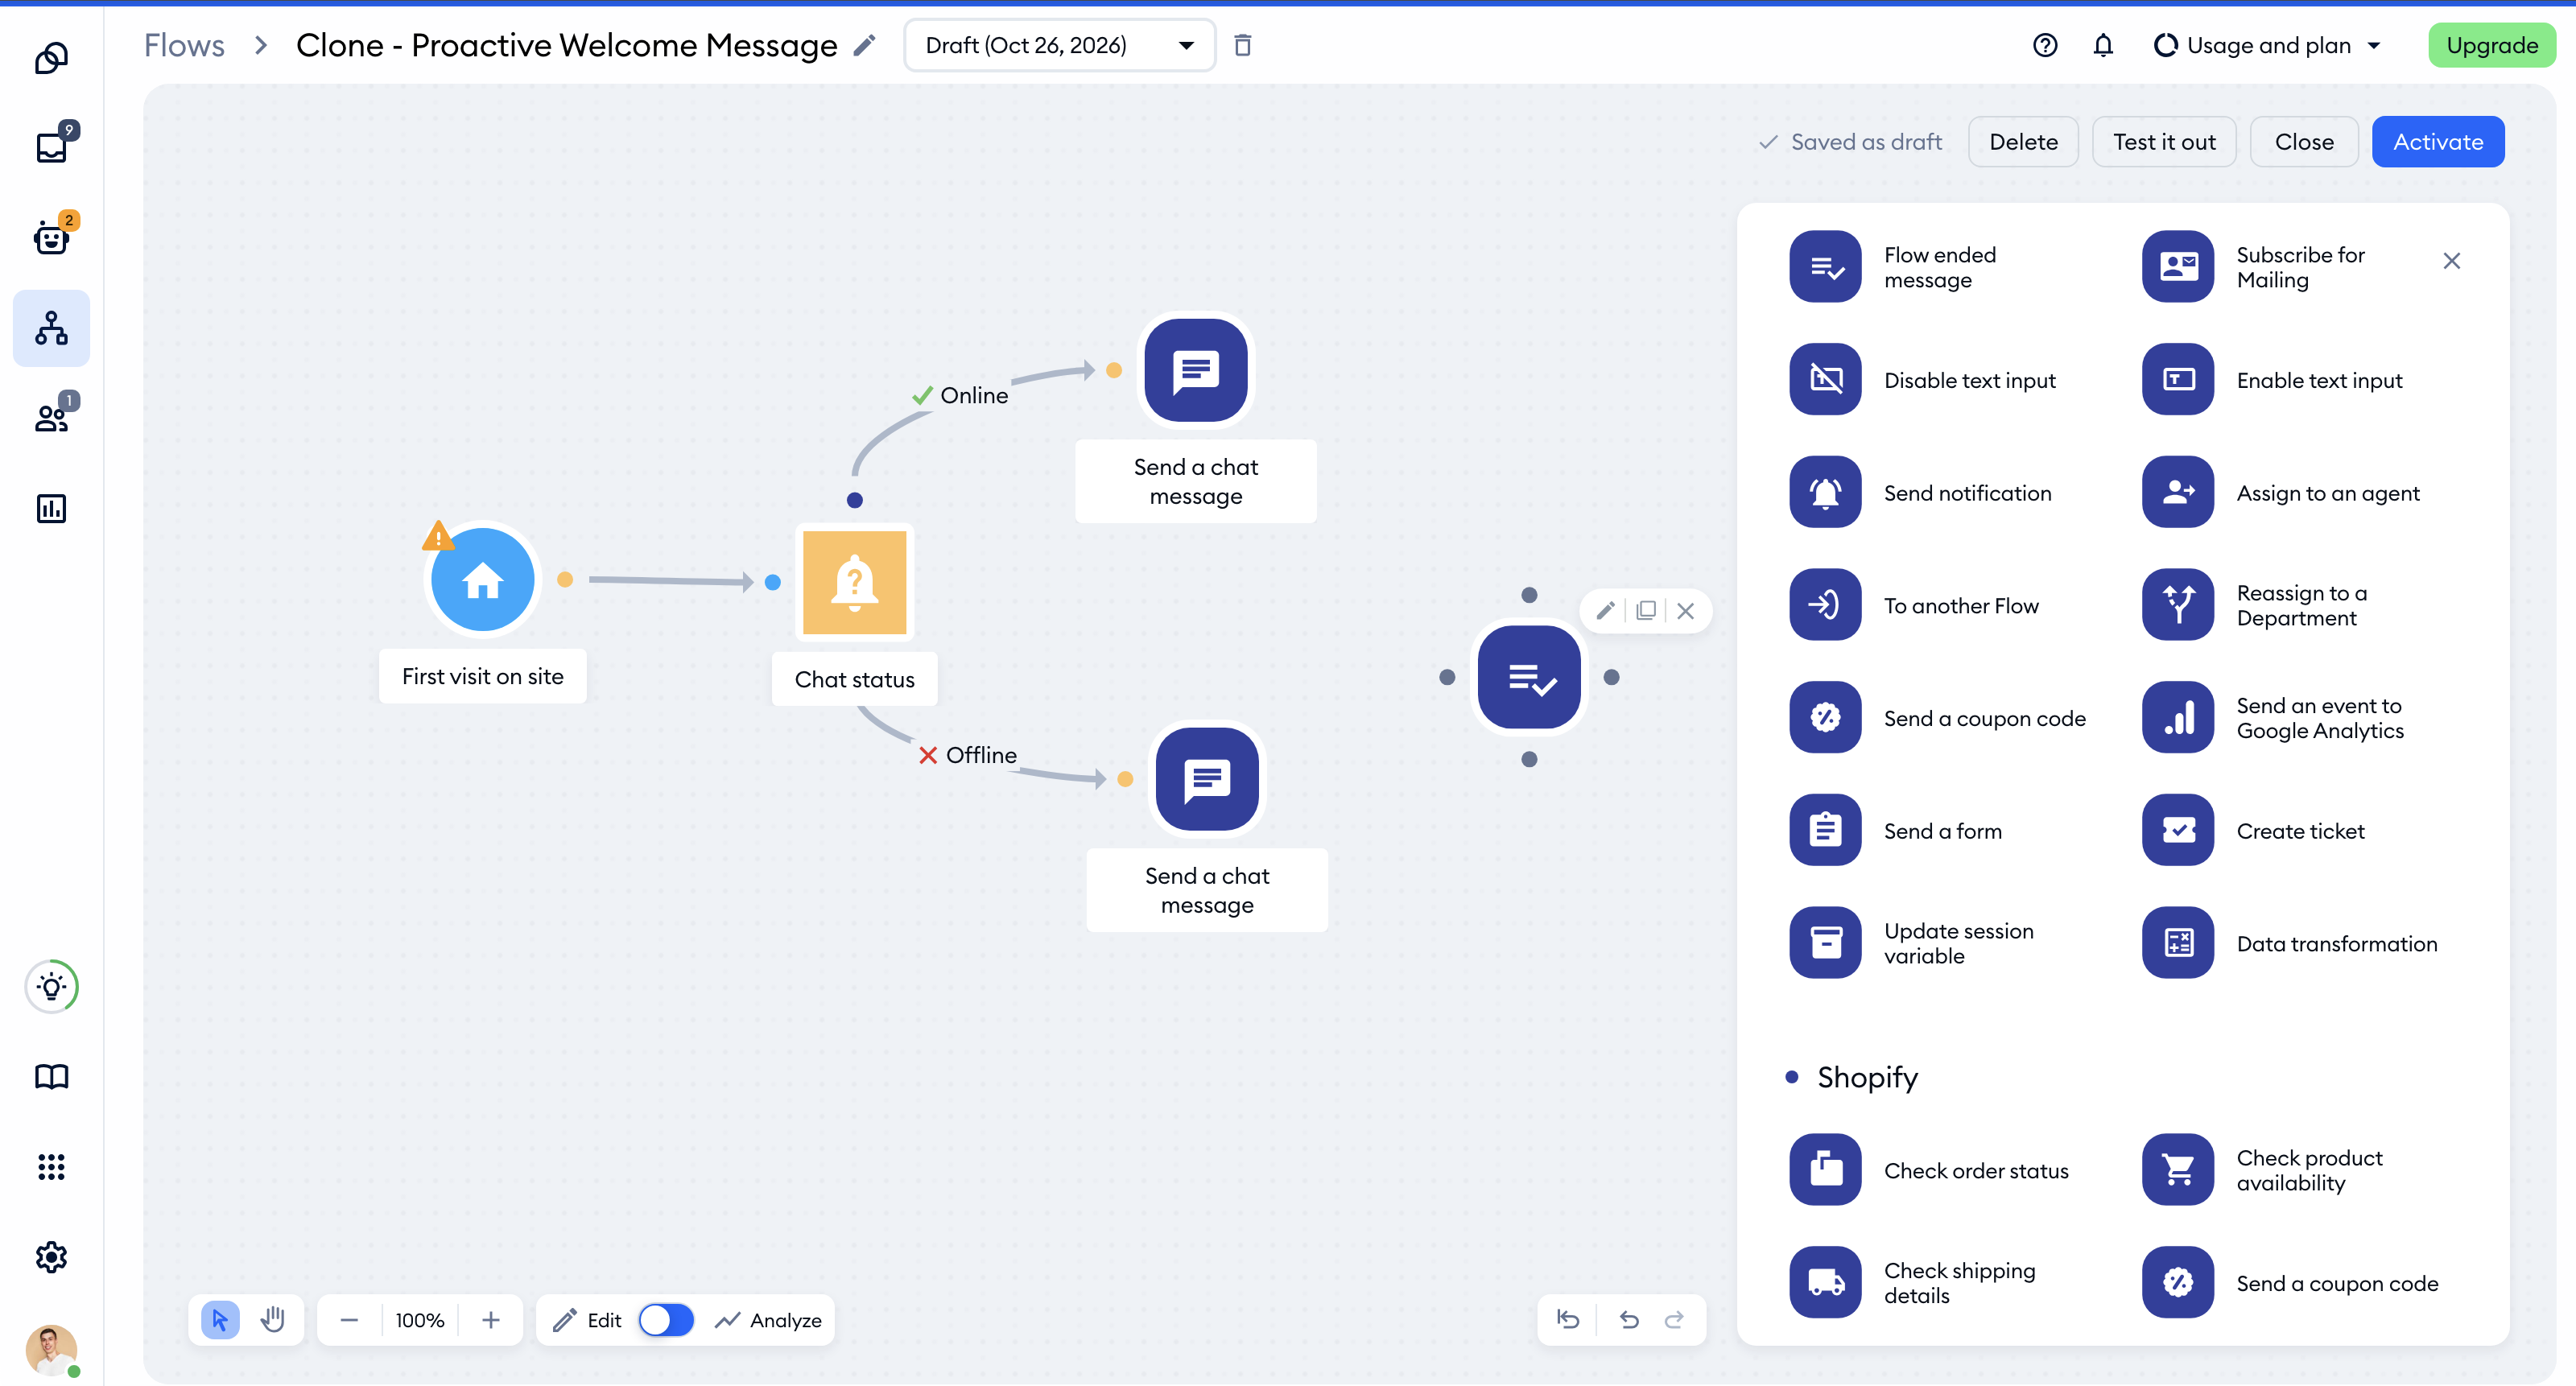
You'll see all the actions in the Actions tab of the menu on the right of the flow editor - simply drag the one you need onto the board. Shopify stores see a separate Shopify group at the bottom of the list.
Send a chat message
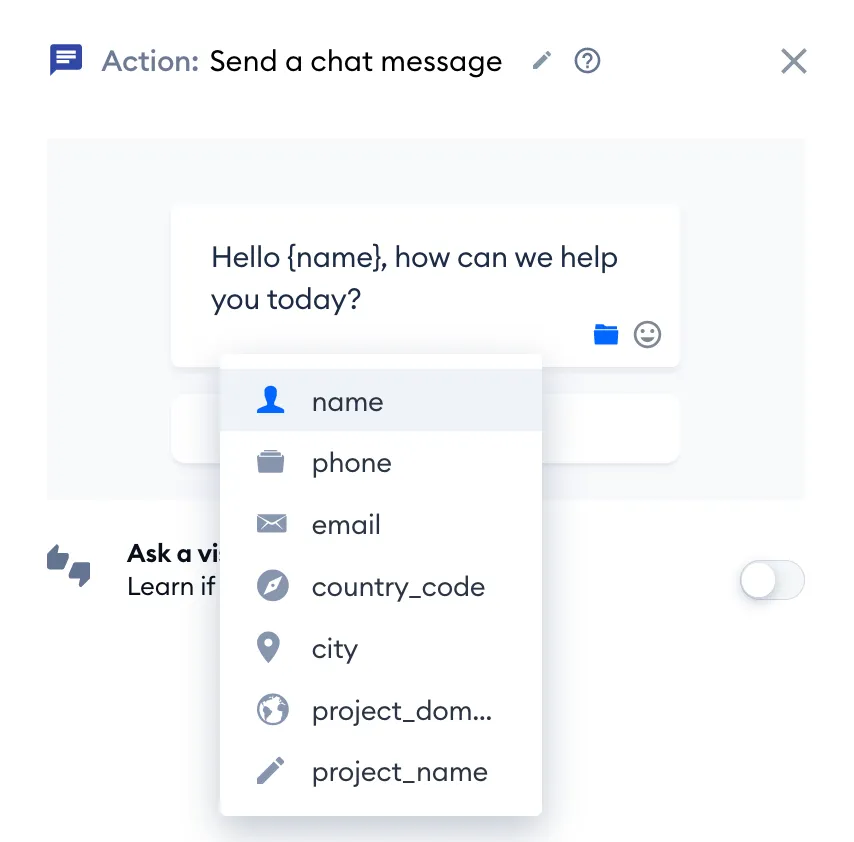
The Send a chat message action allows the flow to send a simple message to your website visitor. It can include text or images. You can also include a contact property, like the visitor's name to greet them in a more personalised way.
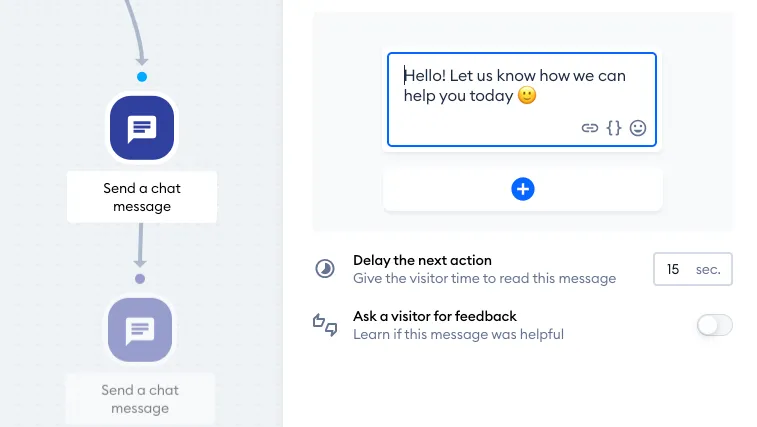
There is also the option to set a delay for any action that comes next. You can use this to allow your visitor more time to read the flow's message, without getting distracted by any upcoming message. Please note: this option allows a maximum of 15-second delay; if you need more, feel free to add a Delay action separately.
Send an email
This action allows you to create an email that will be sent to the visitor - for example, with more information about the product, your services, policies, etc.
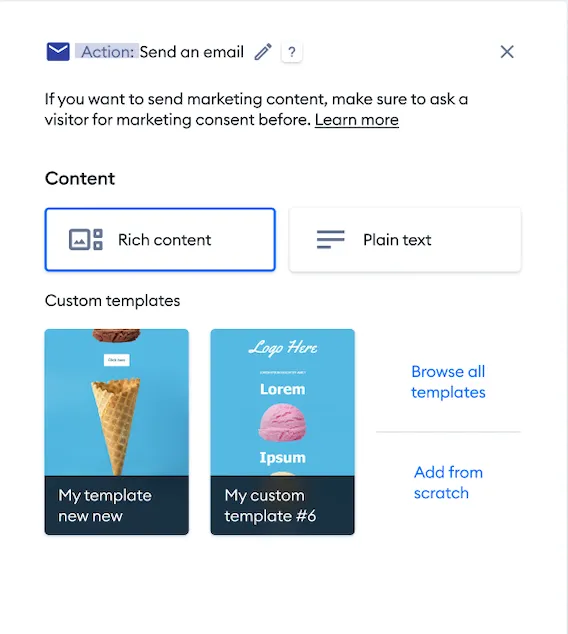
If your project has Campaigns, you can choose from two modes inside the action: Rich content or Plain text. The plain text version allows for basic text and image formatting, while the rich content version allows much more detailed formatting and flexibility, and the content is edited inside the Campaigns editor. Without Campaigns, the action uses Plain text only - and a flow that still sends a rich-content email will show the message "Rich content is no longer available. Please consider using a Plain text or remove this action."
You can also choose from the available templates or create new content from scratch. The templates can be previewed and edited directly from the flow editor, without interrupting your flow creation process.
Naturally, any rich-content email that you send through your flows will be listed in the Campaigns > My campaigns section, along with other campaigns you may have. This allows you to track the email's deliverability, open rate, and other stats. Any campaign that is sent from a flow will be listed under My automated flows:
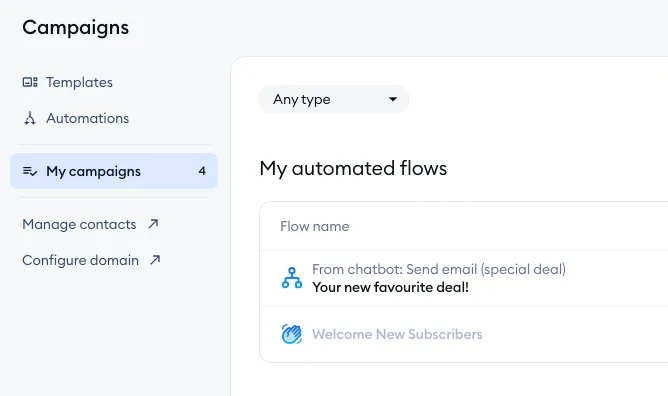
Starting June 17th 2024, the Campaigns tool is available exclusively to Plus subscribers and to users of the legacy Campaigns subscription.
Ask a question
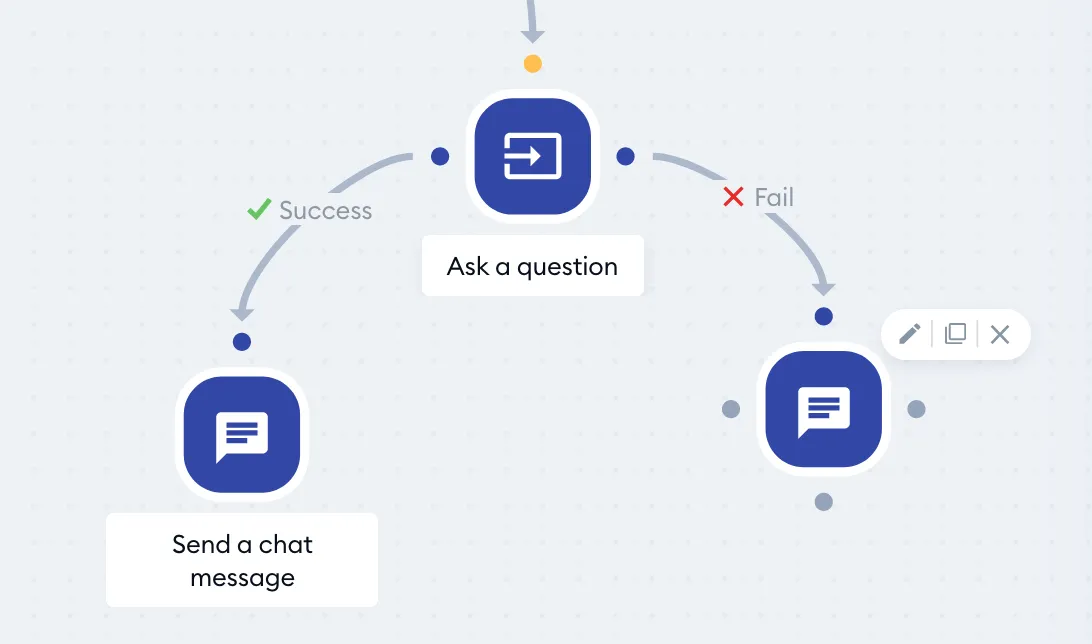
The Ask a question action allows you to ask your visitor a question. You can create individual flows' paths to each successful or failed answer based on the answers.
Send a form
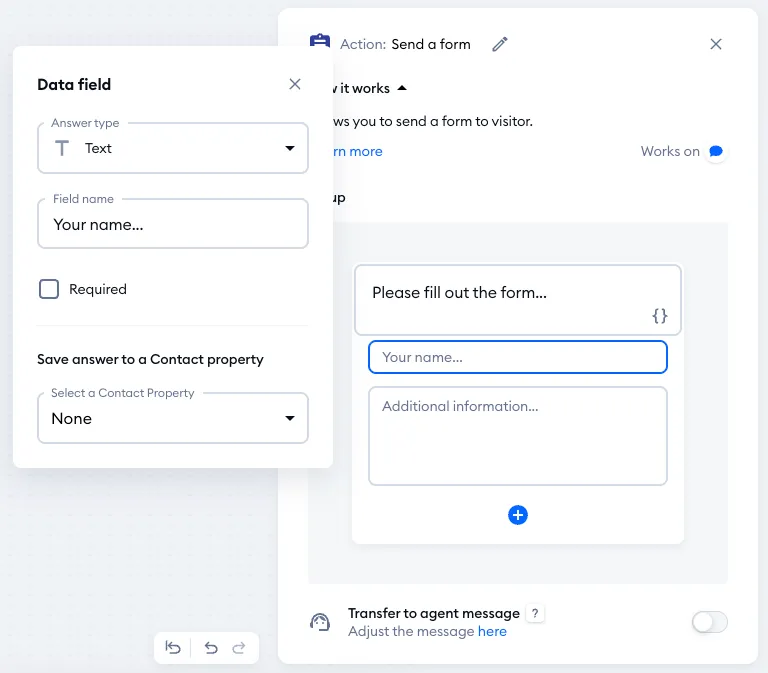
The Send a form action gives you the option to collect various data from your website visitors through a form included in the widget. It also allows the visitor to upload files. You can learn more about this action in this article.
Decision (Quick Replies)
Decision (Quick Replies) asks the visitor to select a preset option, allowing you to build e.g. an FAQ flow that will answer a chosen question. The node will enable you to create a list of selectable options (quick replies), which branch out of the node to connect with appropriate actions. You can rearrange the buttons in your preferred order anytime, by using the 'move' option next to each button.
The decision node supports up to eleven answers!
Please note: due to technical limitations, WhatsApp users will only be able to see the first 3 buttons you create in this action.
Decision (Buttons)
Decision (Buttons) gives you an option to ask the visitor to select presented options (buttons). You can rearrange the buttons in your preferred order anytime, by using the 'move' option next to each button. Moreover, in the Decision (Buttons) action, you can add clickable links to its buttons.
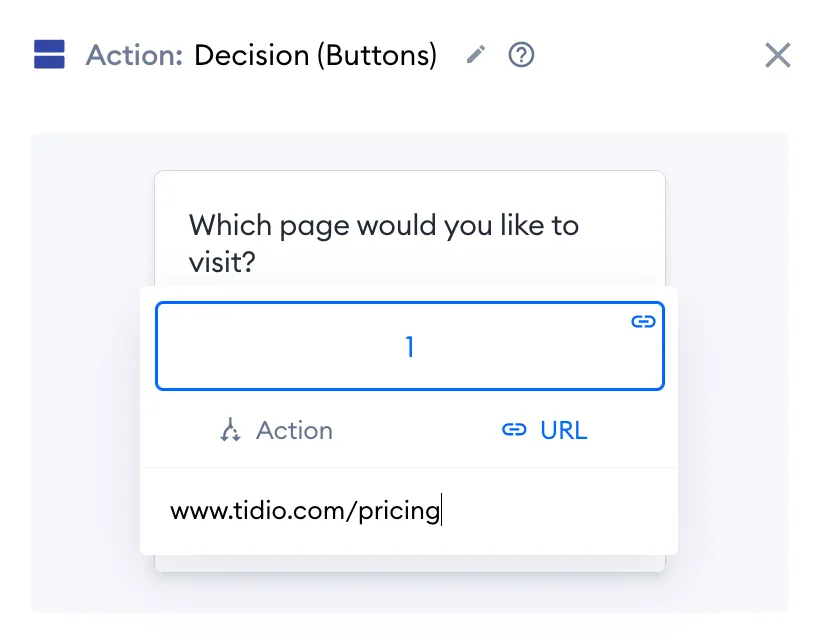
You can only add up to 3 buttons in this node; consider using the Decision (Quick Replies) node described above if you need more options.
Decision (Card Messages)
Decision (Card Messages) allows you to send out messages with a number of separate cards, which can be scrolled and browsed horizontally - you can create up to 10 such cards. Each card includes a title, a bit of text, an image, a clickable link, and up to 3 clickable buttons (you can change the order of these buttons as well). All this provides an excellent way to give your visitors a lot of detailed choices in one flow message.
Delay
The Delay action allows you to delay any action that follows, and you specify the exact amount of time - anywhere from 1 second to 30 days. Please note: both the Send a chat message and Send a coupon code actions include their own built-in delay option (but limited to a maximum of 15 seconds).
Randomize
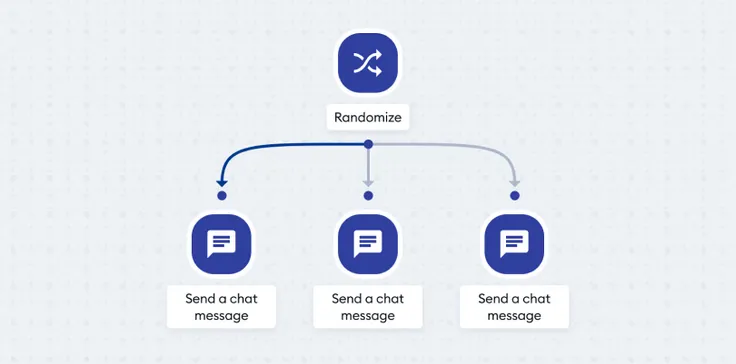
The Randomize action allows you to randomize the flow's flow experience. You can, for example, send different welcome messages to your website visitors.
Update contact property
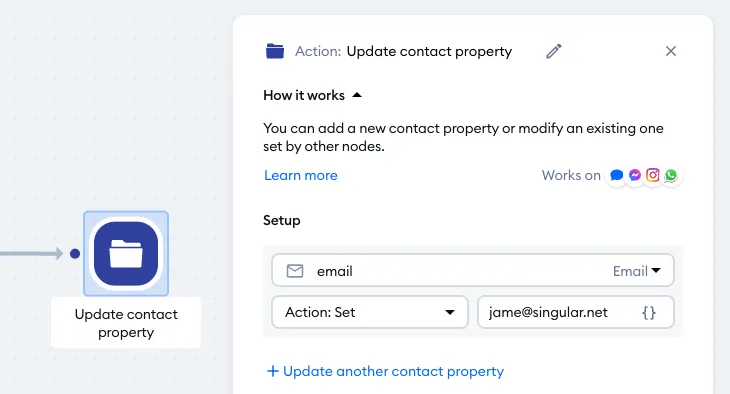
The Update contact property action allows you to adjust an existing contact property for the current visitor, or create a new one.
Update session variable
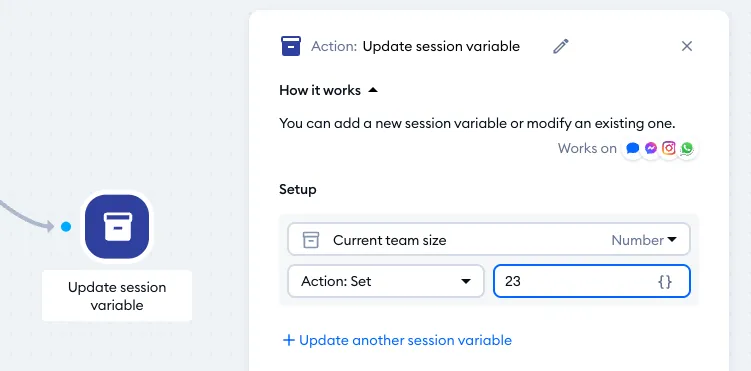
The Update session variable action allows you to adjust an existing session variable for the current visitor, or create a new one. Session variables are temporary pieces of information which you can generate through API with Lyro Actions .
Add a tag
This action allows you to add a tag to the visitor. Later, you can see the tags during the chat conversation or on your contacts list. These tags are also referred to as customer tags, as opposed to ticket tags (which are only associated with ticket threads, not users).
Remove a tag
The Remove a tag action gives you an option to remove a previously added customer tag.
Data transformation
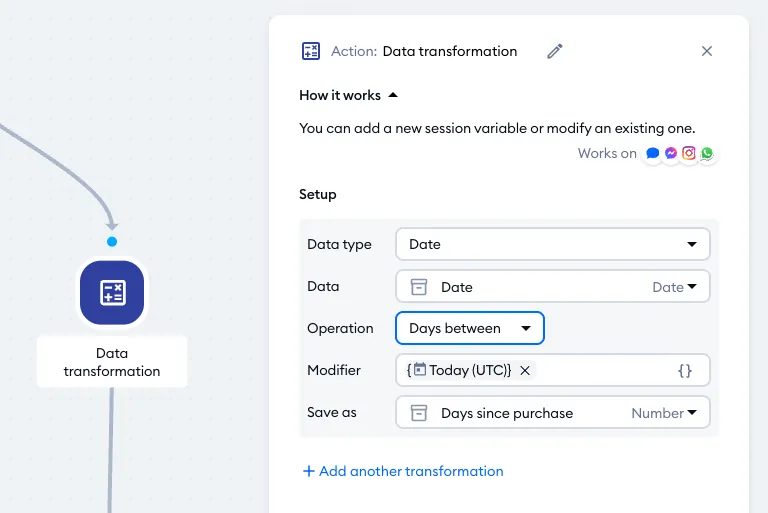
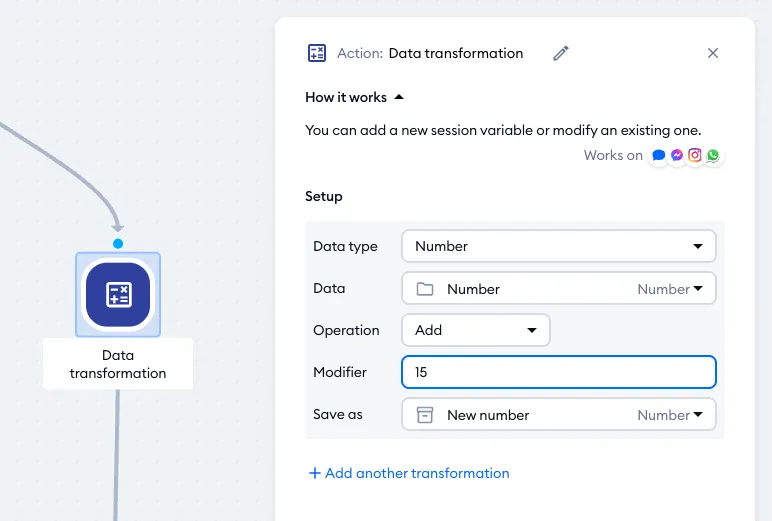
The Data transformation action allows you to do some basic math, e.g. subtraction or multiplication, as well as calculating the number of days between two specified dates, etc. You can add multiple such transformations within a single action.
For the transformations' values, you can use existing Contact Properties or session variables or create new ones, as well as put in values directly. The results can be saved as either Contact Properties or session variables as well.
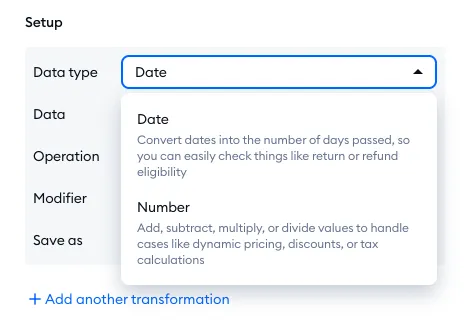
Use the Date option if you want to output a number calculated from two specified dates, or add/subtract some time from a specific date:
Use the Number option for basic calculations (adding, subtracting, multiplying, dividing):
Send to Zapier
The Send to Zapier action gives you a chance to send collected data to the Zapier system and later on to other external apps. You can learn more by checking our article about integration with Zapier.
Open website in modal
With this action, you are able to show a separate window with a specific page, in popup form - without leaving the current page or browser tab. This can be especially useful when you need to show some information quickly while keeping your visitor's focus. The action allows a title, description, and a button (with the URL linked to it), which will present the popup when clicked.
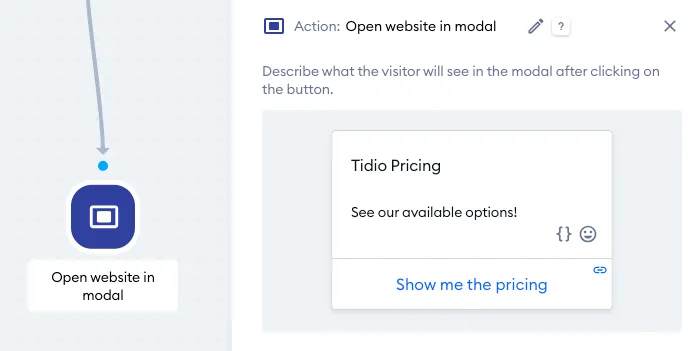
Tidio uses iframes to open these pages within a modal, so the target page needs the correct headers to allow this functionality. Please note that tweaking page headers can be rather complicated and requires web development knowledge.
Flow ended message
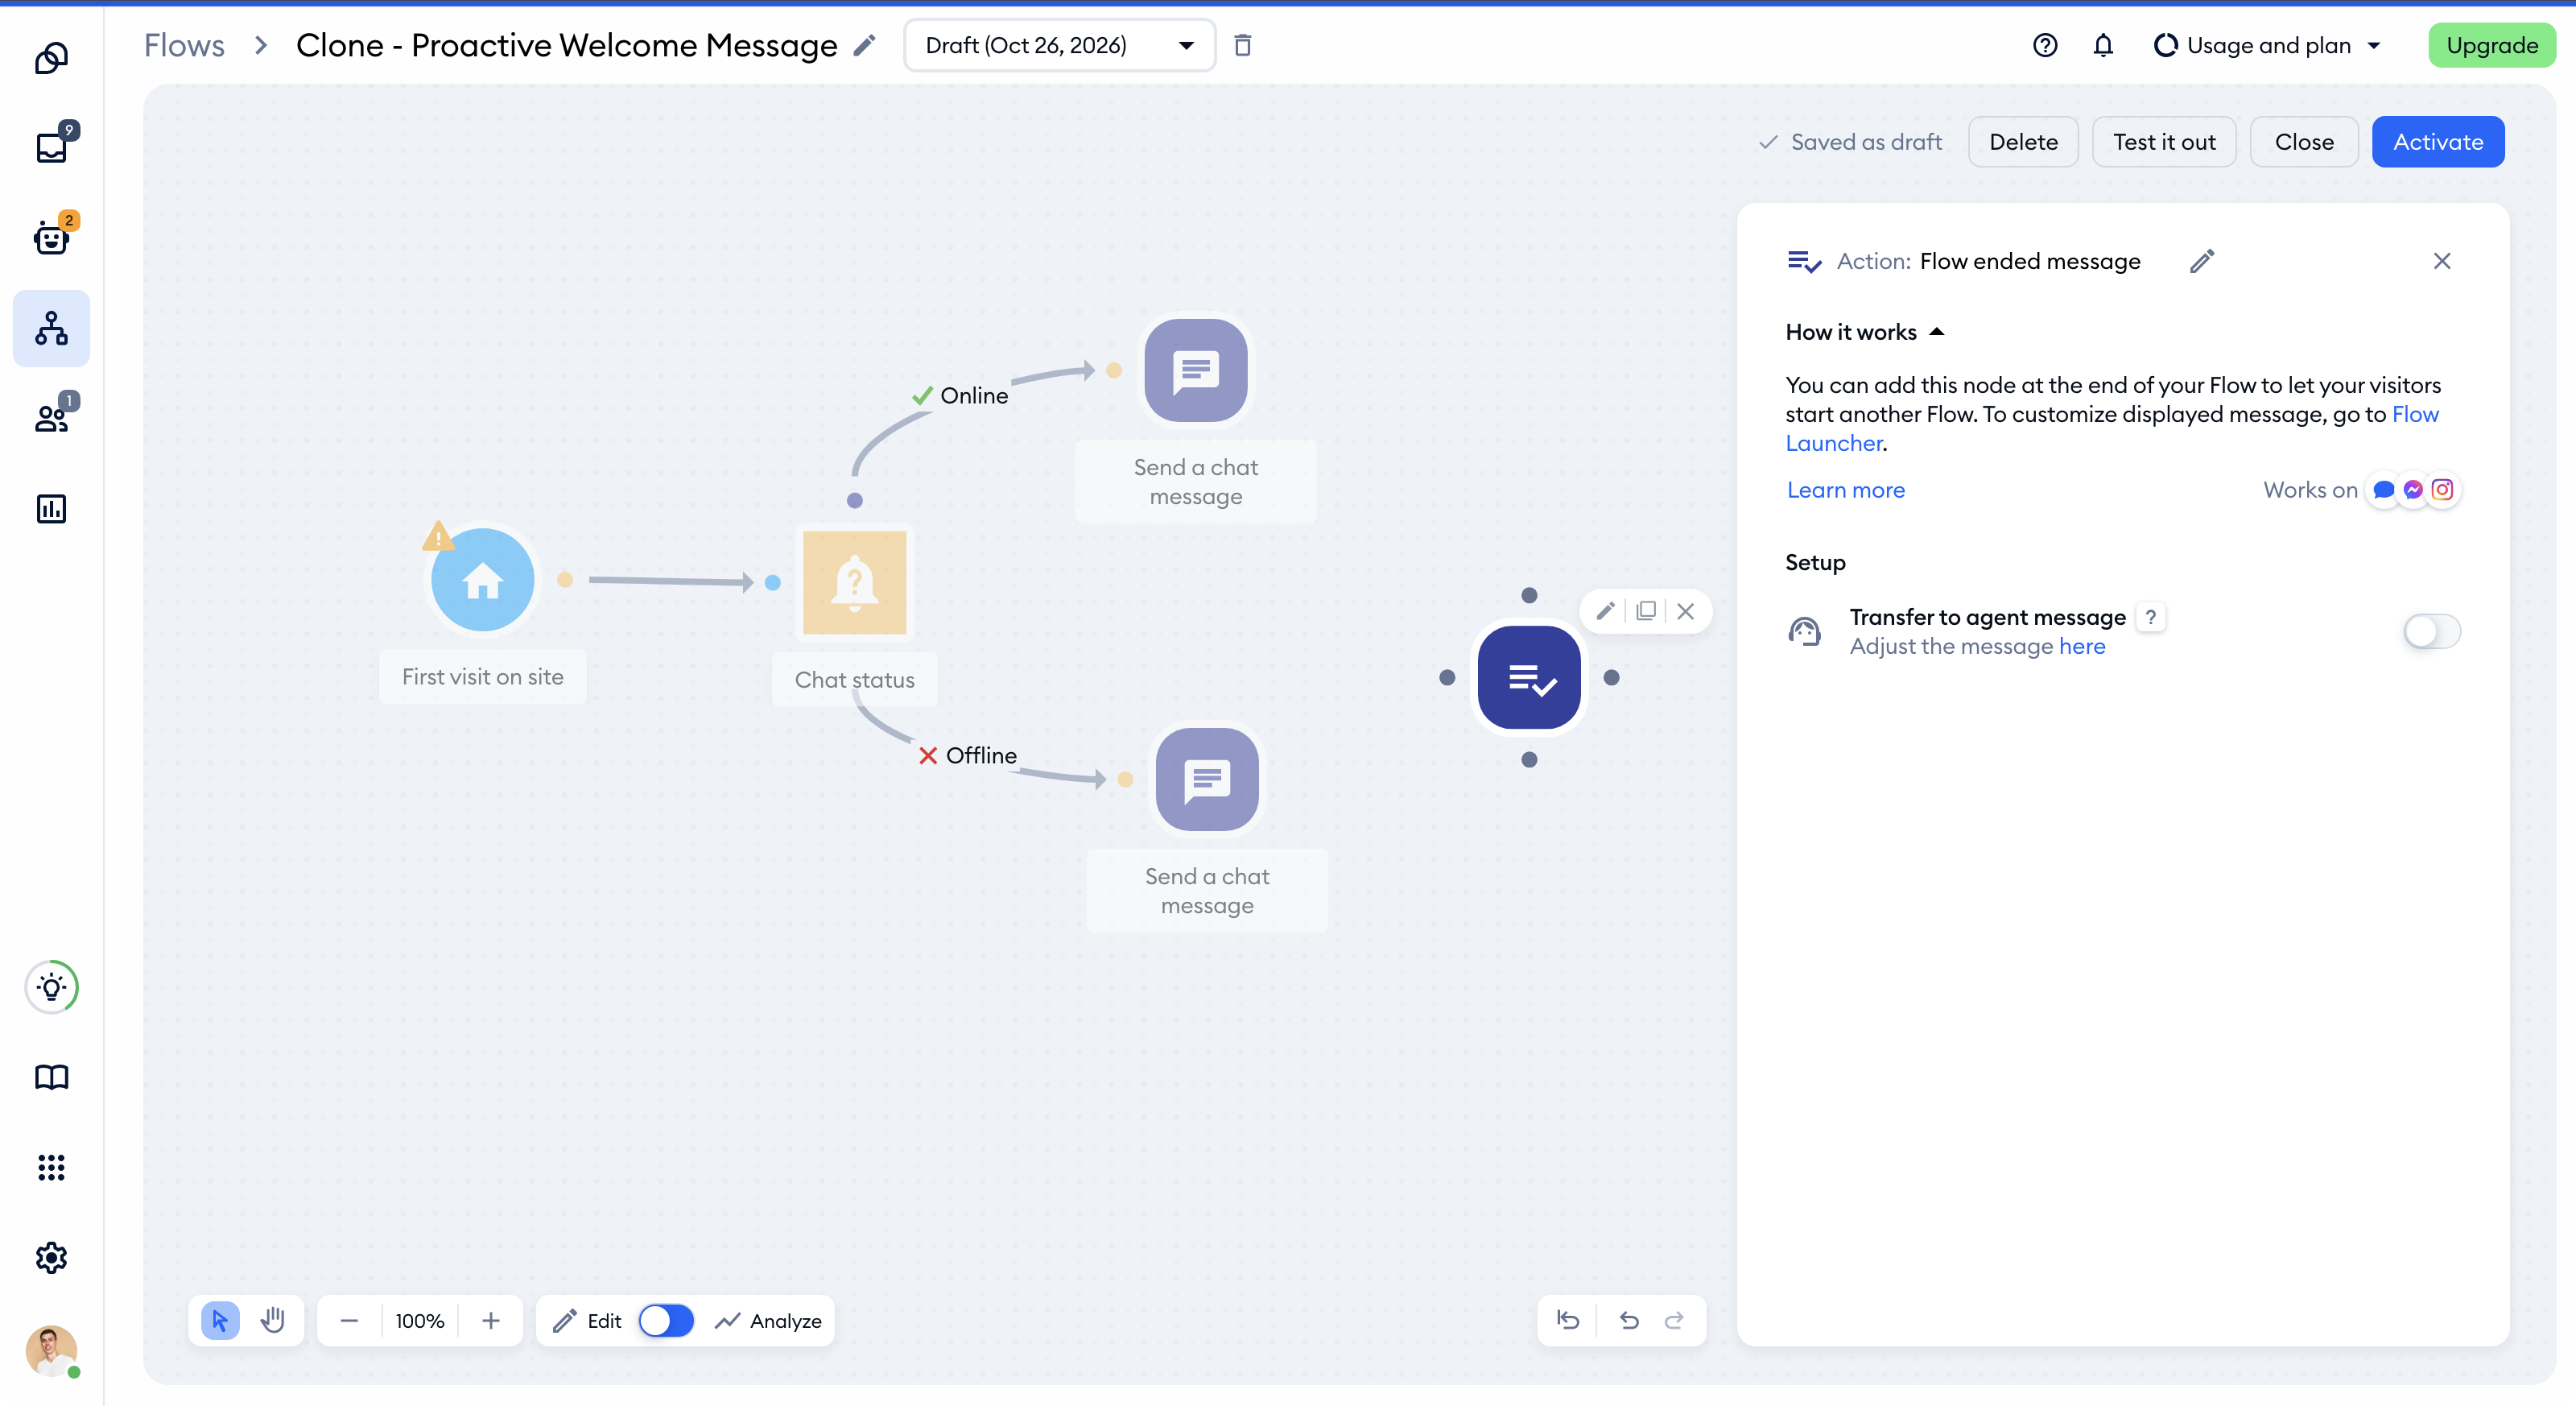
Add the Flow ended message action at the end of your flow to let your visitors start another flow. It sends the Flow ended chat message together with your Flow buttons - you write that message once, in the Flows launcher at the bottom of the Flows menu (see The Flows launcher).
Inside the action, you can also turn on the Transfer to agent message, sent when a visitor types a reply instead of clicking one of the buttons. Learn more in The "Transfer to agent" message.
Subscribe for Mailing
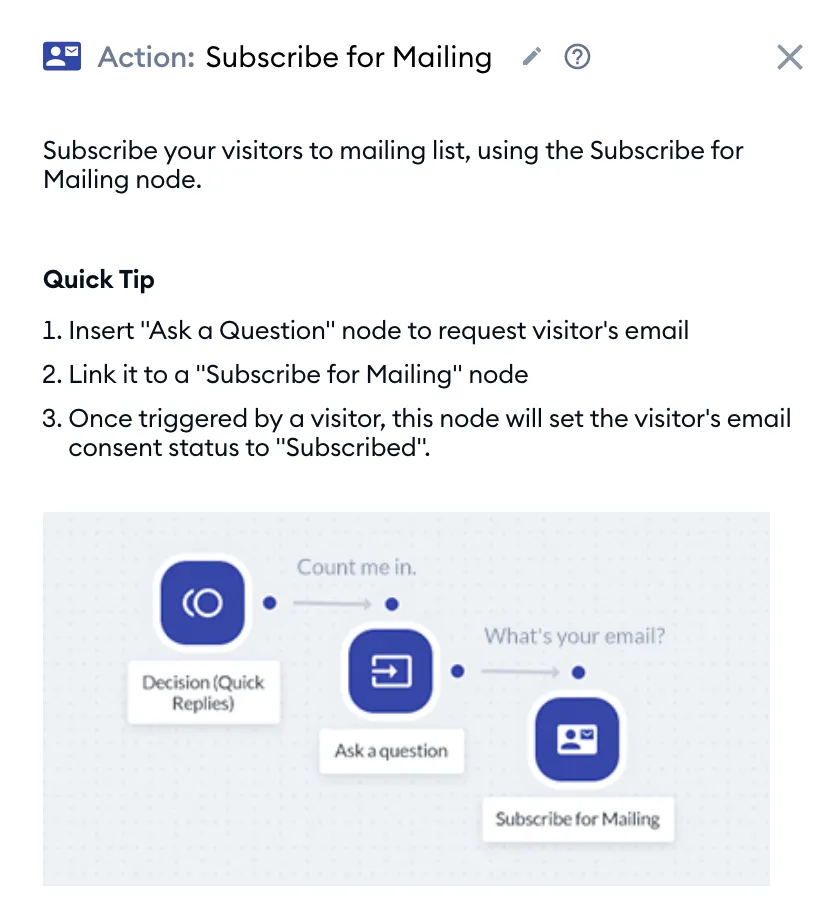
The Subscribe for Mailing action allows you to sign in the visitor to your mailing list. That means the user gives you consent to be on your mailing list. Please remember to ask the visitor for consent first - for example, by using the ask a question node.
Disable text input
The Disable text input action prevents visitors from typing when a flow is running. The action blocks the text input field, so the user can't write to you when the flow is running. You can learn more about it here.
Enable text input
The Enable text input action returns the typing field into the chat widget, allowing your website visitors to contact you. You can learn more about it here.
Send notification
The Send notification action will send a web notification to the agents when they're online - this acts similarly to receiving a brand new chat request for agents. You customize the notification message inside the action itself. Your website visitors will not see the notification; it is only meant for agents.
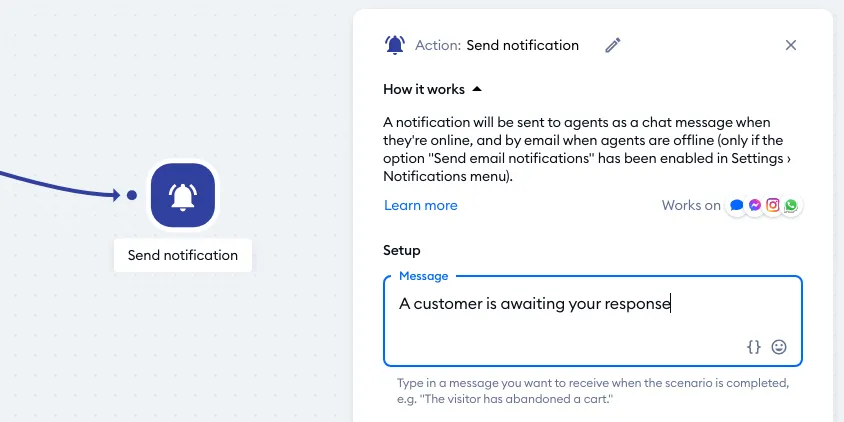
If all agents are offline, an email will be sent to their configured inboxes as well (only if the email notification was enabled in Settings > Notifications).
Assign to an agent
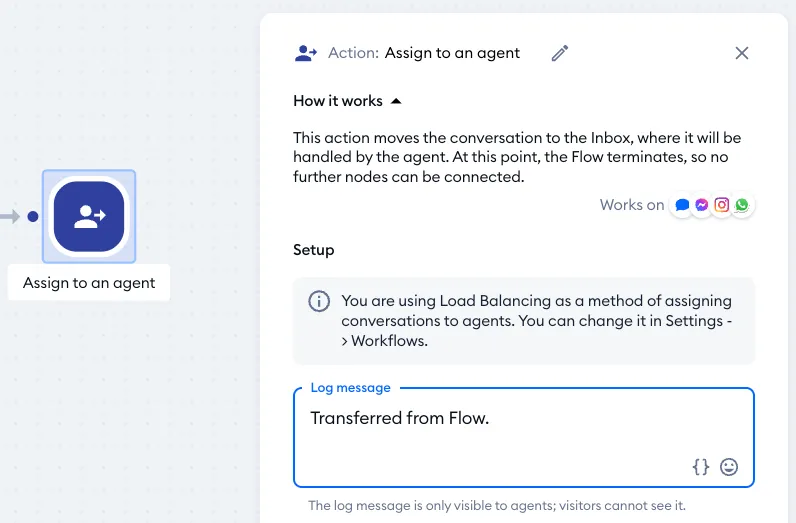
The Assign to an agent action allows your flow to immediately transfer the visitor to the Unassigned conversations folder, where any available agent will be notified. Of course, if your project uses automatic chat assignment (Round Robin or Load Balancing, set in Settings > Workflows), then the chat will be transferred to the appropriate agent right away instead - the action tells you which method your project uses. Please note that this action ends the flow; no other nodes can be connected after it.
You can also edit the Log message (by default, "Transferred from Flow."). It's added to the conversation for your agents only - visitors can't see it.
Reassign to a Department
The Reassign to a Department action can transfer the chat conversation to a selected team/department. To learn more about departments, see our article on how to use departments.
Please note: departments are available on the Plus plan and above. Without them, the action shows an upgrade message instead of the list of departments. If you haven't added any departments yet, add one in Settings > Team > Departments first.
Create ticket
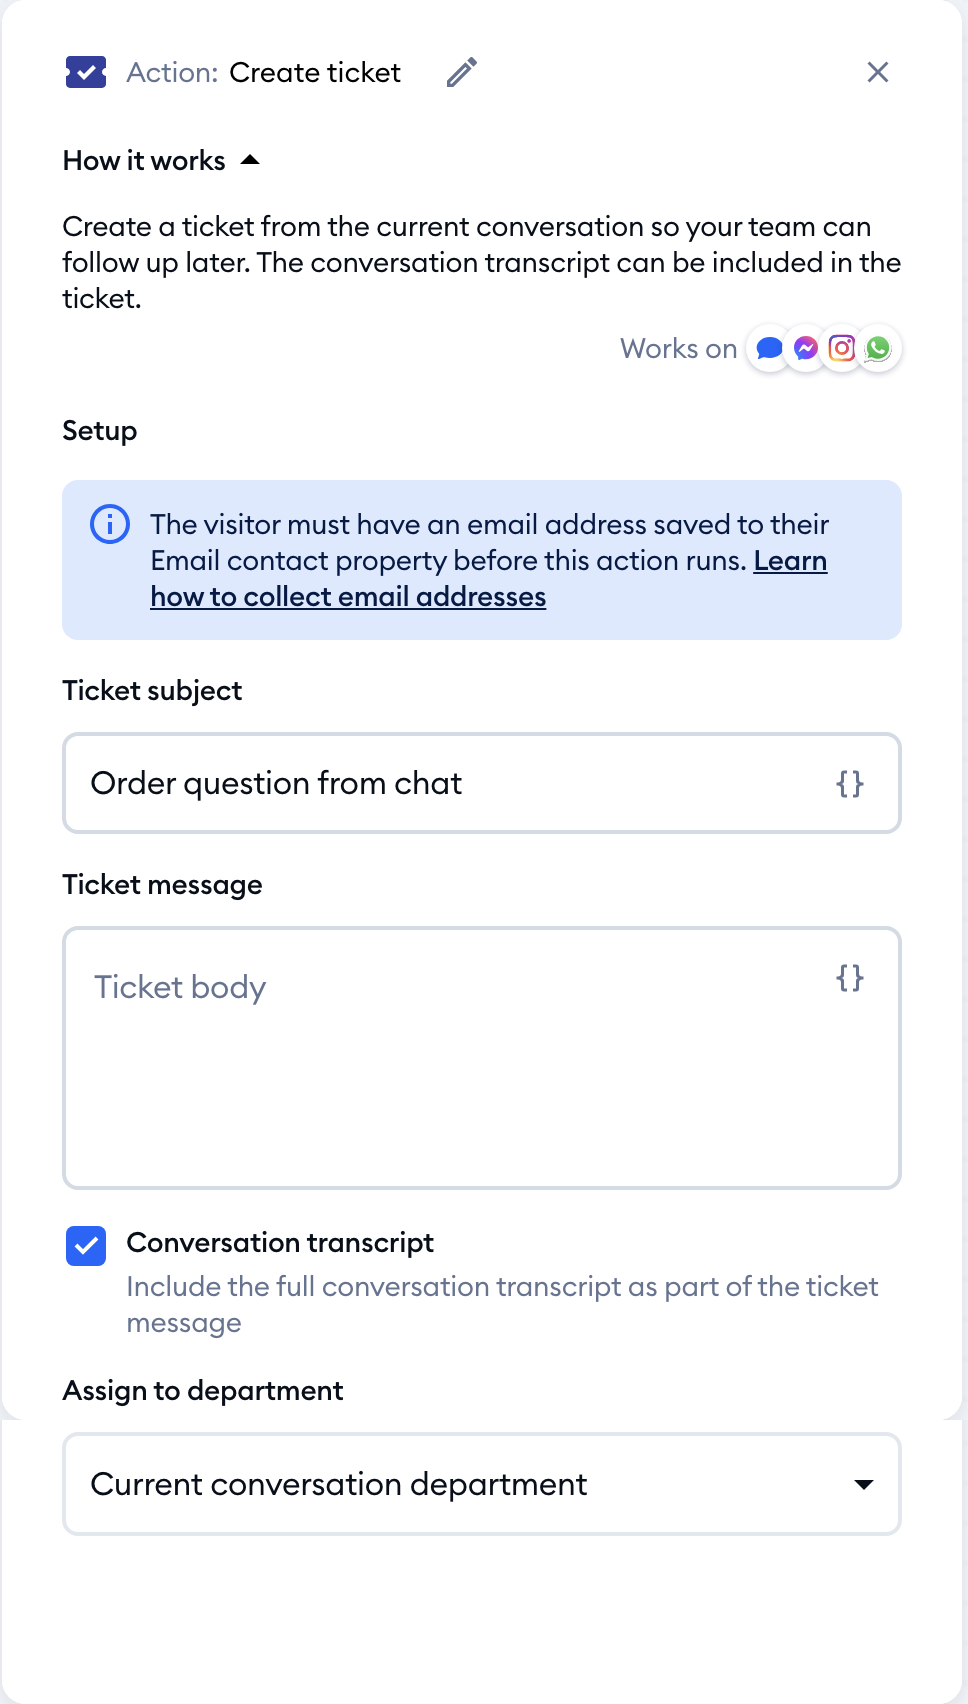
The Create ticket action turns the current conversation into a ticket, so your team can follow up later. You set the Ticket subject and Ticket message, choose whether to include the Conversation transcript, and pick the department in Assign to department.
The visitor needs an email address saved in their Email contact property before this action runs - for example, collected earlier in the flow with Ask a question. See Create a ticket from a Flow for the full setup.
To another Flow
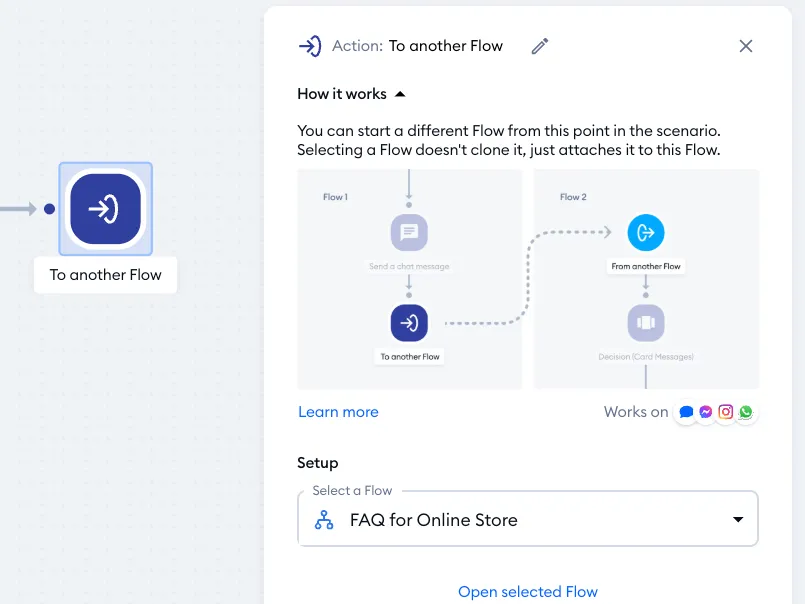
This action allows you to create portals: connect one flow with any other target flow of your choice. The target flow does not require any special trigger or setup - you can connect any flow this way! See this article for more details on using this functionality.
Send an event to Google Analytics
This action allows you to send a custom event to Google Analytics. This will require an enabled integration with Google Analytics in Tidio's integration section.
API call
This action allows you to make HTTP requests. That means you can send data from Tidio to external systems (such as a CRM or an email marketing tool), and to get external data into Tidio during live chat interactions. This makes not only for a great lead generation tool, but is also a flexible way to present necessary external information to your Tidio chat visitors.
The action has two outputs, Success and Fail, so you can plan what happens when the request doesn't go through. Please see this dedicated guide to learn more about API calls in Tidio.
Send a coupon code
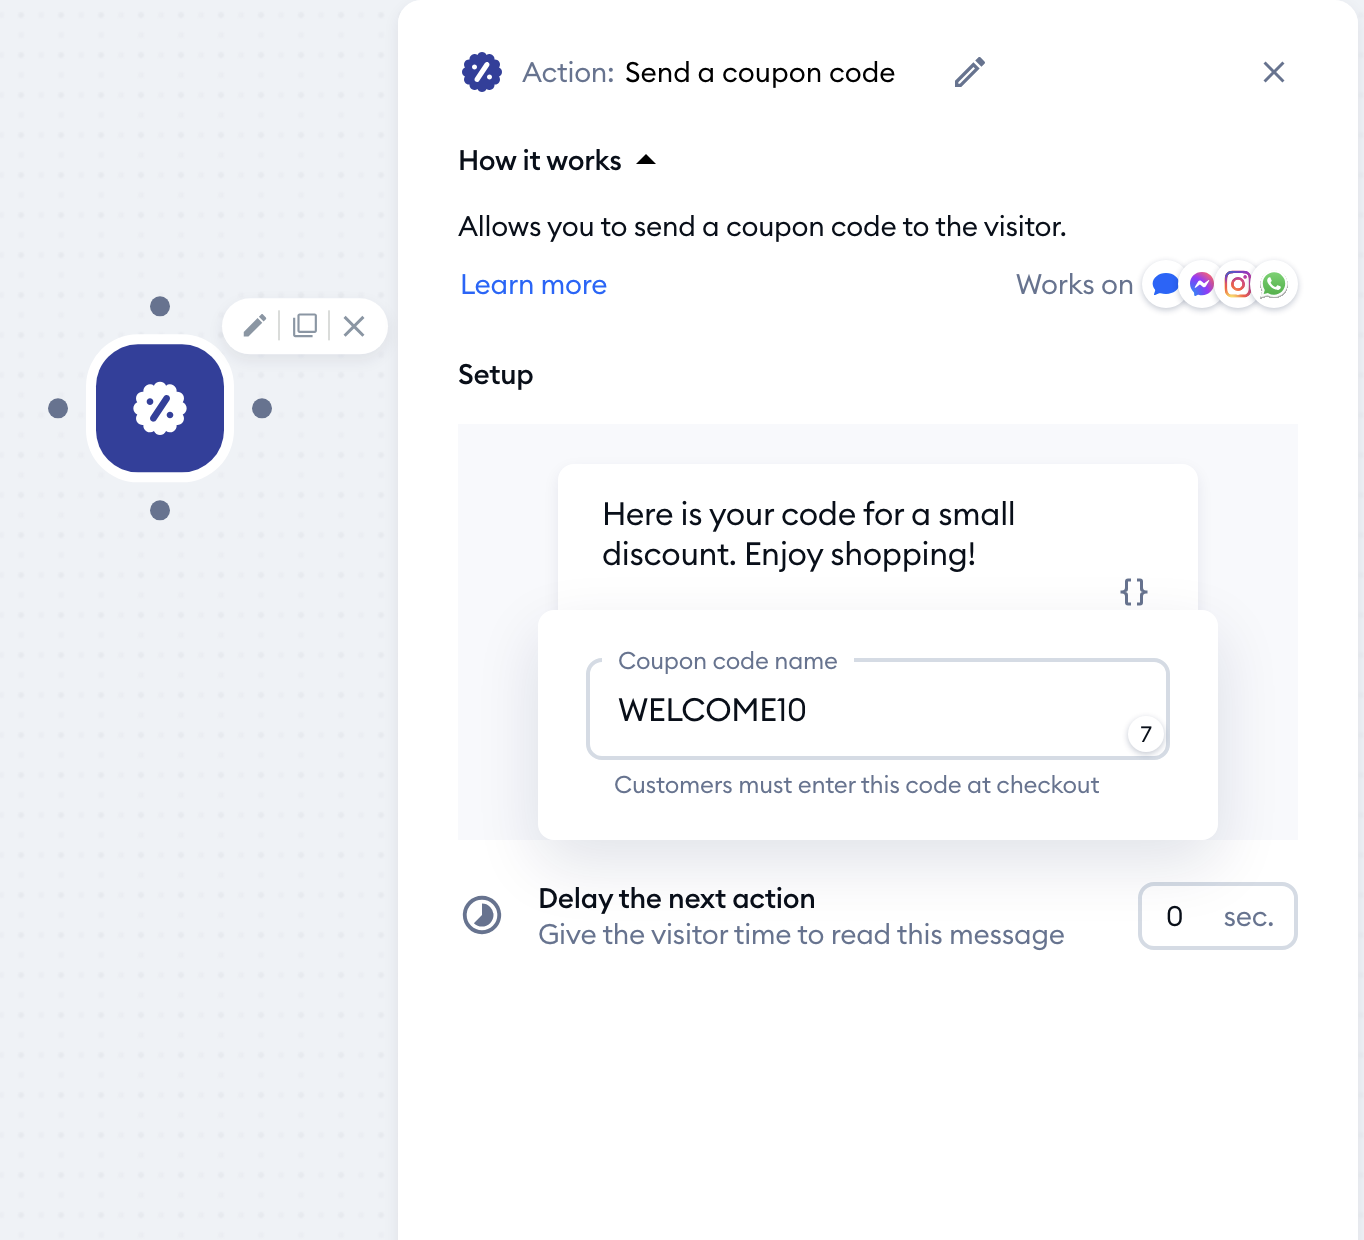
The Send a coupon code action gives you the option to send a well-looking coupon code to your visitors, with a short message. It comes in two versions, depending on your store:
- If your Tidio project is connected to a Shopify store, you'll find the action in the Shopify group. You can create a new coupon code or pick one of your store's codes, and they automatically sync with your Shopify store. Learn more in Coupon Code (flow action).
- Any other store gets the general version among the regular actions. Click on Add coupon code and type in a code that already works in your store under Coupon code name - customers must enter this code at checkout.
Please note: similarly to the Send a chat message action, this action includes the built-in option to delay any action that comes next.
Check order status (Shopify only)
The Check order status action will answer the questions about your customers' orders, and after providing an order number or email address, the client will learn about their order status.
Check product availability (Shopify only)
The Check product availability action will answer your visitors' questions about the availability of particular products from your store. After providing the product's name, the client will learn whether the product is available.
Check shipping details (Shopify only)
The Check shipping details action will answer your visitors' questions about the delivery locations of your products. The action will ask your visitors about their location and, based on that, provide the information on whether the delivery to that place can take place. Please make sure your delivery settings are set correctly in your Shopify account, so that the flow can work properly.
Recommend products (Shopify only)
The Recommend products action will automatically offer your visitors a set of products similar to those they interacted with in your store previously (they've added a certain product to their cart). You can choose how many products should be displayed, and visitors can add the recommended products to their carts directly from the widget.
You can learn more about setting up this feature in this guide.
