It is possible to make HTTP requests in Tidio via flows, with the help of the API call action. This allows you to send data from Tidio to external systems (such as a CRM or an email marketing tool), and to get external data into Tidio during live chat interactions. This makes not only for a great lead generation tool, but is also a flexible way to present necessary external information to your Tidio chat visitors.
For example, when a visitor inquires about their order status, your flow can prompt them to provide their order number. Tidio can then send a web request to your server and obtain the order details (you also decide which information is returned to the visitor).
In this article, you will learn:
- How to add the API call action
- What types of requests are available
- How to configure your requests
- What authentication methods are available
- How to use the request in your flow
- How to handle matters of security
Adding the API call action to your flow
Inside the flow editor, open the Actions tab of the menu on the right - you will find the API call action listed there. Simply drag it onto the board:
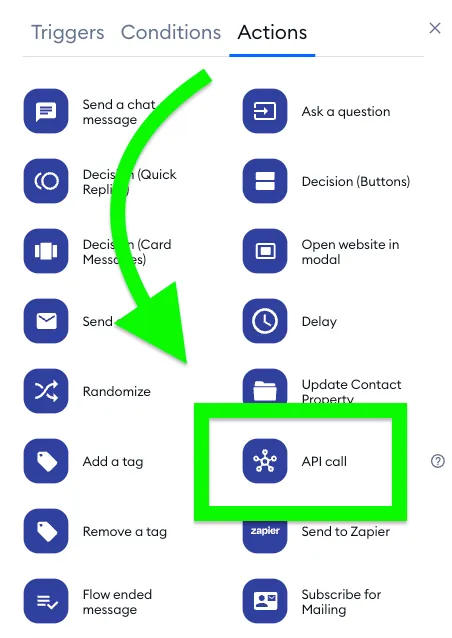
Add it wherever necessary in your current flow; once a visitor interacts with this flow and reaches the API call action, it will carry out any valid instructions that you configure inside this node.
To set up these instructions, use the Configure HTTP request button inside the action, and you will be able to configure all the necessary details. At the top of the window, you will also find the How to set up a request and How to ensure security links.
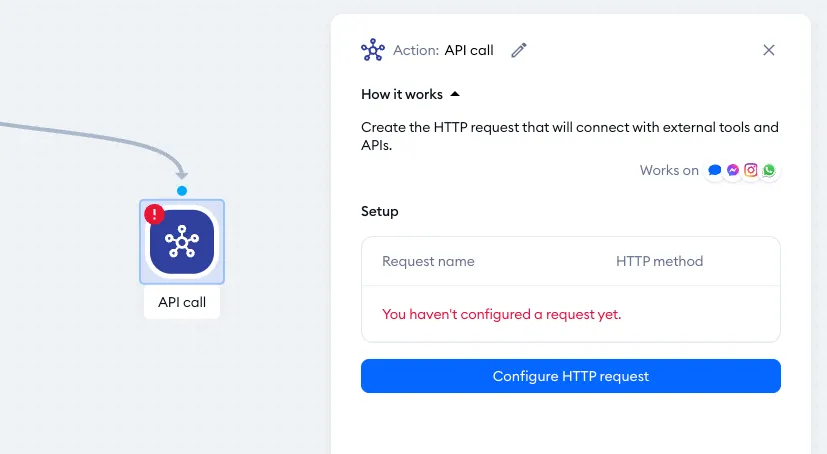
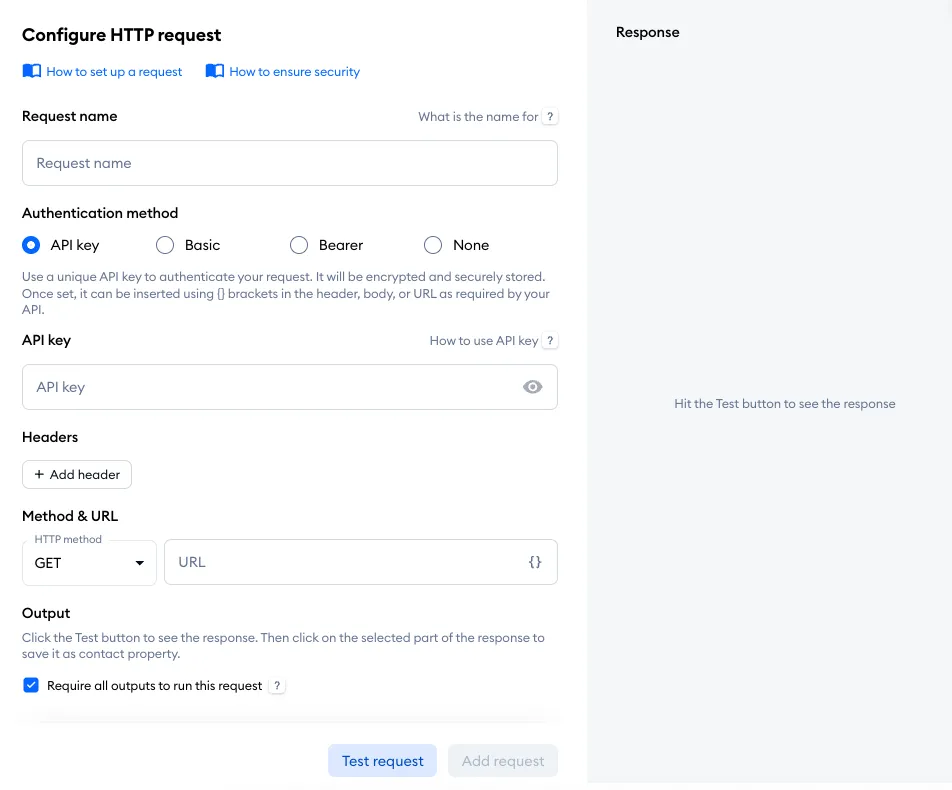
Inside, you will see a screen with all the available options, including the ability to test your request:
Types of available requests
There are five types of HTTP requests that you can make via the API call action: GET, POST, PATCH, PUT, and DELETE.
GET requests
This request allows you to pull data from an endpoint. For example, it can be used to get specific order details, or a list of contacts, etc.
POST requests
This request allows you to trigger some action in the target software, or send data. For example, it can be used to generate a new contact or ticket in an external CRM.
PATCH requests
This request allows you to update something that already exists in the target software. For example, it can be used to add new details to leads in a CRM.
PUT requests
Similarly to PATCH requests, this request allows you to update information in the target software; and similarly to POST requests, it can also be used to create something in the target software. The difference is that PUT requests are idempotent - i.e. executing the same request multiple times will have the same result as executing it just once.
DELETE requests
This request allows you to remove data from the target software. For example, it can be used to delete a ticket or contact in a CRM.
Configuring your requests
When you're configuring your HTTP request, there are several fields available to set up - and they change depending on the type of request you're configuring.
Request name and authentication method
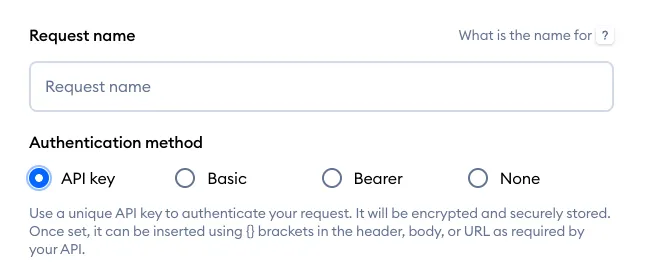
The first section is the Request name field; it is simply a way for you to quickly identify the request within Tidio, and it's not sent with the request.
The second section is for your Authentication method; this will serve as your authorisation for the call, for security purposes. It can be used further in your configuration, e.g. as part of any headers you may add. You can choose between several types of methods, including no authentication at all.
Please see more details on all of these methods in this section of the guide.
Headers
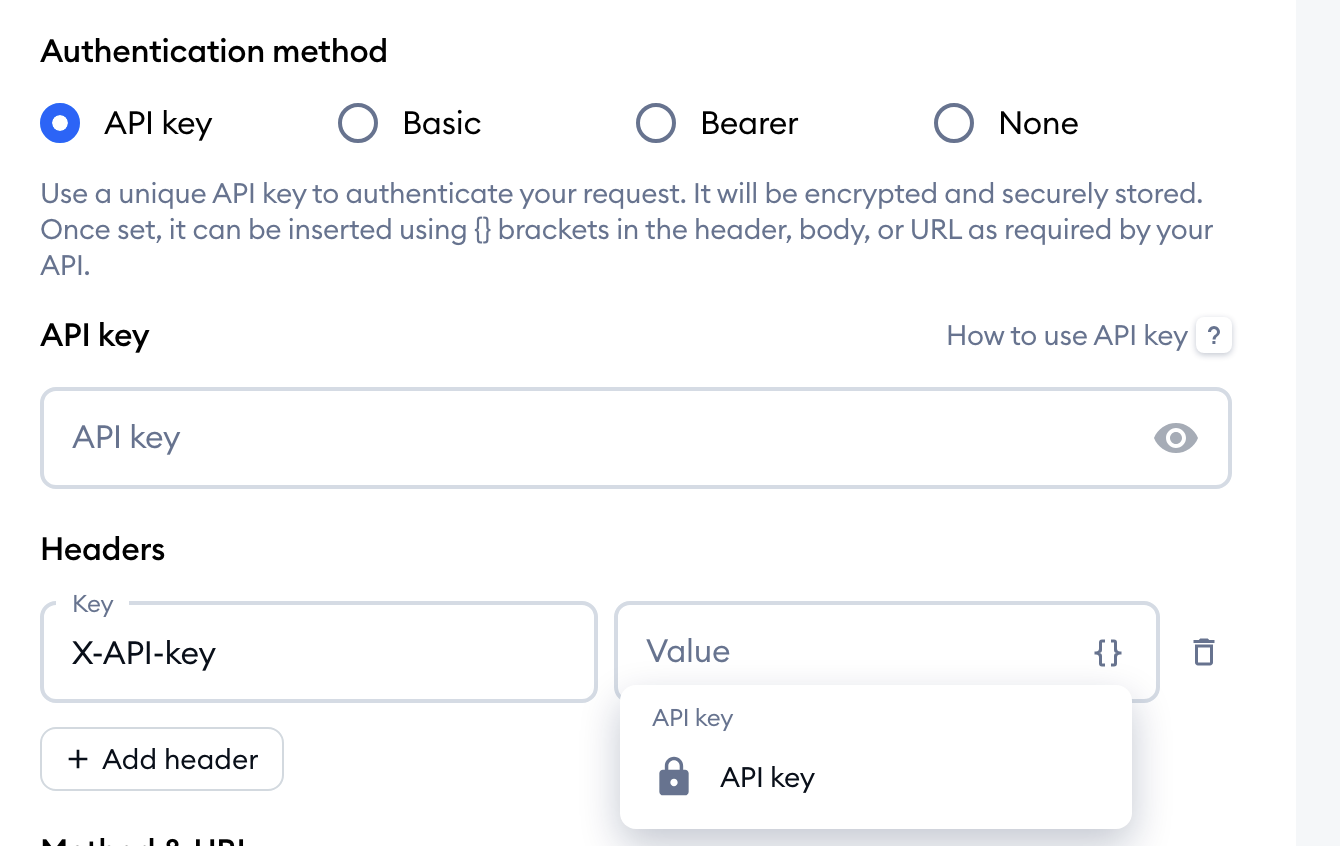
Here you can set up your header(s), up to 10 of them, where you need to provide a Key and Value. In the Value field, you can use the Insert API key or Encrypted Variable option for quick input, if you've chosen the API key authentication method earlier (with other methods, the option is Insert Encrypted Variable). An encrypted variable is a session variable of the Encrypted type, which never appears in logs. Use Add header to add another one:
Method & URL
In this section you define the HTTP method (GET, POST, PATCH, PUT, or DELETE), and provide the necessary details for it to work:
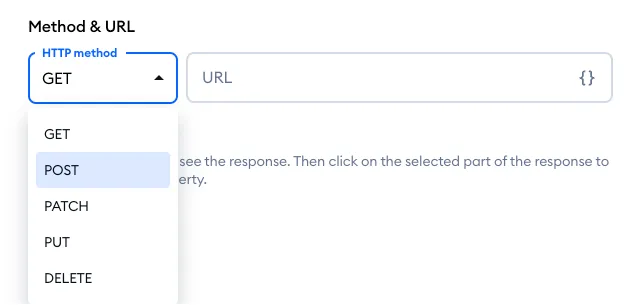
The URL must be a public address that starts with https - otherwise, you'll see URL must start with https or, when you test the request, The URL address is not public. Some domains can't be called at all (This domain is not allowed).
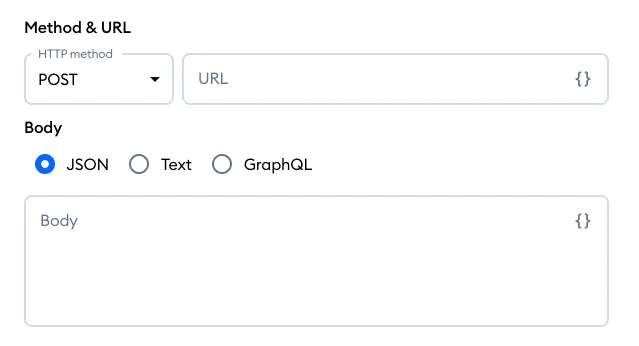
Apart from the URL field, you will also see the Body field to complete (it's not available for GET requests). In both fields, you can also use the Insert contact property or API key option: it lists your contact properties and session variables, and the API key if you've chosen that authentication method.
Every contact property or variable you insert is listed under Used parameters, with a Test value field - type in a sample value there, so that you can test the request.
The Body field supports three types of queries: JSON, Text, and GraphQL. With GraphQL, you write the query in the Body and define the values it uses under Variables (each with a name starting with $ and a Value). Contact properties, session variables and the API key can only go into these variables, not into the GraphQL body directly:
Output (test)
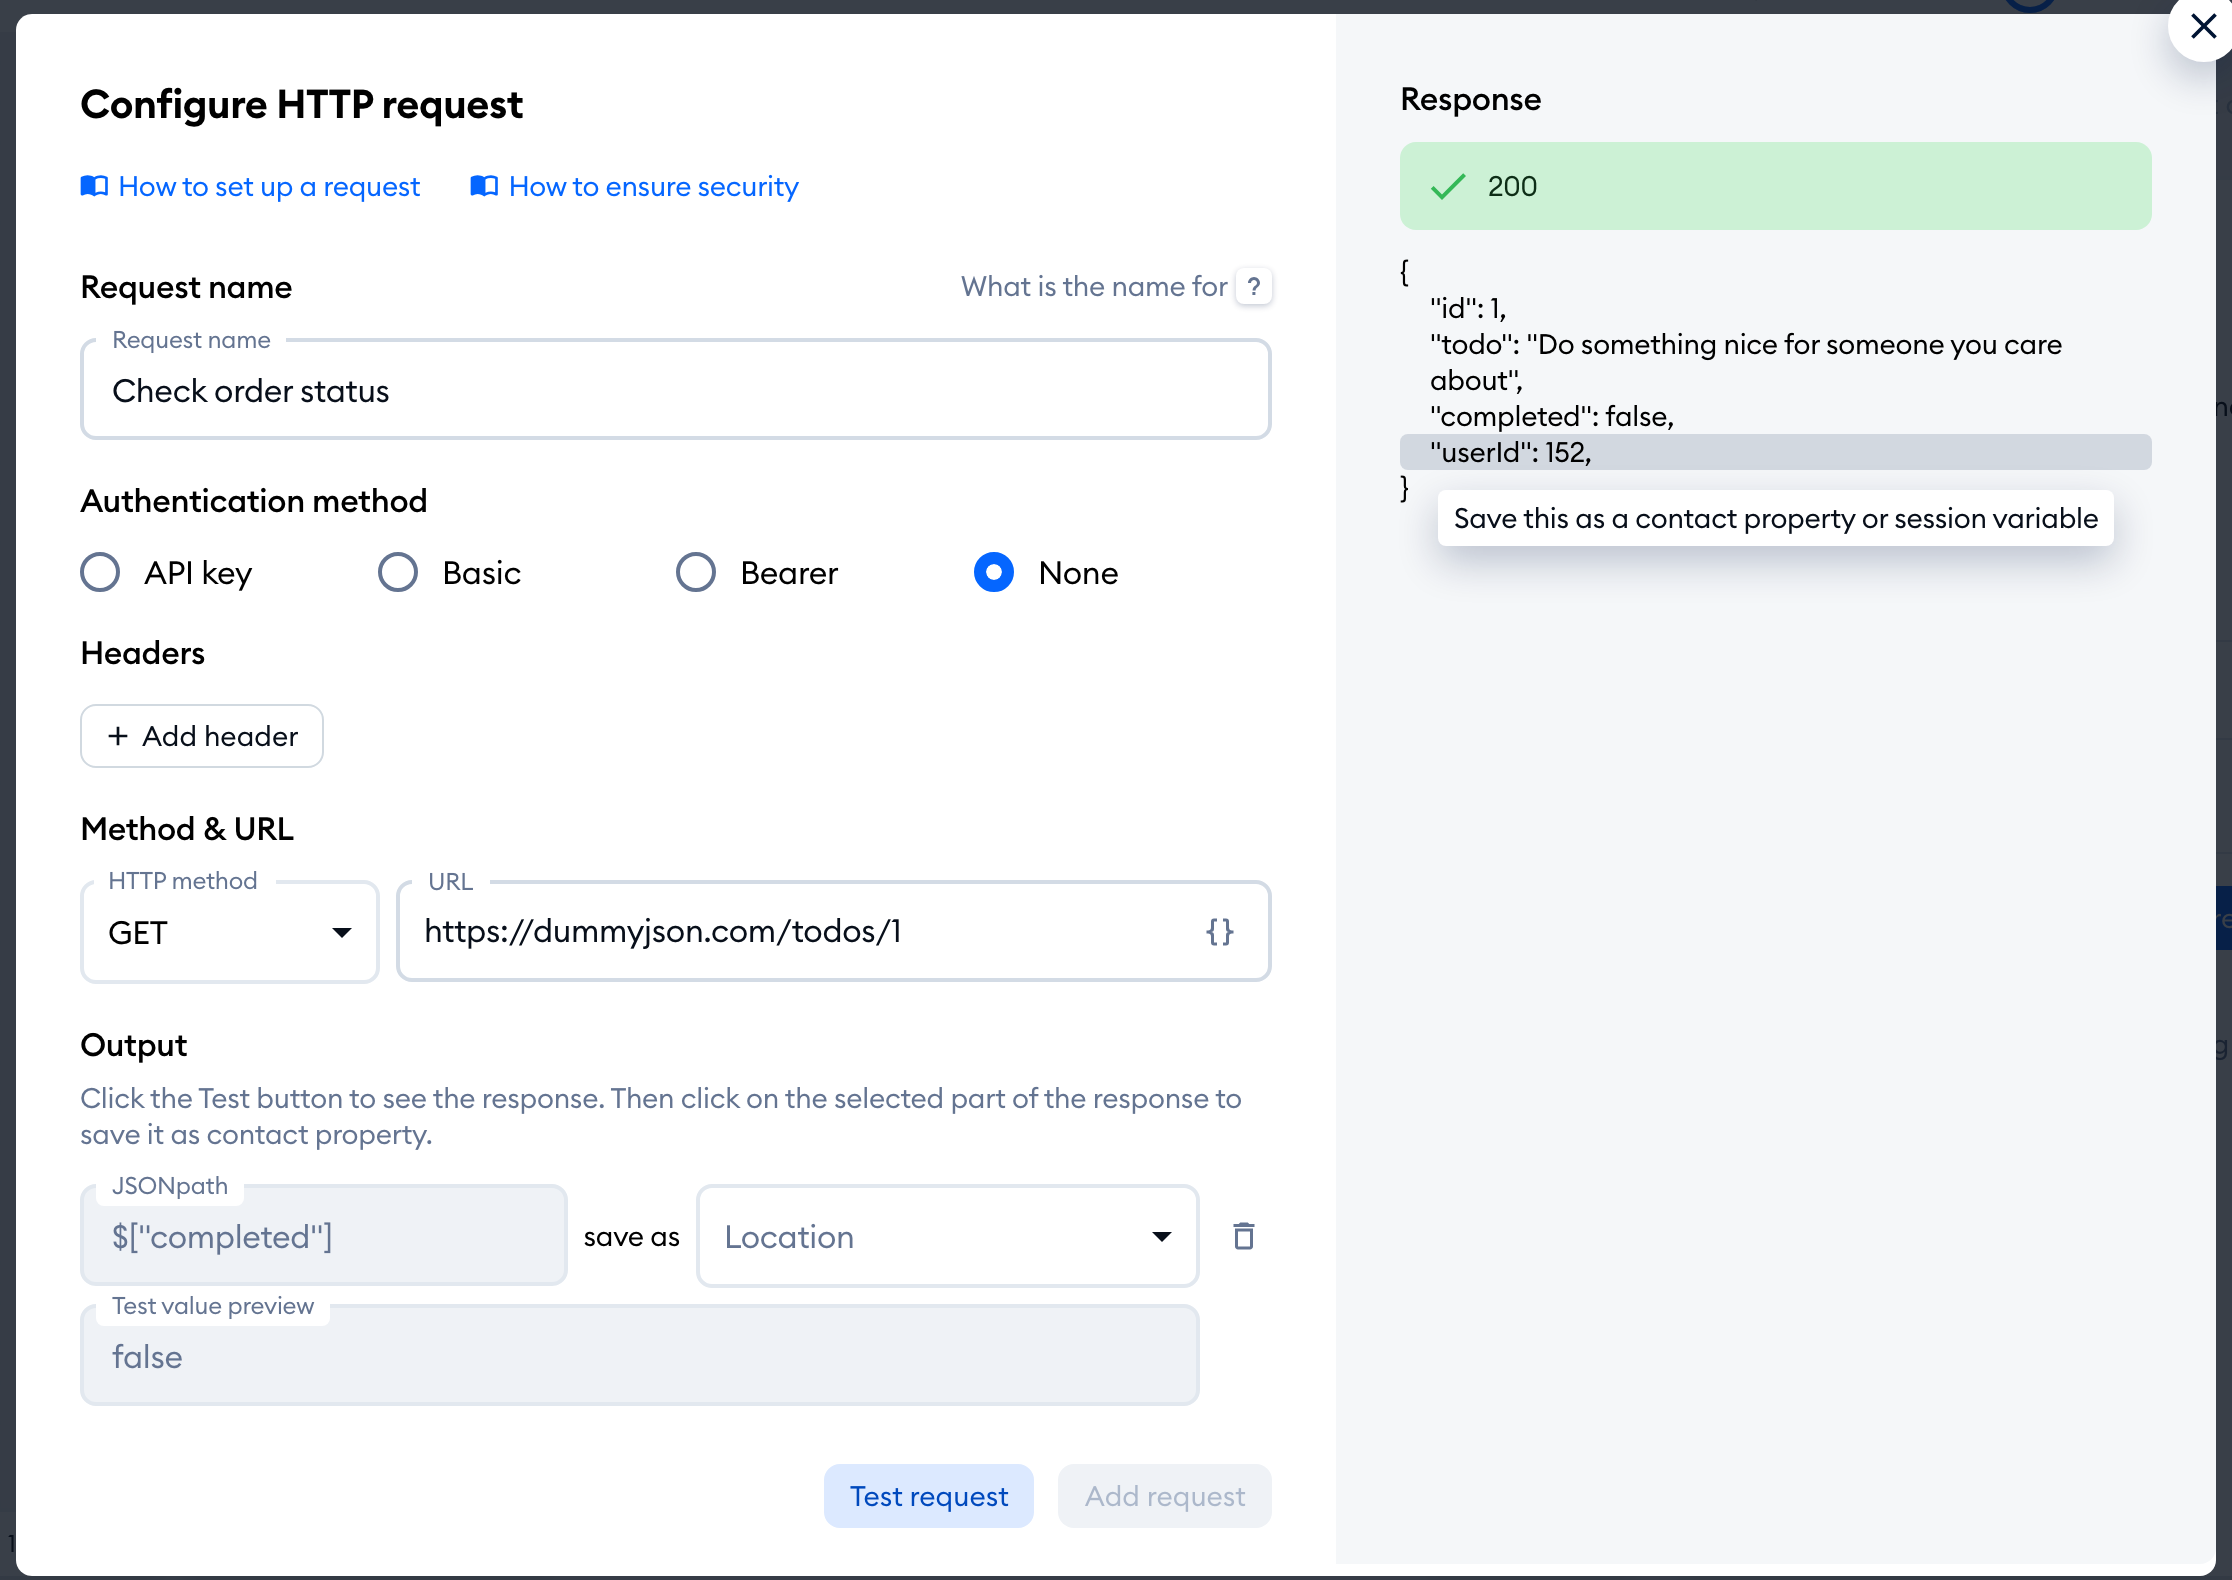
Once your request is fully configured and valid, you can use the Test request button at the bottom. You will see the status code and the resulting API response in the Response field on the right:
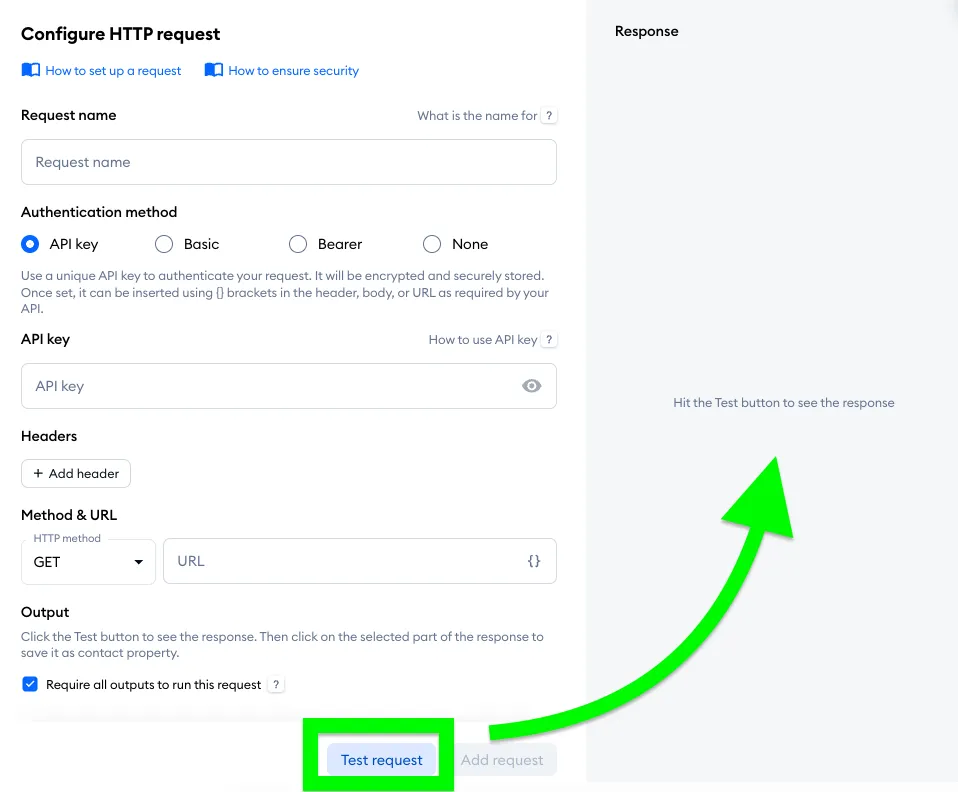
To use a part of the response later in your flow, click on it in the Response field (Save this as a contact property or session variable). It will be added to the Output section, where you choose whether to save it as a contact property or a session variable. You can save up to 20 outputs per request.
Please note the checkbox at the bottom of this section, labelled 'Require all outputs to run this request':
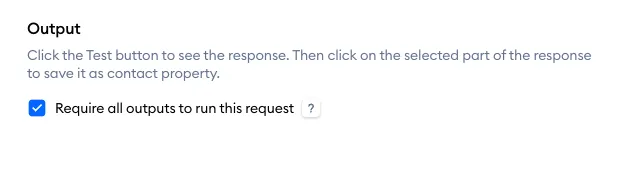
It is enabled by default, which means that the request will only run if every single mapped output is successfully returned in the response. The request will not proceed at all if any required value is missing. You can disable this option if you do not require all outputs for running the request.
When you're done with setting up the request, make sure you hit the Add request button at the bottom in order to save your setup. The button becomes available once you've tested the request successfully - if you change anything after the test, simply test it again (To add a request, fill in all required fields and test it first.).
Authentication methods
There are four different authentication methods that you can use for your API call: API key, Basic, Bearer, and None. Choose the one that is most appropriate for the given request, and make sure to configure it correctly.
API key
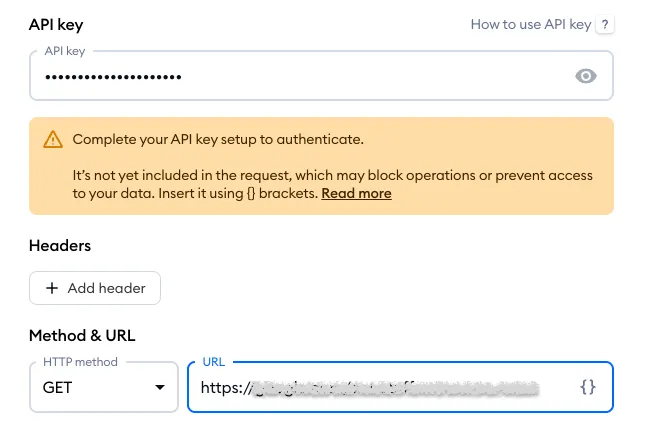
This method is a flexible solution for any other types of authentication that aren't covered by the other methods. You should store your API key (or authentication key, or access token, or secret) and then use that securely stored value with a placeholder in any request field (like header, URL, or POST body). Your request will be sent with your sensitive data in place of this API key placeholder. This way we can keep your token/key/secret encrypted and secure, so it won't be visible in any part of our system, and safe from any potential security incidents.
Remember: never put your sensitive data directly into the request's header, URL, or body. This can be the source of security issues; please be responsible with your access.
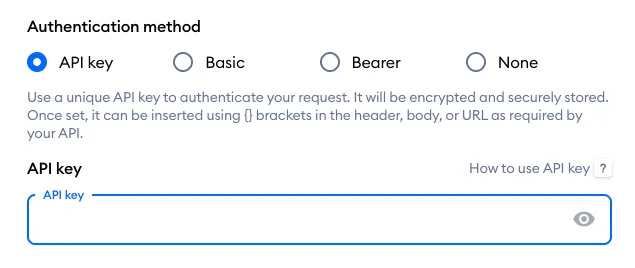
- When to use: Should be used with any API that supports a different standard than those available through the other methods.
-
How to configure:
- Store your token/key/secret in the API key field.
- Insert the API key placeholder wherever the key should appear: a header, query string, or body. Use the Insert contact property or API key option in the URL and body, or Insert API key or Encrypted Variable in a header.
- An example header would be
X-API-keywith the value{API key}
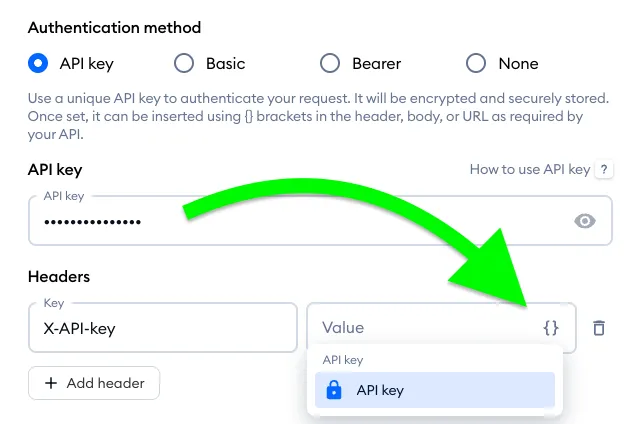
If the API key is not placed in the request in any way, you will see an alert regarding that (Complete your API key setup to authenticate.) - reminding you of this necessary step:
Basic
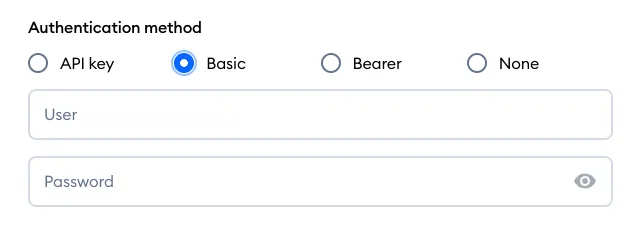
This is a standard method of authentication, based on logging into a specific resource. You will need to provide your login credentials (User and Password). We keep your credentials encrypted and secure, so they won't be visible in any part of our system, and safe from any potential security incidents.
- When to use: Should be used with any APIs that support this standard.
-
How to configure:
- Enter your User and Password.
-
The request is sent with the header
Authorizationand the valueBasic <base64(username:password)>
Bearer
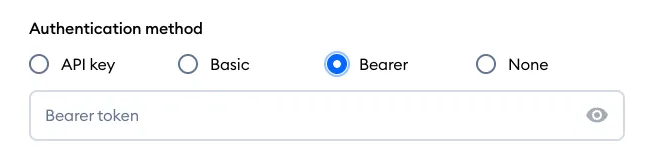
This is a widely adopted method that transmits an access token in the request header. We keep your token encrypted and secure, so they won't be visible in any part of our system, and safe from any potential security incidents.
- When to use: Should be used with any APIs that support this standard.
-
How to configure:
- Paste your token into the designated Bearer token field.
- The platform automatically sends the header
Authorizationwith the valueBearer [token]
None
This method should never be used with your internal tools, nor with any API that expects a token, secret, or key.

- When to use: Only for publicly available APIs that require no authentication at all.
Best-practice reminders
- Never hard-code secrets directly in request fields.
- Rotate tokens and keys regularly.
- Revoke credentials immediately if you suspect compromise.
- Grant only the minimal scope or permissions the integration needs.
By following these guidelines, you’ll keep your credentials secure while ensuring your requests authenticate correctly.
Using the request in your flow
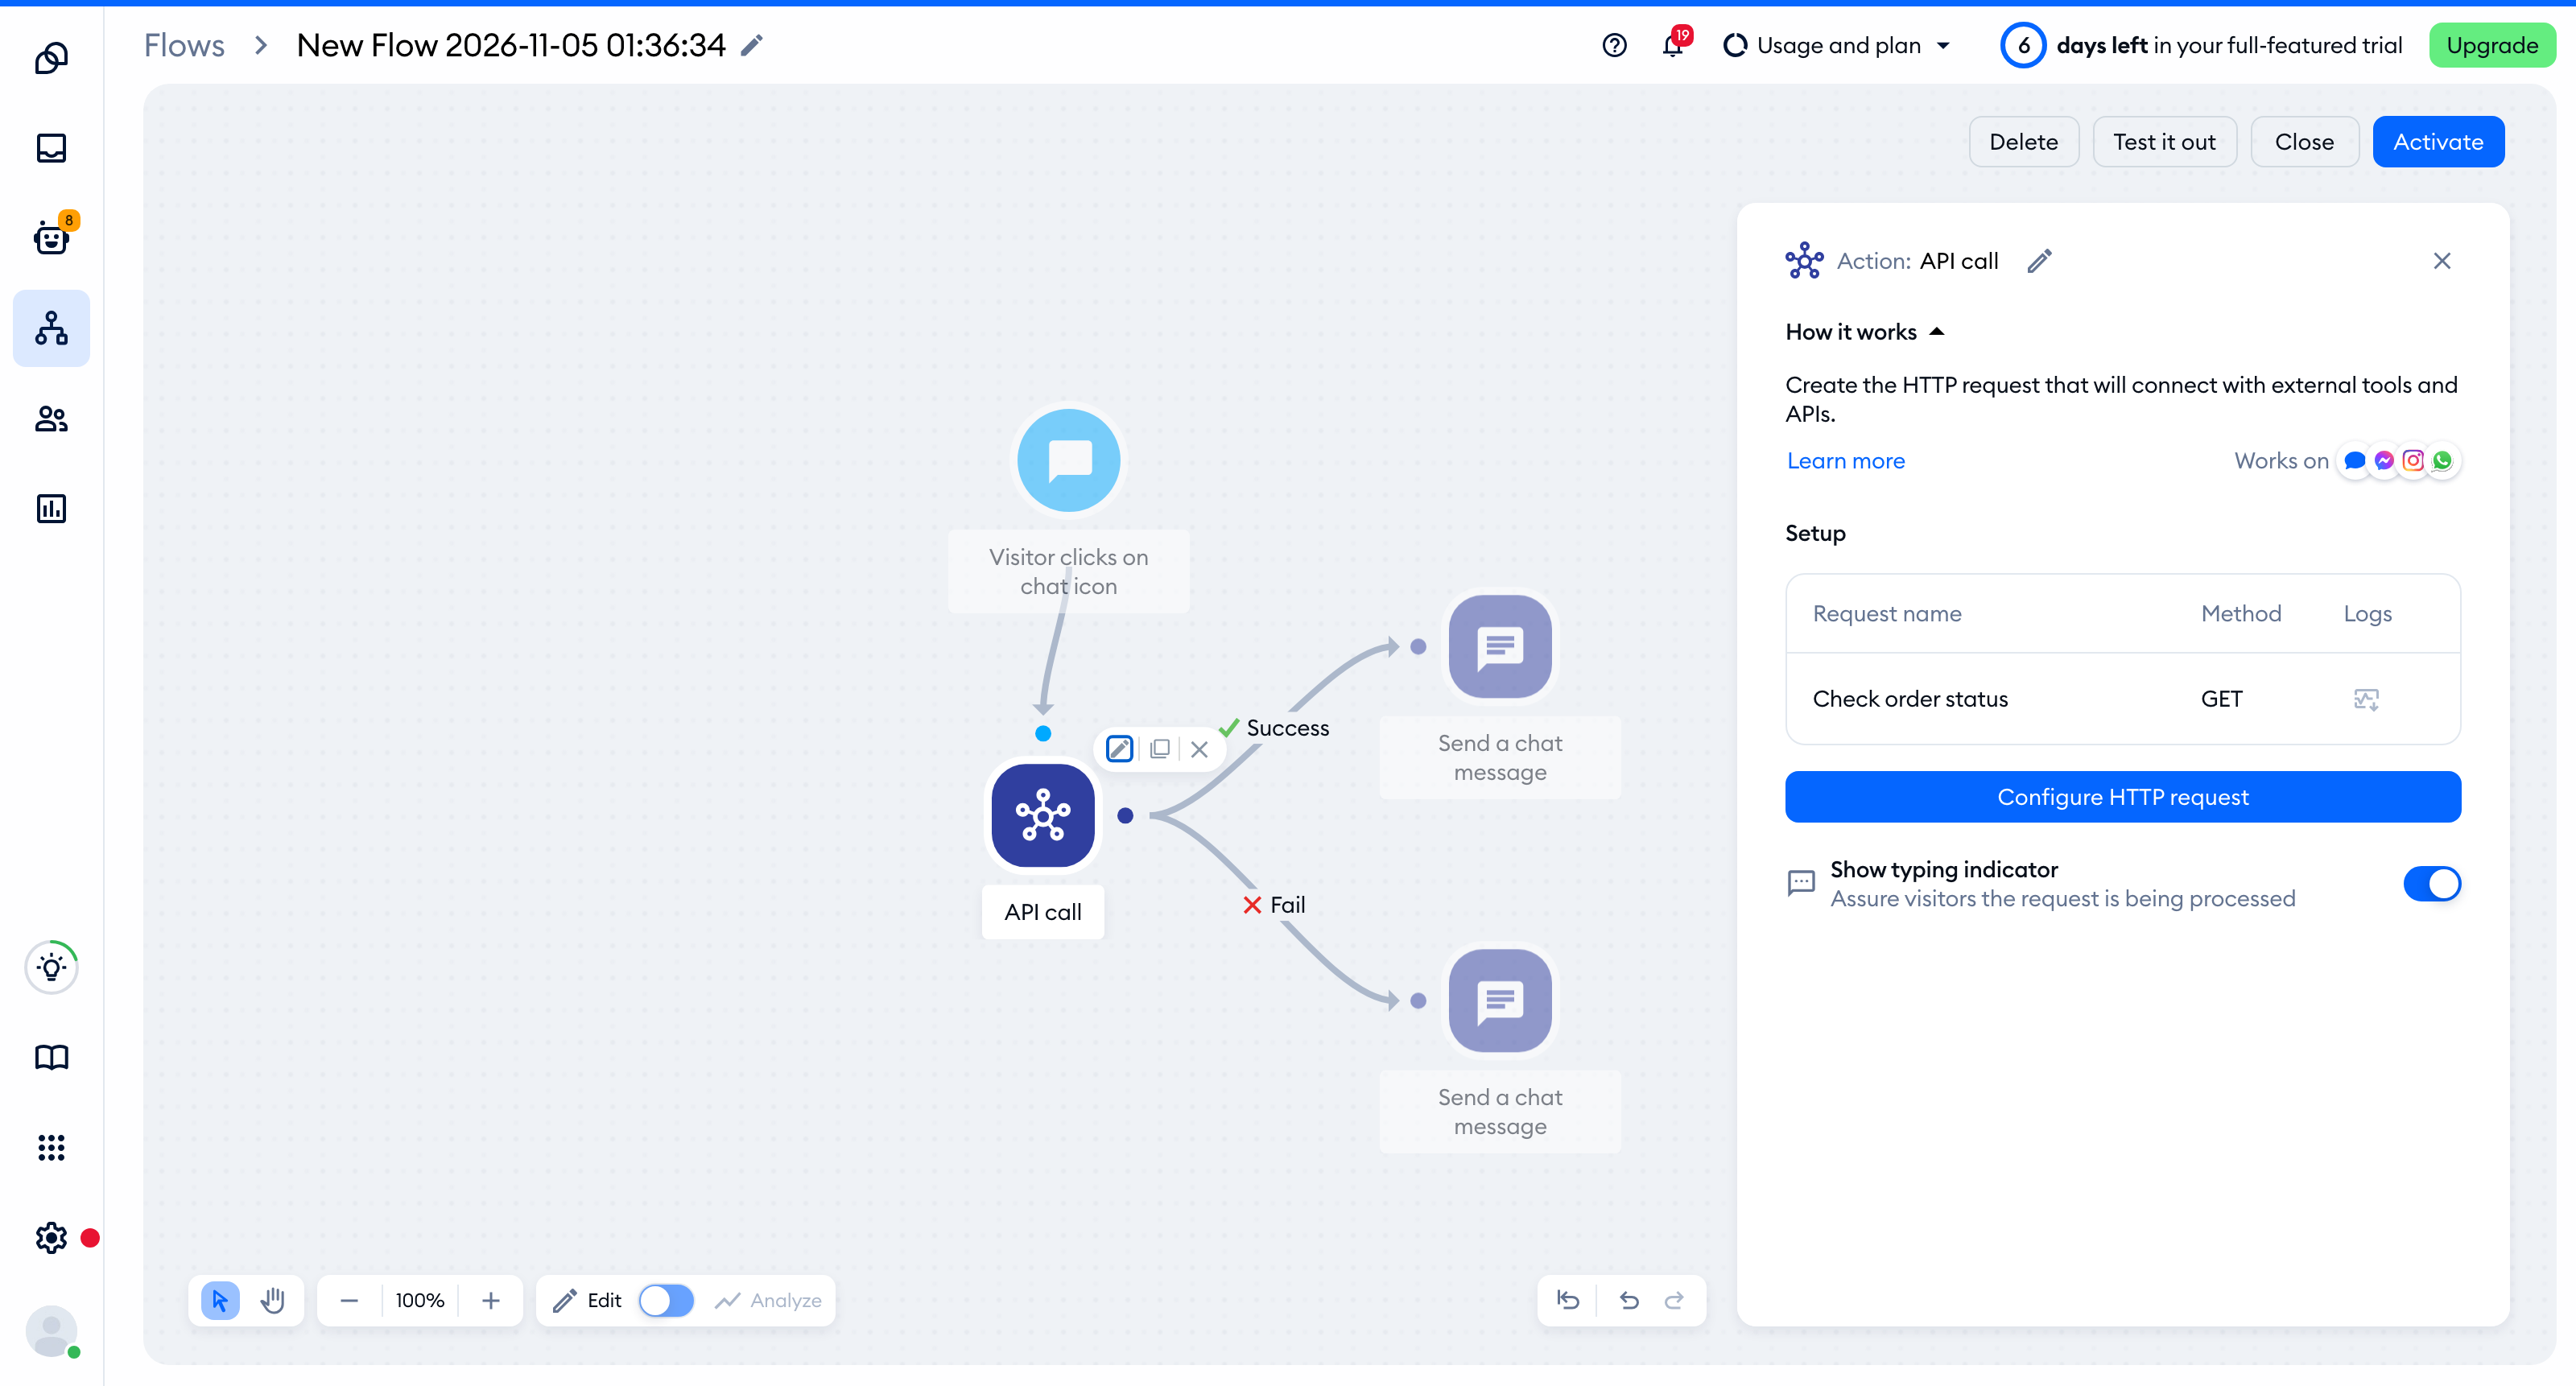
Back in the flow editor, the API call action shows your request (its Request name and Method). The action has two outputs: Success and Fail. Connect the next steps of your flow to both - for example, show the order status after Success, and offer a chat with your team after Fail.
If the request may take a moment, switch on Show typing indicator (Assure visitors the request is being processed) in the action, so that your visitors know something is happening:
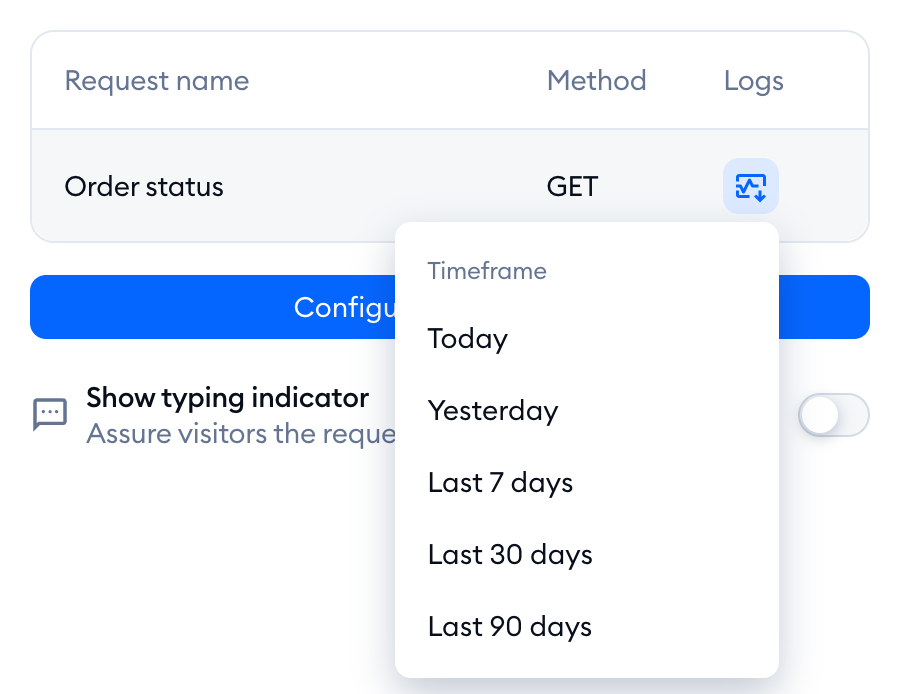
Once the flow is saved, you can also download the request's logs: click on the Download logs icon in the Logs column and choose the Timeframe - Today, Yesterday, Last 7 days, Last 30 days or Last 90 days. You'll get a CSV file with the log of the request.
Security considerations
It is crucial to carefully decide what information you disclose to visitors. An imposter might request order details for an order they have not placed, attempting to access other customers' information. For instance, if you return sensitive information such as email addresses, phone numbers, names, or street addresses, an attacker could enumerate order numbers to retrieve confidential data about your customers. This risk is heightened if you accept order numbers in a predictable format, such as sequential integers (e.g. 8123, 8124, 8125, etc.).
Recommendations
To mitigate these risks, we strongly advise you to:
-
Limit returned information to non-sensitive dataConfigure your API call action to return only non-sensitive information, such as the order status (e.g. "shipped," "processing," or "awaiting courier").
-
Require complex data format before returning sensitive informationIf you need to return sensitive information, ensure that you require unpredictable identifiers before doing so. Instead of using predictable, incremental order numbers, consider using unique identifiers in UUIDv4 format (e.g.
29c7be5f-0f9c-4264-a86e-6733beecf0d8,d425fc88-579c-4a91-a940-68c750db08ff, etc.). These IDs are random and cannot be easily guessed by attackers.
The same security considerations apply to other functionalities you may want to automate using the API call action.
