Our Send a form action offers a powerful solution for collecting various data types through a form built inside the widget. Automate this monotonous task and start collecting essential data through Tidio flows!
This action also enables your visitors to upload files, if that is something you want to allow in your form submission.
In this article, you'll learn:
- How to use the Send a Form node
- How to allow your visitors to send files
- How to delete the fields
- How to move (reorder) fields
Using the Send a Form node
The Send a form node allows you to design and customize forms according to your specific requirements. By leveraging its functionality, you can effortlessly capture valuable information from your website visitors.
To start using this action - open your flow editor and drag the Send a form node from the Actions tab of the menu on the right onto the board.
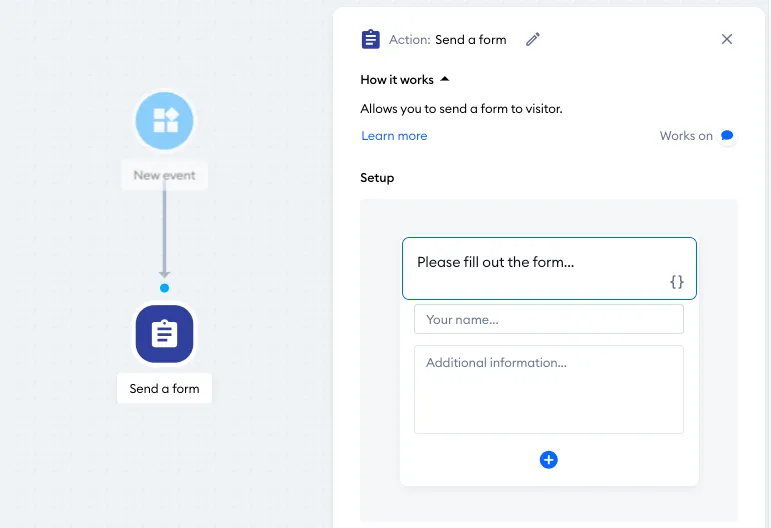
To add a new field to the form, click on the + icon below the existing fields.
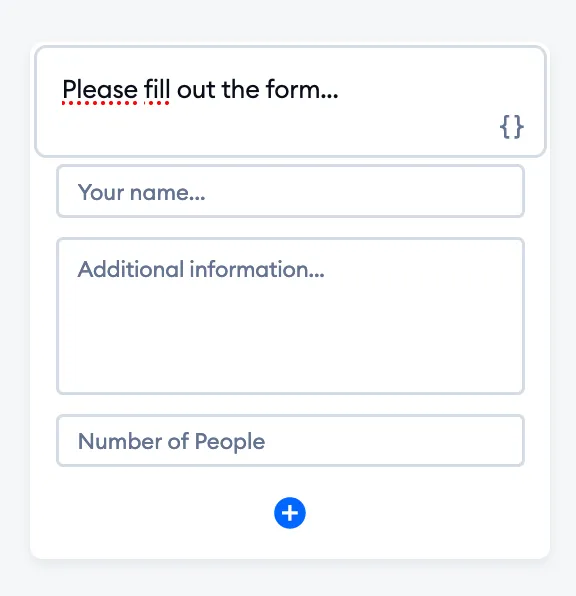
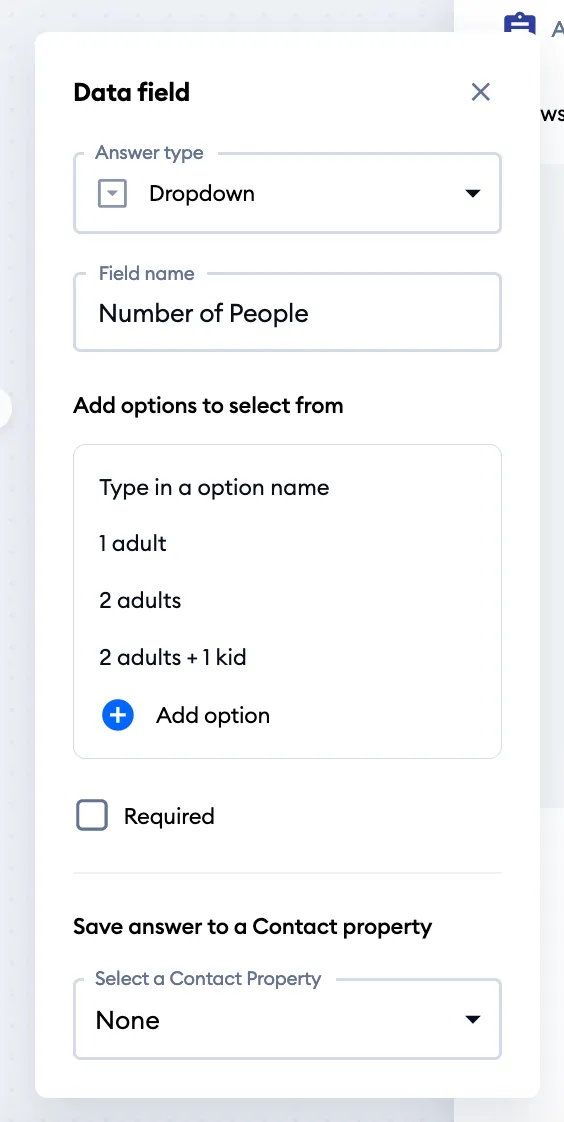
By clicking on each field, you open the Data field window, where you can specify the following:
- Answer type
- Field name
- whether the field should be Required (mandatory)
- whether the answer should be saved as a Contact Property (Save answer to a contact property)
Let's take a closer look at all of these options.
Answer Type
This allows you to choose the format of how you wish to save your visitors' answers. At this moment, you can select from the following options, in two groups:
- Inputs: Text, Long text, Number, Name, Email, Phone number, URL and File
- Select: Checkbox and Dropdown (this allows your visitors to choose from a list of answers - add them under Add options to select from with the Add option button)
Field name
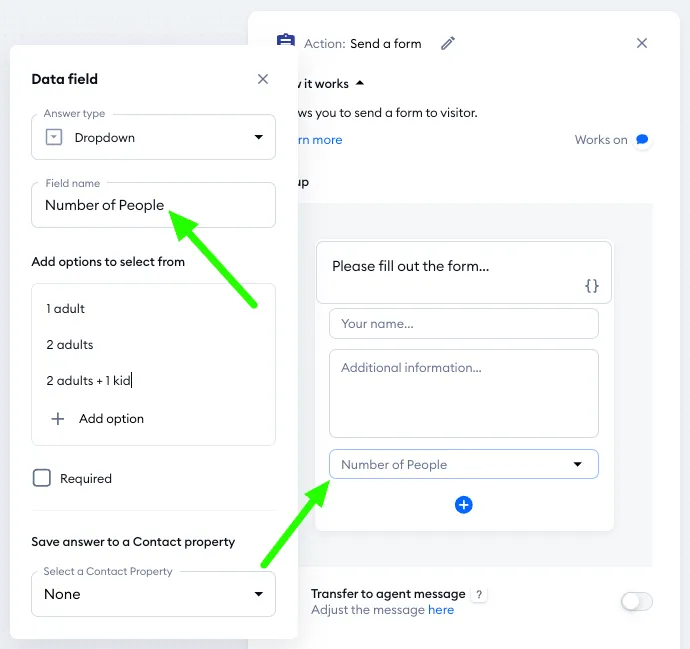
This option allows you to specify the field name that will be visible to your visitors inside the form.
Required checkbox
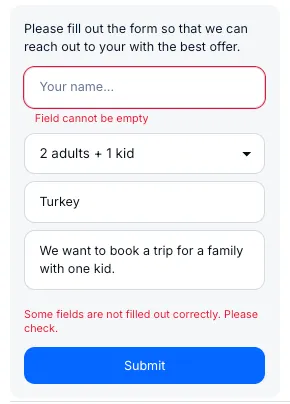
This allows you to decide whether the specific field should be mandatory in the survey. When the Required option is enabled, the form will only be submitted if all mandatory fields have been completed.
Save as Contact Property
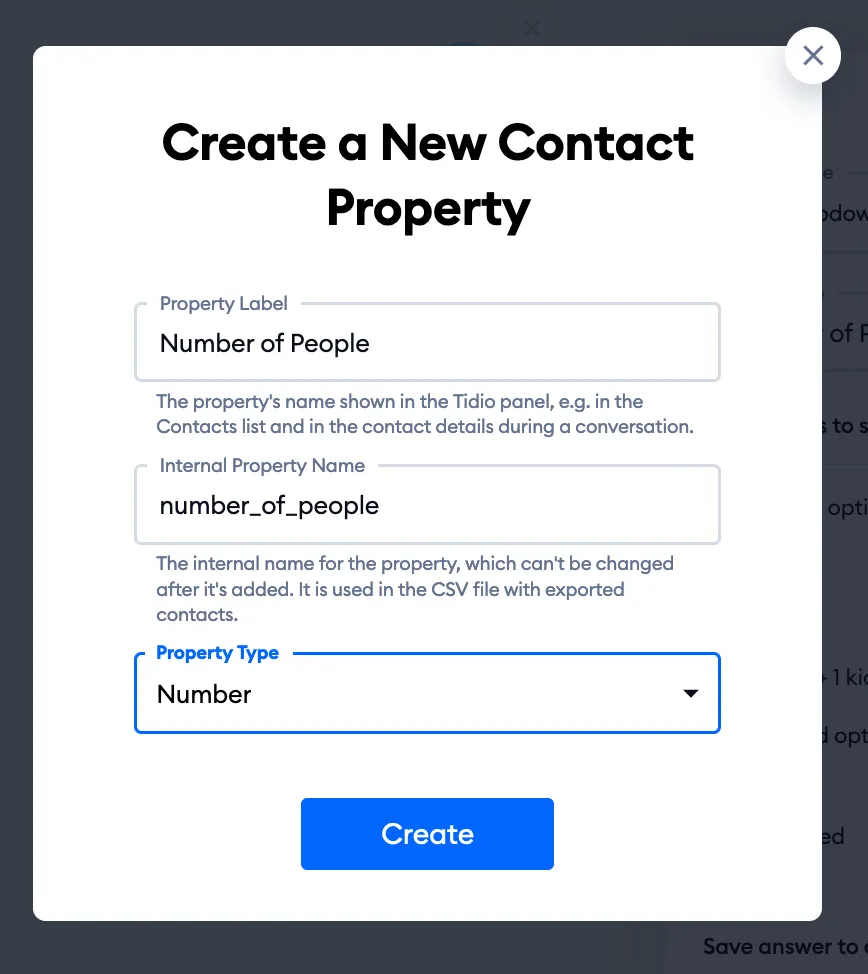
Under Save answer to a contact property, you can save the collected data as a Contact Property. The Contact Properties assigned to the contacts are stored in the Contacts section. You can also use this data later on for Condition and Action nodes to make your flows even more personalized.
Naturally, the answer type has to fit the contact property you pick. If it doesn't, Tidio changes the Answer type for you and lets you know with a short note in the window.
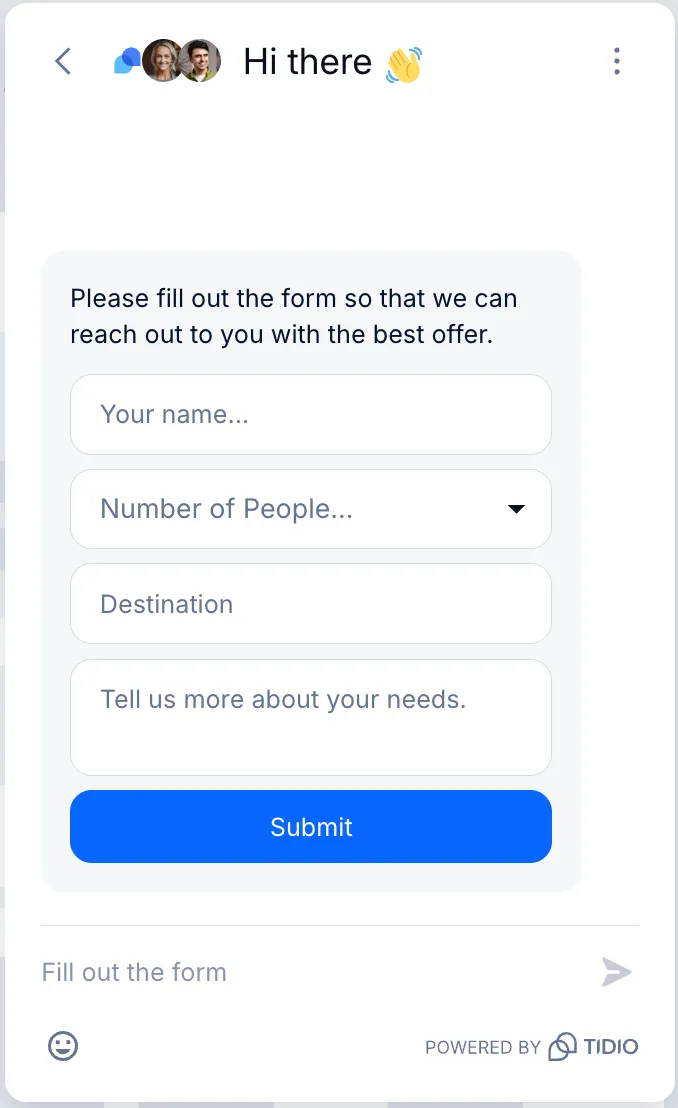
Once the form is created and the flow activated, it will be displayed on your website visitors' side as a built-in form inside the widget.
Receiving files
You may have noticed that one of the available answer types listed above is File. Adding this field to your form will allow the visitor to upload a file from their device, so that you can receive it along with any other submitted data.
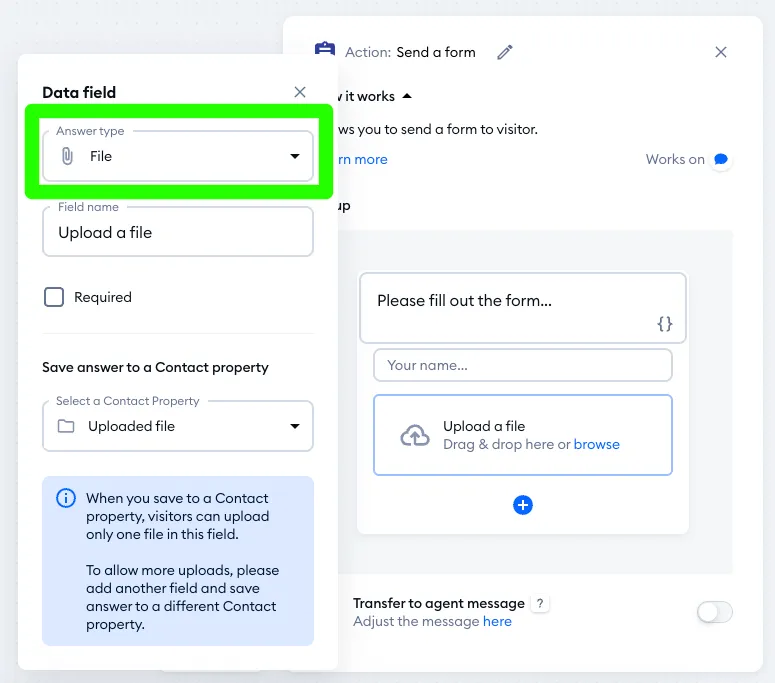
You can provide your own text as the field name and, of course, you can decide whether file submission is required (mandatory) or optional. The visitor can drag and drop a file directly from their computer, or browse their device for a file. Once the form is submitted, chat agents can access the files via links inside the chat conversation.
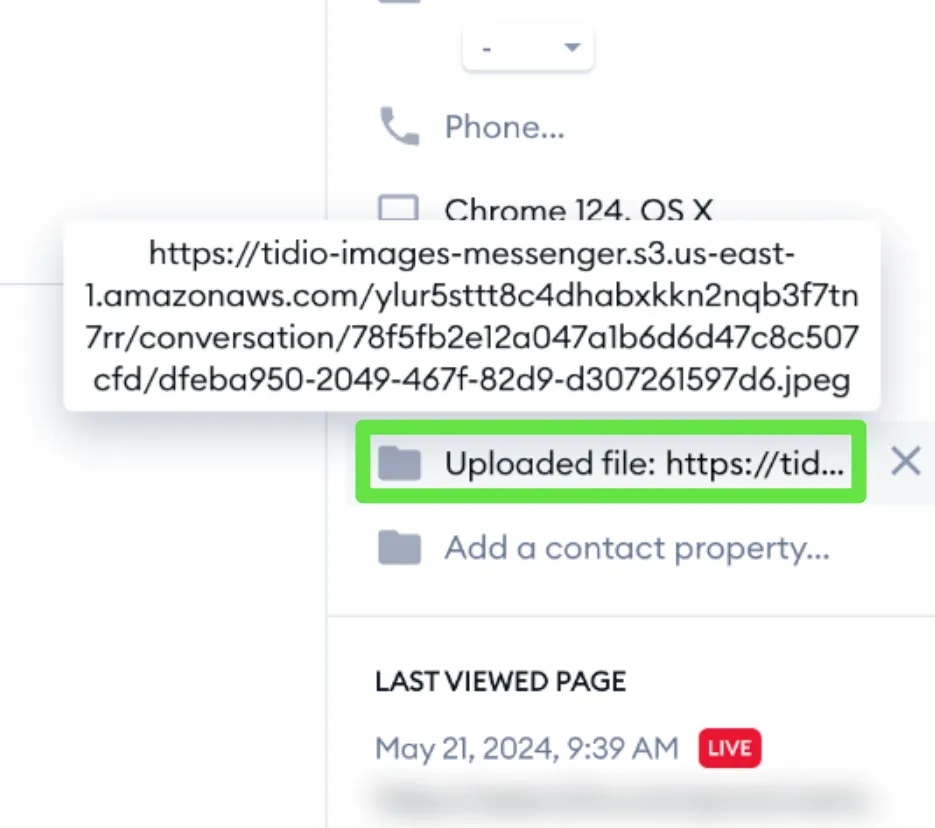
You can also save the file's URL as a Contact Property, making it easily visible to your team in the visitor's info tab or the contacts list later on. This way, your agents can quickly access and share important files.
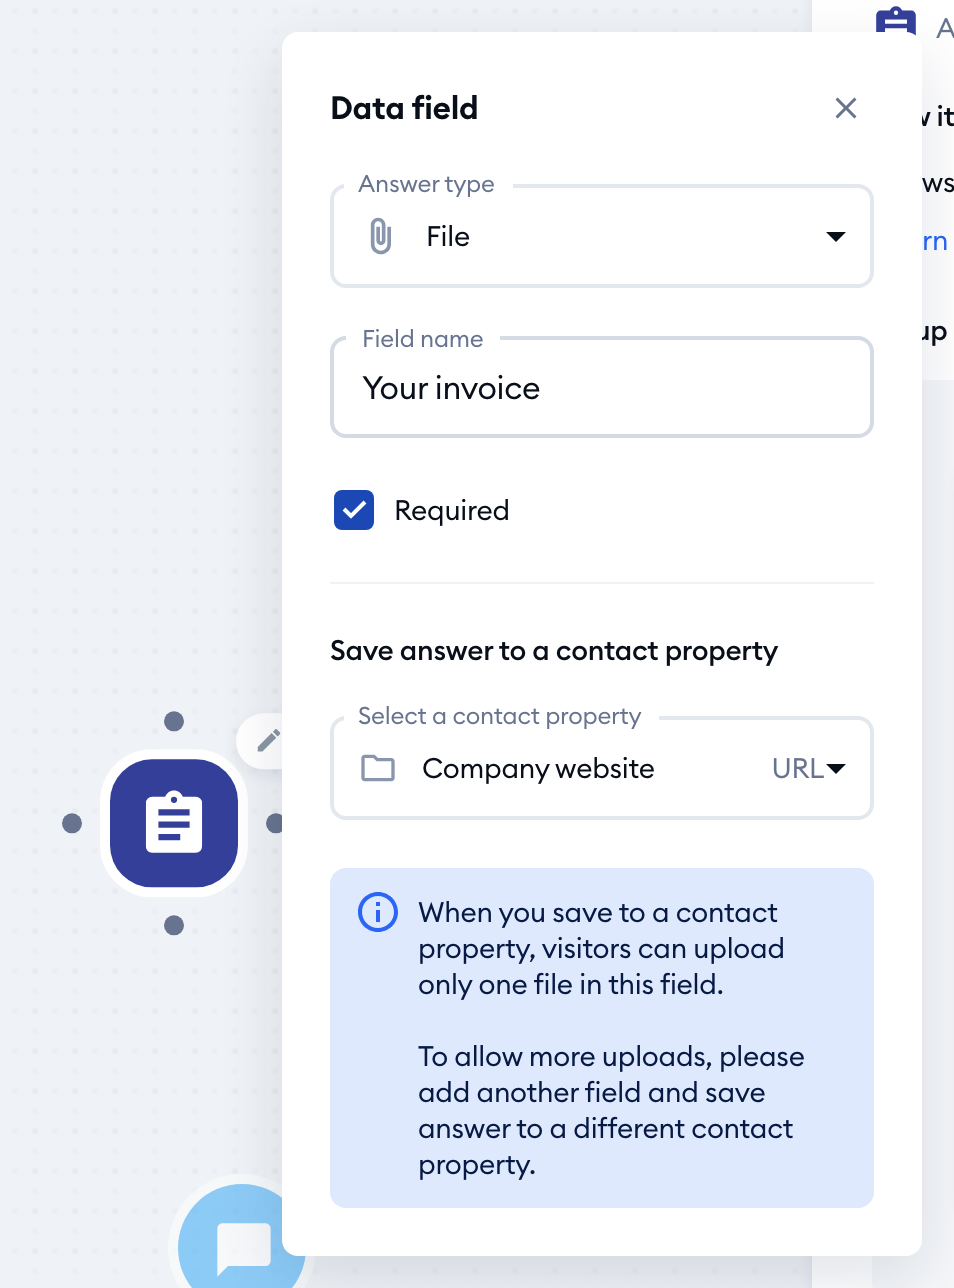
Please note: when you save the answer to a contact property, visitors can upload only one file in that field. To allow more uploads, add another File field and save its answer to a different contact property.
Otherwise, up to 10 files can be uploaded this way. Other limitations are the same as with uploading files live on chat: 10MB per file maximum, with filetype limitations applicable as well.
Deleting fields
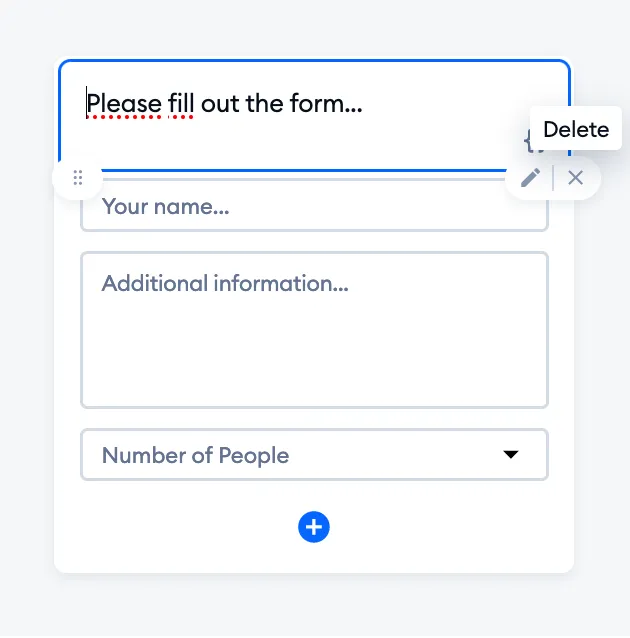
You can delete each created field by clicking on the Delete icon (an x) next to each field. The Move, Edit and Delete icons will be shown when you hover the mouse over a chosen field. A form always needs at least one field, so you can't delete the last one.
Rearranging fields
To move a field, hover the mouse over the chosen field. You'll see a Move button that, when pressed, allows you to move the field and change the order of fields.