Lyro Actions is a powerful tool that allow Lyro to connect with external systems and communicate back and forth with them. Making use of API, this lets you send data as well as retrieve it, and use the information during Lyro interactions, or for your Tidio database overall.
Please note: a small number of Tidio projects will see a distinction between Simple Actions and Smart Actions in this section. This is an older, legacy version of the tool, even though the overall functionality is the same. This article deals with the latest version, with no distinction between two different types of Actions. If your Tidio project uses the legacy version, a separate article on Simple Actions can be found here.
In this article, you will learn:
- What the benefits of Actions are
- How to navigate the Actions section
- How to create an Action from scratch (an example)
- How to use the Shopify steps (order details and shipping address)
- How to export and import an existing Action
- What the limits of Actions are
- How to use Action logs
The benefits of Actions
The Actions tool is a way for Lyro to communicate with external services, letting the AI agent resolve cases that need 3rd-party data. This is not possible otherwise, as Lyro normally depends on the knowledge you upload into it. With Actions, however, Lyro can retrieve (and send) information dynamically and use that information during conversations.
That means Actions allow Lyro to check order statuses and shipment details, manage address changes, update databases, and handle many other scenarios that depend on external data. Running a Shopify store? Lyro can look up orders and change shipping addresses with ready-made Shopify steps, too.
Retrieving and modifying information in external systems is possible through their available APIs. The extent of what is possible (and methods of achieving it) depends on what the external system's API allows and how that can work with the Actions tool.
In general, Lyro will understand whenever a customer of yours requires external information (e.g. for checking their order status), and if such a need arises - an API call (or sequence of API calls) will be triggered, according to your Actions setup. The collected information then becomes available for Lyro to use and share. Naturally, this can be tested inside the Actions editor before deploying on your live website.
Navigating the Actions section
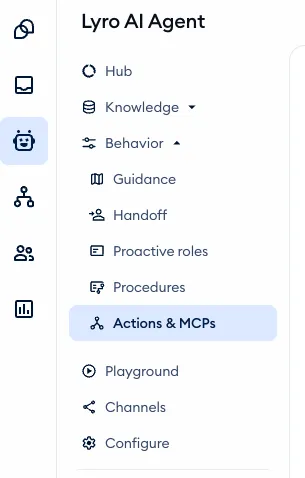
You can access the Actions tool inside the Behavior > Actions & MCPs tab of your Tidio project's Lyro AI Agent section:
Inside the Actions tab there, you will find a list of any Actions that you may have already added, as well as the option to browse and use the available templates. Of course, you also get the option to create entirely new Actions from scratch, and the option to test your Actions before they're activated.
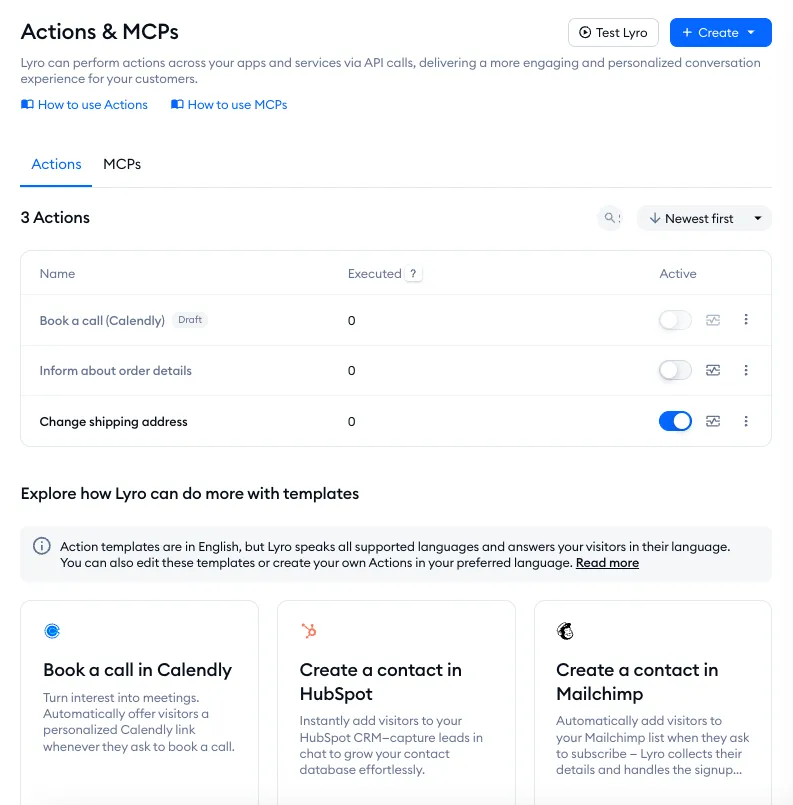
Your Actions
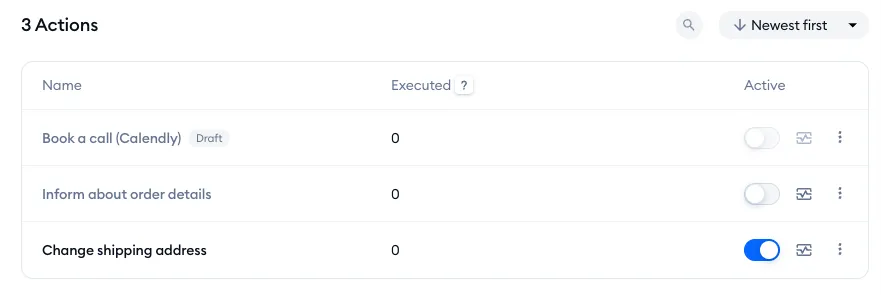
In the Actions tab, you can see a list of all the Actions that you've added so far. Naturally, any custom Actions you've created from scratch will be listed alongside templates that you may have added, and drafts will be marked as well. The list also features a column that shows the number of executions for each action (in the last 30 days):
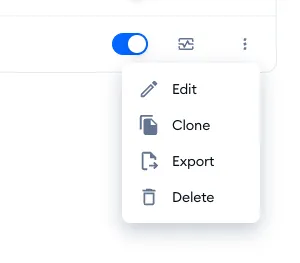
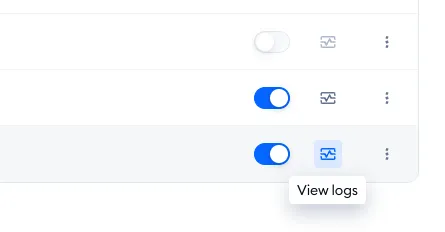
These Actions can be disabled or enabled manually, as well as edited or deleted. Actions can also be cloned and exported. (A clone can't be active at the same time as the original until you give it its own name and instructions.) In addition to that, you can also view the logs of any action. These options are available on the right of every particular Action:
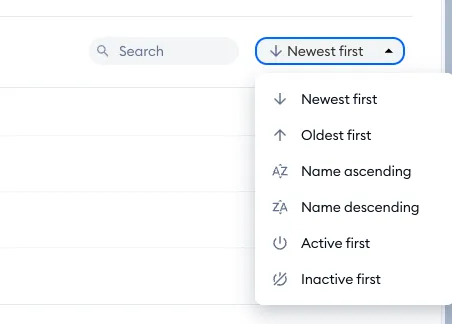
In the Actions list, you can also use the Search tool to quickly find an Action you're looking for, as well as well as sort the listed Actions by different filters:
Templates
At the bottom of the Actions tab, you will find a list of templates, available to modify and use - as well as the option to request a template that you feel is missing:
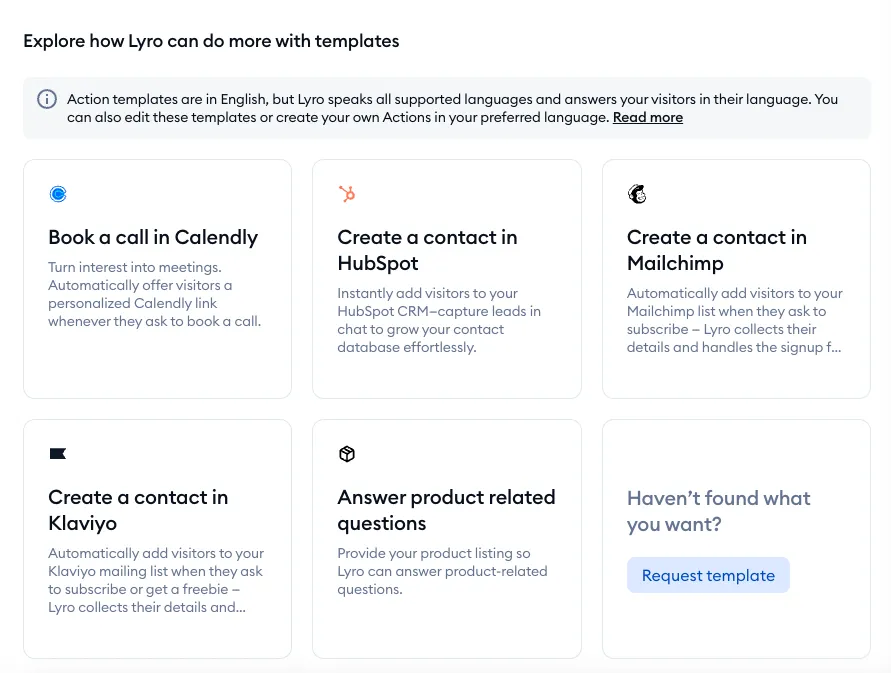
Notice that all the templates are in English; no need to worry if you're going to use Lyro with other languages, however! Lyro will translate internally and use any of its supported languages to communicate with your customers. To learn more about Lyro's multilangauge capabilities, please see this dedicated guide.
To learn more about the available templates and how to use them, please see this detailed guide.
Creating an Action from scratch (an example)
To go over the overall process of creating a custom Action, let's use a common and practical example: checking a customer's order status. We'll create this Action from start to finish, allowing Lyro to retrieve test data from an existing test store.
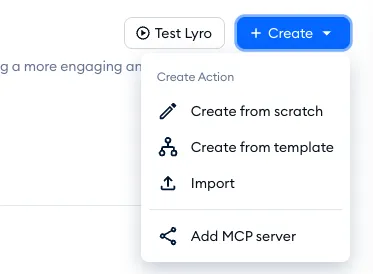
In the Behavior > Actions & MCPs section, use the Create button in the upper-right corner, and select Create from scratch:
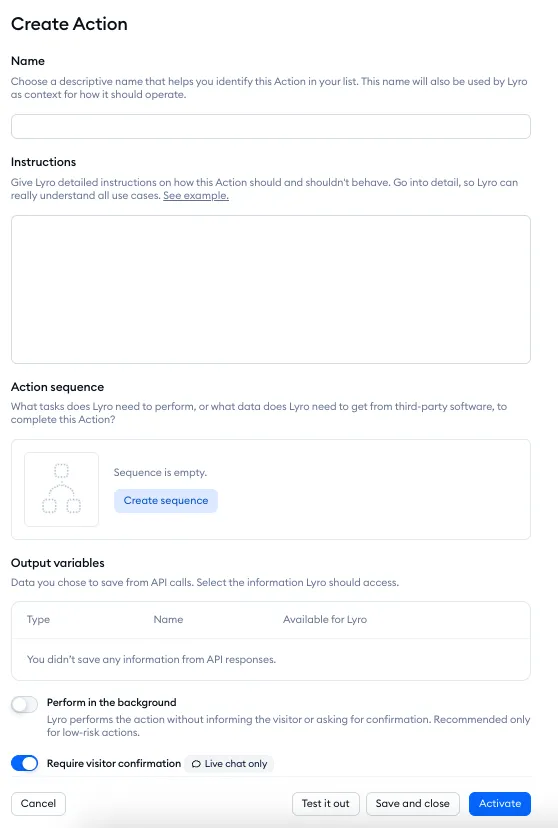
This will open the Action creator, with several sections to complete and options to choose:
- Name
- Instructions
- Action sequence
- Output variables
- Perform in the background
- Require visitor confirmation
In the paragraphs that follow, we'll go over each step of the Action creation process:
- The goal
- The name and instructions
- Input variables
- The Action sequence
- The output variables
- Background performance and visitor confirmation
Establishing the goal
Let’s start by outlining our goal with this Action, and see how it translates to specific fields in the Action creator later on.
We want Lyro to inform customers about the details of their orders, and we need Lyro to ask for their order ID to provide them with information. The store's order ID format is N-XXXX (where the Xs are numbers), and every customer can find it in their order confirmation email.
The specific details I want customers to receive are:
- the delivery status
- the update date (the date of the last status change)
- the total price
- the shipping address
I already have a specific endpoint (from my test store) that can return order details in response to a correct order ID. I have a pre-prepared example order in that store with the order ID of N-1231, and we'll use that in our example Action setup below.
Name and instructions
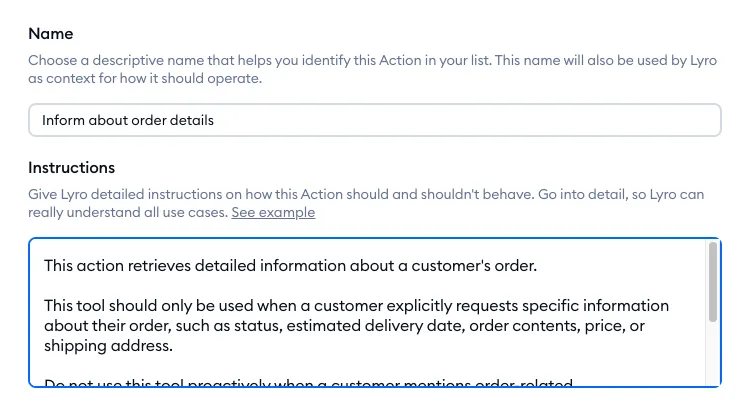
Give the Action a suitable name, e.g. Inform about order details. This is only used for your convenience, and does not affect the Action in practice.
To maximize the Action's performance, do provide a very detailed set of instructions. Lyro will use this to understand the context and goal of the Action, so it's crucial to go into as much detail as necessary and remain clear.
Explain exactly what the Action does, when it should or shouldn’t be used, and how each variable works. Be sure to highlight any limitations as well, to establish expectations. The more context you provide to Lyro, the better it will be at handling the Action. While including examples can be helpful, thorough descriptions should always come first to ensure precision.
Please note: Action instructions can be up to 10,000 characters in length.
Here's the set of instructions used in this example Action:
-
This action retrieves detailed information about a customer's order.
This tool should only be used when a customer explicitly requests specific information about their order, such as status, estimated delivery date, order contents, price, or shipping address.
Do not use this tool proactively when a customer mentions order-related troubleshooting issues (e.g. changing their shipping address, canceling orders, reporting damaged items). For troubleshooting scenarios, answer based on Data Sources. This tool is strictly informational and cannot make changes to orders - it simply returns the current details associated with the provided order number.
Action sequence
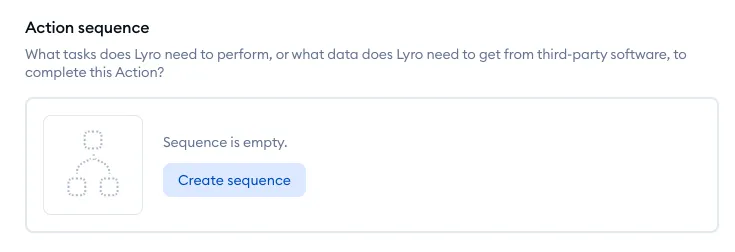
Now that we've established the Action's detailed description, it's time to create the Action sequence - this is the exact set of instructions that Lyro is going to follow once the Action is executed. In this case, we'll need Lyro to perform an API call (HTTP request), where it uses the customer's order ID to retrieve details about their order from the store.
Hit the Create sequence button to start configuring the sequence:
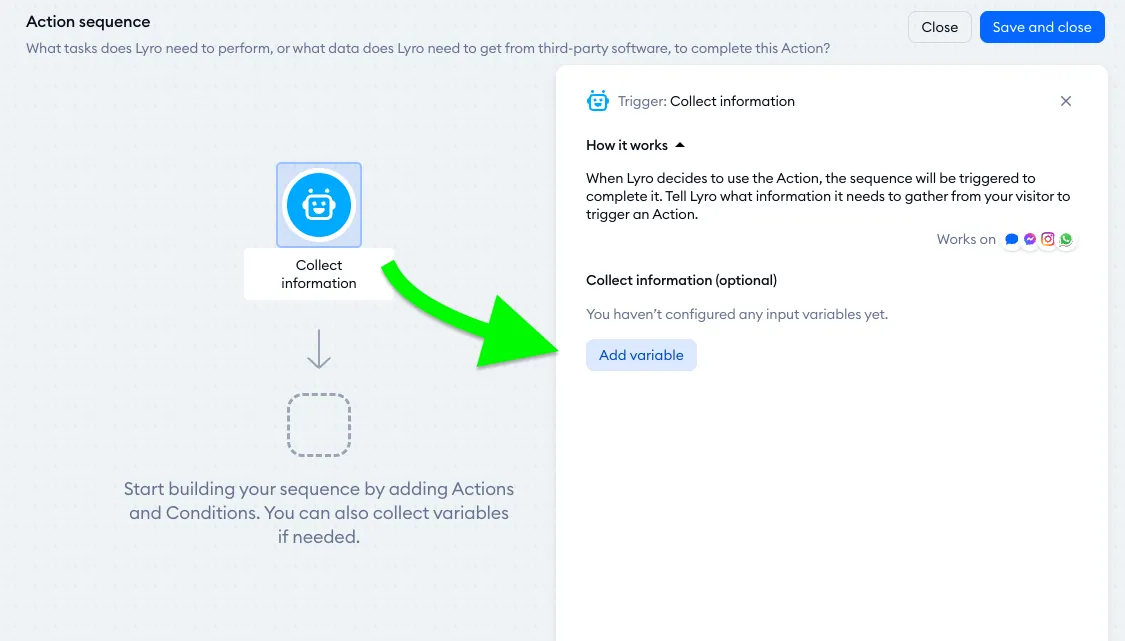
The sequence editor is very similar to the regular flow editor in Tidio, except it only has a limited number of action and condition nodes. The sequence always starts with one specific trigger, and it allows some optional configuration: adding input variables. Using this option is necessary if the sequence requires specific information from the visitor in order to execute properly - which is true for our current example (retrieving order details).
Input variables
Input variables are pieces of data that Lyro needs to collect in order for the Action to work. In this case, we need to collect the customer's order ID.
Click on the initial trigger of the sequence, and then hit the Add variable button to create the necessary variable:
In the window that pops up, we need to select the correct type for this variable, give the variable an appropriate name, and provide a detailed description so that Lyro understands it well:
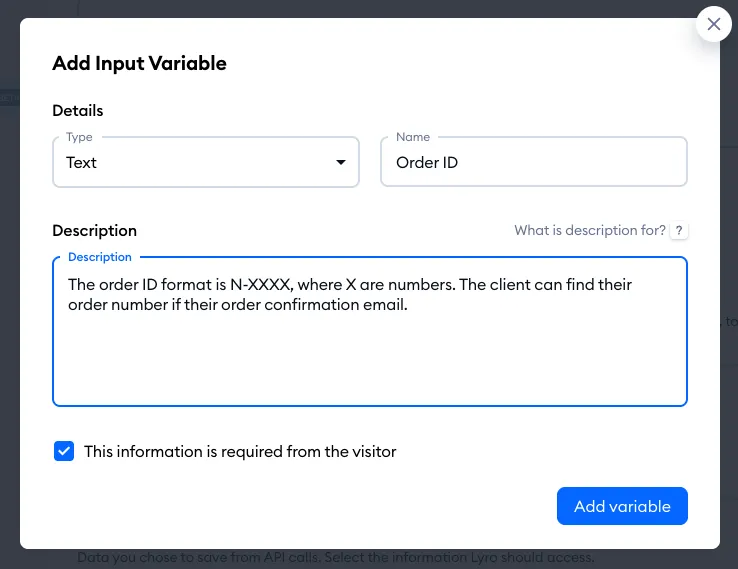
Type
- Text
Name
- Order ID
Description
- The order ID format is N-XXXX, where X are numbers. The client can find their order number if their order confirmation email.
Please note: input variable descriptions can be up to 2,500 characters in length.
Make sure you tick the box labelled This information is required from the visitor at the bottom. This will make sure that the visitor provides the data before the Action is performed.
Once you confirm by clicking on the Add variable button in the bottom-right, your new input variable will be saved inside the sequence's trigger (and available to modify or delete as well):
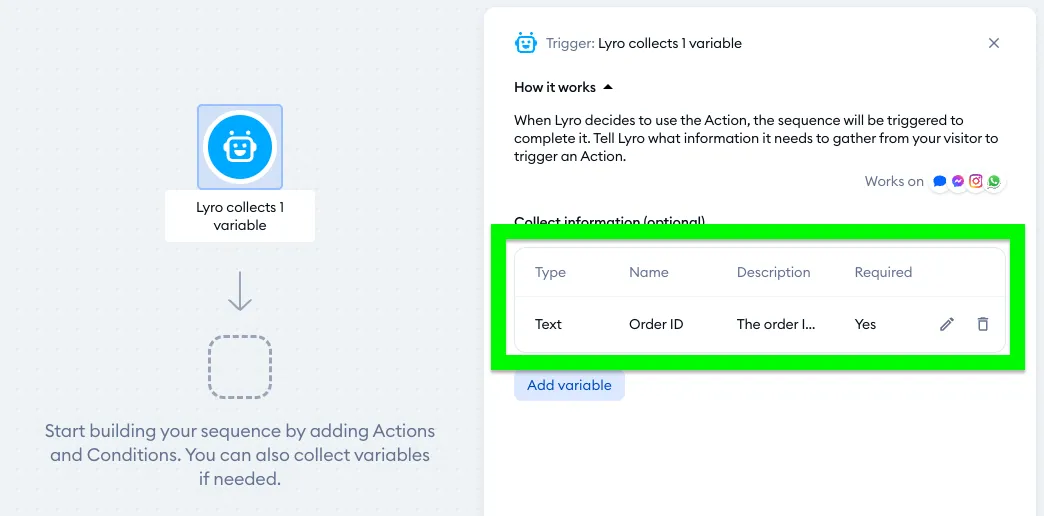
Now that the trigger is set up with the appropriate input variable, it's time to move on to the next step in the sequence.
Configuring the sequence further
As the second step in this example sequence, we need to use the API call node:
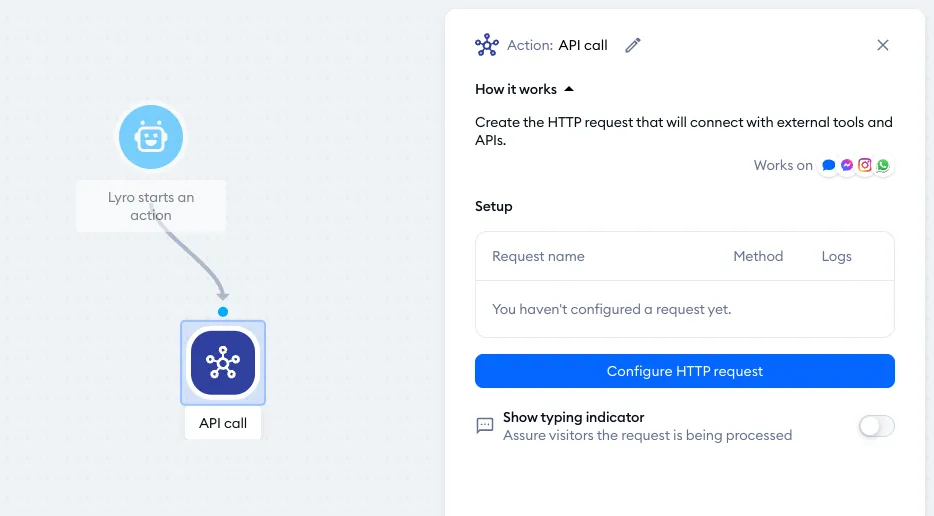
Once your add the API call node into the editor and connect it with the Collect information trigger (once it has input variables, it shows how many - e.g. Lyro collects 1 variable), hit the Configure HTTP request button (available inside the API call node itself).
Inside, we need to give the request an appropriate name (e.g. Get order status). There are also authentication methods available to configure of needed, as well as headers, but we're not using any of that in this example.
Most importantly, we need to set the HTTP method (GET in this case) and paste the correct URL endpoint for the API call to retrieve data from.
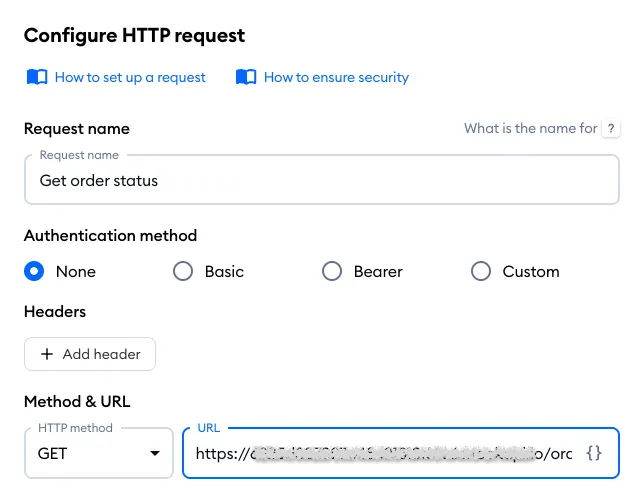
Request name
- Get order status
Method & URL
-
GET + your store's correct endpoint for retrieving order information
Once you've pasted the URL into the field, make sure there is a slash ("/") at the end. Next, click on the brackets button to insert the correct input variable at the end of this URL:
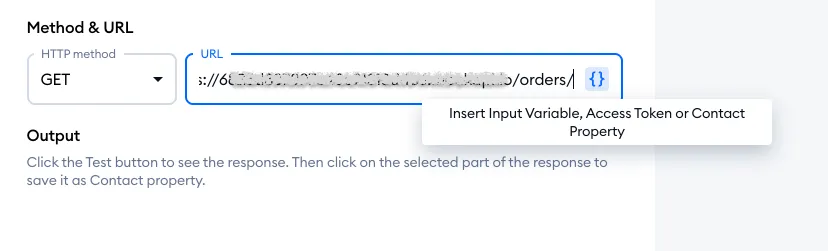
Select the Order ID variable created earlier:
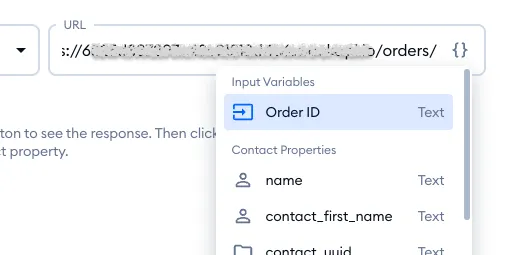
You will see the variable added to the end of the URL, and you will see it listed below as well. You will be able to provide a test value for this variable - in our example, that's the order ID of N-1231:
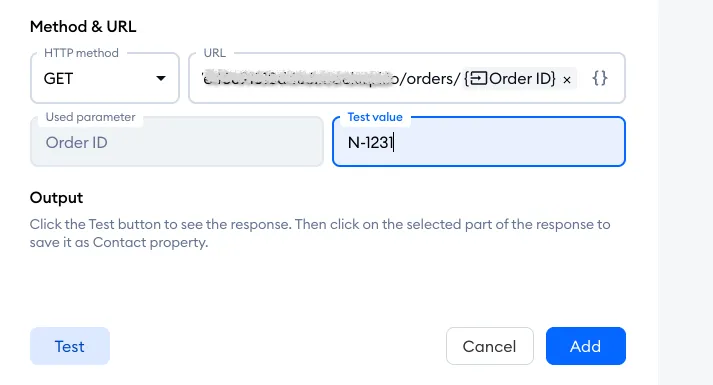
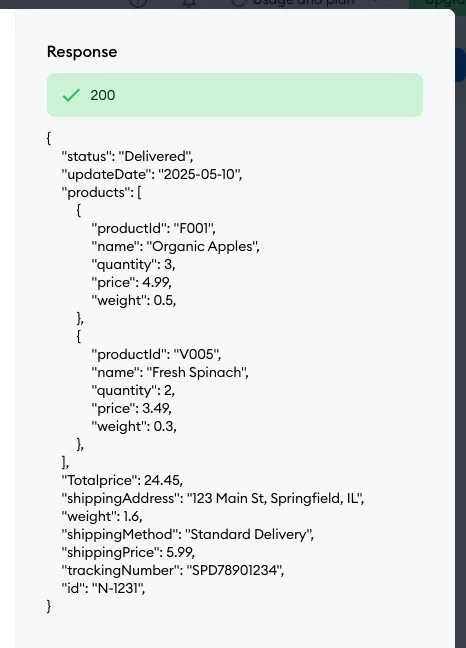
Having done all the above, it is now possible to test this API call and see what data is retrieved from the store. This data can then be saved as output variables that Lyro will be able to use during the conversation.
Hit the Test request button in the bottom-left, and you will see the response on the right:
Output
Now that the Action sequence itself is set up and working well, it's time to extract the output variables from the response; this is the raw information that Lyro has requested from the store, and which will become available to use during conversations with the customer. This will be the last step of configuring the Action sequence overall.
To pick the output variables you want to save, just click on the information you need in response on the right-hand side. You will see a tooltip that says Save this as a contact property or session variable:
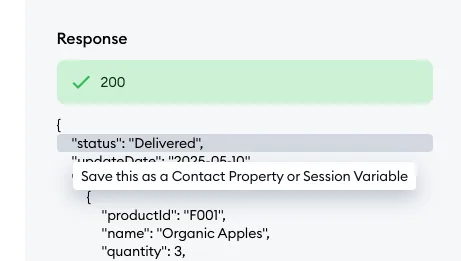
In this example, I've clicked the piece of data labelled status - this resulted in the variable being added in the Output section (along with its test value, which is Delivered in this example). Now, this data can be saved as usable information.
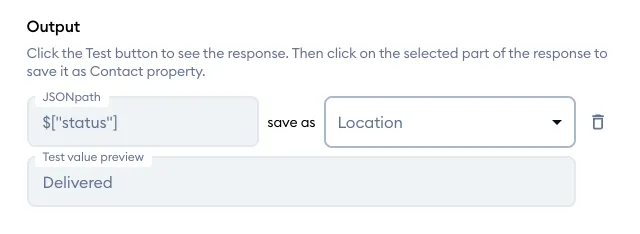
We want to save it as a Session Variable (as opposed to a Contact Property), so that the data is only available for the particular conversation when the customer requests it.
Open the Location menu and hit the Add new button to create a Session Variable:
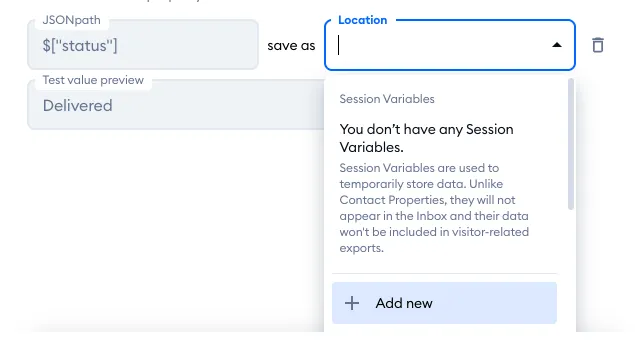
In the window that pops up, give your new Session Variable a name (Delivery status in this example) and select the appropriate type for this kind of data (text in this case). Hit the Create button when you're done:
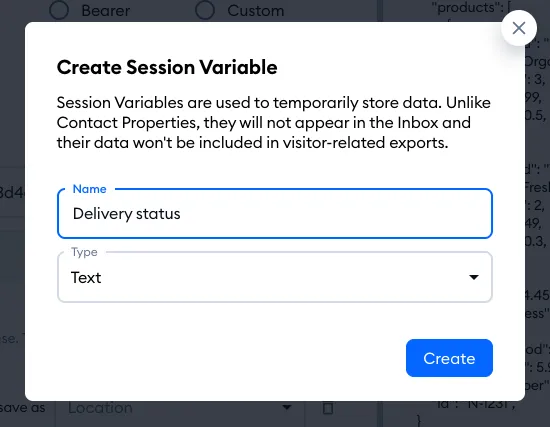
In most cases (if you just want to provide Lyro with the retrieved value), the text type is usually fine. However, if you plan to transform the variable in some way (e.g. convert a date into the number of days that have passed, or perform some basic calculation), you should select the correct type (e.g. date or number).
You should repeat this output variable creation process for every piece of information needed. In this example, I've chosen and saved the following variables (as they are mentioned in the Action's instructions earlier):
-
- status
- update date
- total price
- shipping address
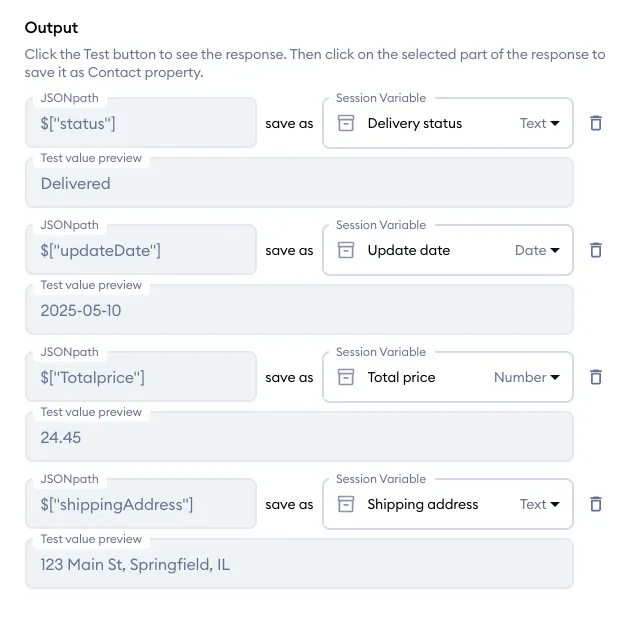
To save this API call setup, hit the Add request button at the bottom. Once that is done, exit the Action sequence creator by hitting the Save and close button in the top-right:
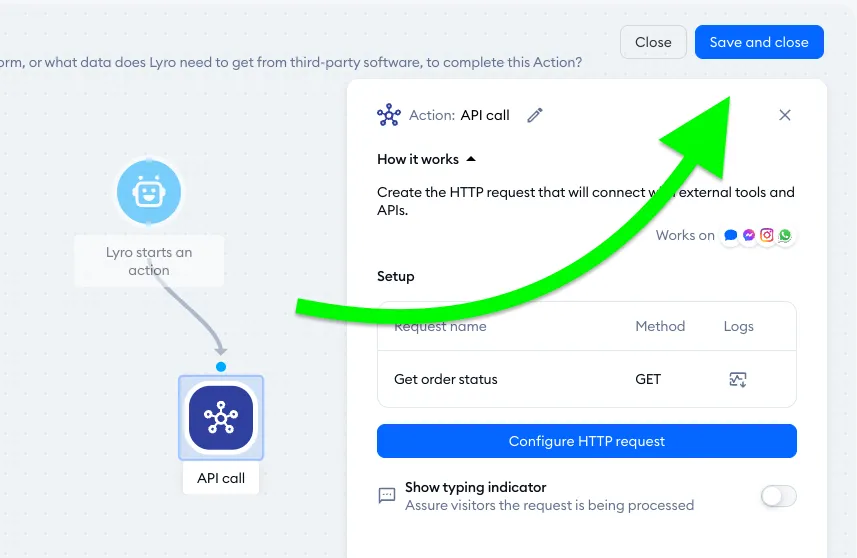
Your Action sequence is now finished and available to view and modify, if needed:
Output variables
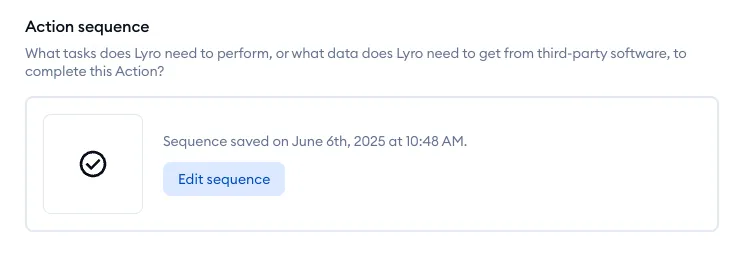
Back in the general Action setup screen, the Output variables section lists all of the Session Variables that our Action sequence is retrieving (and saving) from the store's response.
Here you can decide if the given variable is available for Lyro to use or not, as you may not want Lyro to provide certain information to a customer while chatting:
Background performance and visitor confirmation
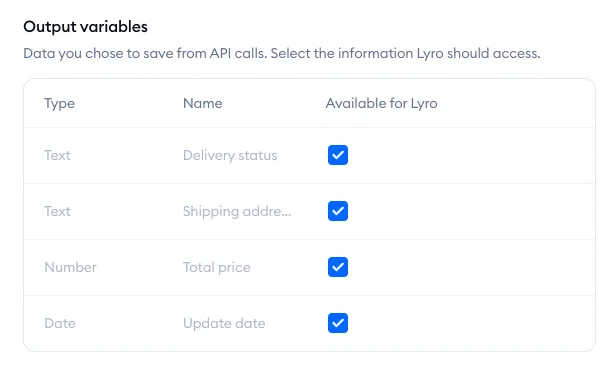
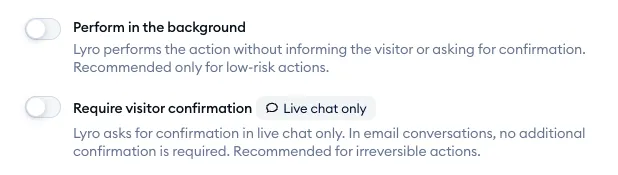
Below the Output variables section, you can see two options that you can switch on or off:
- Perform in the background
- Require visitor confirmation
In this case, we do not need either of them enabled.
Perform in the background is useful for actions that are simple and low-risk, and if you do not want them to be visible in any way to the visitor. Require visitor confirmation is not necessary here, either, as this order status request is a simple request for information, and cannot really cause any damage (e.g. change the shipping address or cancel the order).
Please note that Require visitor confirmation works in live chat only - in email conversations, Lyro doesn't ask for confirmation. It also can't be combined with Perform in the background: switch that off first.
Testing
Now that everything's ready, it's time to test the Action. Click the Test it out button in the bottom-right, and a new panel will appear with the Tidio widget. In there, you can chat with Lyro and ask for the information you're looking for - in this case, the status of your order.
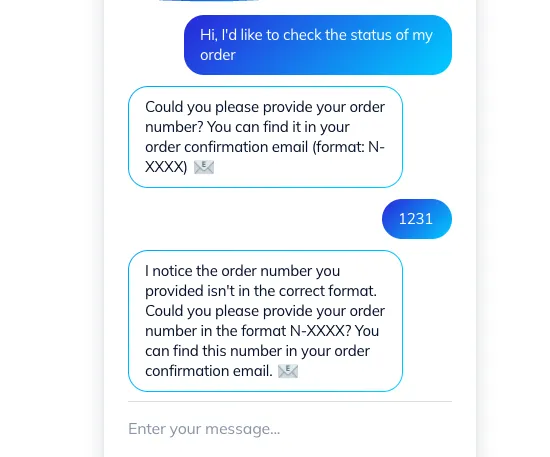
Note that Lyro, thanks to the detailed Action instructions, will be able to assist the customer if they format their order ID incorrectly, as in the example below:
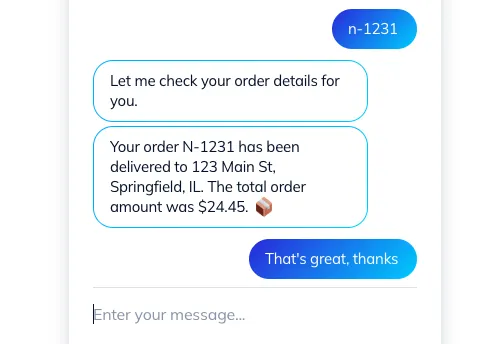
Once you provide the correct order ID (which we've already tested in the API call earlier), Lyro will be able to fetch the available information:
To save your new Action, hit the Save and close button in the bottom-right (or Activate, to save it and switch it on right away). You will see it listed in the Actions tab from now on, and you can freely activate, deactivate, modify, clone, or delete it:
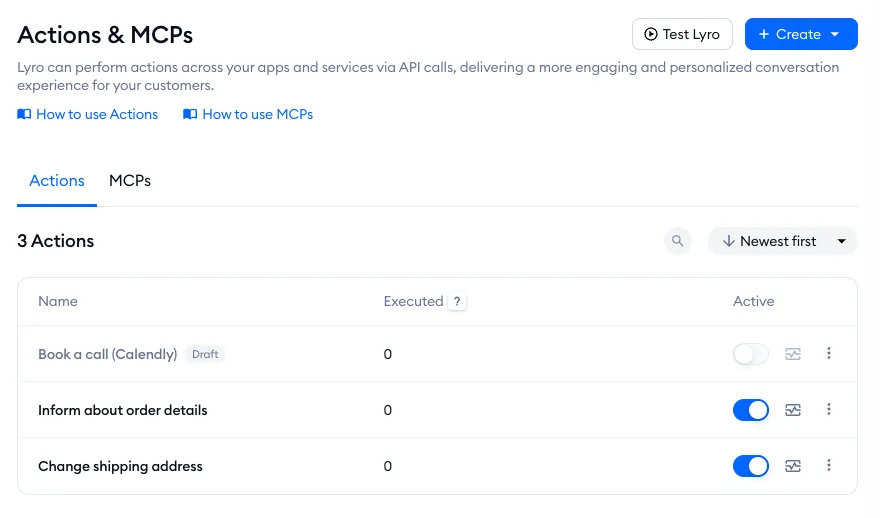
Make sure to activate your Action if it's ready and you are satisfied.
In addition to this testing playground, please note that your Actions also include detailed, time-stamped logs, which you can browse and analyze. Learn more about using these logs later in this guide. For more ways to test Lyro before it talks to your customers, see Test Lyro before it goes live.
Shopify steps: order details and shipping address
Running your store on Shopify? You don't need your own API endpoint to let Lyro help with orders. The Action sequence editor has two ready-made Shopify steps that work with your store directly:
- Get order details - Lyro looks up the customer's order and tells them about it, for example its status.
- Update shipping address - Lyro changes the order's shipping address in Shopify, in real time.
You'll find both in the Shopify group of steps in the sequence editor, below the API call step:
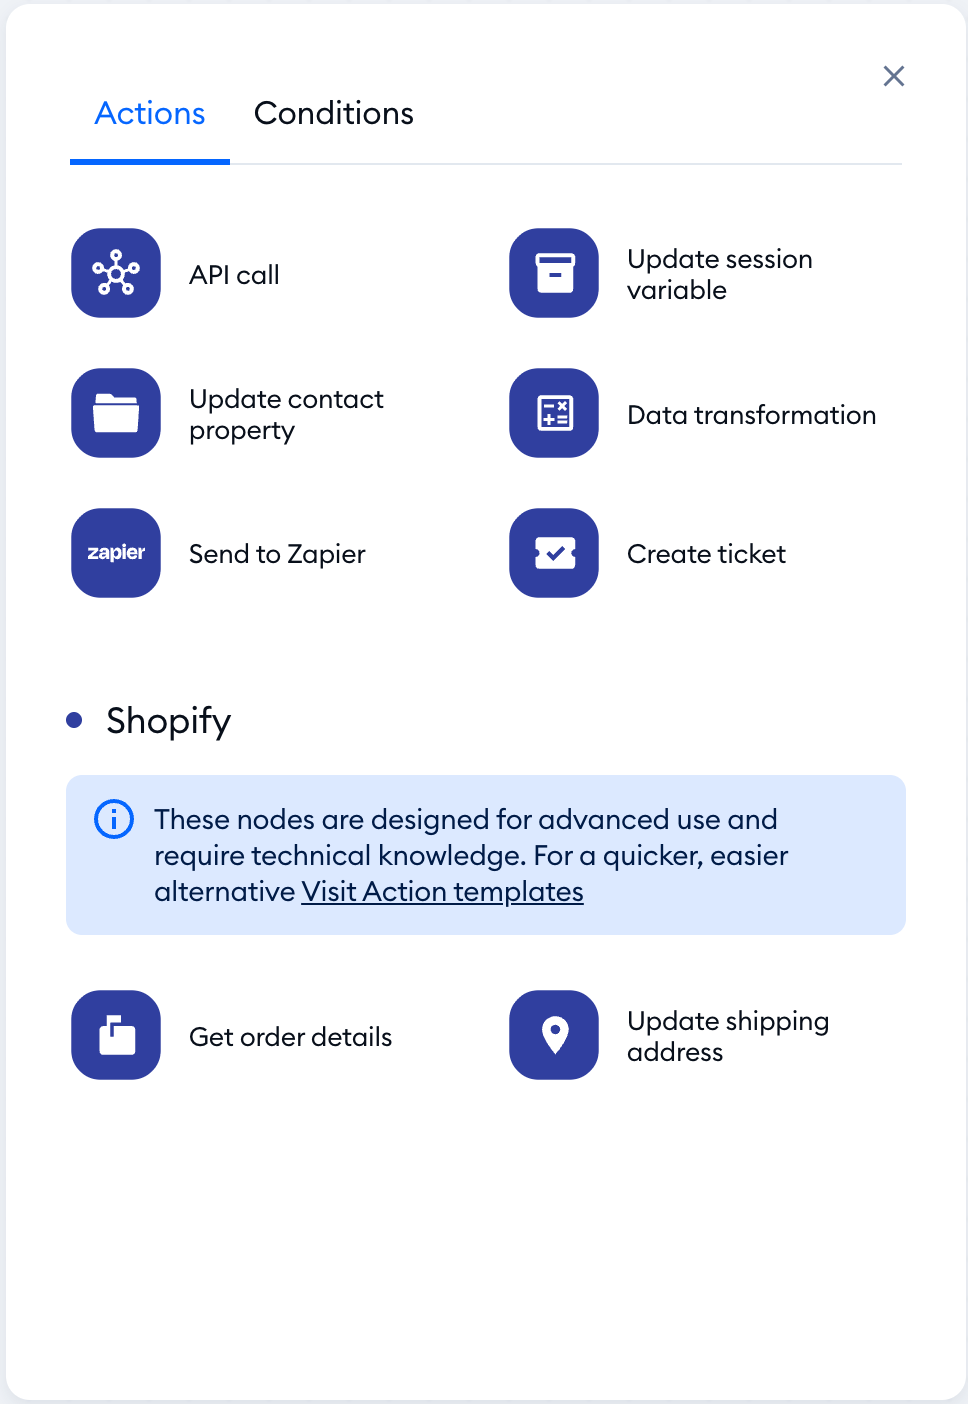
Please note: these steps need your Shopify store connected to Tidio. If it isn't, the step shows Shopify integration and the Integrate with Shopify button - it only takes a couple of minutes. Looking for a quicker start? The Shopify order status template sets up an order lookup for you - click on Visit Action templates, or see Lyro Action templates.
Get order details
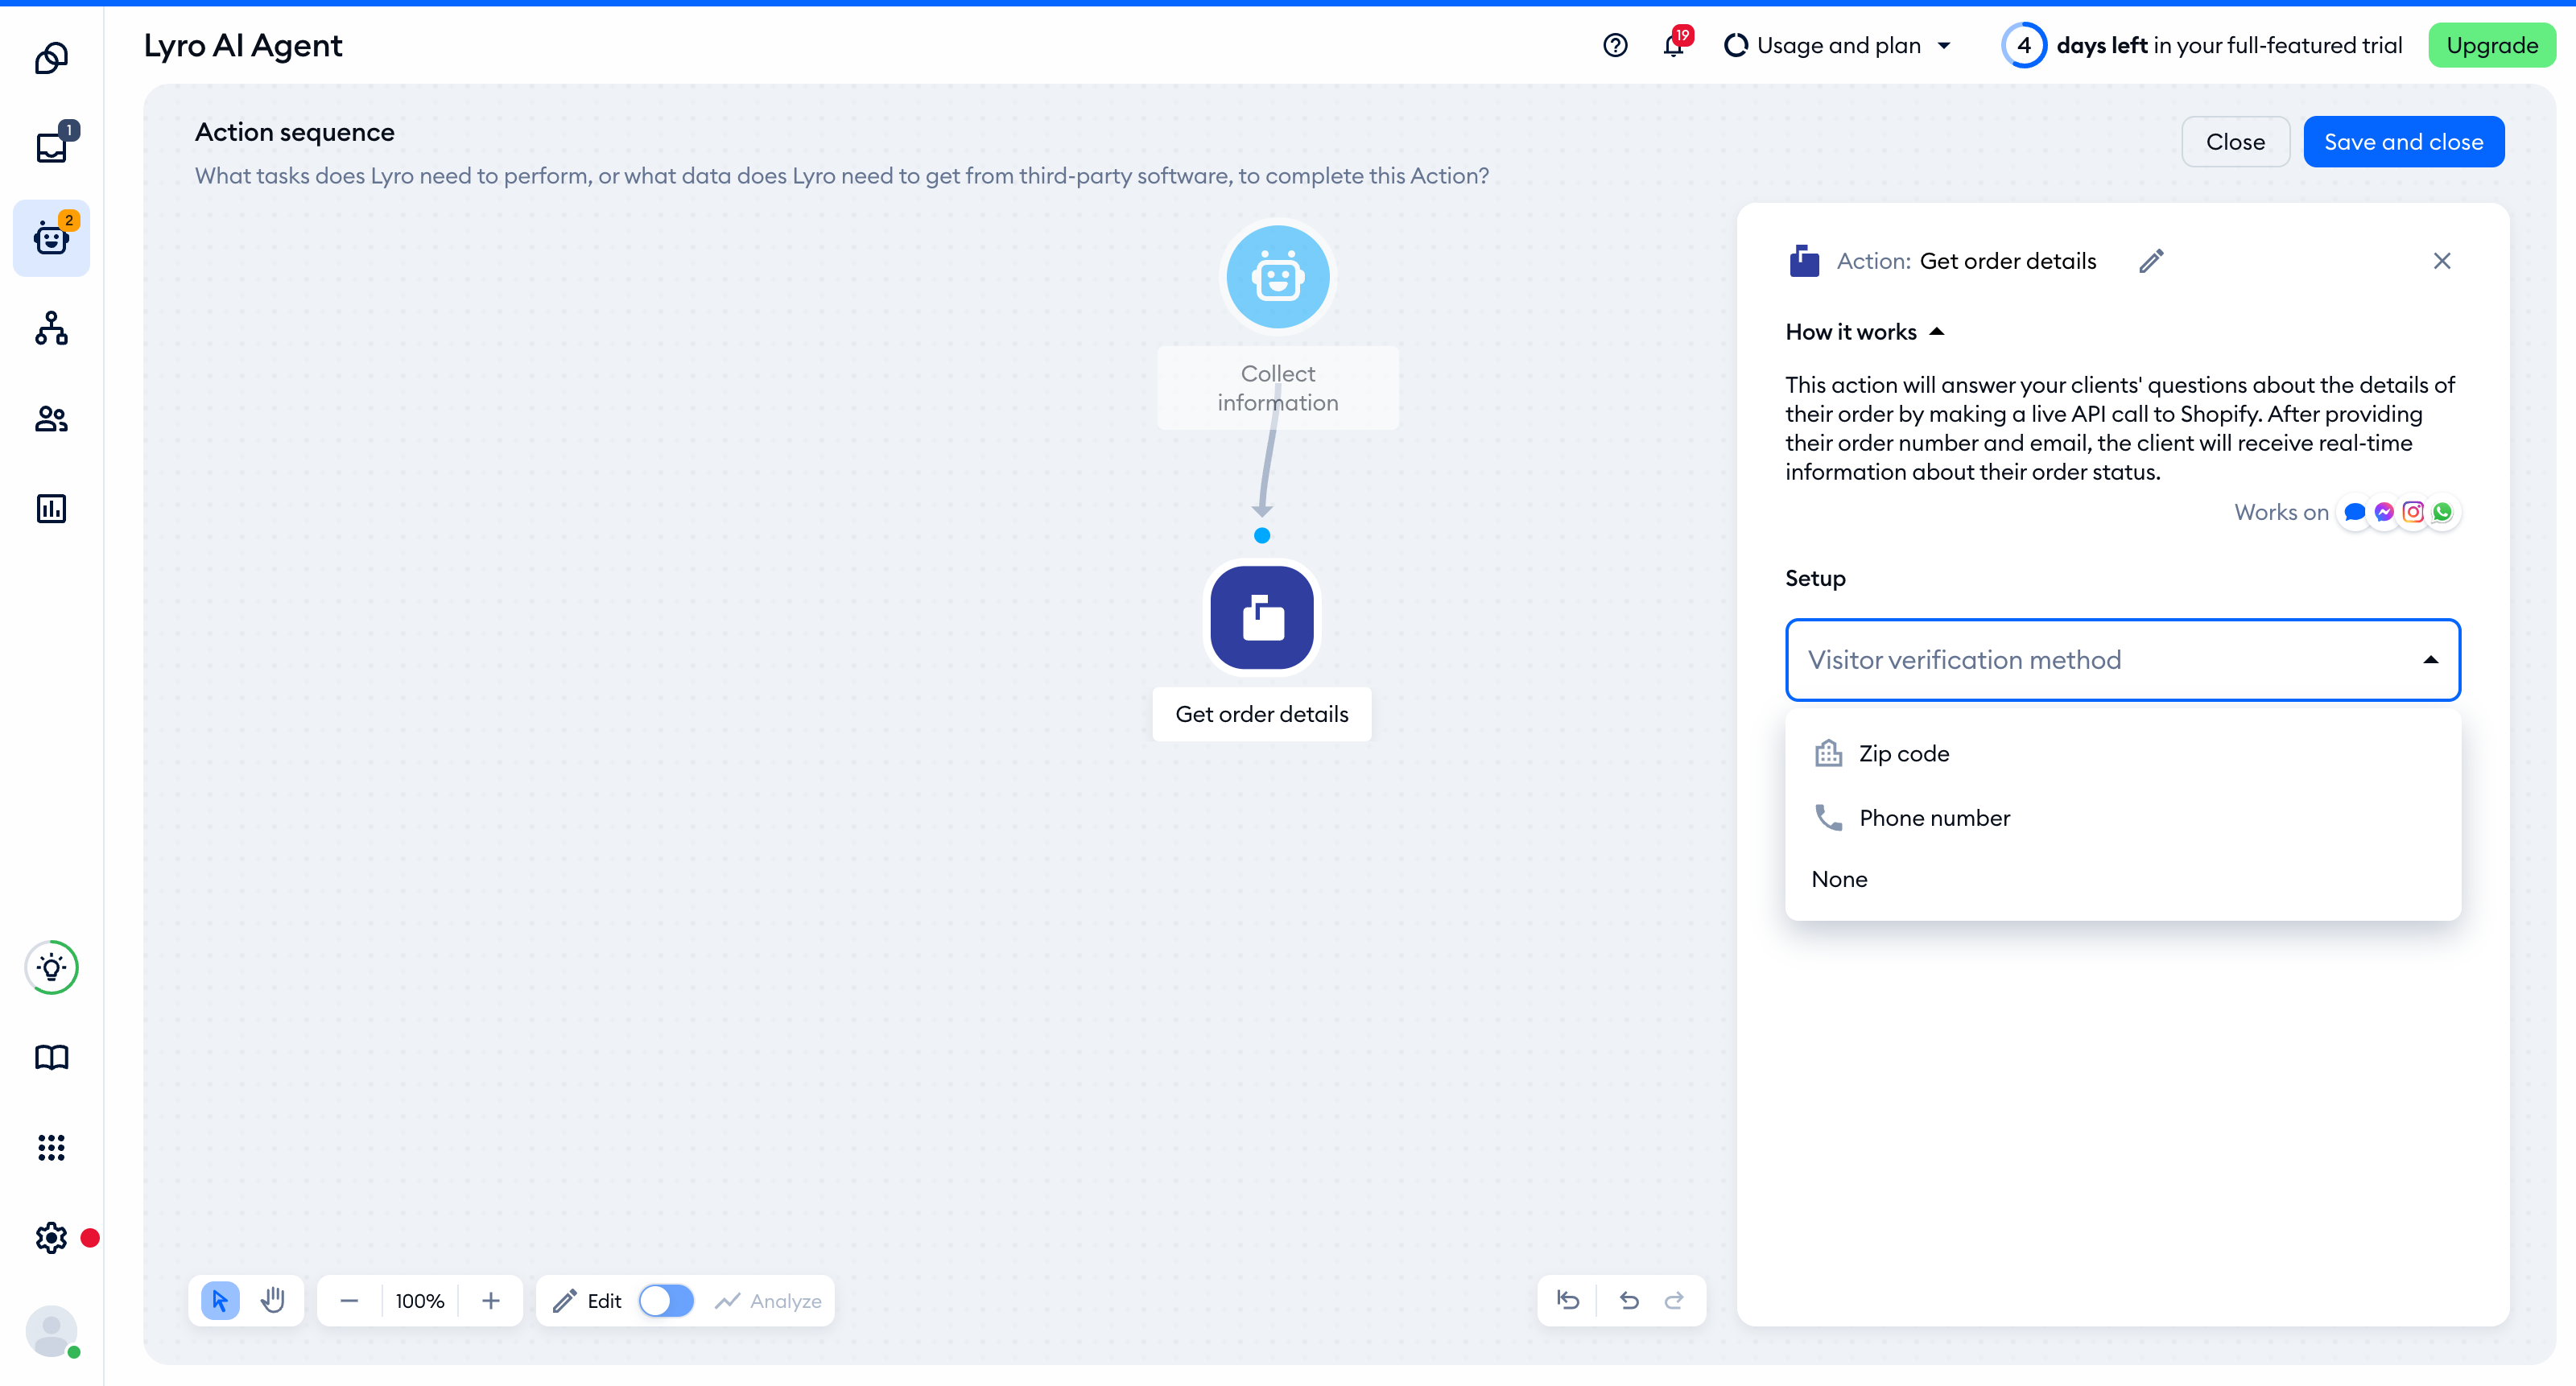
Add the Get order details step right after the Collect information trigger. Lyro will ask the customer for their Order ID and Customer email - these input variables are added to the trigger for you, and they can't be edited or removed while the step is in the sequence (hover over them to see Required by Shopify node).
Then choose the Visitor verification method. It confirms that the person chatting really placed the order:
- Zip code - Lyro also asks for the shipping zip code of the order
- Phone number - Lyro also asks for the phone number of the order
- None - the order ID and the email are enough
The order's details are saved in the Order data output variable, so Lyro can use them to answer the customer. As always, describe in the Action's Instructions when Lyro should look up an order and what it should tell the customer.
Update shipping address
The Update shipping address step lets Lyro change the address of an order for your customer. Lyro collects the Order ID, the Customer email and the new address: New address line, New province, New zip code and New city. Just like with order details, pick a Visitor verification method as well.
Please note: Lyro updates only address line 1, the province, the zip code and the city - and only within the same country as the original order. If an order needs to go to a different country, your agents can change its address in the Inbox - see Manage Shopify orders.
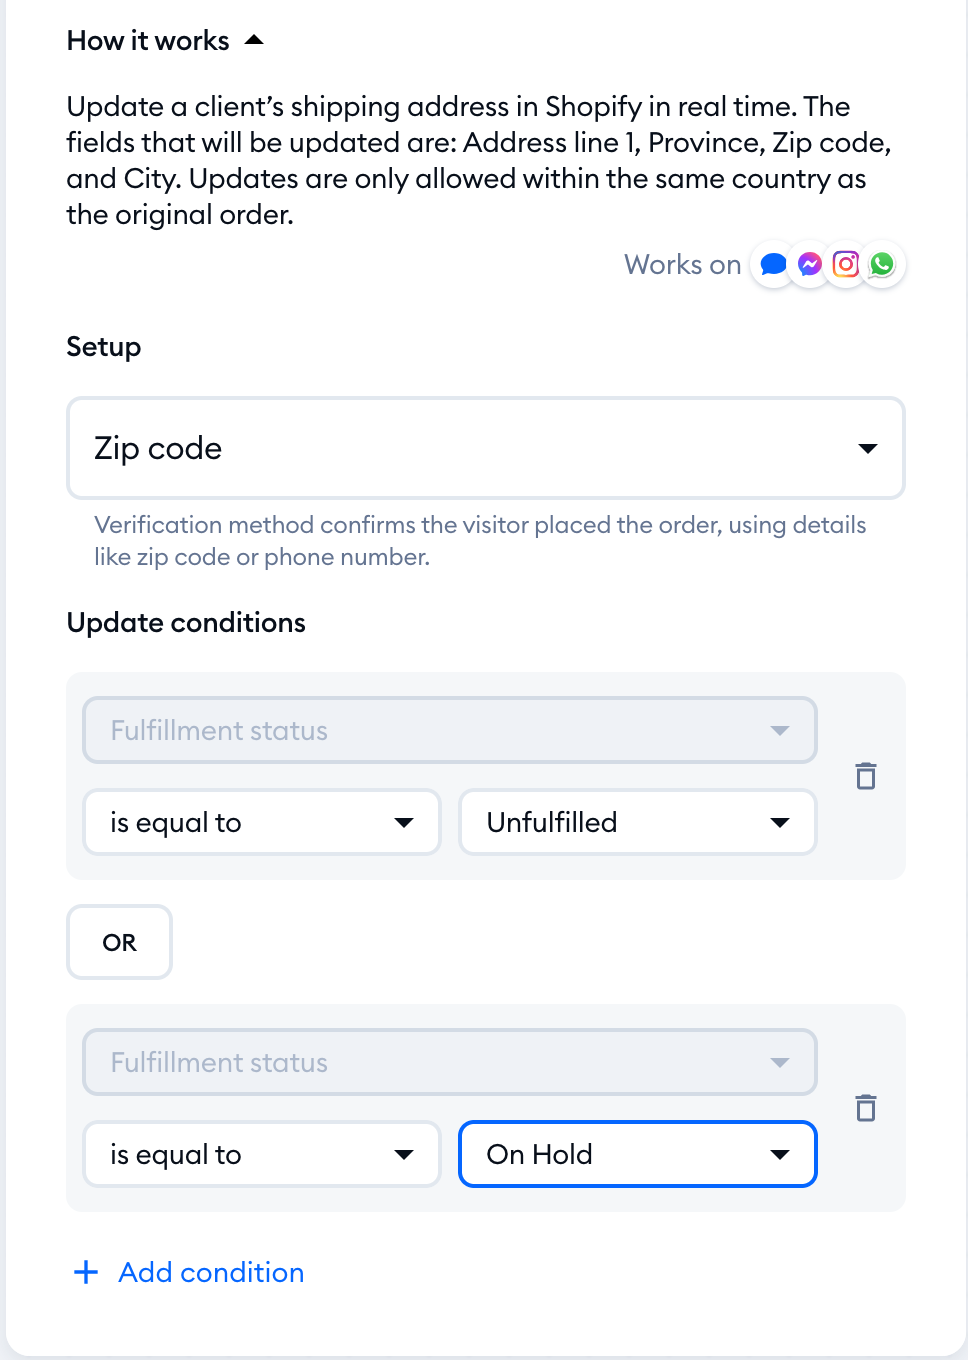
Under Update conditions, decide which orders Lyro is allowed to change. By default, Lyro updates the address only when the Fulfillment status is equal to Unfulfilled. You can pick a different status (Unfulfilled, In Progress, Partially Fulfilled, Fulfilled or On Hold), switch to is not equal to, or click on Add condition to allow more than one status (the conditions are joined with OR):
Since this step changes orders in your store, we recommend switching on Require visitor confirmation for this Action, so Lyro asks the customer to confirm the new address before it changes anything. Naturally, test the Action on a test order with Test it out before you activate it.
There are no ready-made steps for canceling or refunding orders - these stay with your agents in the Inbox.
Exporting and importing Actions
If you have created an Action that you like, and if you own multiple Tidio projects - you are able to export that Action and use it wherever you wish! Thanks to the export/import options found in the Actions section, you can easily transfer any Action to other projects.
This can be especially useful if you've spent a lot of time on your Action and want to use it elsewhere for the same purposes, or if you're creating Action templates to be used later on other Tidio projects. You can also use this as a form of backing up any important Actions outside of Tidio.
Exporting
To transfer an Action that you've already created, you have to be logged into the Tidio project where that Action exists. Head over to the Actions & MCPs section, and find the Action that you need in the Actions tab.
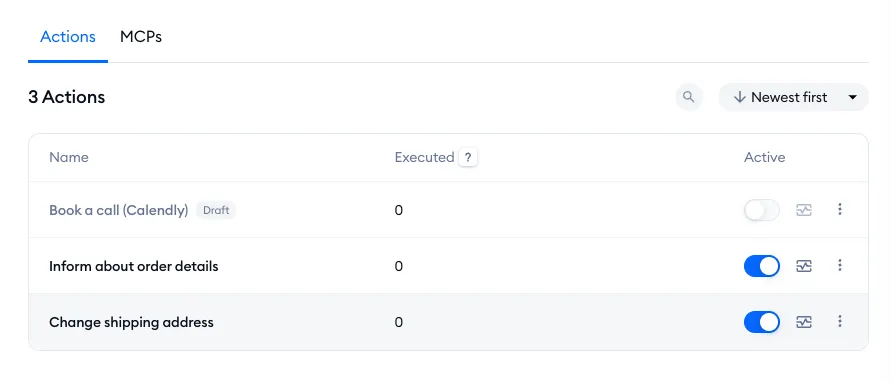
Use the Options menu on the right of your Action, and select the Export option:
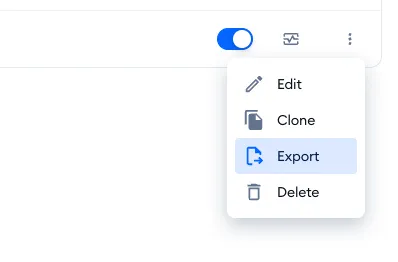
Once you do that, a JSON file will be downloaded to your computer - that is the file with all your Action's raw data:
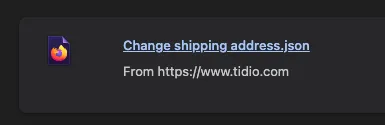
Now you are ready to import that file into your other Tidio project!
Importing
To import your Action into another project, you first need to log into that project. If you're using the same email login to access both projects, you can find it listed in your projects dropdown menu, visible when you click on your avatar in the bottom-left:
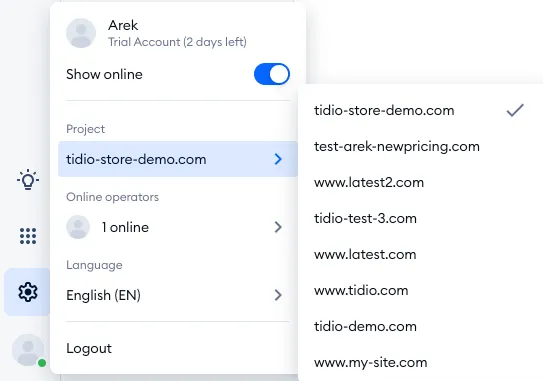
Once you're inside the correct project, head over to the Actions & MCPs list in the Lyro AI Agent section. Use the Create button in the upper-right, and you will notice the Import option there:
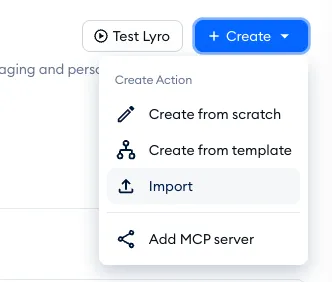
When you click on that option, a new window will pop up - allowing you to upload your JSON file:
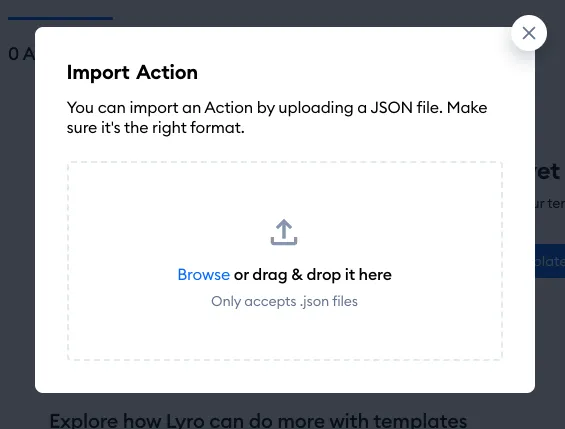
After successfully importing the right file, you will see a confirmation message on the screen. That means your Action is now available in this project (as a draft).

For your convenience, the prompt lets you open the editor and immediately customize your newly imported Action. You will need to verify and activate the Action's setup in the editor before being allowed to enable it in your project.
Of course, this Action is entirely separate from the original version that you exported earlier. You can modify both independently, and they will not affect each other in any way.
The limits of Actions
There is a limit on the number of active Actions in your Tidio project (Actions switched on at the same time), and this limit changes with your paid subscription.
- During your initial 7-day trial, you are allowed up to 3 Actions;
- The free version of Tidio allows 1 Action (this also applies to any paid subscription that does not include the Lyro AI Agent package);
- Subscribers of the Lyro AI Agent package are allowed up to 3 Actions;
- Subscribers of the Plus package are allowed up to 10 Actions;
- More than 10 Actions are allowed for subscribers of the Premium package.
If you have a certain number of Actions active and you downgrade to a package that allows fewer Actions - the most executed Action will remain active, while the rest gets disabled. Of course, you can decide which Action is enabled and which isn't, as you can change this manually.
Actions that define Lyro's handoff don't count toward this limit. Once you reach it, the switch next to your inactive Actions is grayed out - hover over it to see how many active Actions your plan allows (e.g. Your current plan allows 1 active Action.), with a link to upgrade. You can still save new Actions with Save and close and activate them later:

Using Action logs
To make Actions easier to manage and troubleshoot, Lyro includes detailed logs in addition to a testing playground. This gives you more control over troubleshooting and lets you make sure everything works before going live.
When you go to Actions inside your Lyro AI Agent section, you’ll find the option to view logs next to each Action in your list:
Each Action log includes a time-stamped record of all of its executions along with key analytics such as:
- Executed
- Success rate
- Successful
- Failed
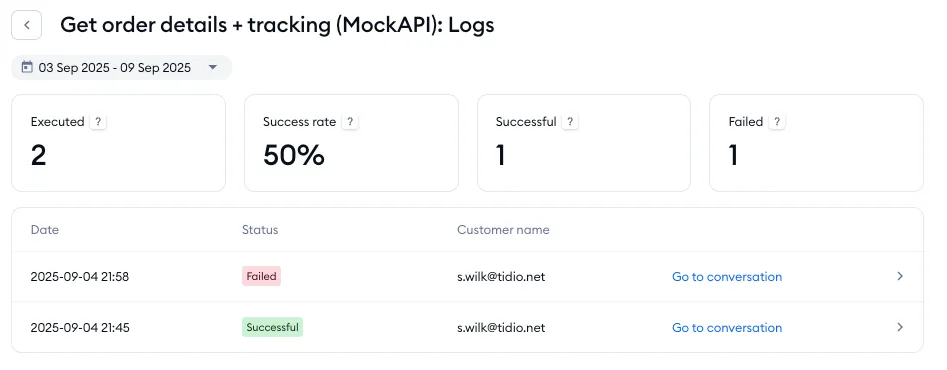
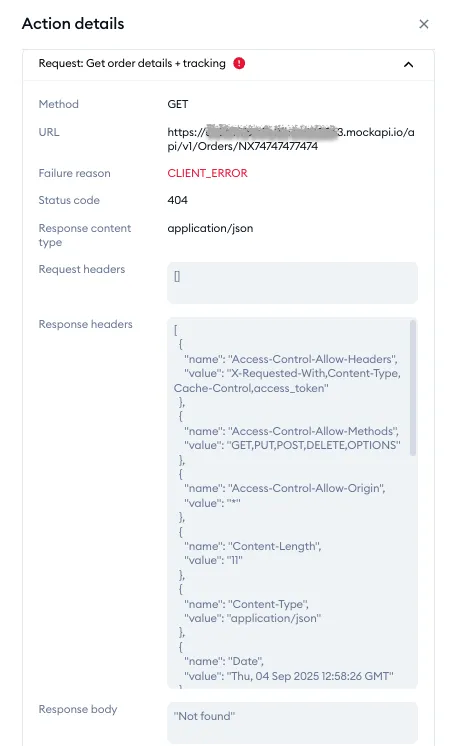
Failed runs usually occur when the action cannot retrieve the expected data from an API, e.g. if a customer enters an invalid order ID that the API cannot recognize.
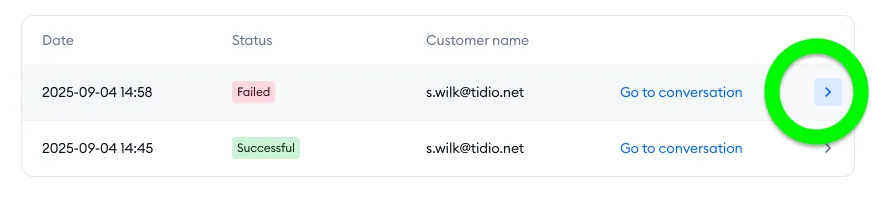
Clicking into an entry reveals all the details you need to understand what happened:
In the panel that appears, you can see the exact input values provided by the visitor, the full API request and response, and the result of the Action:
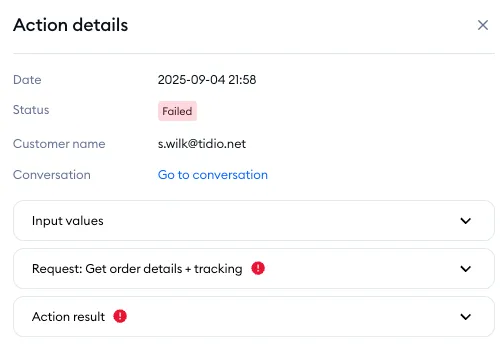
Opening the Request subsection for details makes it clear whether the issue was caused by missing or incorrect data, or by an error in the API itself:
Another improvement is the ability to move seamlessly from a log entry to the related conversation inside your Inbox:
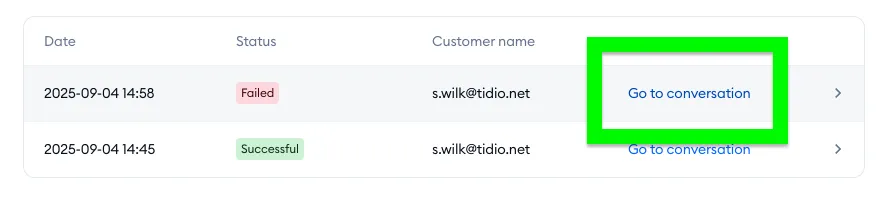
This allows you to review the full interaction in context, message by message, and see how Lyro collected the visitor’s input before running the Action.
Within the conversation view, you’ll also notice that Actions are clearly marked, making it easier to identify which Action was triggered and whether it succeeded or failed:
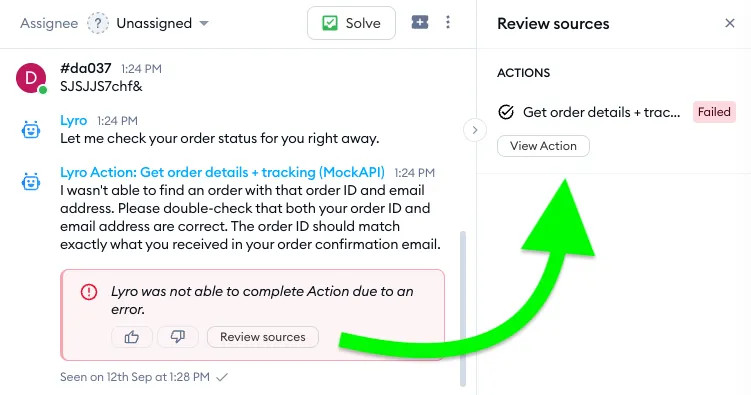
In addition to logs for live Actions, Lyro provides the option to test Actions before deploying them. Inside the Action editor, you can open the testing playground, start a conversation with Lyro, and supply the input values it requests. You can see this described earlier in this guide, back here.
The system then displays the same kind of detailed log information (including API requests and responses) that you would see for a live Action. This way, you can verify that your Action behaves correctly, troubleshoot potential errors, and confirm that the API is returning the expected data before making it available to real customers.
By combining logs with real-time testing, Lyro gives you the tools to build and refine Actions with confidence, while reducing the need for external troubleshooting.
Further reading
- Test Lyro before it goes live
- Manage Shopify orders
- Lyro Action templates
- Lyro Procedures
- Lyro - the conversational AI agent
