Some questions can't be solved in a single chat - a visitor asks about a refund after hours, or needs an answer your team has to look up first. With the Create ticket action, your Flow can turn the conversation into a ticket, so your team can follow up later, with the whole chat at hand.
You decide what the ticket says: its subject, its message, whether the conversation transcript goes with it, and which department gets it.
In this article, you'll learn:
- How to collect the visitor's email address first
- How to add the Create ticket action to a Flow
- How to set up the ticket's subject, message and department
Collecting the visitor's email address
A ticket needs an email address, so your team can reach the visitor later. That's why the visitor must have an email address saved to their Email contact property before the Create ticket action runs.
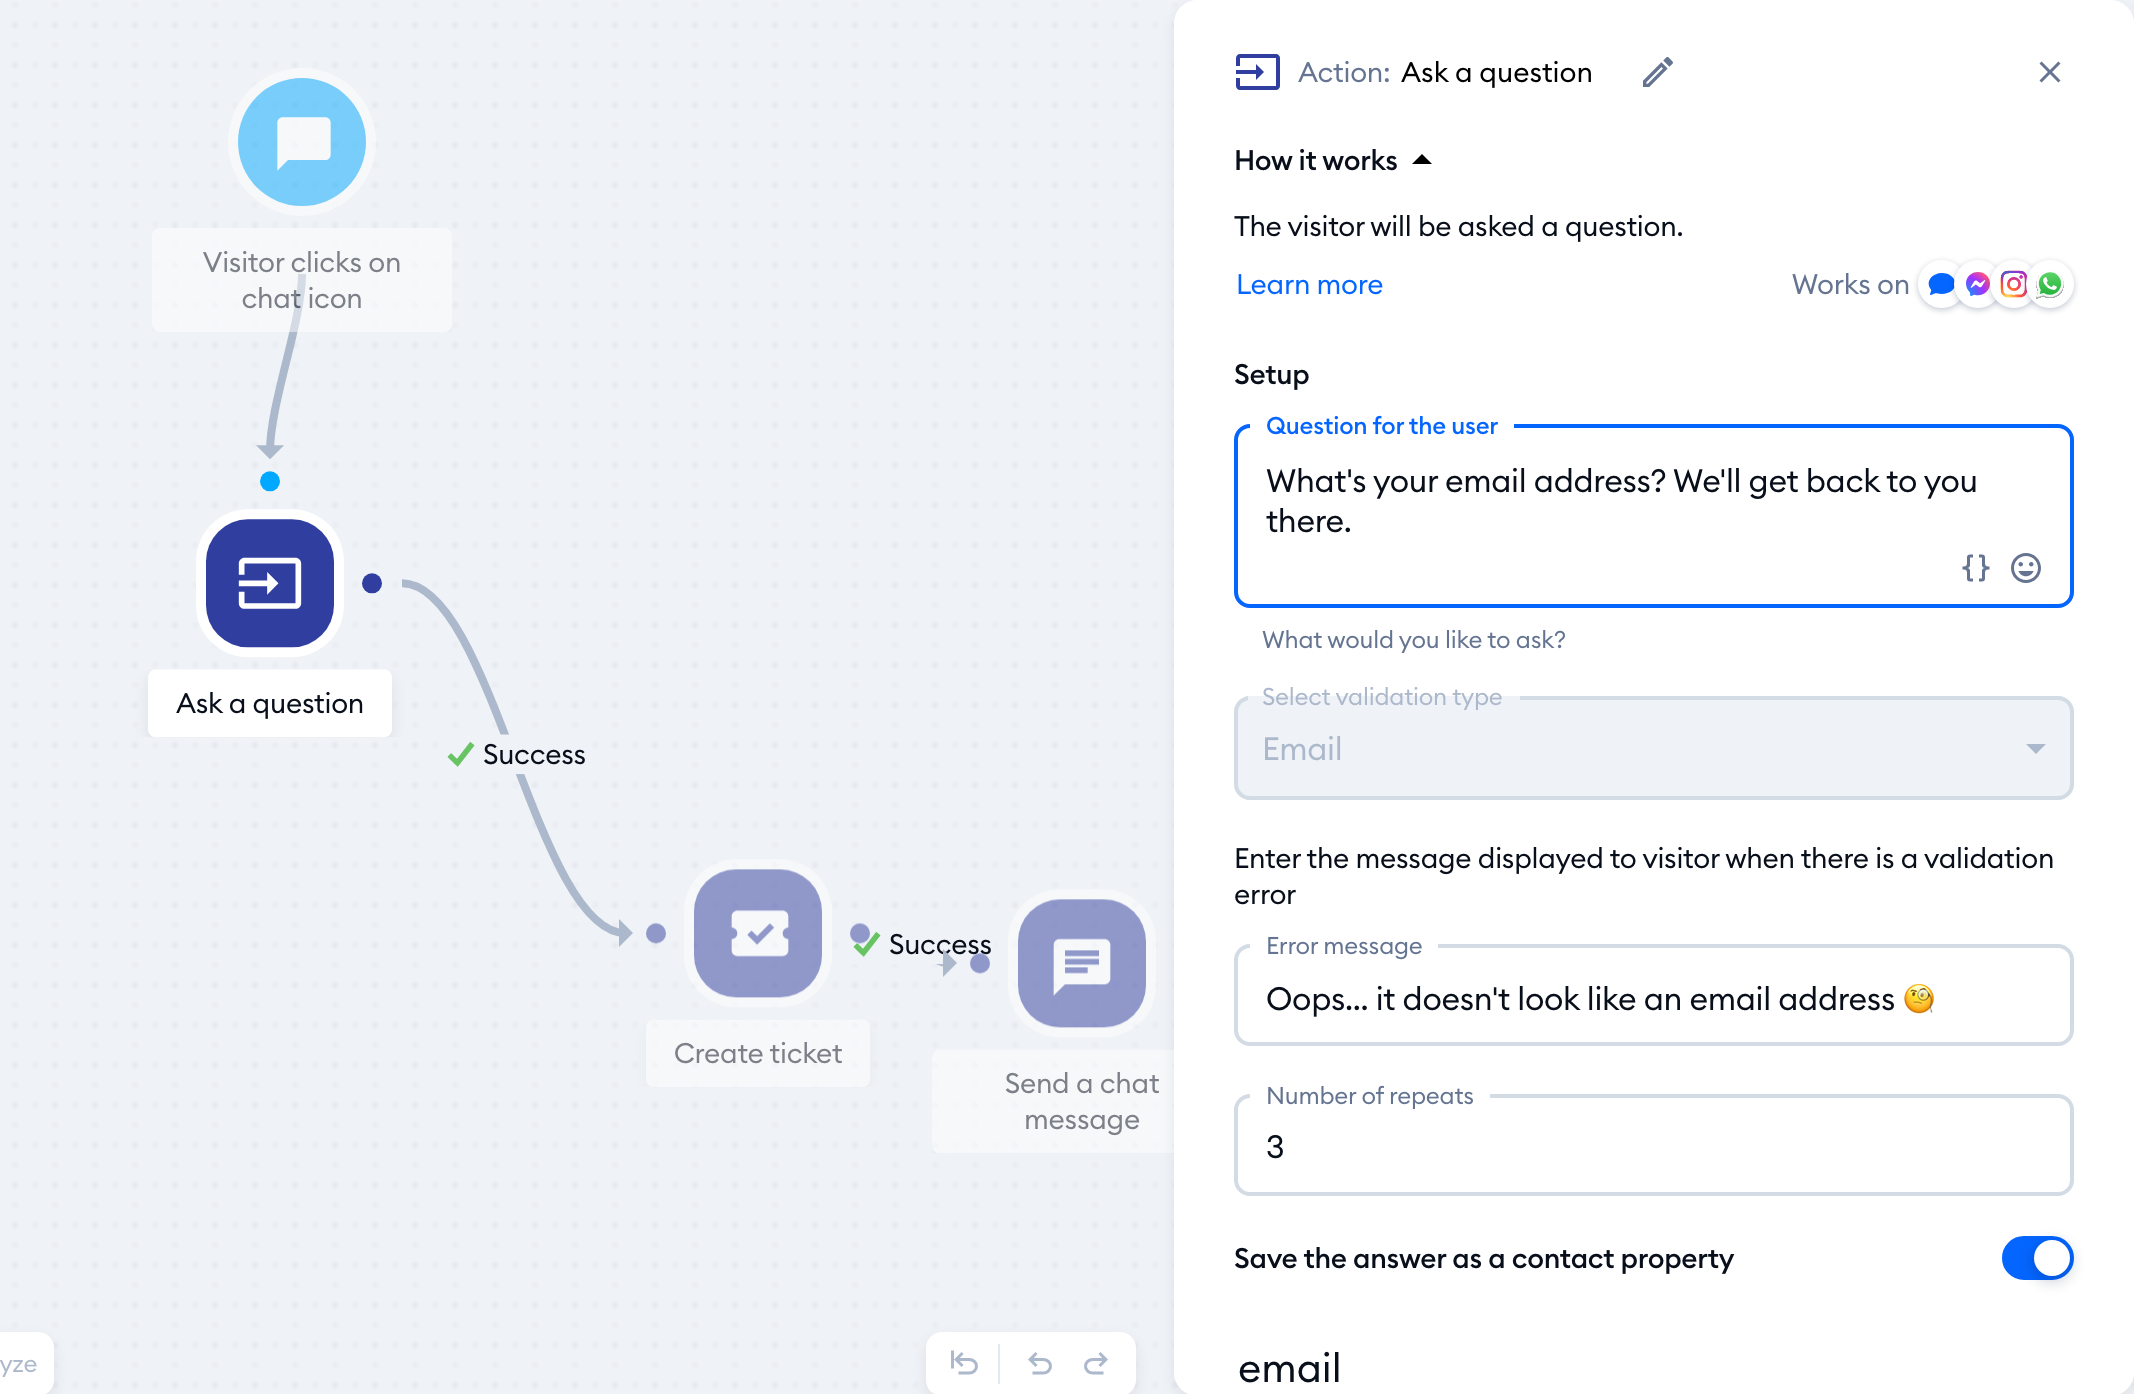
If you don't have it yet, simply ask for it earlier in the same Flow. For example, add the Ask a question action, type your question in Question for the user, and set Select validation type to Email - the answer will be saved to the visitor's Email contact property:
You can also collect it with the Send a form action. Learn more in Start collecting leads.
Adding the Create ticket action
Head over to Flows > My Flows, and open the Flow you'd like to use - click on the three dots menu on its right and choose Edit. You can also start a new one with Create from scratch.
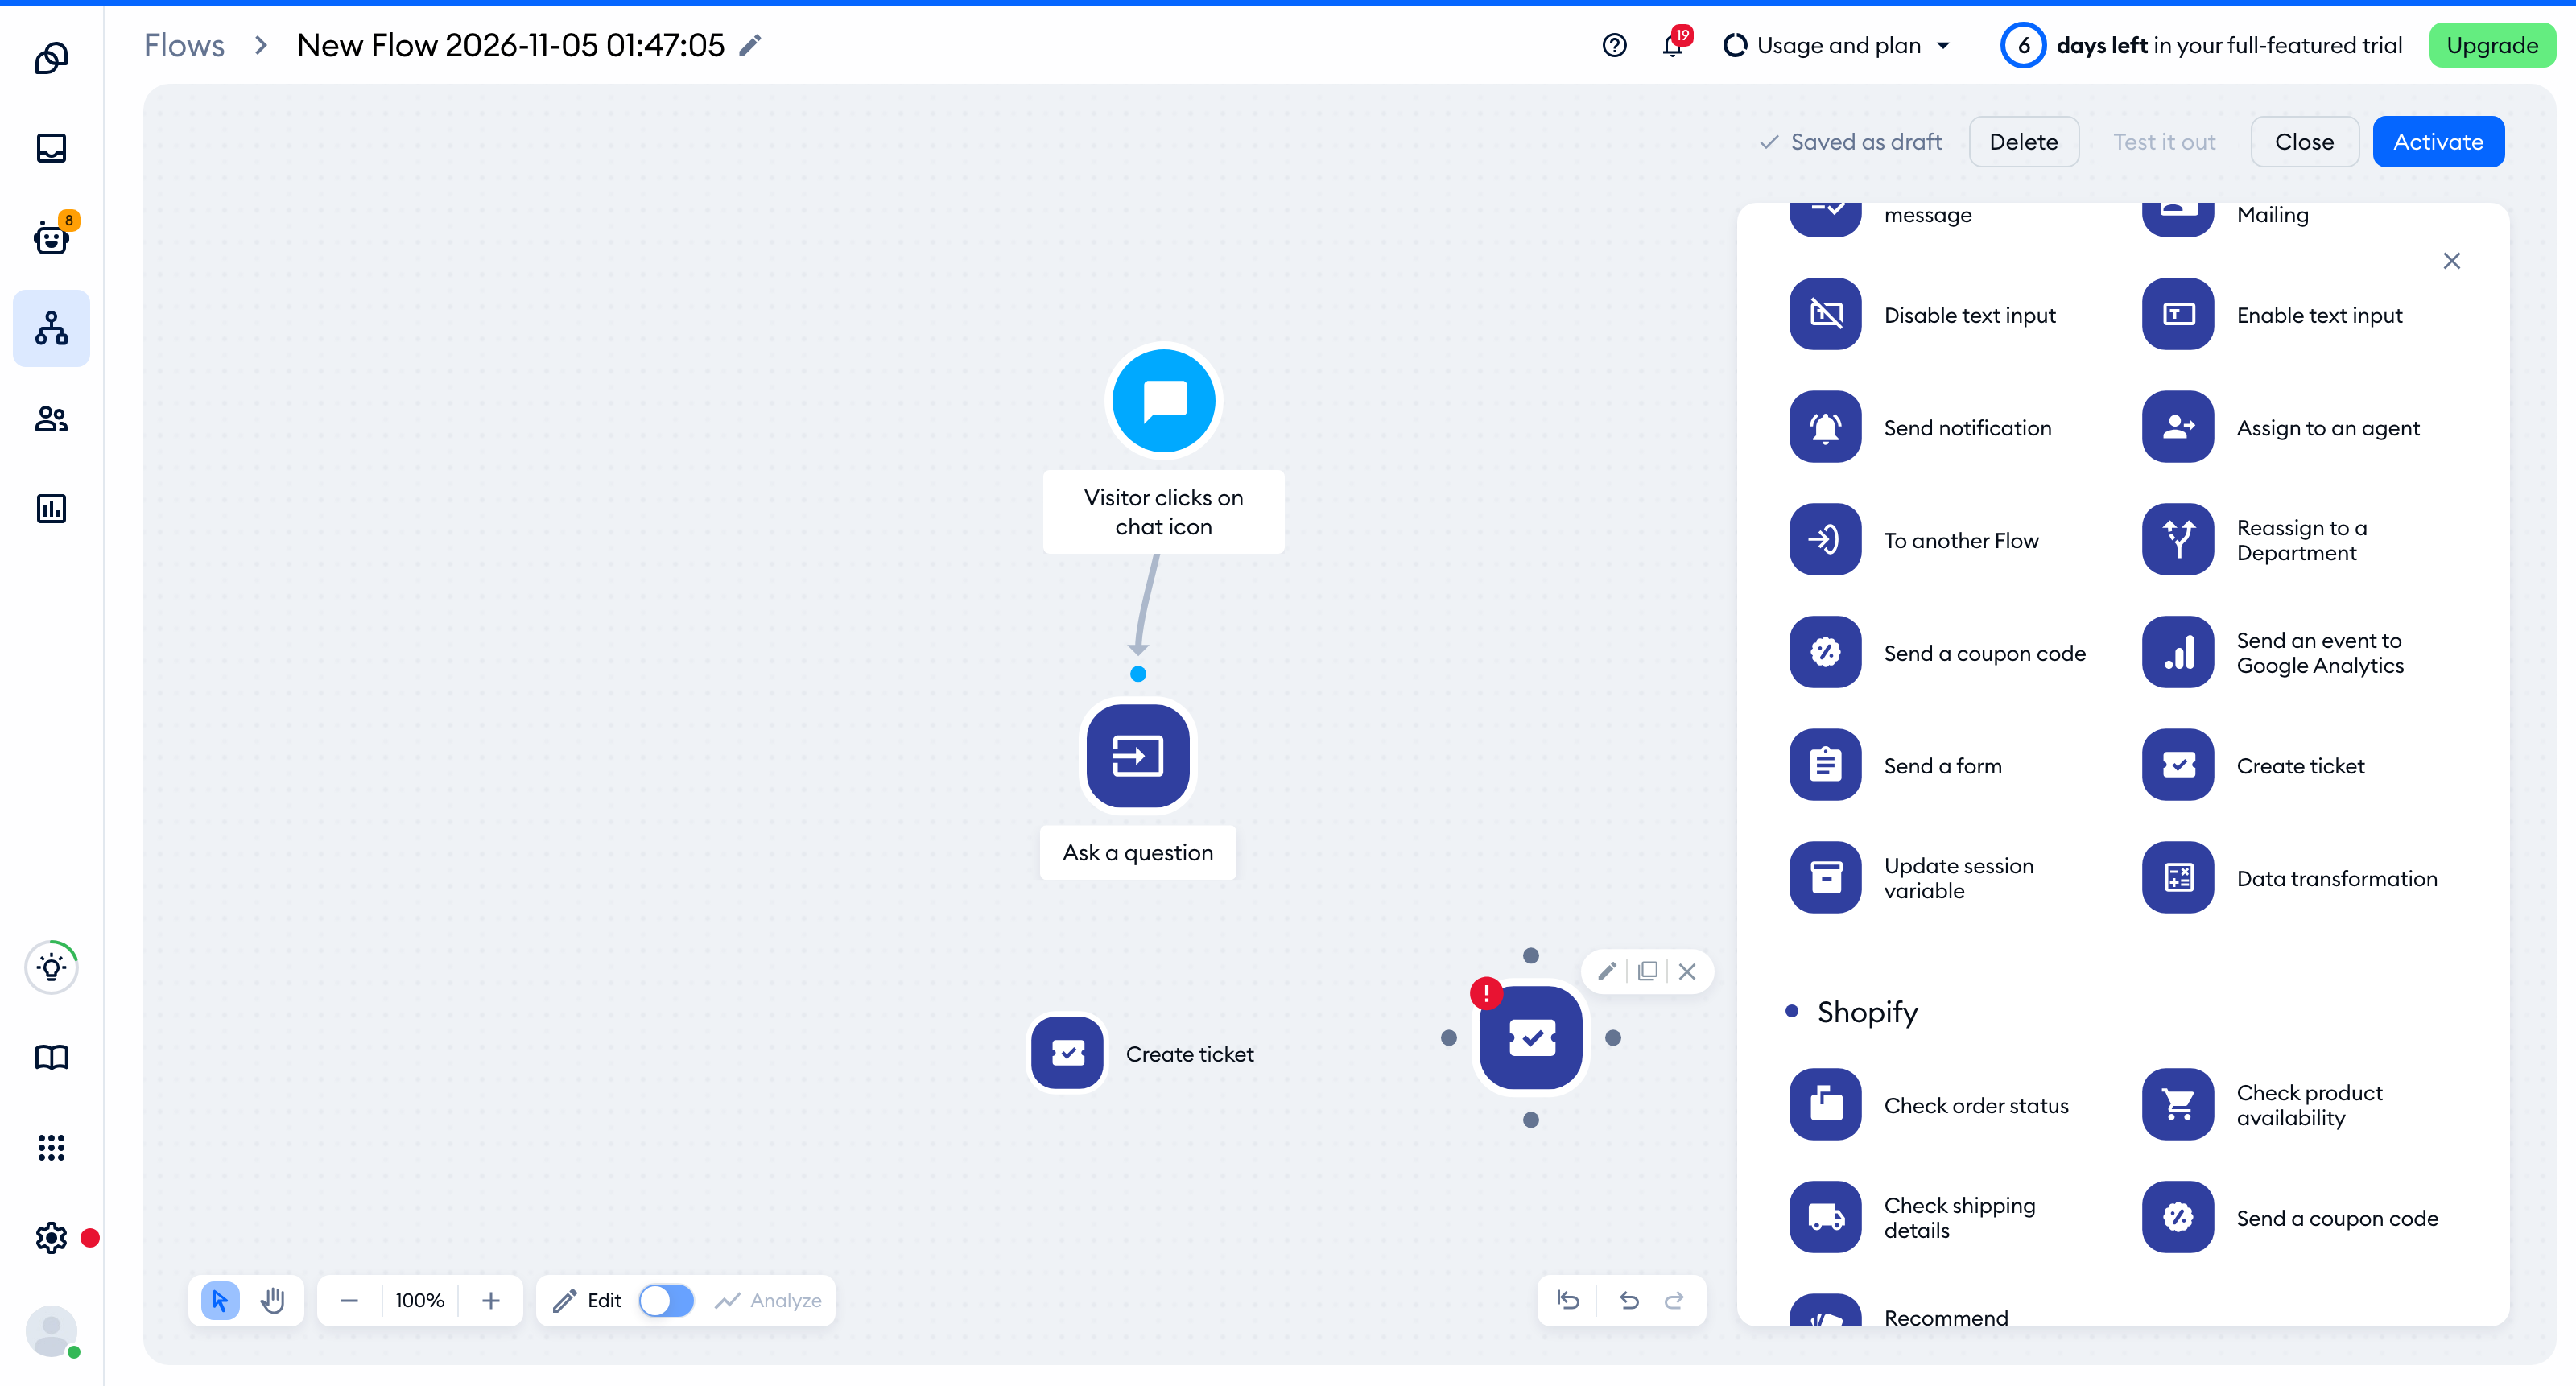
In the flow editor, click on Actions in the menu on the right, find Create ticket, and drag it onto the board, right after the step that collects the email address:
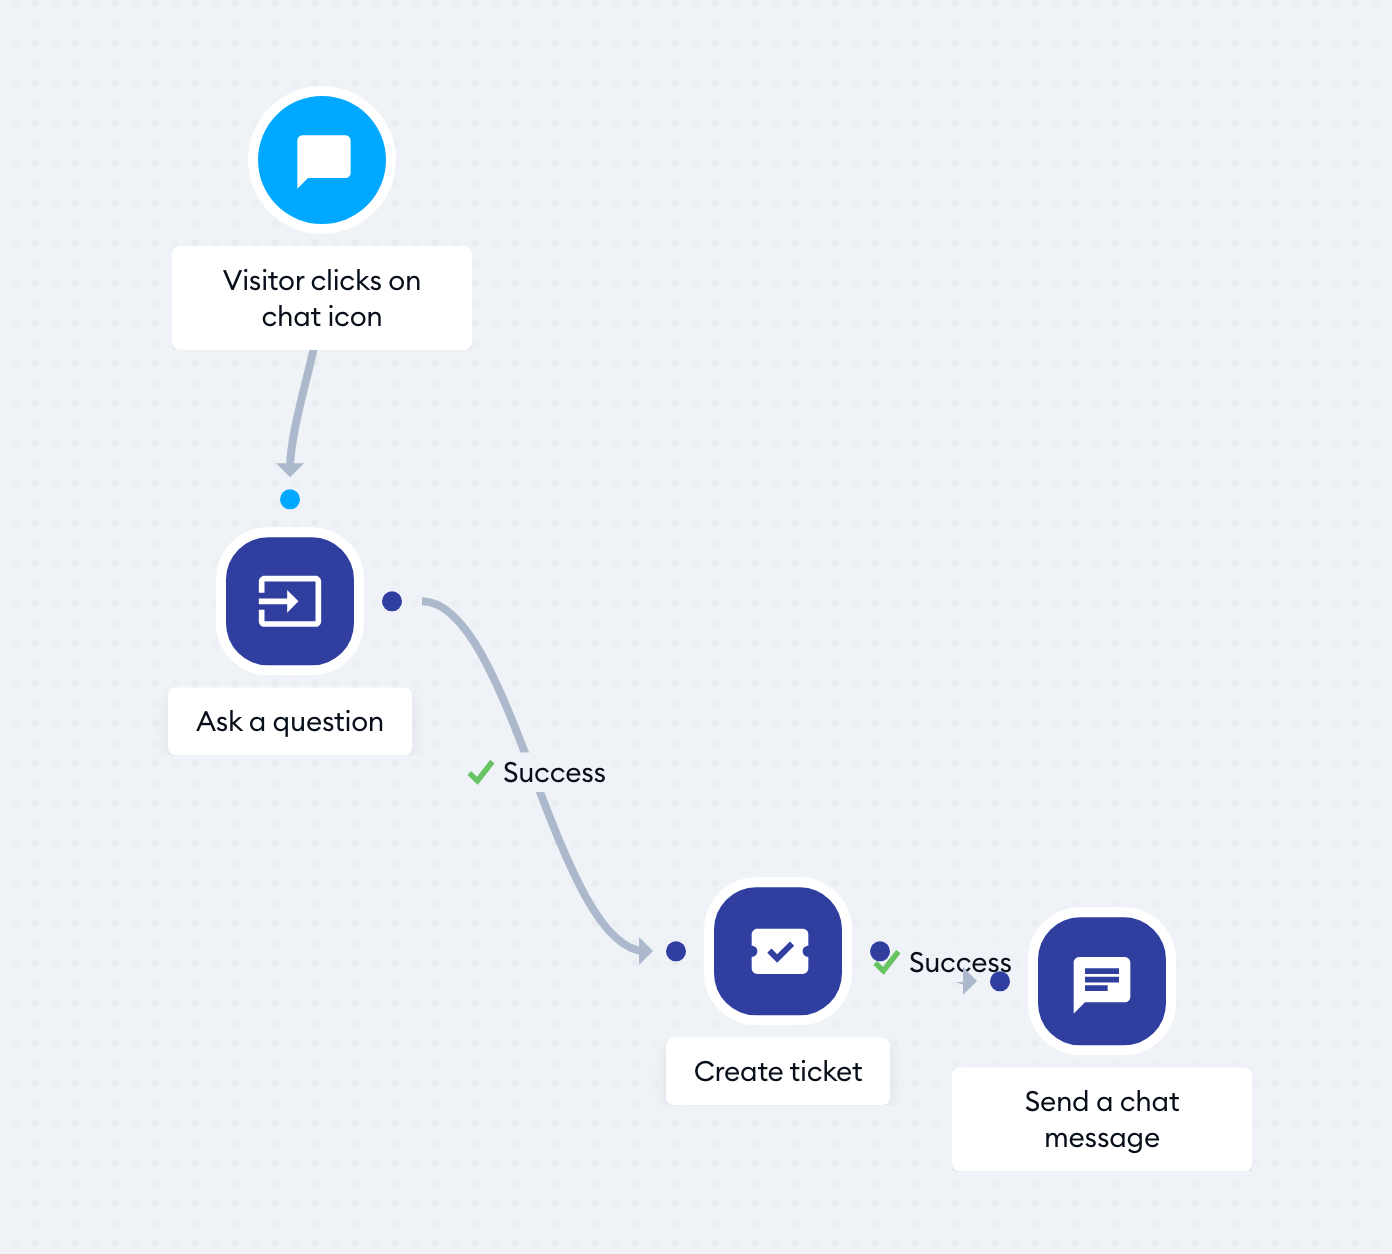
Connect the previous node to Create ticket. The action has one output, Success - connect it to what should happen next, for example a Send a chat message action that tells the visitor you'll get back to them by email:
Setting up the ticket
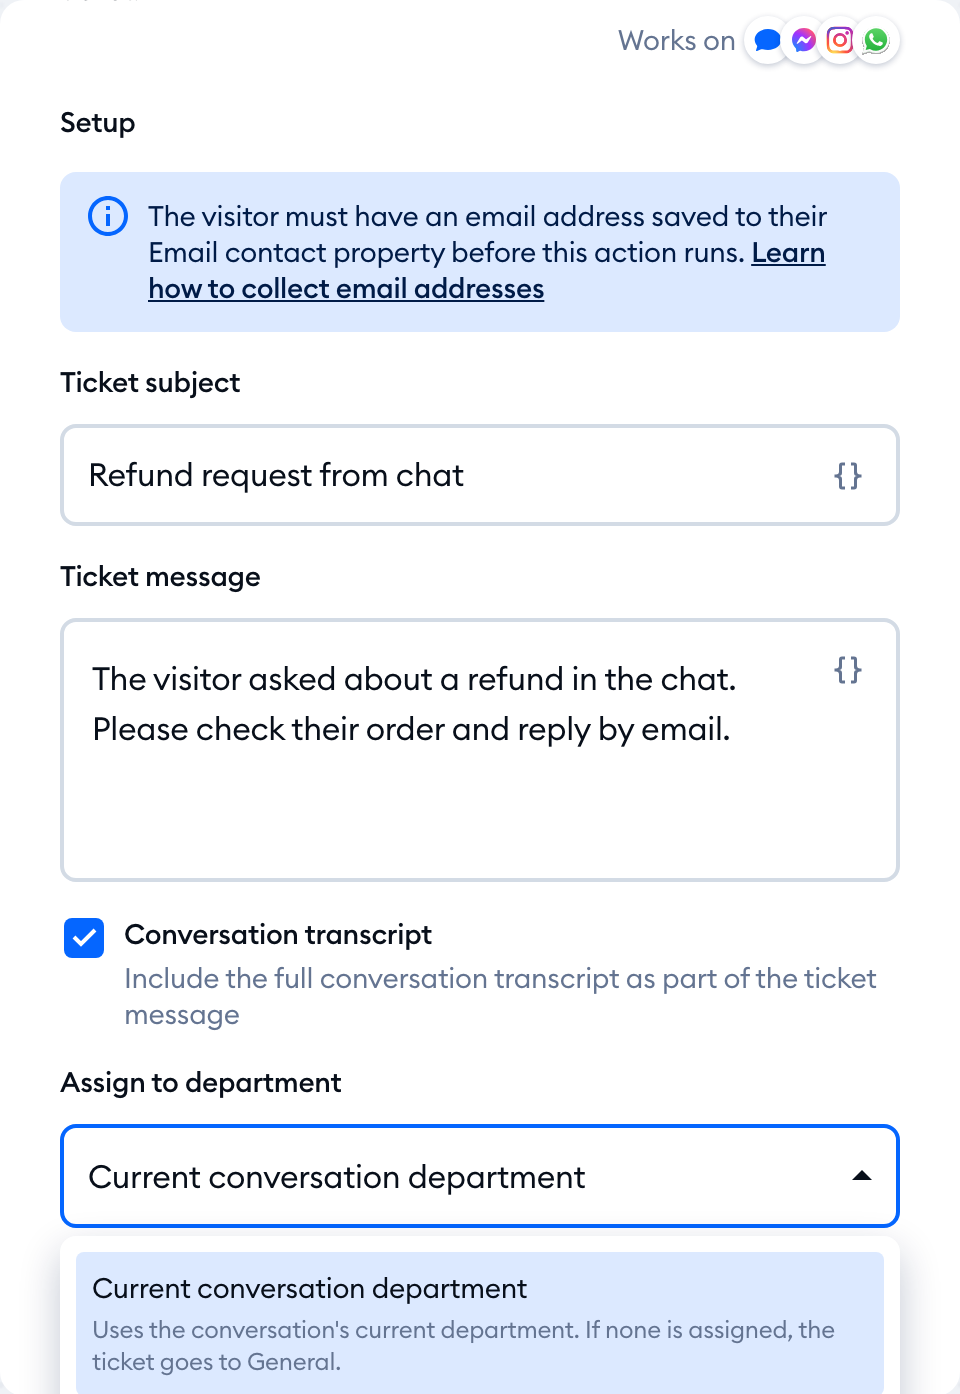
Click on the Create ticket node to open its settings on the right. At the top, you'll see a reminder that the visitor must have an email address saved to their Email contact property before this action runs. Below, fill in the ticket's details:
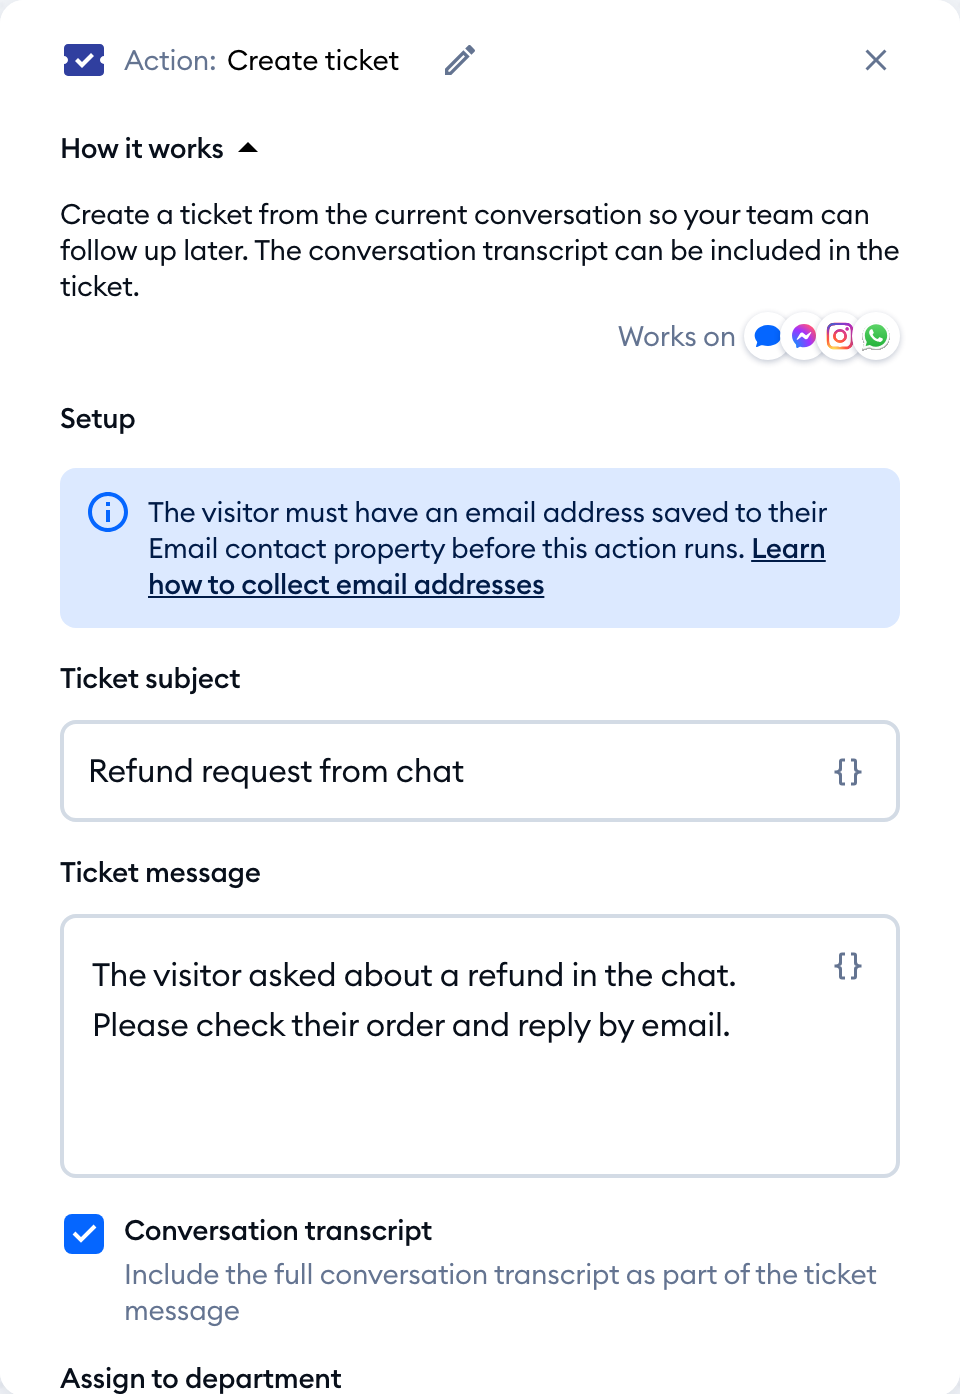
- Ticket subject - required. This is the ticket's subject line, e.g. "Refund request from chat".
- Ticket message - the body of the ticket. You can leave it empty, as long as the transcript is included.
- Conversation transcript - ticked by default. It includes the full conversation transcript as part of the ticket message, so your team sees everything the visitor wrote.
- Assign to department - which department gets the ticket (see below).
In both text fields, you can click on Add variable to insert a contact property or a session variable - for example, the visitor's name.
Please note: you need either a Ticket message or the Conversation transcript. If you untick the transcript and leave the message empty, you'll see "Add a ticket message or include the conversation transcript to continue."
Choosing a department
By default, Assign to department is set to Current conversation department: the ticket goes to the department the conversation is already in, and to General if there's none. You can also pick one of your departments from the list:
Please note: departments are available on the Plus plan and above. On other plans, the Assign to department list is greyed out and the ticket uses the current conversation's department. If a department you picked is deleted later, the action shows "The department previously selected in this node is no longer available." - simply choose another one.
Once everything is set, hit the Activate button in the editor. That's it! From now on, every visitor who reaches this step will have their conversation turned into a ticket.
