Tidio's Ticketing system offers a convenient solution for efficient customer query management. By moving time-consuming conversations to tickets, you can effectively manage your team's work. This article will guide you through the setup and usage of the Tidio Ticketing system, helping you optimize your customer support workflow.
In this article, you'll learn:
- The benefits of using Ticketing
- How to connect your mailbox
- How to add your custom signature
- How to send emails from your own domain
- How to set an automatic response
- How your visitors can create a ticket when you're offline
- How to block emails
- How to manage tickets (responding, sorting, SLA)
- How to ask for a rating and collect feedback
- How to add tags to tickets
- How to let the Lyro AI Agent respond to tickets
Ticketing benefits
Manage your time
Move time-consuming conversations to tickets to save the efforts of handling complaints, queries, and requests via chats. Change tickets' statuses and keep your inbox squeaky clean.
Create an omnichannel support
Offer your customers more ways to interact with you. Omnichannel support connects the experiences across different channels, making the customer experience completely seamless.
Set priorities for your tickets
Mark your tickets as Low, Normal or High priority, so your team knows what to handle first.
Cooperate with your colleagues
Assign the tickets to the team members who are best-suited to handle them, or mention other agents through internal notes to notify them (or ask for their assistance). For example, a ticket with pricing questions can be assigned to an agent with relevant sales expertise. Create a team of ticket owners responsible for resolving them in the shortest turnaround time.
Add notes and tags to improve communication
Help your coworkers out by leaving notes regarding each ticket, as well as tagging your tickets with useful information.
Connect your Mailbox
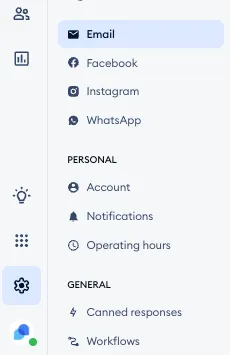
To start using the ticketing system, you'll need to connect your mailbox first. You can connect your mailbox by heading to Settings > Email section in your Tidio admin panel.
You can learn more about adding your external mailbox in our article about forwarding emails to Tidio.
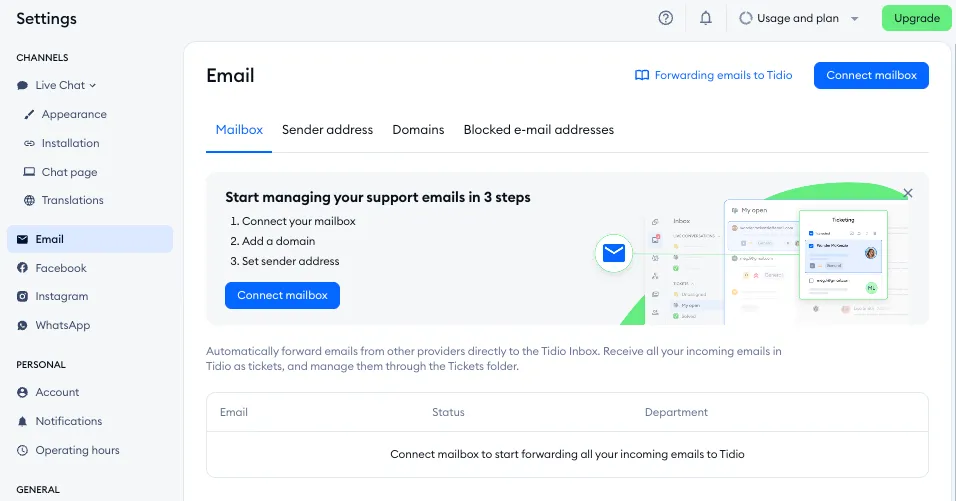
Once inside, hit the Connect mailbox button to start the process:
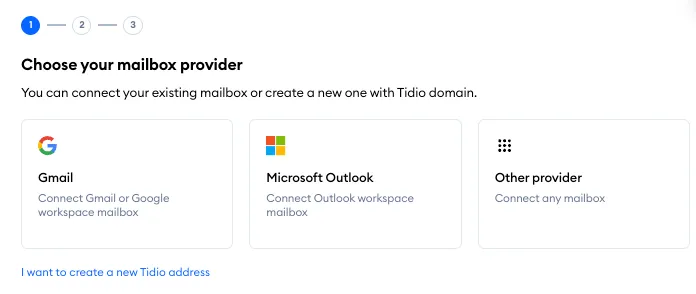
You will see a pop-up with several options to choose from: Gmail, Microsoft Outlook or Other provider:
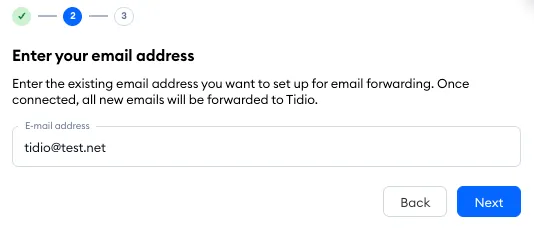
Connect with your existing email
Here, you can choose an existing mailbox that you'd like to connect with Tidio. Type in your email address and hit Next:
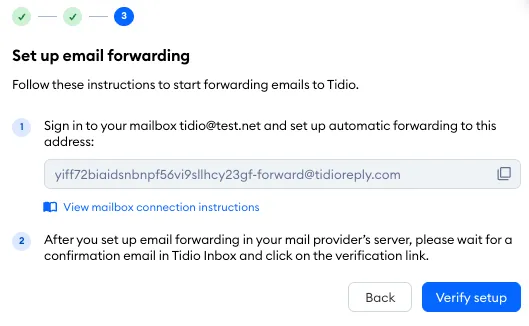
In the next step, you will get detailed instructions for setting up the connection and get your Tidio forwarding address immediately:
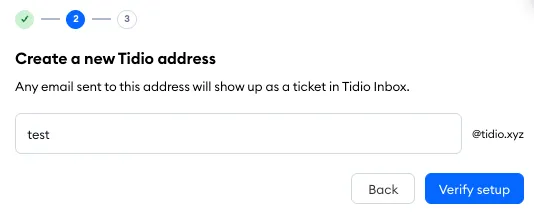
Create a new email address
An alternative option is to create a brand new address - with the @tidio.xyz domain. This can be useful if you just need an address quickly, and it's an address you can share with your customers or use it for forwarding to other mailboxes if you wish.
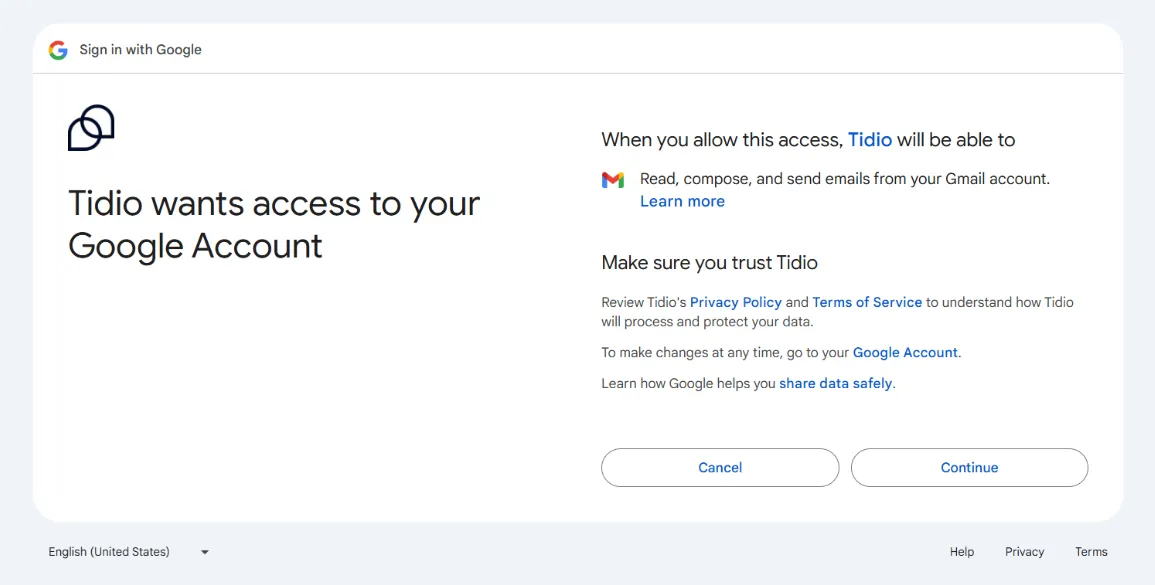
Connect Gmail account
The last (and quickest!) option is to use an existing Gmail account that you have access to - this integration doesn't require any actual setting up. Just select the Connect Gmail account option and follow the steps: sign into Gmail (or select one of the accounts you're already signed into), and confirm:
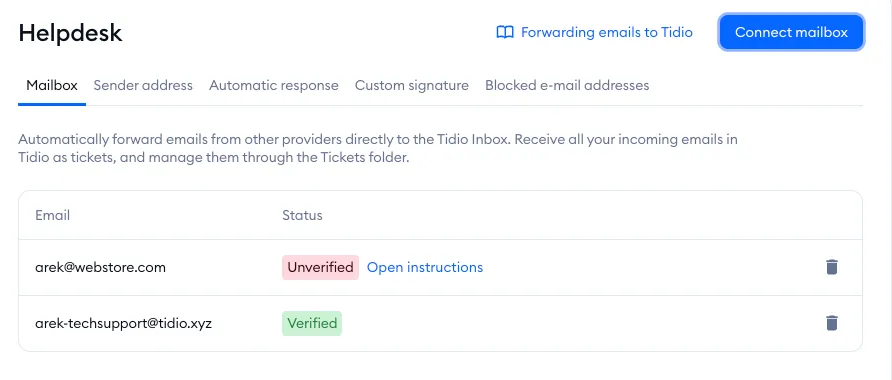
Once added, each mailbox will be listed in the Mailbox tab, along with its verification status (and instructions, if applicable):
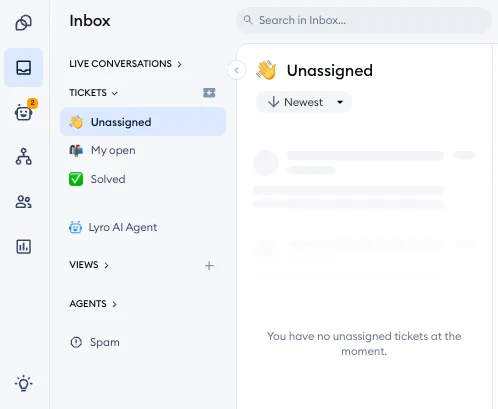
Any email that arrives in your external mailbox(es) will create a ticket in Tidio. You can find all new tickets in the Unassigned folder under the Tickets section in your Inbox panel:
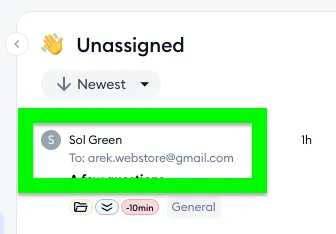
You'll find the original mailbox that received the email listed under each ticket individually. This is especially useful if you've integrated multiple mailboxes:
Adding your signature to tickets
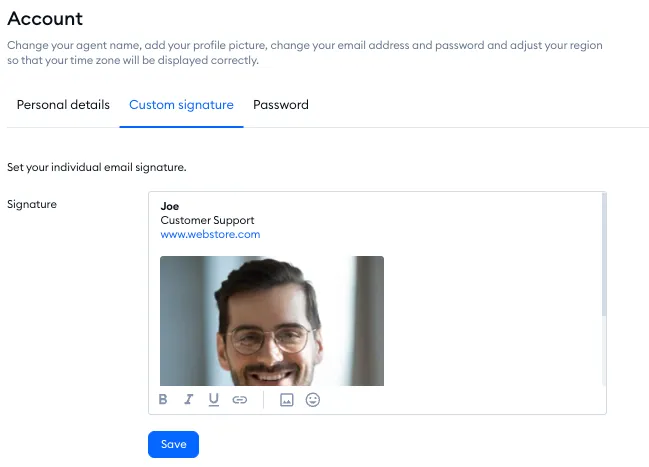
Each agent can add their own signature in Settings > Account as well. See the Custom signature tab there; you can enable the signature and modify it.
You can add text, multiple images, use basic text formatting as well as hyperlinks.
Please note: there is currently no way to add custom coding or change the overall format of the signature. The text can only be modified in the ways provided, and the images can only appear vertically (although you can place them at any point of the signature in general).
Send emails from your own domain
To improve your credibility, you can start sending emails to your customers from your own email address. This becomes possible when you connect and verify your own business domain and use that for a more professional look and improved deliverability.
Navigate to Settings > Email and open the Sender address tab. Notice that the Add sender address button (in the top-right) may be inactive:
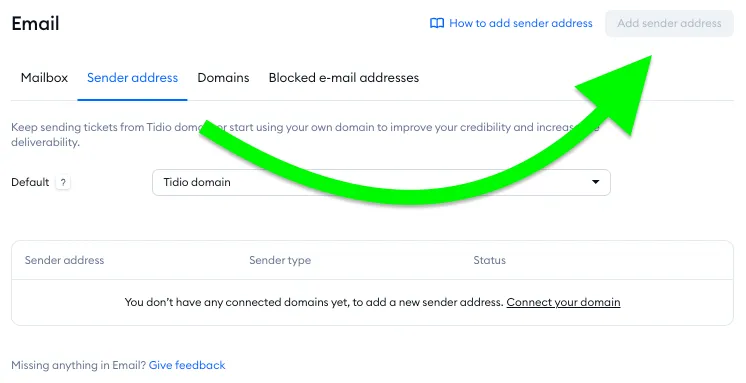
That's because you need to connect your own business domain first. If you've already done that, and the domain is verified in Tidio, you can head over to this section of the guide to see how to add a sender address.
Connecting your own domain
Connecting your own domain allows you to set up your own DNS records and increase the deliverability of your tickets. For each domain you add and successfully verify, you can add custom aliases as well.
Head over to Settings > Email, and go to the Domains tab - then click on the Add domain button:
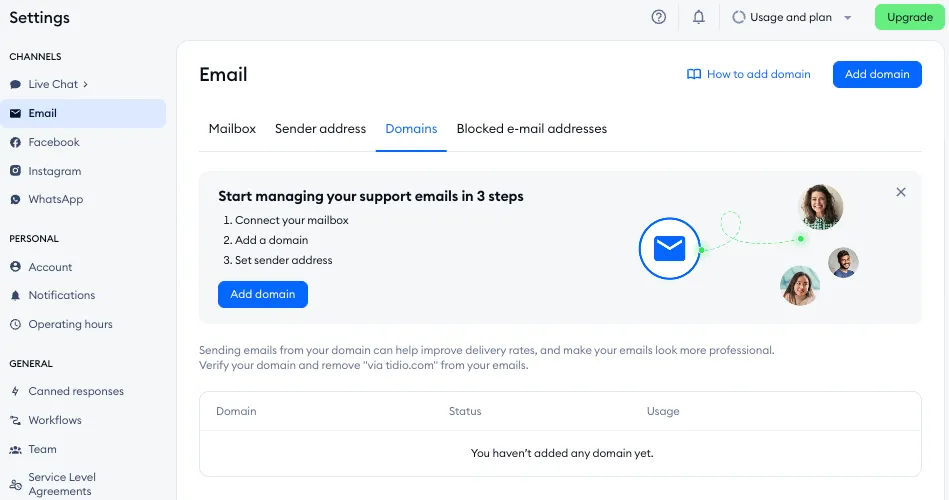
In the new window that pops up, provide the domain you'd like to connect:
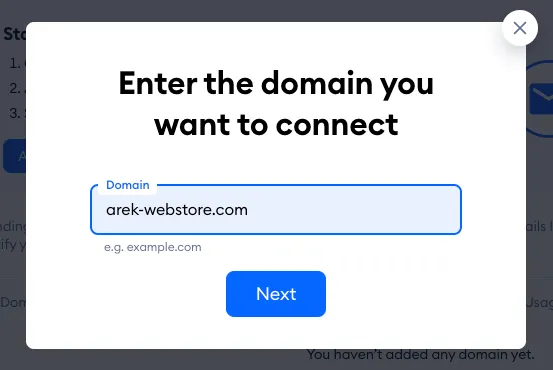
This will let you proceed to the automatic domain connection, which is powered by Entri. This specialised app will assist you in connecting your domain in a few simple steps (as long as your domain provider is supported by Entri, which you can check here).
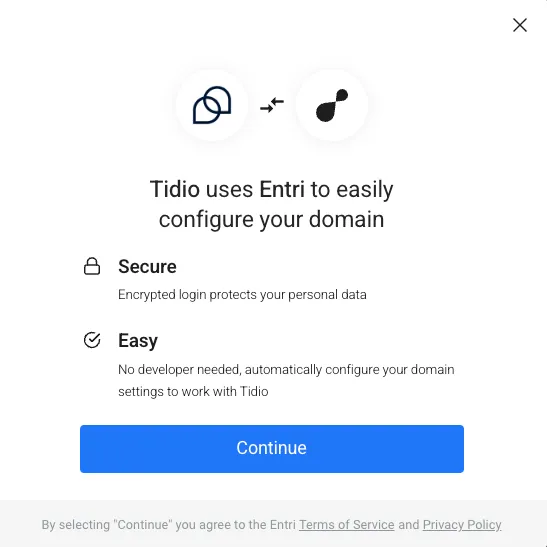
Once you continue, the domain will be analyzed for all the relevant details - all in order to allow a secure and smooth connection. During this process you will be asked to input your provider login details, in order to properly allow Tidio to connect with your domain. You will most likely need to confirm the connection request with a security code sent via email.
Once you successfully verify everything that's necessary, you will see a confirmation screen:
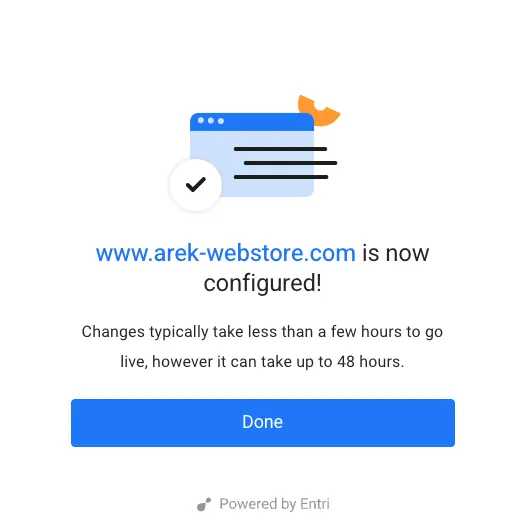
Please note: in some cases where your domain provider is not supported for automatic connection by Entri, you will be given all the necessary DNS records to implement manually into your domain settings instead.
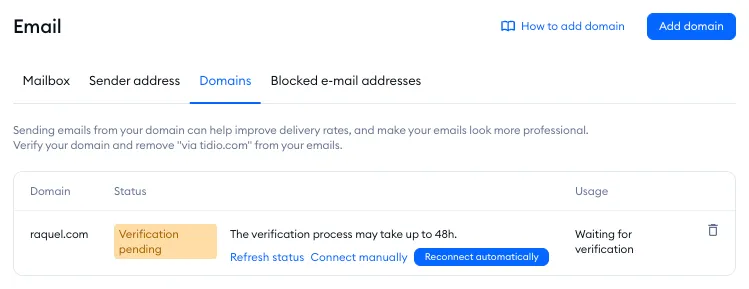
Once the domain is added, you will then see it listed in the Domains tab, with the appropriate Status label showing you the current state of the connection. You also get the option to reconnect or see the DNS records for manual connection:
Adding your sender address
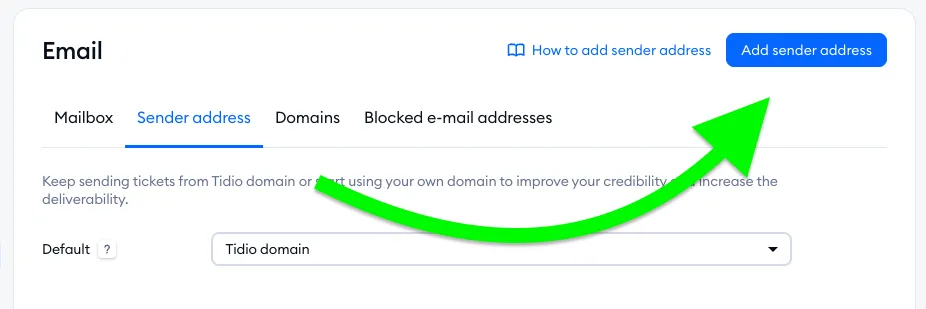
Once a domain is verified, it will become available for you to select when adding a new sender address in Settings > Email > Sender address. Click on the Add sender address button in the top-right, which should now be active:
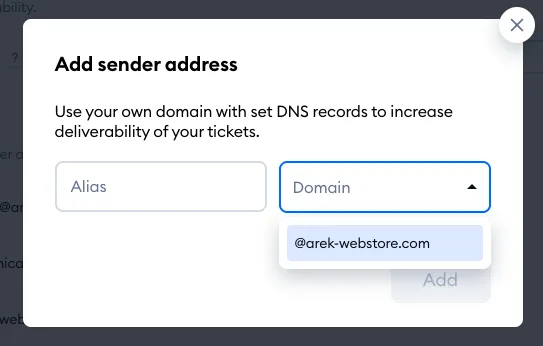
In the popup, you will be able to select any of your verified domains, and create an alias to use with it:
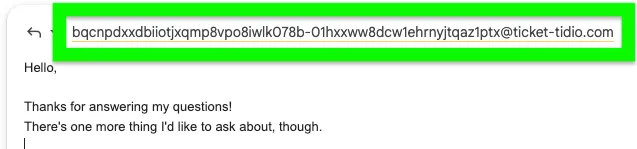
- This reply-to address is only visible once the customer wants to reply to your email. It is not visible initially; your sender address is.
- This only takes place if the ticket was created from inside your Tidio panel (this includes tickets created manually from scratch; tickets created from live conversations; tickets created automatically by the Lyro AI agent). Tickets created from incoming customer emails (forwarded from a connected mailbox) are not affected by this.
For more details and troubleshooting, please take a look at our article on connecting your own domains here.
Automatic response
If you wish to send an autoreply to each incoming email (ticket), you can set up your automatic response. To do that, navigate to Templates tab in Settings > Workflows:
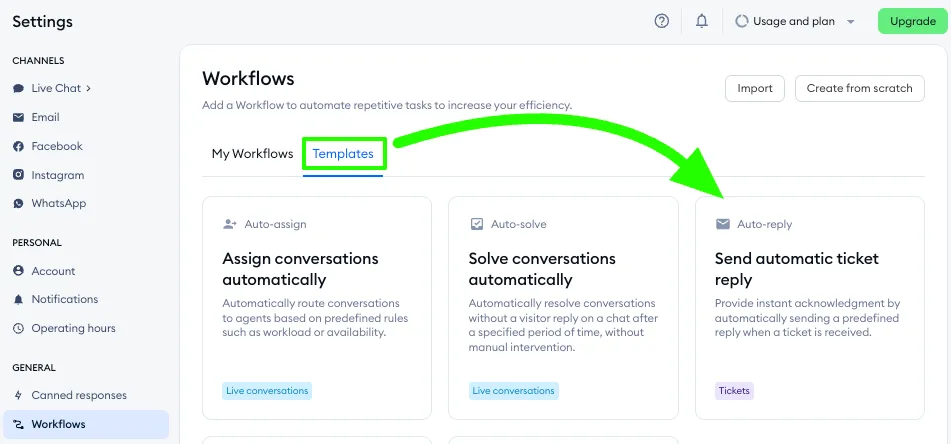
You can enable or disable the automatic response, and modify the message itself. Once it's ready, don't forget to save it!
Let visitors create a ticket when you're offline
When you're offline in your Tidio panel, you can give your visitors an option to create a ticket. This feature enables you to show your visitors a short message that can explain you are offline at the moment and encourage them to submit a ticket through a form built into the Tidio widget.
You will see all such tickets later in the Inbox section of your Tidio panel.
You can customize your Tidio widget by going to the Settings > Live Chat > Appearance section. In there, you will find several different sub-sections that allow you to modify different aspects of your chat widget:
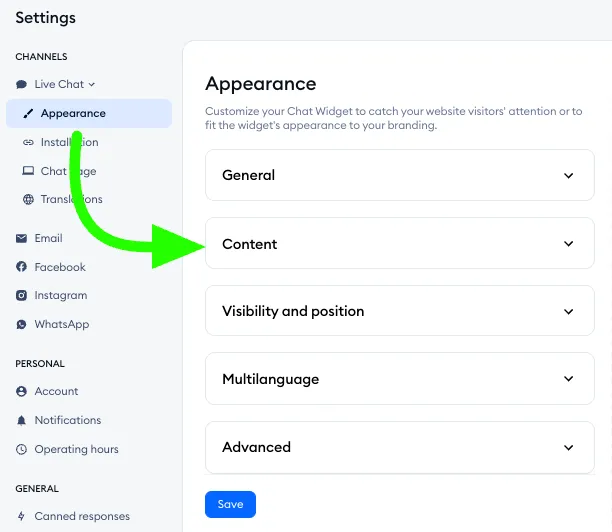
Inside, open the Chat tab. At the bottom, you can see the option labelled Let visitors create ticket when offline:
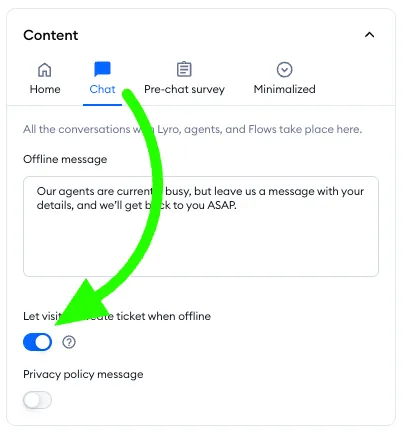
Please note: this option replaces the offline message (which is the default); instead of leaving their email address and continuing to use the chat as usual, the visitor will be asked to submit a ticket. This way, they will not be able to use the chat widget until you're back online.
Blocked emails
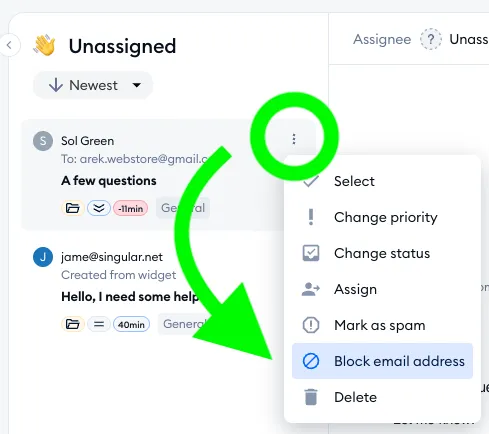
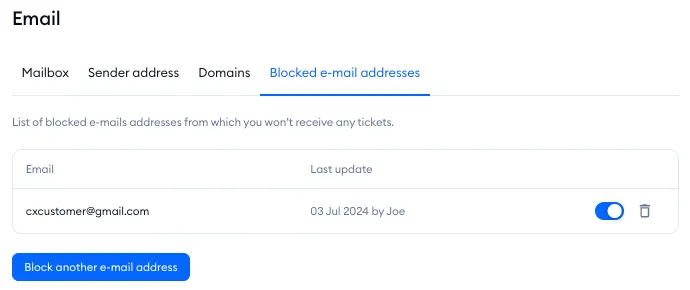
You can later manage all blocked emails by navigating to the Blocked e-mail addresses tab in Settings > Email section:
Managing tickets
In this section, we describe the following aspects of managing tickets:
- Using folders (responding, forwarding, leaving notes)
- Creating tickets from scratch
- Ticket statuses
- Creating tickets from chats
- Sorting and filtering tickets (by date and status)
- Creating custom Views
- Service-Level Agreement (SLA) policies
- Merging tickets
Ticket folders
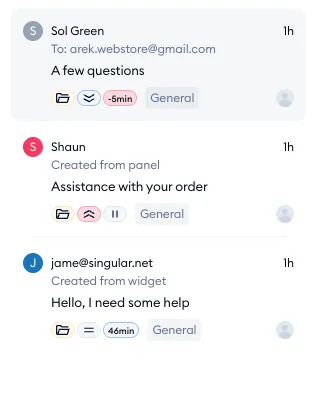
All the tickets forwarded to your Tidio mailbox will be shown in the Unassigned folder with the status Open.
Next to each ticket, you'll see the following information:
- the ticket's subject
- the sender's name or email address
- the mailbox (or other source) the ticket came from
- the ticket's status and priority
- the SLA tag, if an SLA policy applies to the ticket
- the time of the last message
- the assigned agent
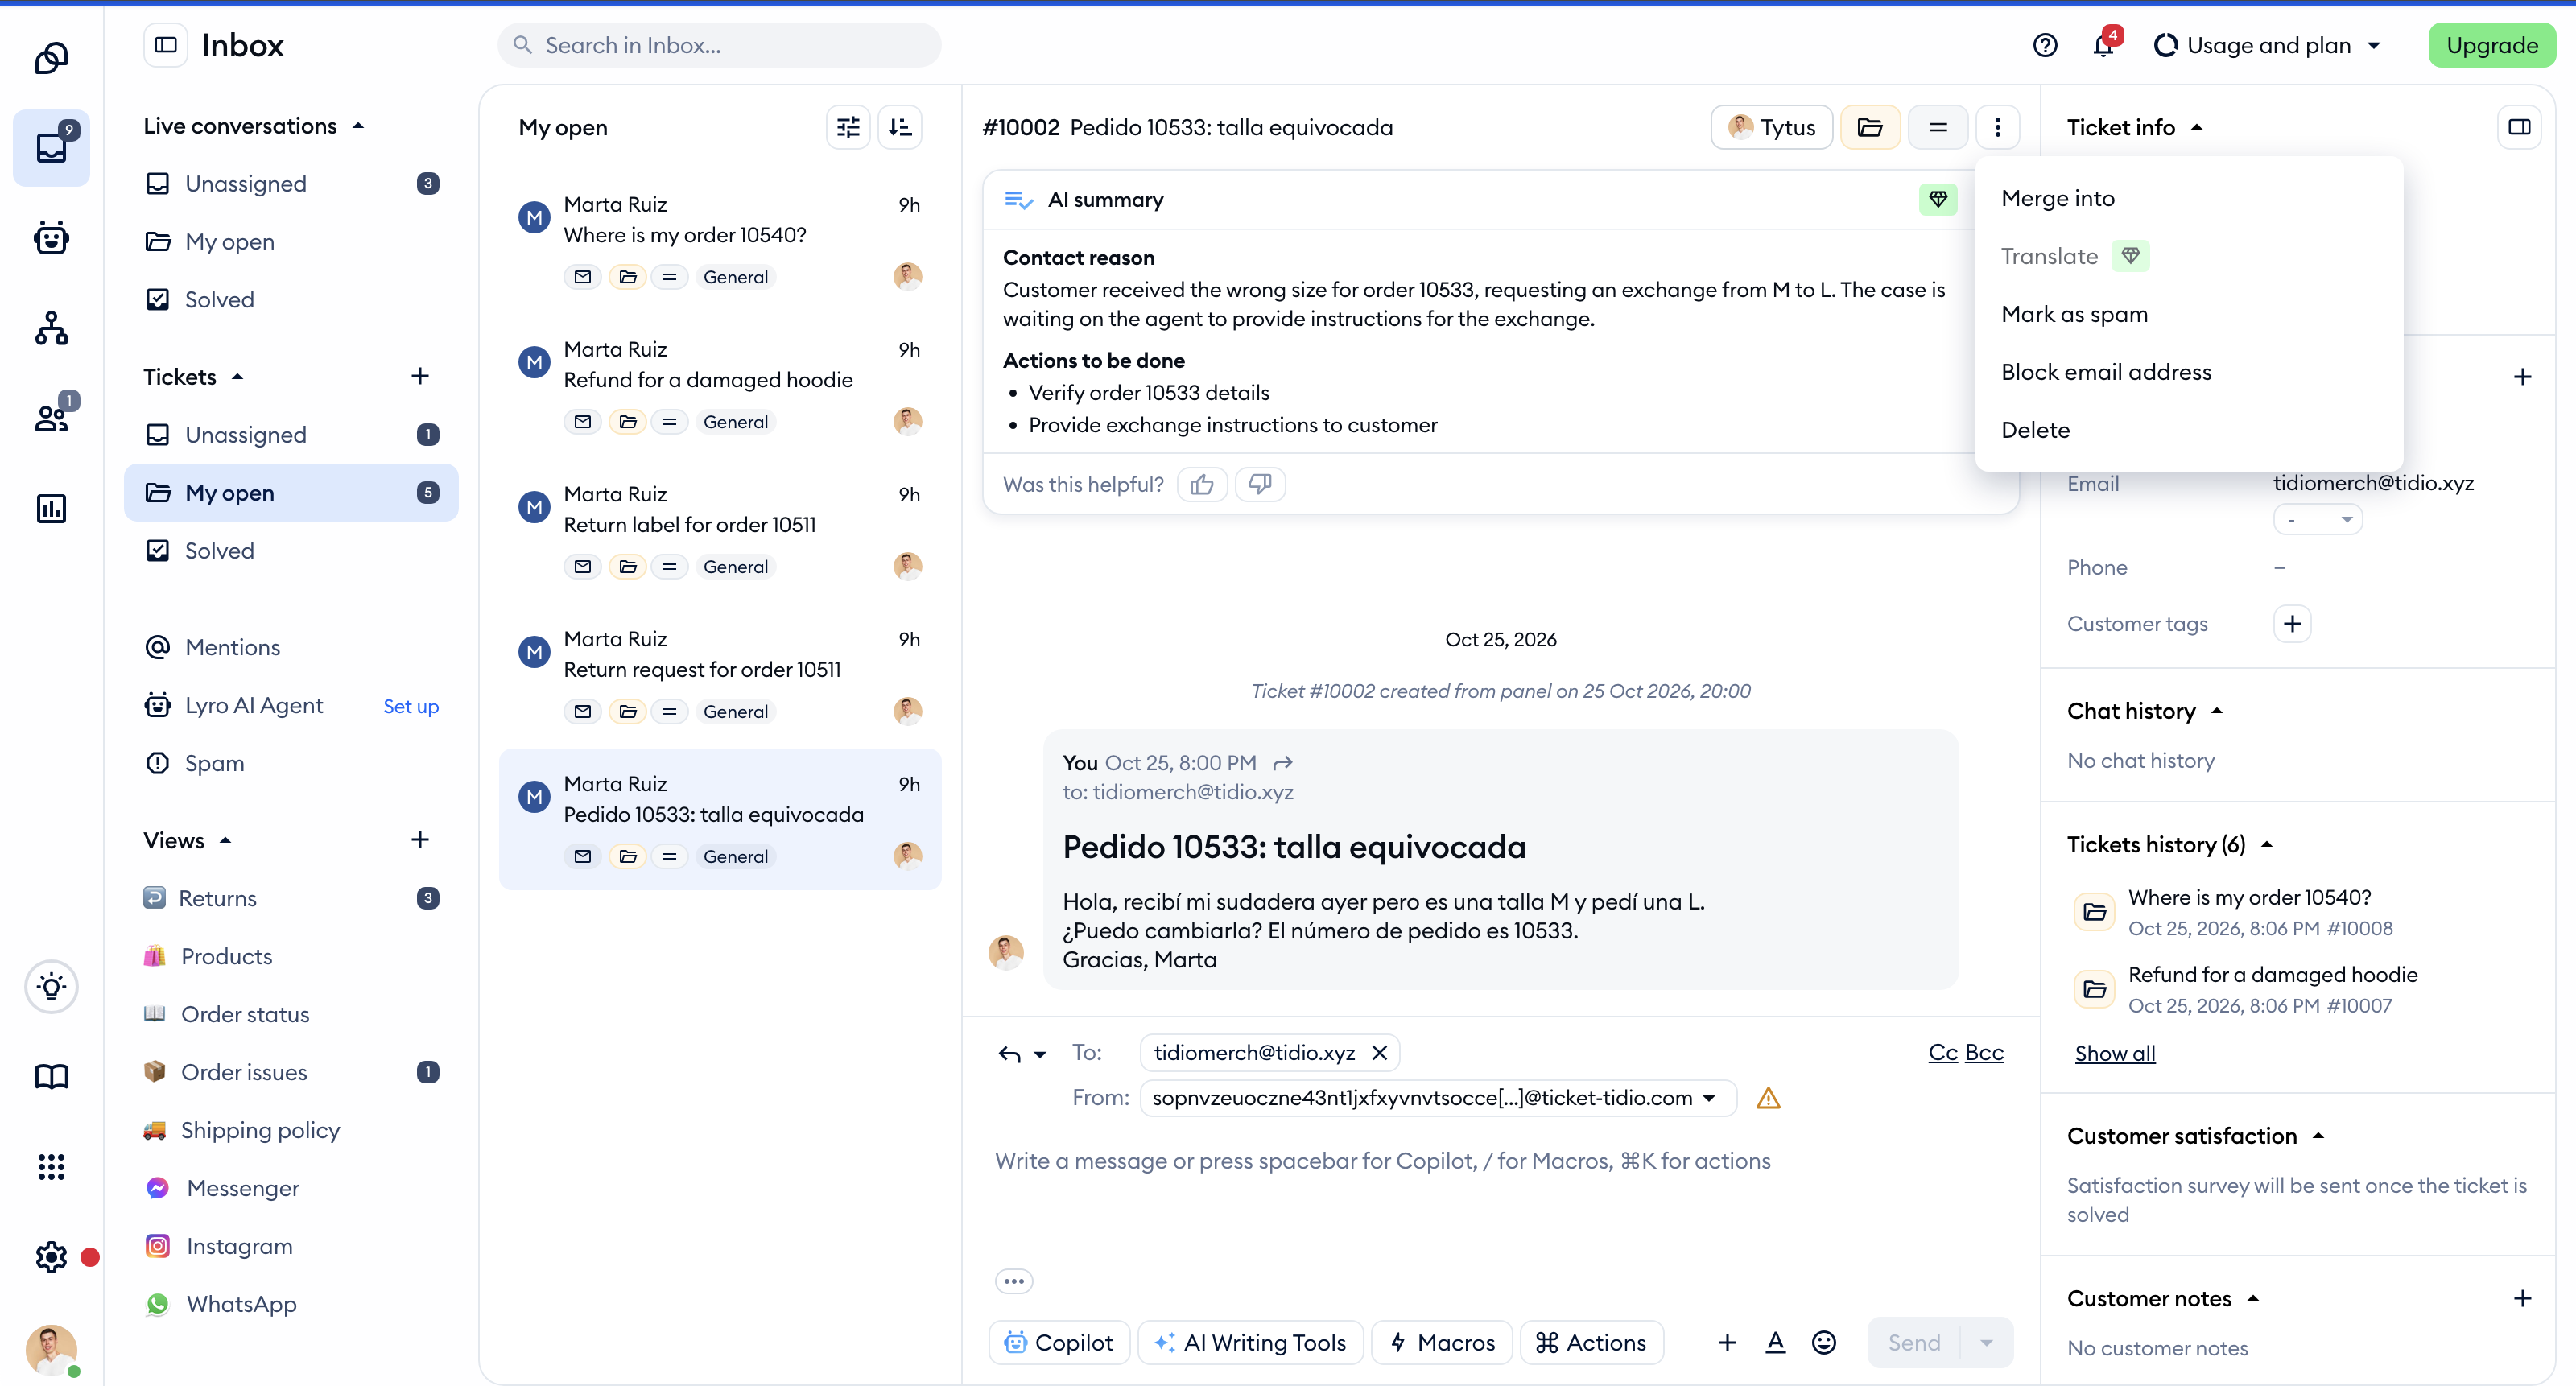
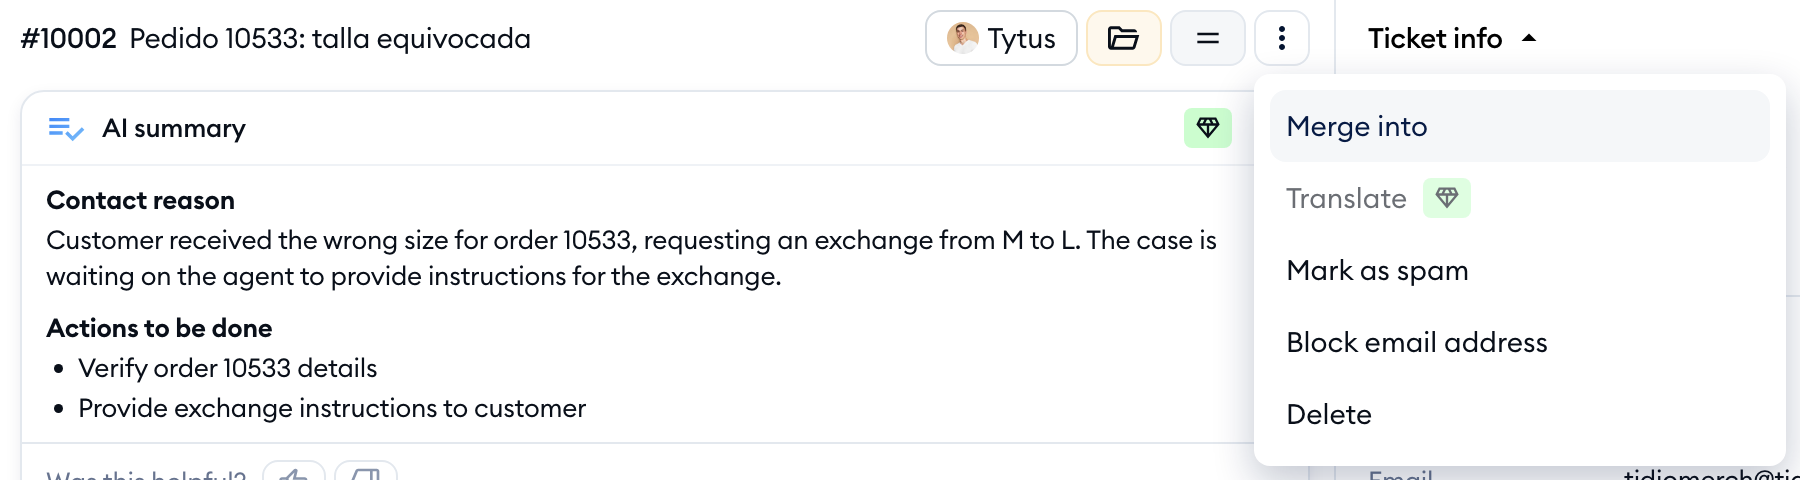
Click on the chosen ticket to open it. At the top bar of the ticket, you can see (and change) the current Assignee, Status, and Priority. The other options are in the three-dots menu on the right: Merge into another ticket from the same sender (if any such tickets are available); Mark as spam; Block email address to block the sender entirely; and Delete to delete the current ticket (visible only to agents whose permissions allow deleting tickets).
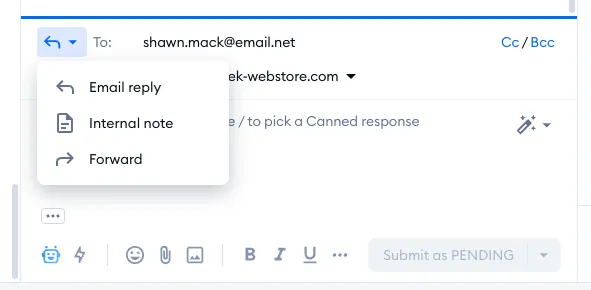
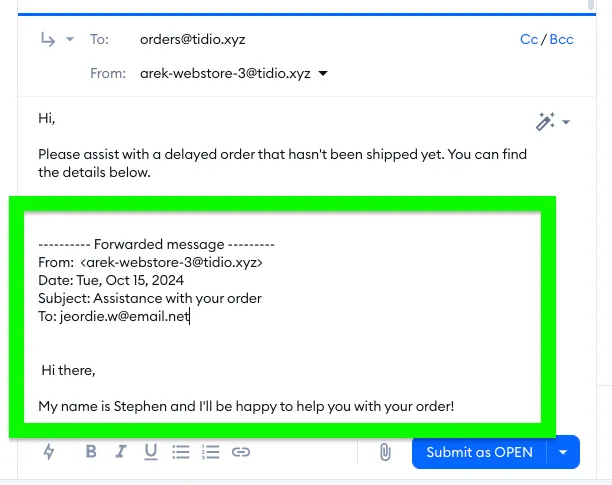
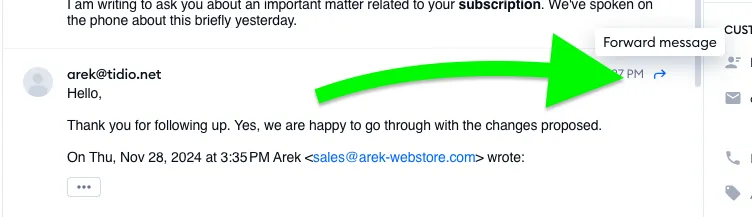
When you're viewing a ticket, you can respond to it directly, leave an internal note, or forward the ticket's most recent message to another address. You can see these different options in the lower half of the ticket, where the typing window is located (and notice that you can also use the additional Cc and Bcc options on the right, if you need to add more recipients):
Direct email responses
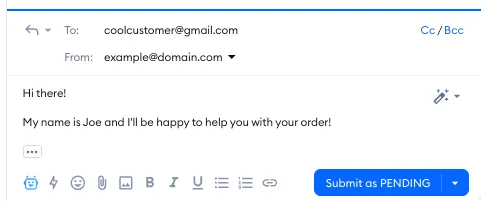
Using the Email reply option, you can compose a regular response which is sent to the recipient(s):
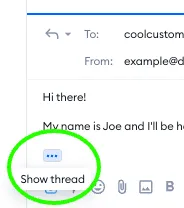
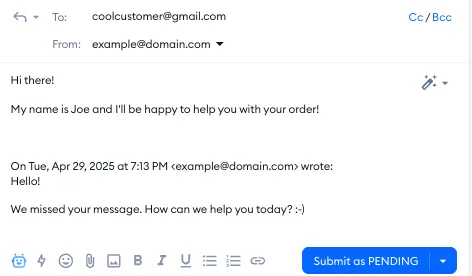
Please note: you can use the Show thread button in the lower-left, and this will display the entire ticket thread underneath your response:
This can be useful if you'd like to search for some specific information from past messages in this ticket, and perhaps quote them in your response.
Internal notes
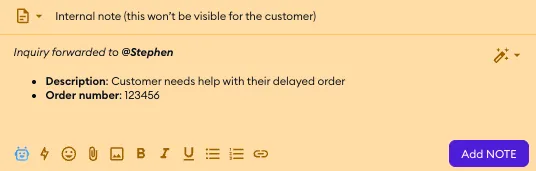
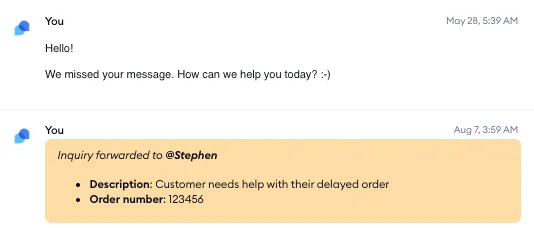
By selecting the Internal note option, you will be able to leave a note which is only visible to any agents who view the ticket:
Placing inline images into your ticket responses
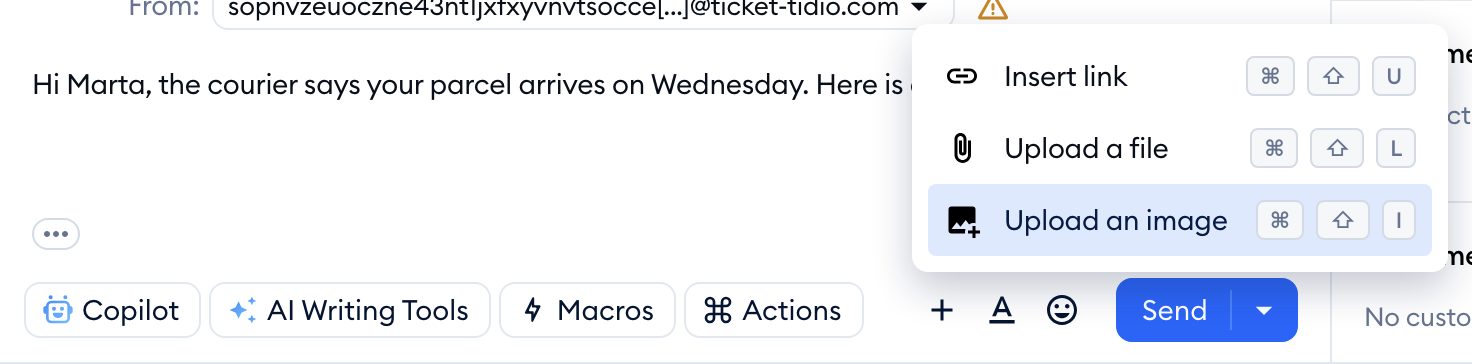
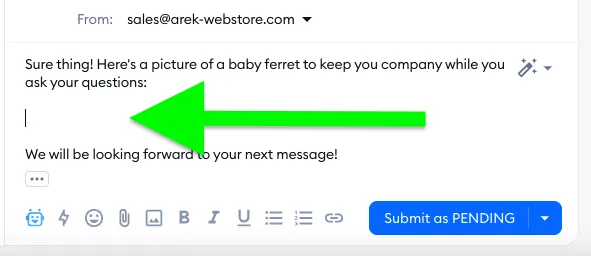
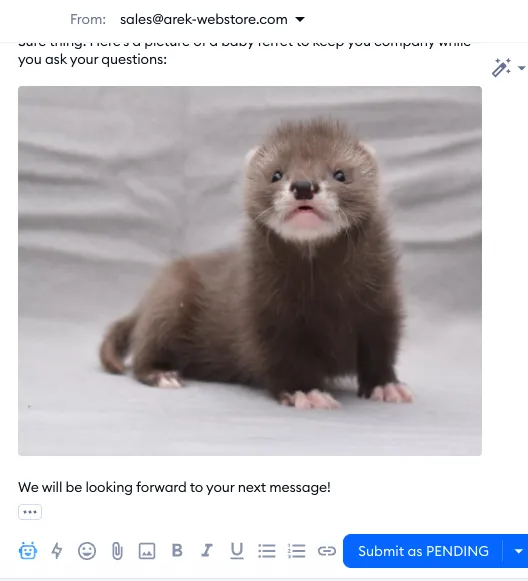
When composing a ticket, you're able to not just attach files, but also place images directly into the response itself - so that it is part of your message. You can either paste the image directly using Ctrl+V on Windows (or Cmd+V on a Mac), or click the + (Add to message) button at the bottom and choose Upload an image to select and upload an image file into your response:
Forwarding tickets
Cc and Bcc
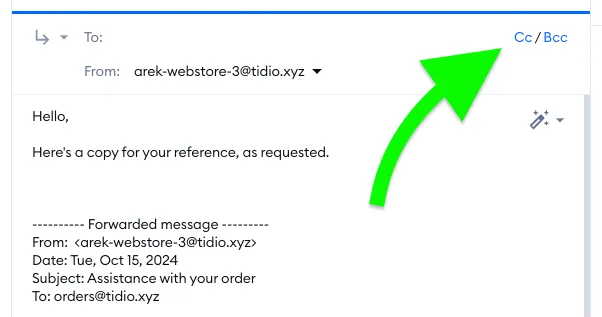
One more useful feature is the option to specify additional recipients whenever you respond in a ticket (or when you create one from scratch or from a conversation, or when you want to forward an entire thread to someone else).
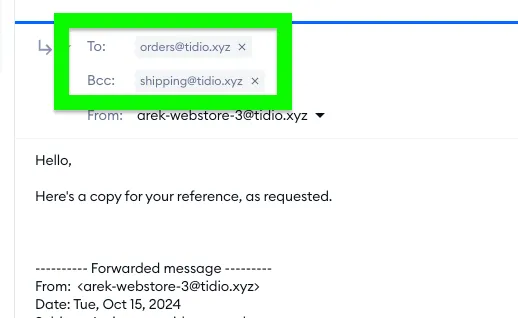
When replying in a ticket thread, you can see the Cc and Bcc options on the right of the default recipient; this allows you to send copies of the communication to additional recipients, either visibly or in a hidden fashion:
Once you add these visible or hidden recipients, their addresses will be listed in your ticket response:
Changing the text input area size
Checking and retrying ticket delivery
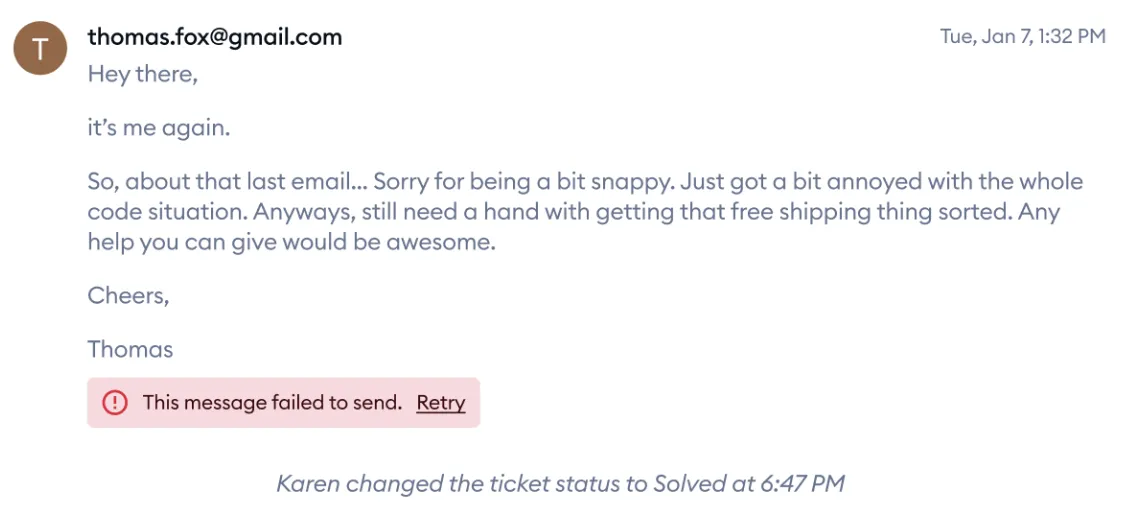
If a message isn’t delivered, you’ll now see a "This message failed to send" error directly in the ticket. You’ll also have the option to retry sending the message. No need to rewrite or resend from scratch!
Creating a ticket from scratch
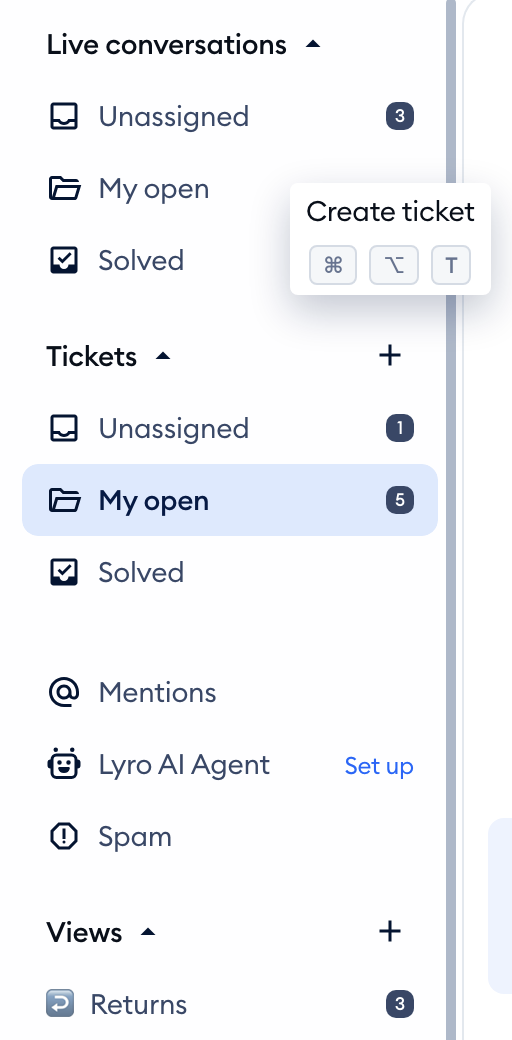
To create your own ticket from scratch, click on the + icon next to Tickets in the Inbox navigation:
Inside the New ticket view, you can specify the following (the Assignee, Status and Priority are in the bar at the top):
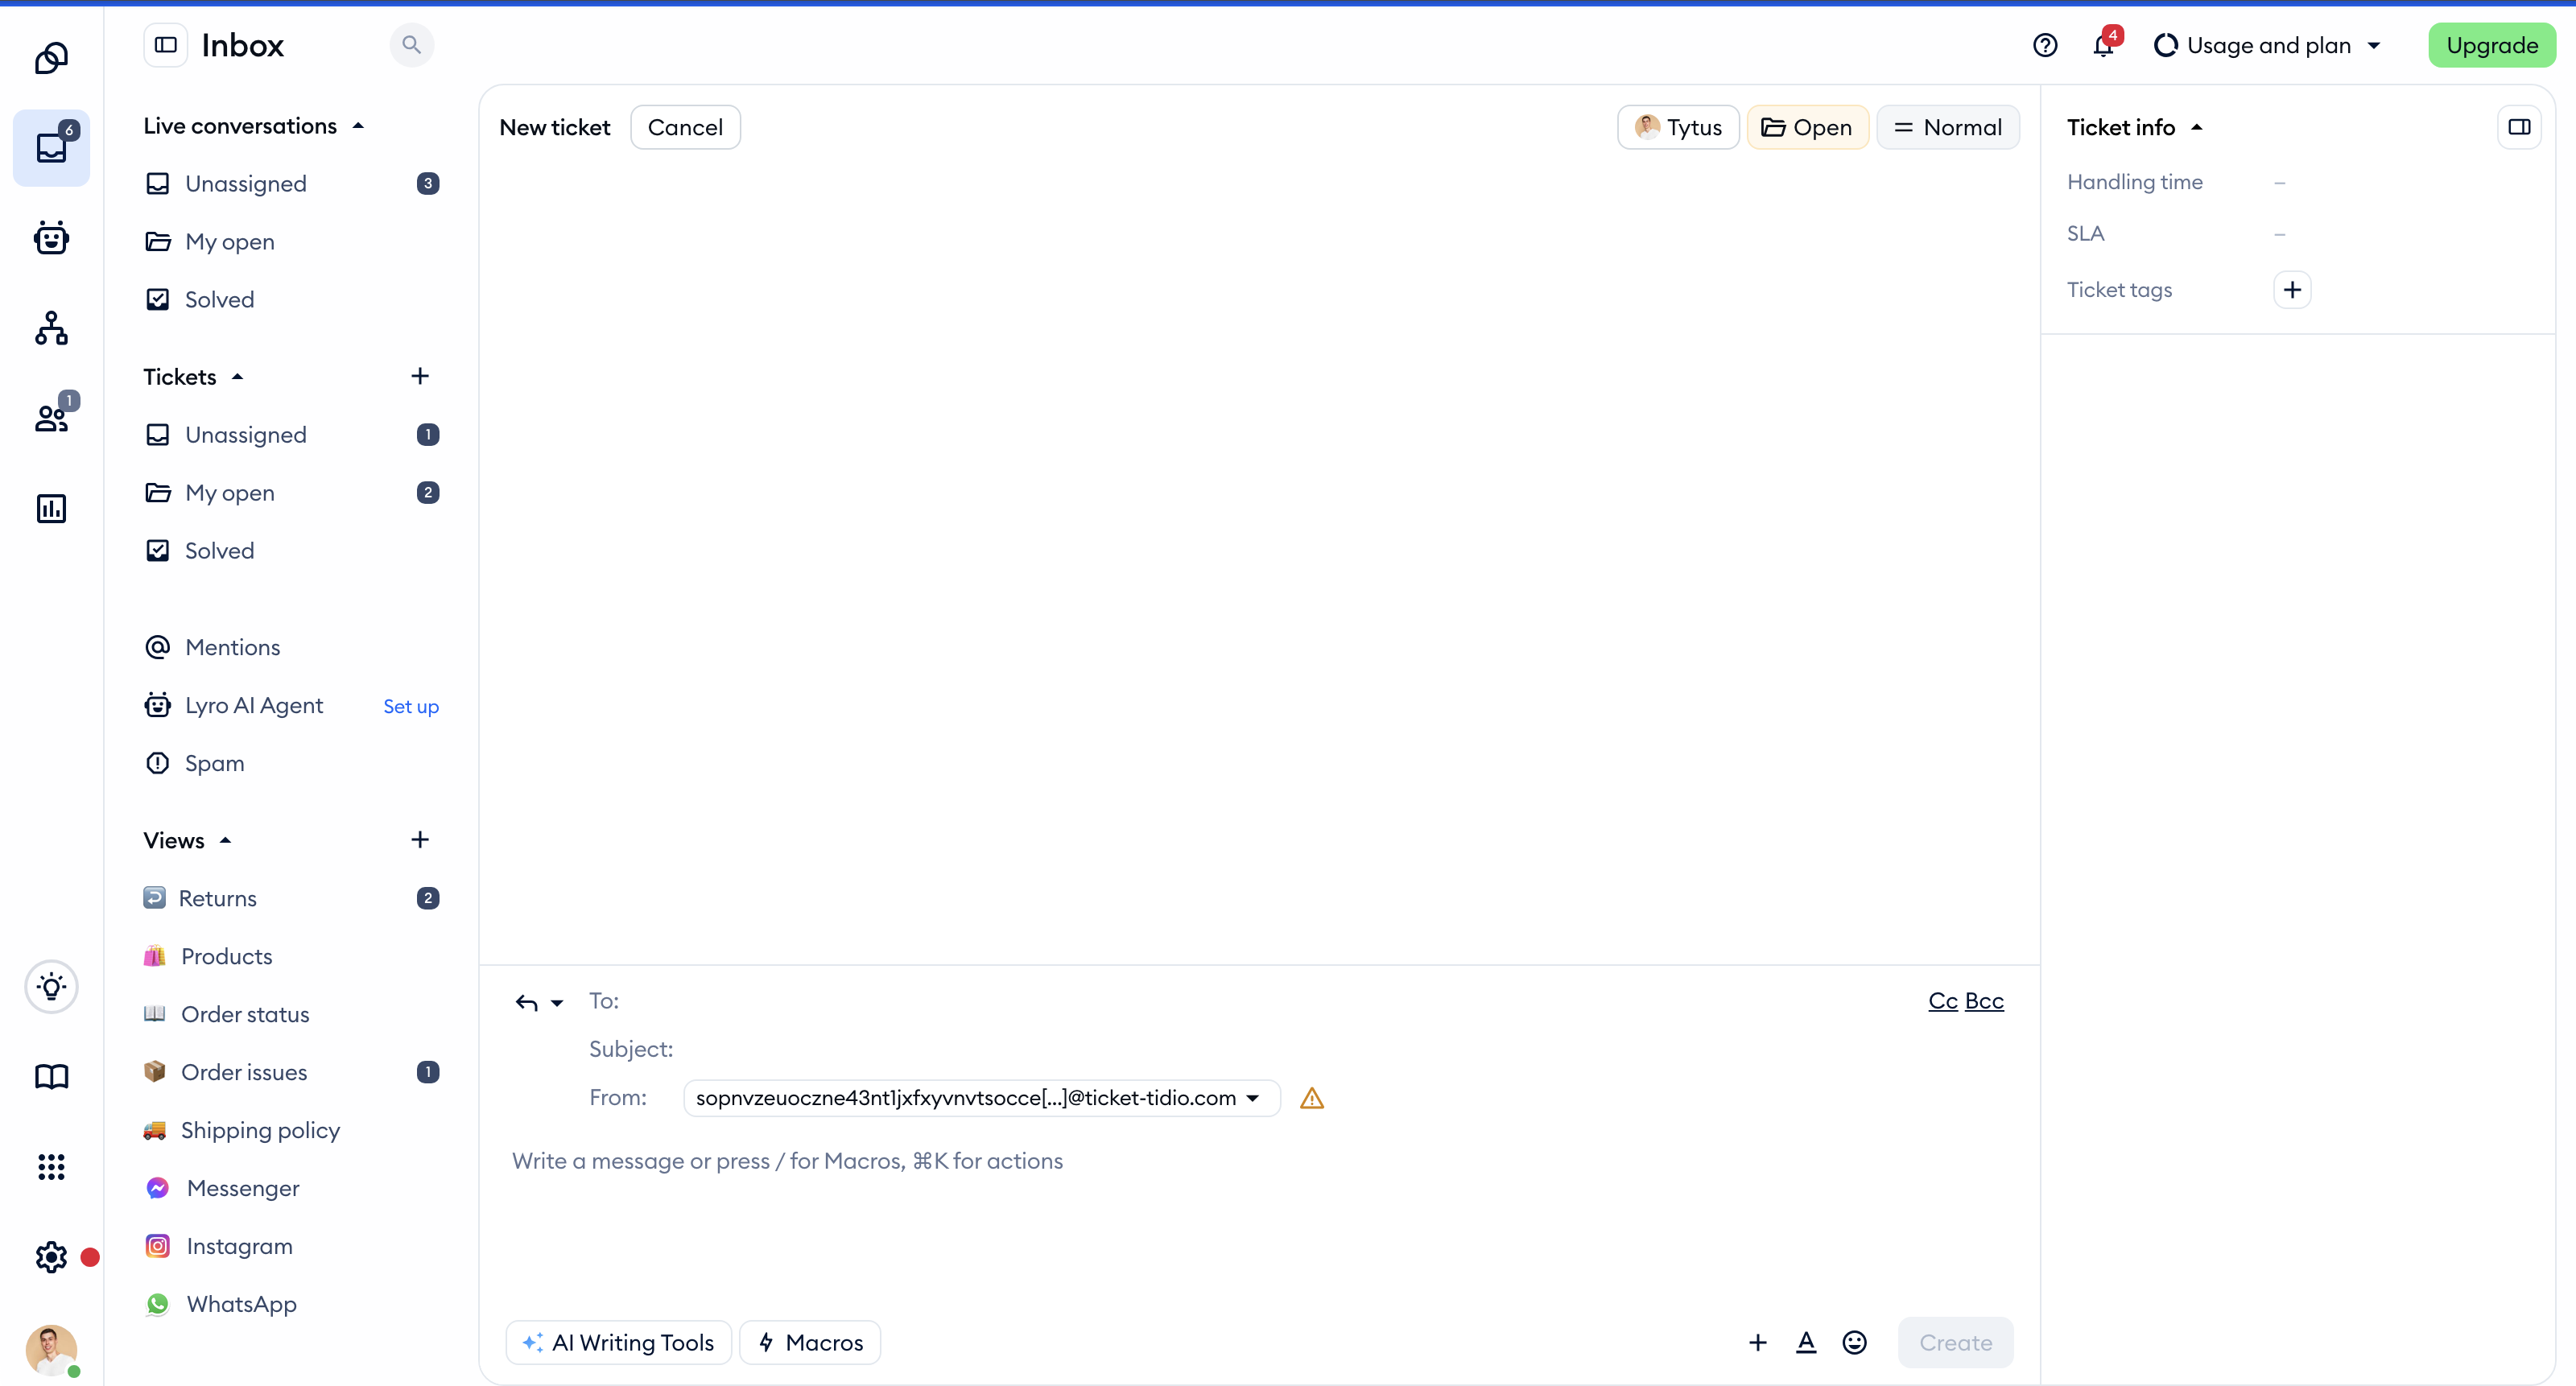
Ticket Subject
A summary of the ticket content in the form of a short sentence.
To (the recipient's address)
The email address of the person who will receive the email (you can add additional addresses using the Cc and Bcc options - which allow you to forward the message to either visible or hidden recipients).
From (your sender address)
The email address you're using to send this message (you can use the default Tidio domain, or one of your own addresses, if added already).
Priority
You can set the priority to Low, Normal, or High. New tickets start as Normal.
Assignee
The agent responsible for handling the ticket (you, by default).
Ticket message (text input)
The content of the email; this is where your actual message is created. Please note that you can add basic text formatting, hyperlinks, as well as Macros ( ) and file attachments (
 , in the + menu). Once everything is ready, hit the Create button.
Internal note mode
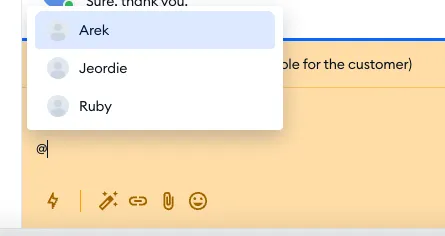
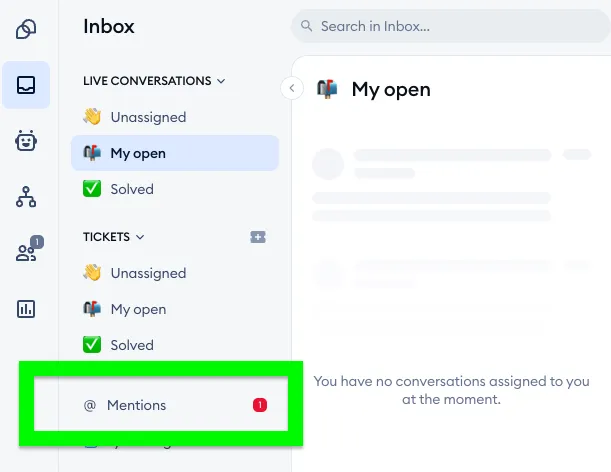
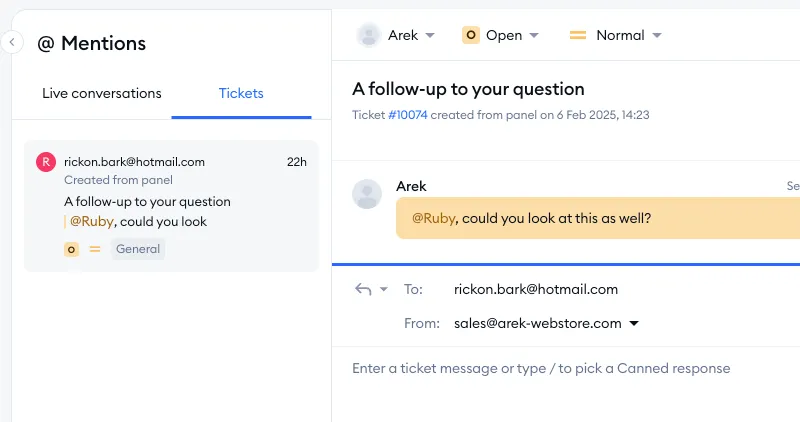
Switching to this mode lets you compose a private message that customers will not see. Internal notes are visible only to the agents viewing the given ticket. You can also mention specific agents by using the @ symbol, so they are notified about your note.
Statuses
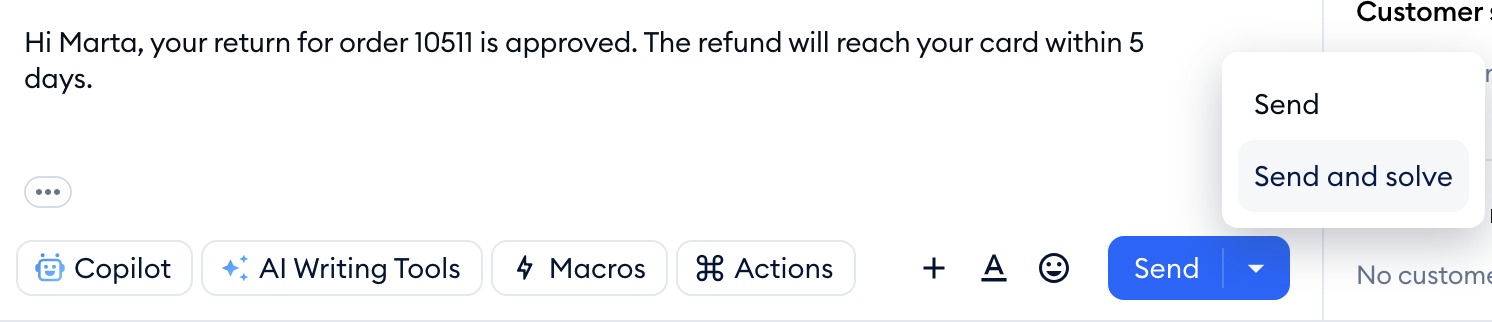
Every ticket has one of three statuses. You can change it at any time with the Status dropdown in the bar at the top of the ticket (or set it before you create a new ticket).
When you reply to a ticket, the status changes together with your message: the Send button sends your reply and sets the ticket to Pending. To send your reply and close the ticket in one go, click the arrow next to the button and choose Send and solve.
Here's what each status means:
Open
The default status for all the new tickets created. If an agent is assigned, the assigned agent will see the email in the My open folder. If no agent is assigned, the ticket will show up in the Unassigned folder.
Pending
Pending status means you are awaiting a response from the customer. When the customer writes back - the status changes automatically to Open status.
Solved
This status means the ticket got closed, and you're not waiting for more responses from the customer. If the customer writes back, the ticket goes back to the Open status.
Creating tickets from chats
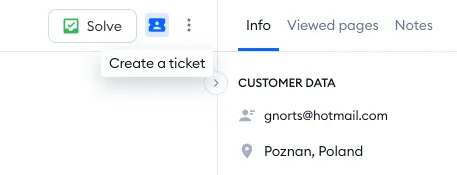
You can also create a new ticket from the chat conversation panel. To create a ticket during your chat conversation - click on the Create ticket icon in the upper-right of the conversation:
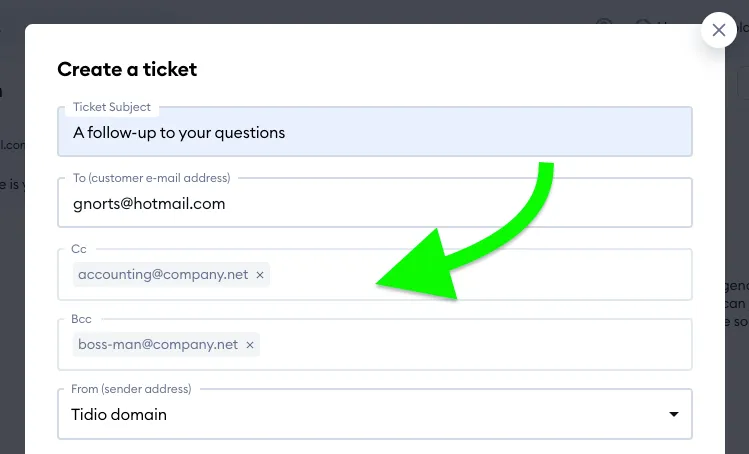
You'll see a window allowing you to create a new Ticket. The system will automatically fill in the email address of the visitor. Of course, you can add more recipients using the Cc/Bcc option, if you wish:
Sorting and filtering tickets
In each Tickets folder you can sort all the tickets inside either from the newest (at the top) to the oldest, or from the oldest to the newest. Just click the sorting icon at the top of each folder to switch between Newest first and Oldest first:
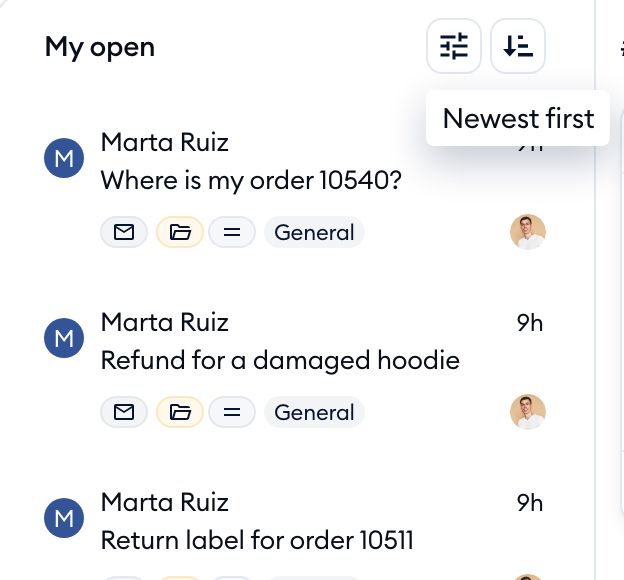
This can be very useful when you have a larger number of tickets to handle, and you'd like to organise your work based on the date of the tickets.
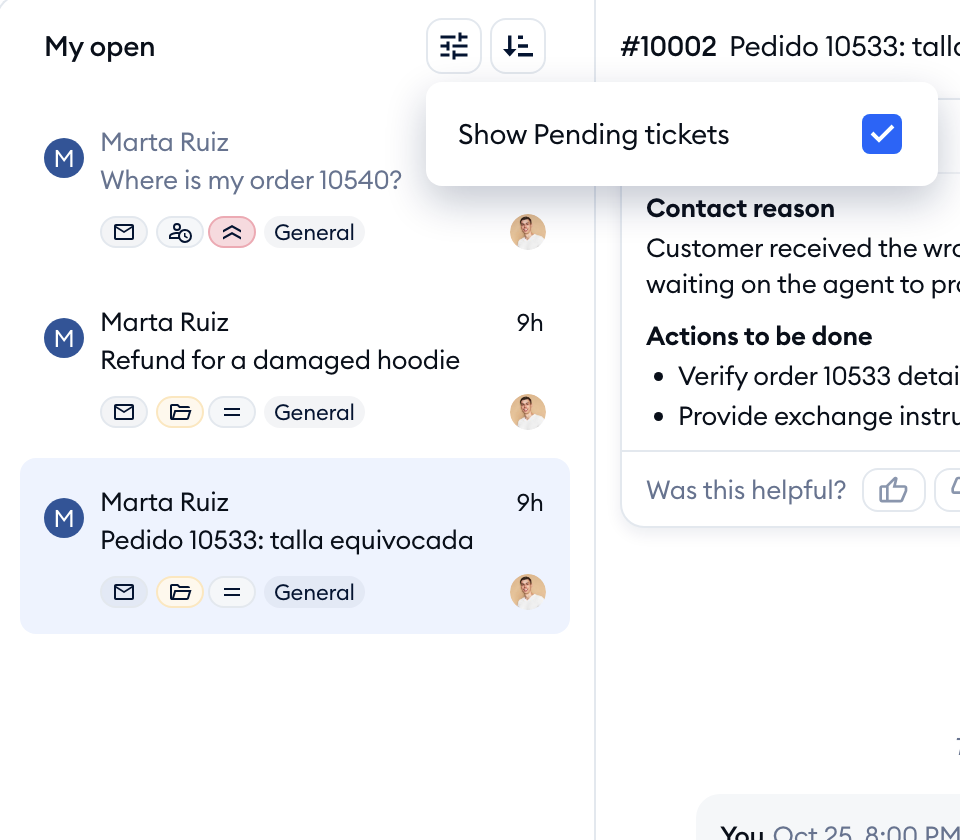
In addition to the sorting option, the My open folder also offers an additional feature: the Show Pending tickets checkbox. You can find it under the Filter tickets icon at the top, and it is enabled by default. When enabled, your list will show tickets that have the Open status as well as the Pending status:
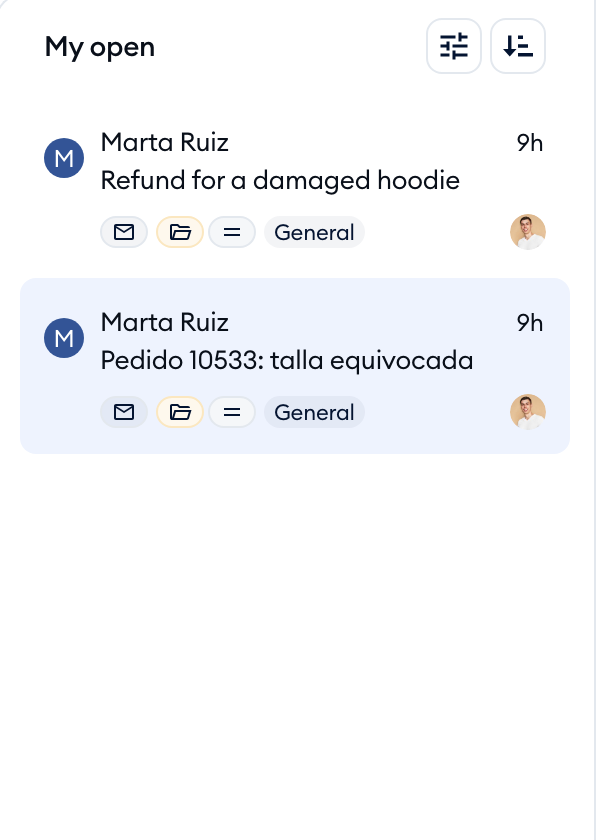
When disabled, the list will show only those tickets that have the Open status:
Naturally, this Show Pending tickets option is not available in the Unassigned folder (since all the tickets there are always open), nor in the Solved folder (all the tickets there are always solved).
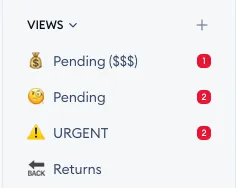
Custom ticket Views
Using custom Views is a great way to organize your communication, and you can use that for tickets. Creating your own views will let you access specific types of tickets quickly, and you can base the views on many different conditions and filters.
Please see this comprehensive guide on creating custom ticket Views for more details.
Service-Level Agreement (SLA) policies
Adding Service-Level Agreement (SLA) policies allows you to set timeframes for your agents' response times for tickets. This lets you set a standard and become more efficient with your services, as agents will become more conscious of their own response times. In turn, it can help you track your team's efficiency with incoming email traffic.
To learn about SLA policies and how to use them in Tidio, see this article.
Merging tickets
When you receive multiple separate tickets from the same user (the same email address), you get the option to merge them all into one single ticket. You can do it straight from any ticket folder (such as Unassigned or My open), a custom View, or an agent's tickets in the Agents section.
Merging works for open and pending tickets from the same email address. Solved tickets, and tickets created from Facebook or Instagram comments, can't be merged - in that case the Merge button is grayed out, and hovering over it tells you why.
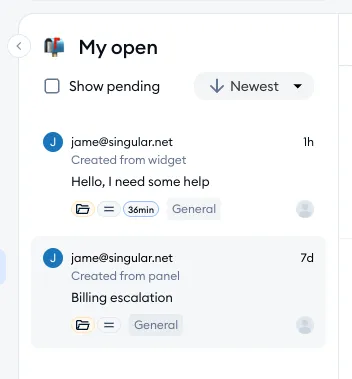
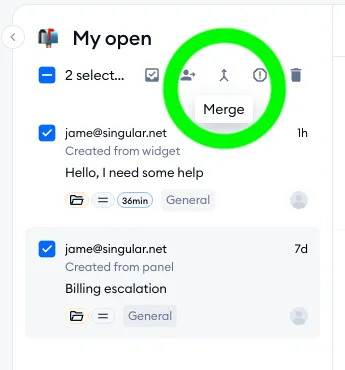
First, you need to find the tickets you'd like to merge - and select them. To do that, tick the box that appears next to a ticket when you hover your mouse over it, and then keep selecting the other tickets (from the same user). Once you've selected all the right tickets, click on the Merge button at the top:
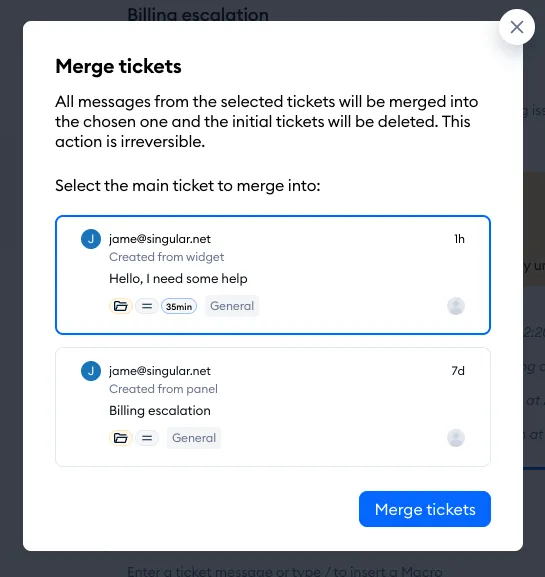
You will see a new window, with all the selected tickets listed. In this step, you need to choose which ticket will become the main ticket from now on; all content from the other tickets will be moved to the new ticket, in chronological order, and only one ticket will remain. Click on the Merge tickets button when you're ready:
Please note: merging can't be undone. The other tickets are deleted once their messages are moved to the main ticket.
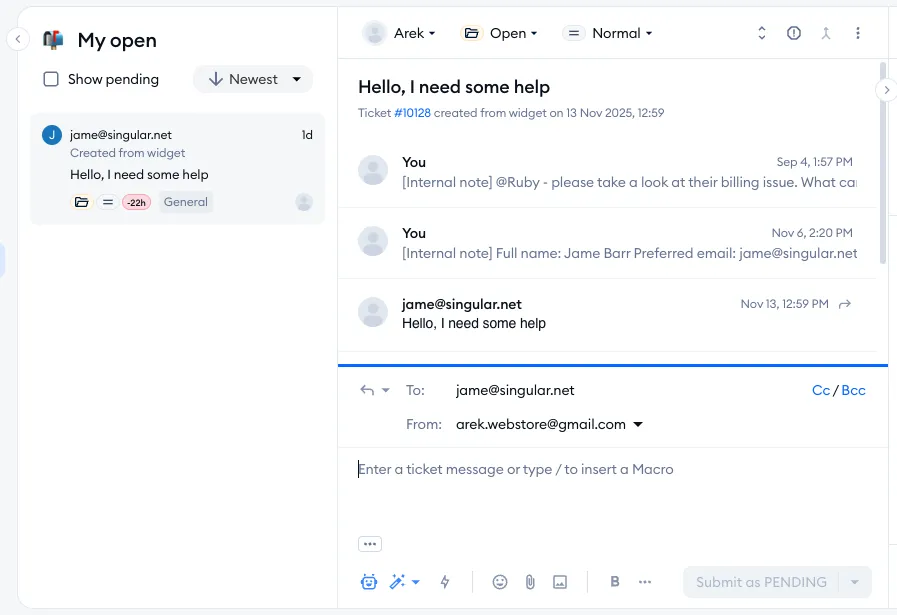
Once merged, you will see the resulting ticket in your folder - and all of the other tickets' content inside:
One more feature that can help you merge tickets efficiently is the Merge into option in the three-dots menu in the upper-right of a ticket. It will become active when you're looking at a ticket and Tidio detects that other open or pending tickets (from the same email address) exist in your Tickets inbox. You can use the option to quickly merge the current ticket with another ticket of your choice. You can avoid searching for them manually!
Once you click the Merge into option, you will see a similar popup window - listing all available tickets for you to merge the current ticket with.
Other actions on several tickets at once
When you select tickets in the list, the bar at the top lets you do more than merge them. You can also Change status, Assign (or Reassign) them, Mark as spam (up to 100 tickets at once), or Delete them (only if your permissions allow deleting tickets). Use the checkbox at the top to select all the tickets in the list.
If you solve several tickets at once and some of them have empty required custom fields, only the other tickets are solved, and the ones that still need their fields filled in stay selected.
Customer Satisfaction rating and feedback
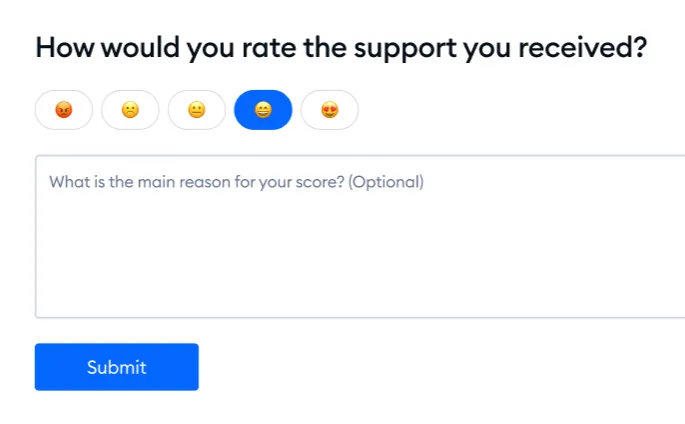
Whenever a ticket is closed (solved), you can send an automated satisfaction survey via email. This is enabled by default, and can be managed via Settings > Customer Satisfaction. You can learn about the Customer Satisfaction tool in more detail here.
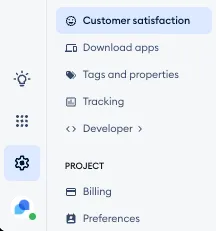
Enabling and modifying the survey email
The Customer satisfaction tool allows you to ask for a rating on a scale comprised of 5 options (emojis). You can decide about the amount of time after which the survey will be sent. Of course, you can modify all the default texts for the survey email as well.
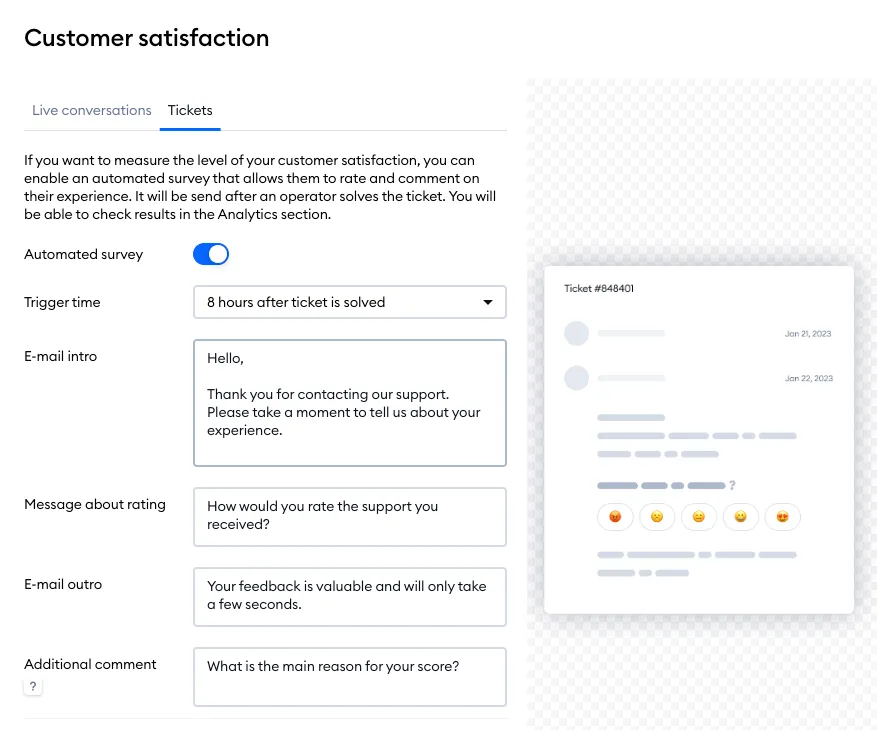
Here's an example of what such a satisfaction survey email may look like on the customer's end:
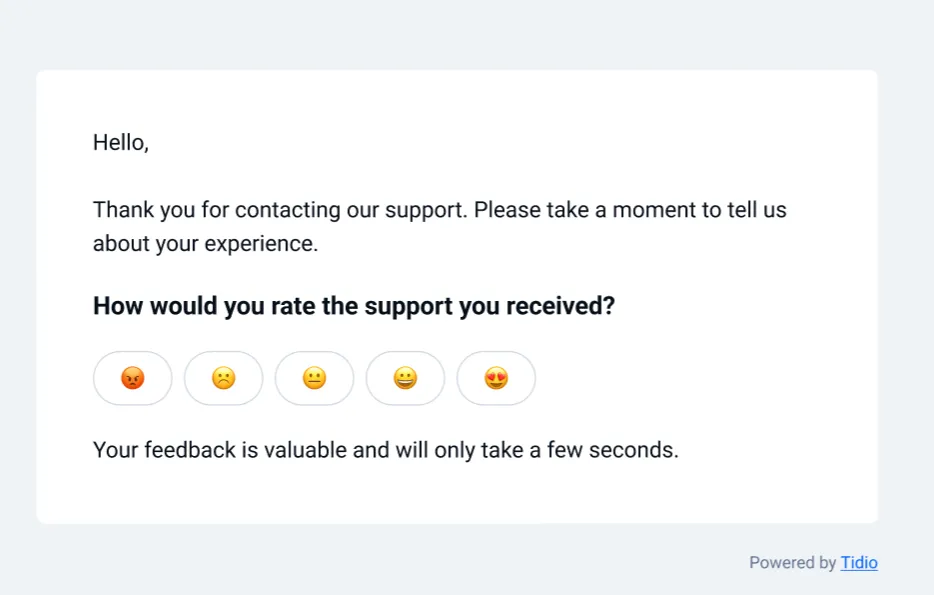
If the customer clicks on one of the ratings in the email, they will be taken to a separate landing page, where they will have the option to leave an additional comment:
Checking the survey results
You can later check the effectiveness and satisfaction rate in the Analytics section, which you can learn more about here. The results can also be viewed inside the ticket itself - in the visitor's details section on the right.
In Analytics, you can find the average rating (for a selected time period) in the Tickets tab. You will see a graph with more details, as well as the View rated tickets option - allowing you to see a list of all rated tickets, sorted by rating.
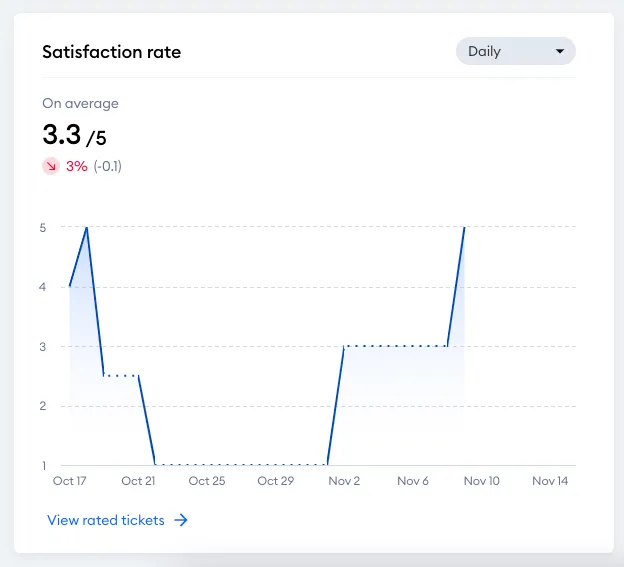
You can also find the average ticket rating for each agent in the Agents tab of the Analytics section.
Adding ticket tags
To add a tag to your ticket, click on Add ticket tag under the Info tab (in the upper-right, visible whenever you're viewing a ticket):
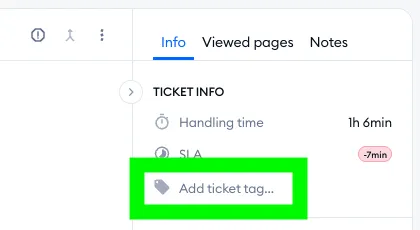
Please note that a ticket tag is separate from a customer tag; ticket tags are associated only with ticket threads, while customer tags are associated with specific users. As opposed to customer tags, ticket tags aren not used in your contacts list (in the Customers section).
Using ticket tags can be useful if you need to quickly identify certain ticket threads or see some crucial information fast. Any added tag will be visible inside the ticket itself. You can also manage your ticket tags via Settings > Tags:
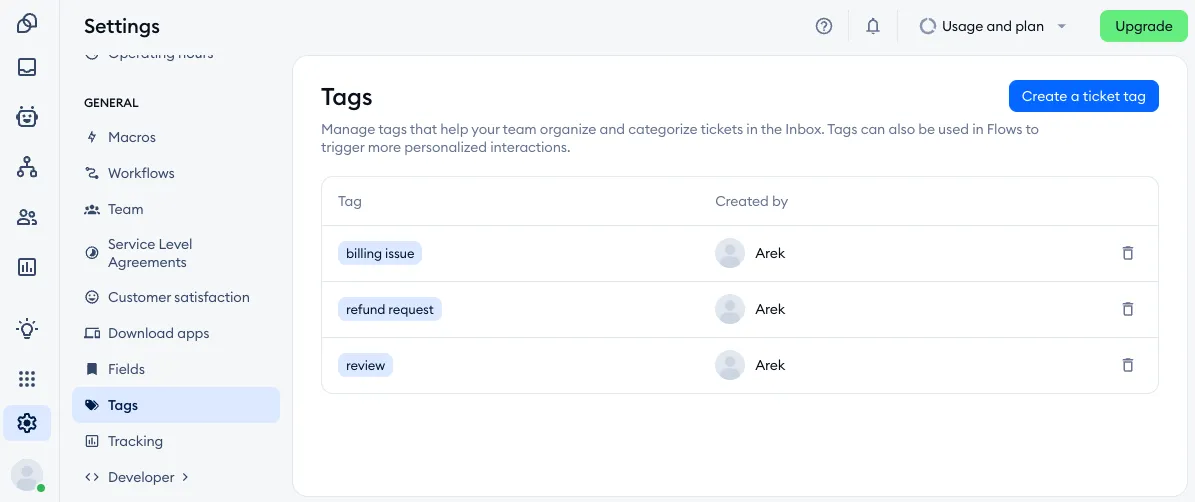
You can also use your ticket tags to create custom ticket views - which you can learn more about in this article.
Enable Lyro for tickets
The Lyro AI Agent is available on your project to automatically respond to incoming messages, and its knowledge is based on what you configure as data sources. If you'd like to learn more about Lyro in general, please see this comprehensive guide.
When you activate Lyro, it always works on the live chat channel by default. However, you can enable Lyro on other channels - including the Email channel, allowing Lyro to respond to incoming tickets in your panel.
You can see these options under the Channels section in Lyro's Configure tab:
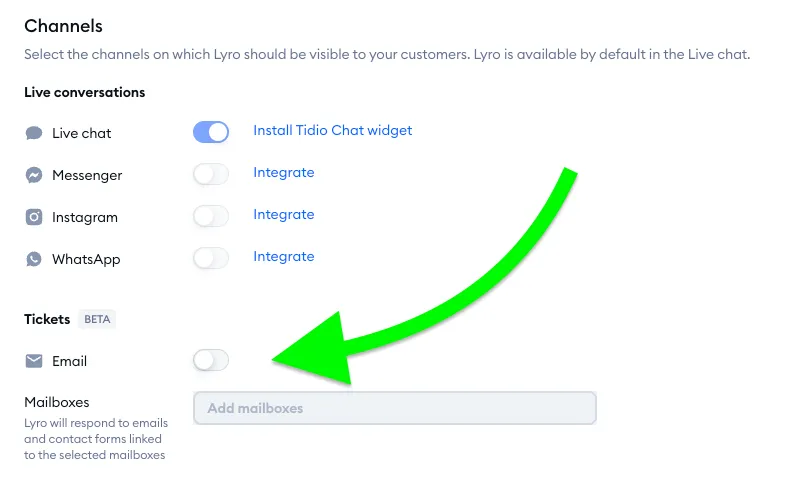
When you enable the Email channel, any mailbox you've already connected (in Settings > Email) will be automatically listed - allowing Lyro to respond to emails forwarded from those mailboxes.
You can, however, remove the mailboxes you wish Lyro to ignore, and even connect new ones:
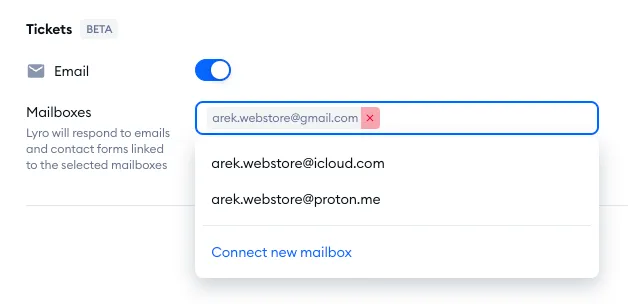
Please note that enabling the Email channel is only possible if you've already connected at least one mailbox with Ticketing.
