Setting up an entire AI agent for your business can seem daunting, but with Lyro in Tidio, it’s a quick and efficient process. In just 10 minutes, you can have a fully operational agent ready to assist your customers! This guide will walk you through the steps to get Lyro AI up and running on your website - and in your mailbox.
In each of the four steps, we will also provide links to other articles that cover each topic in much more detail.
In this article, you will learn:
- How to set up Lyro
- How to test and improve Lyro's performance
- How to go live with Lyro
- What further steps you can take
Step 1: Set up Lyro
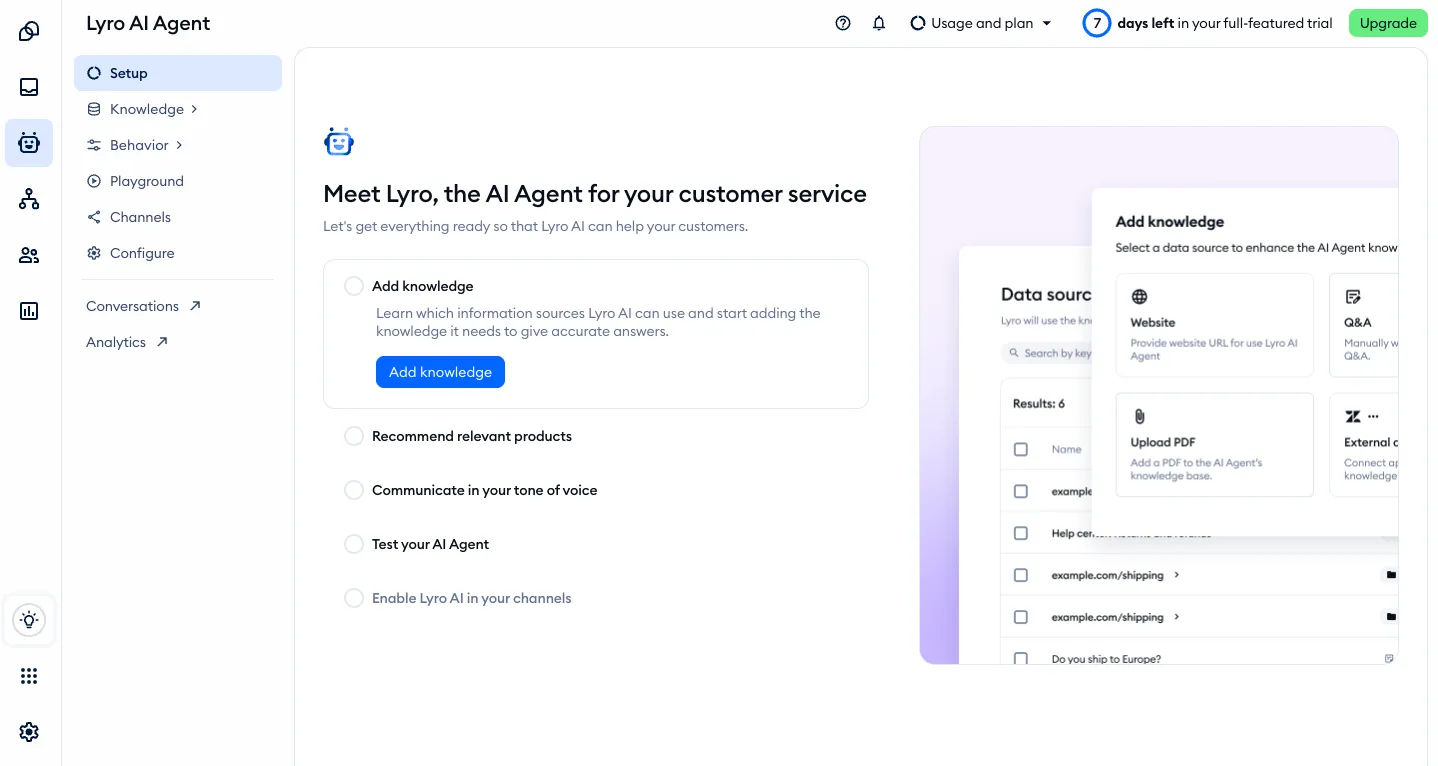
To start your Lyro setup, head over to the Lyro AI Agent section. The first time you open it, you'll land on the Setup page (Meet Lyro, the AI Agent for your customer service), with a short checklist:
- Add knowledge
- Recommend relevant products
- Communicate in your tone of voice
- Test your AI Agent
- Enable Lyro AI in your channels
Click on a step to see what it's about and the button that takes you to the right screen. Finished steps are crossed out, so you always know what's left. Once Lyro is active in at least one channel, Setup is replaced by the Hub - Lyro's performance at a glance.
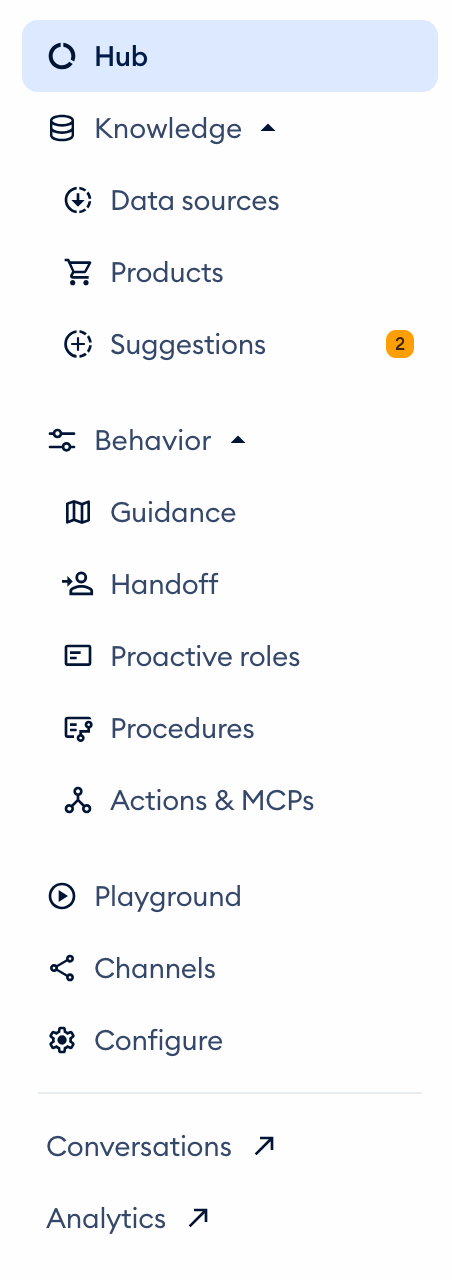
You can also reach every screen from the menu on the left, where Lyro's settings are grouped into Knowledge (Data sources, Products, Suggestions) and Behavior (Guidance, Handoff, Proactive roles, Actions & MCPs), followed by Playground, Channels and Configure:
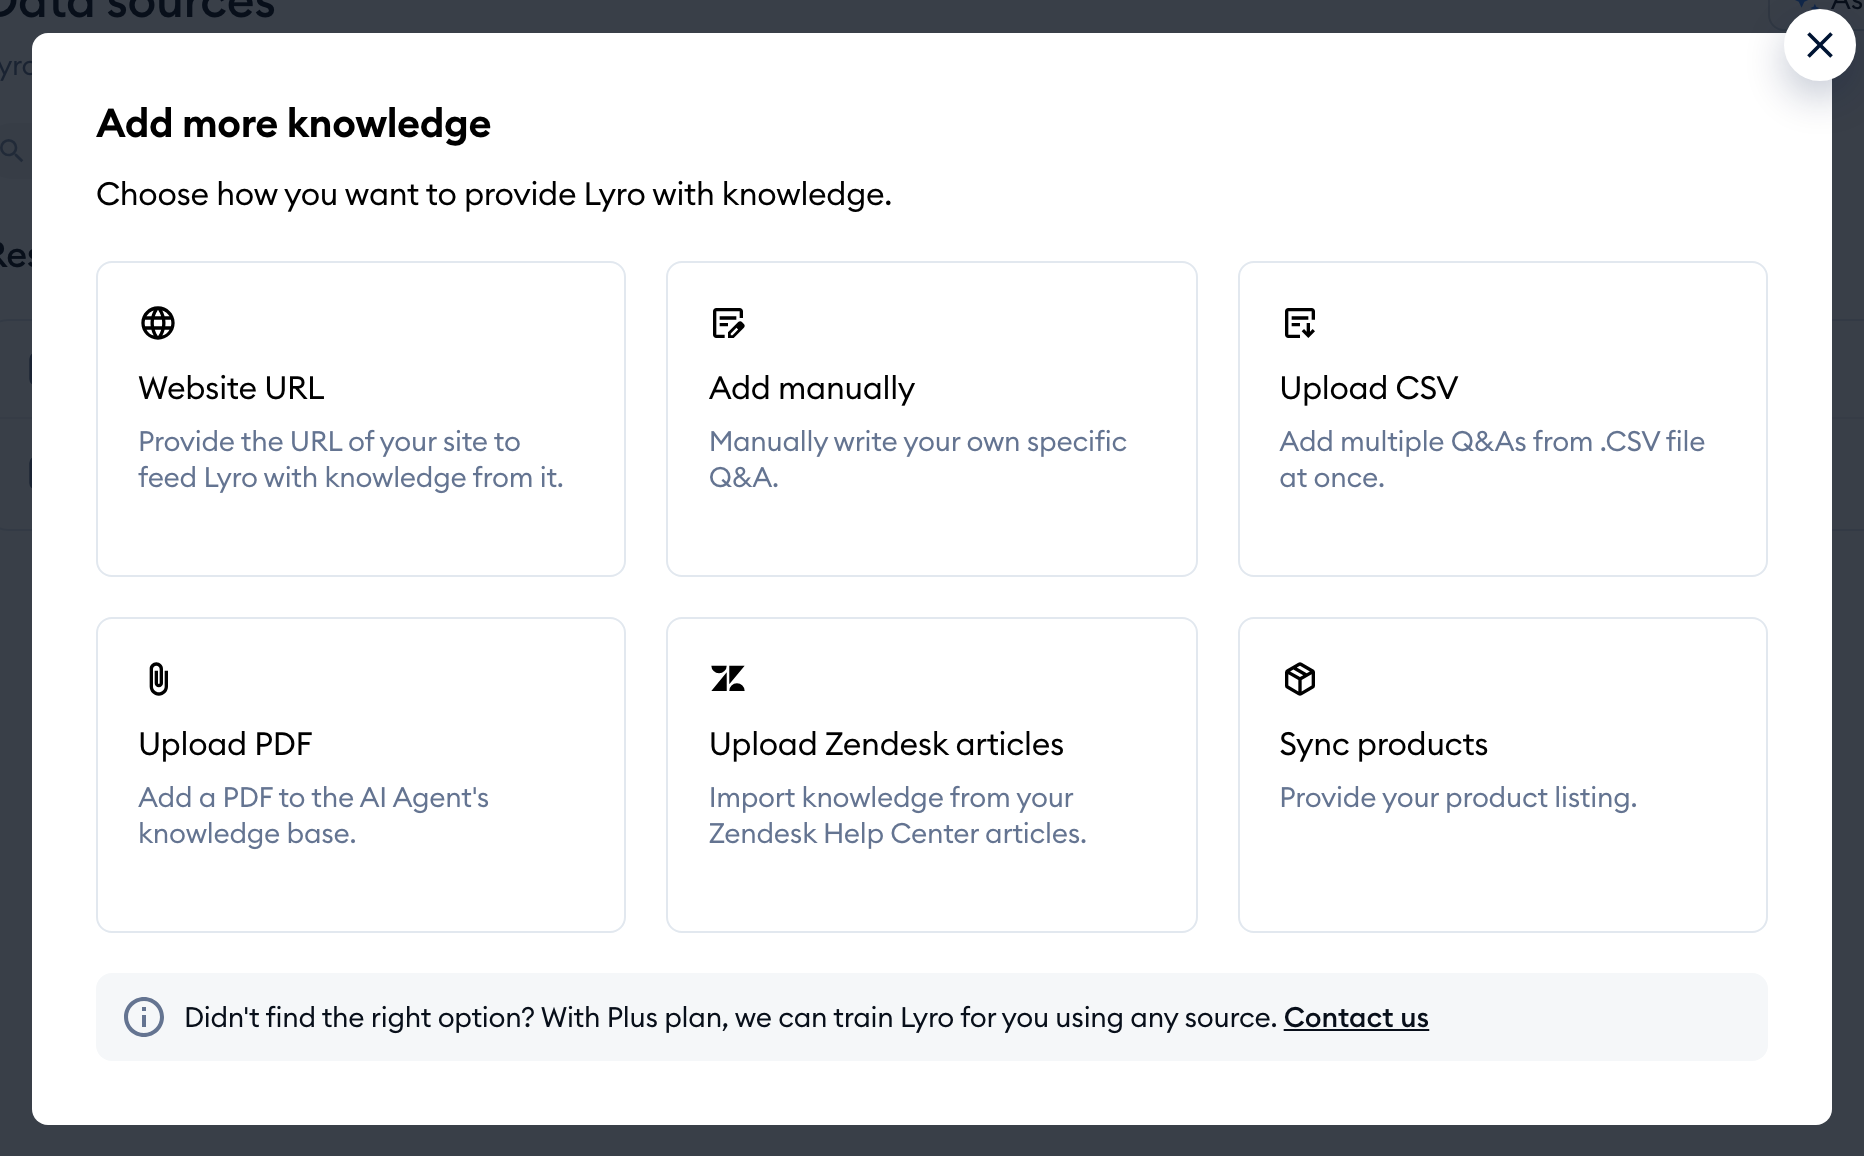
The first part of integrating the Lyro AI agent is preparing it for work. To achieve that, you need to add data sources which Lyro will use as its knowledge base. Click on Add knowledge in the checklist (or go to Knowledge > Data sources) and choose how you'd like to add it:
Add your website URLs as a data source
Choose Website URL, and paste in your relevant website URLs. The AI will learn the content of your page(s), understanding the context to answer visitor queries accurately.
Upload additional knowledge
For more comprehensive responses, add your own question-and-answer pairs (Add manually or Upload CSV), upload PDF files, or import your Zendesk Help Center articles. This helps Lyro provide more accurate and relevant answers.
You can see more details about adding and managing Lyro data sources in Data sources - Lyro's knowledge base.
Please note: Lyro needs knowledge before you can test or activate it. Until you add some, you'll see To activate or test Lyro, you must first provide it with knowledge. on the Channels page.
Add your products
Running an online store? The Recommend relevant products step (Add product catalog) takes you to Knowledge > Products, where you can sync your product catalog, so Lyro can recommend items and answer shopping questions.
Set Lyro's tone of voice
The Communicate in your tone of voice step (Set up guidance) opens Lyro's tone of voice settings in Behavior > Guidance, where you choose how Lyro should sound. For more, please see Lyro Guidance.
Step 2: Test and improve Lyro
Before going live, test your Lyro setup to ensure it functions as expected - and improve where necessary.
Use the Playground
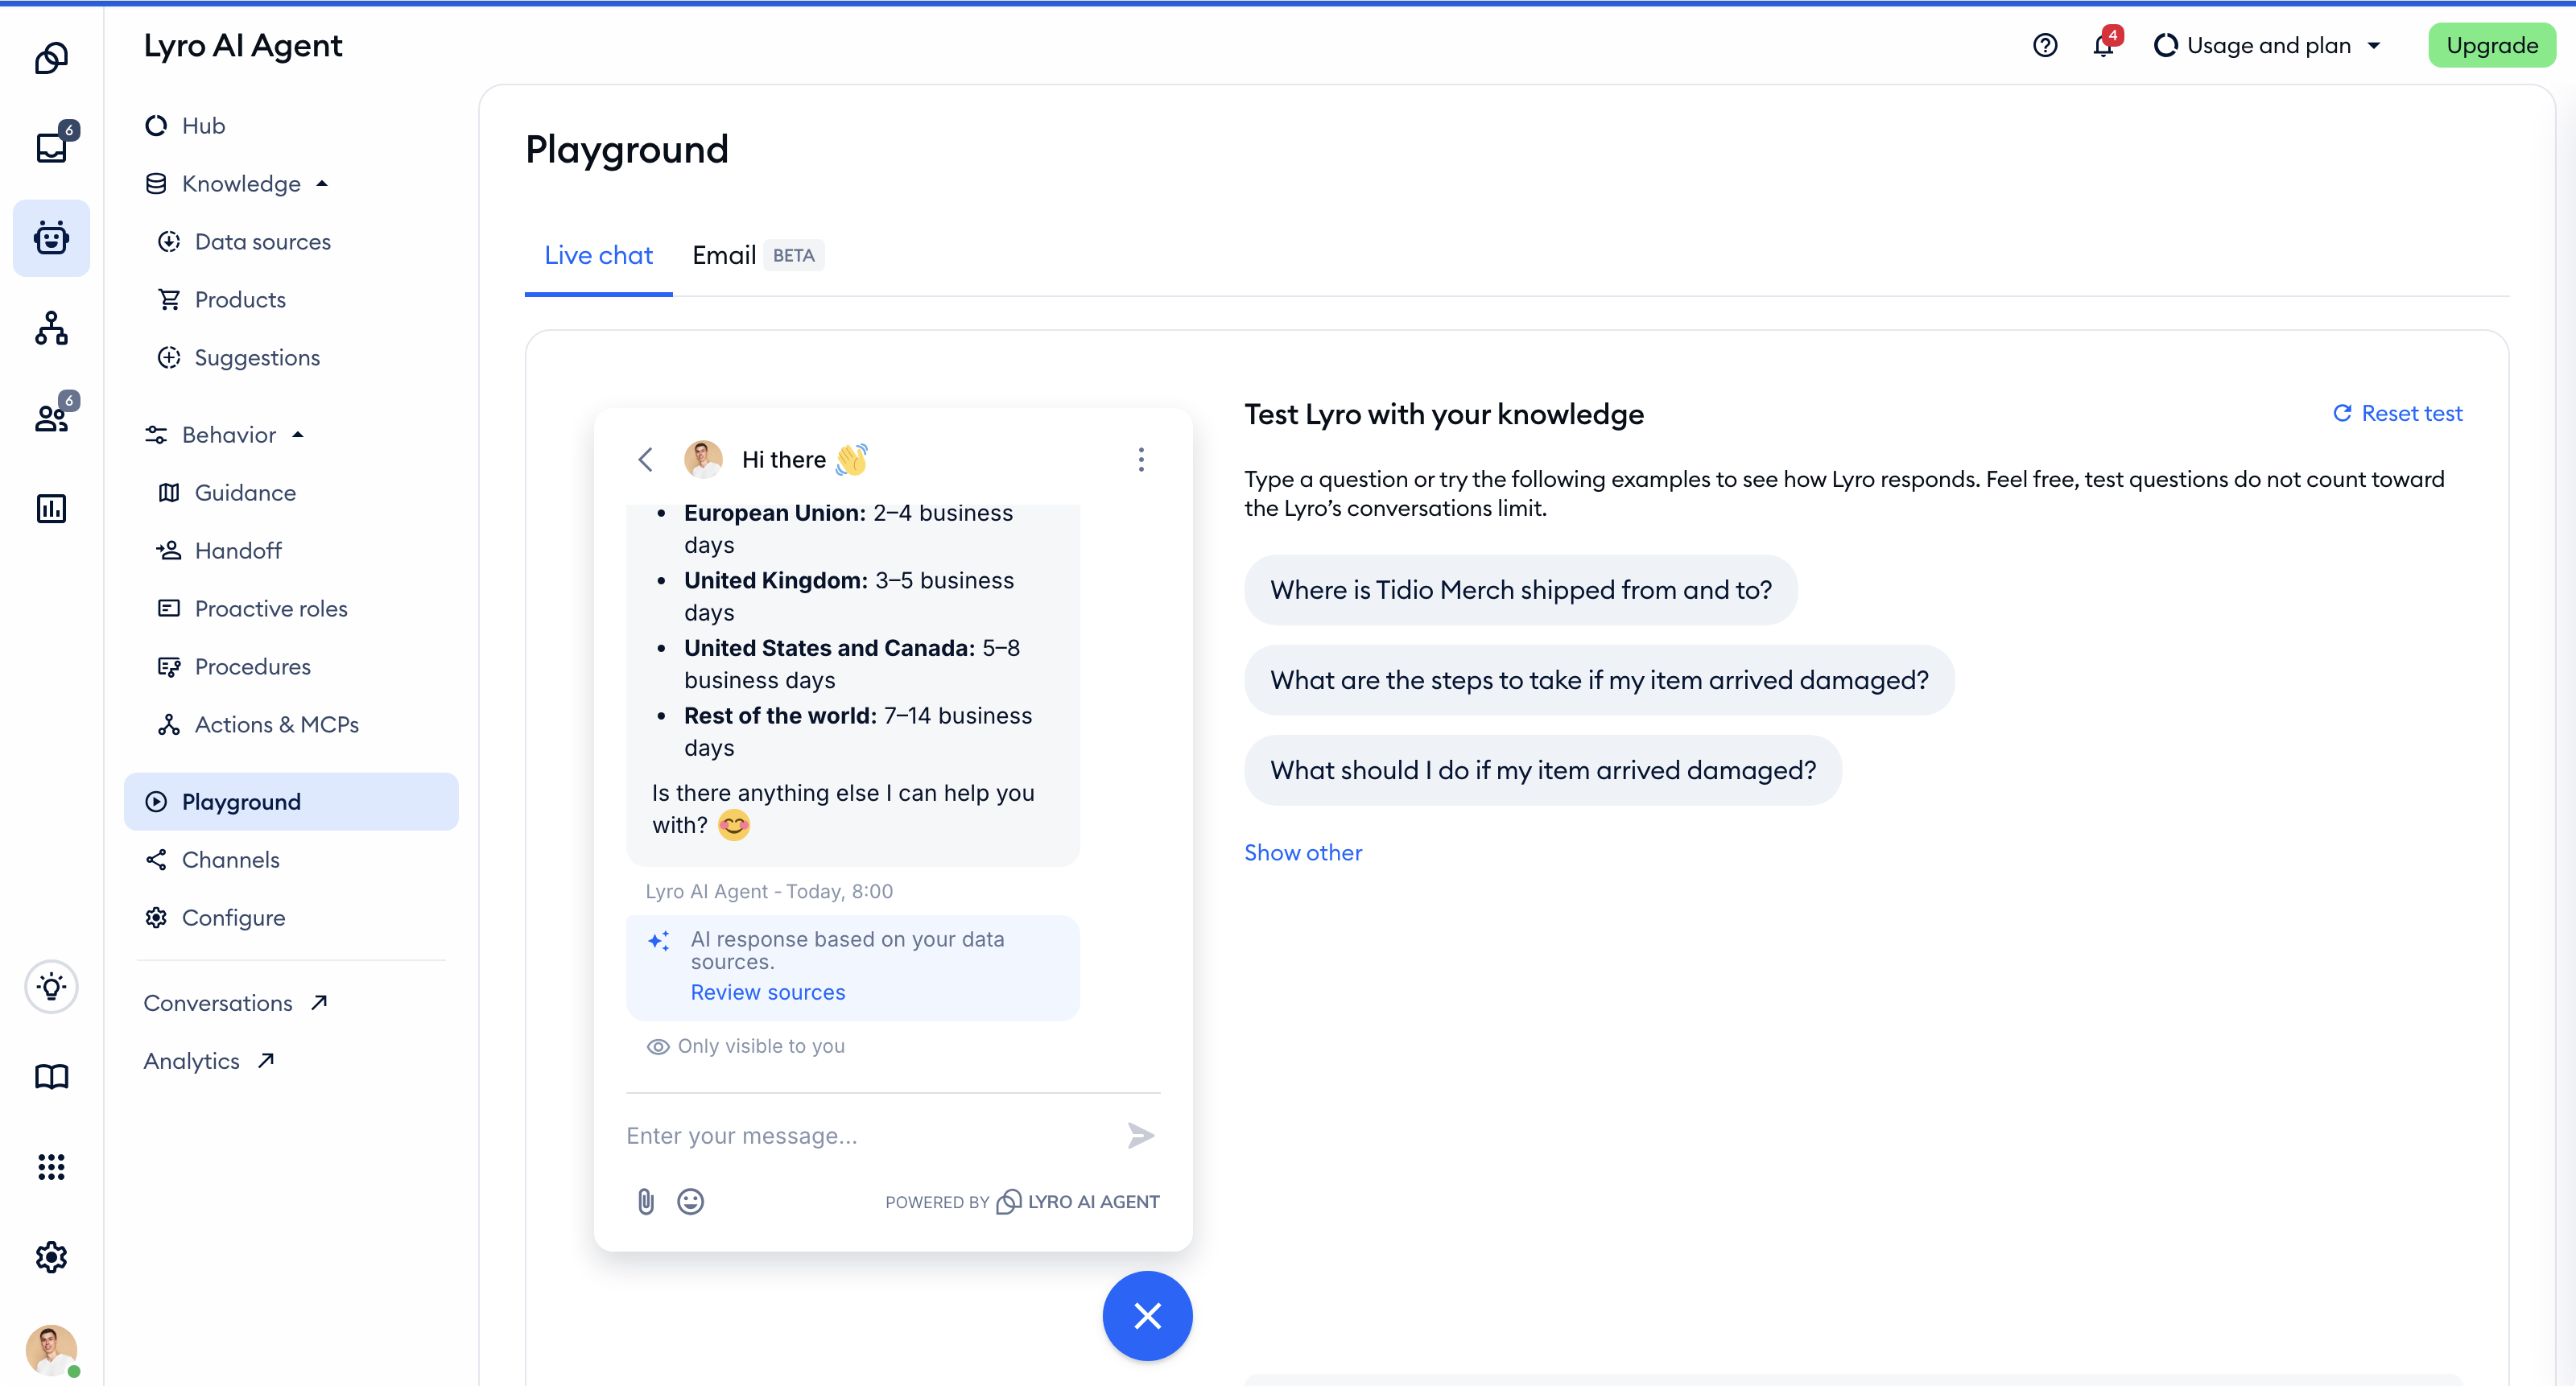
Tidio provides a test environment where you can test Lyro’s responses. In the Playground section, ask questions that customers might submit and review Lyro's answers - on the Live chat tab like a visitor in your chat widget, or on the Email tab like a customer writing to your mailbox. Test questions don't count toward your Lyro conversations limit. You'll also find a Test Lyro button in the top-right of many Lyro screens.
You can see more details in Test Lyro before it goes live.
Refine the responses
If you find irrelevant, missing, or inaccurate information, you can edit, delete, or add responses. Keep an eye on Knowledge > Suggestions, too - it lists questions Lyro couldn't answer, so you can add the missing answers.
You can see more details in How to create a good FAQ for Lyro and Lyro Suggestions.
Configure conversation settings
Decide when Lyro should take over conversations. In Channels, on the Live conversations tab, go to Answer personalization and choose Lyro responds: Always or Only when human agents are offline. Then, decide how Lyro should behave during handoff in Behavior > Handoff.
You can see more details in Lyro - the conversational AI agent.
Step 3: Go live
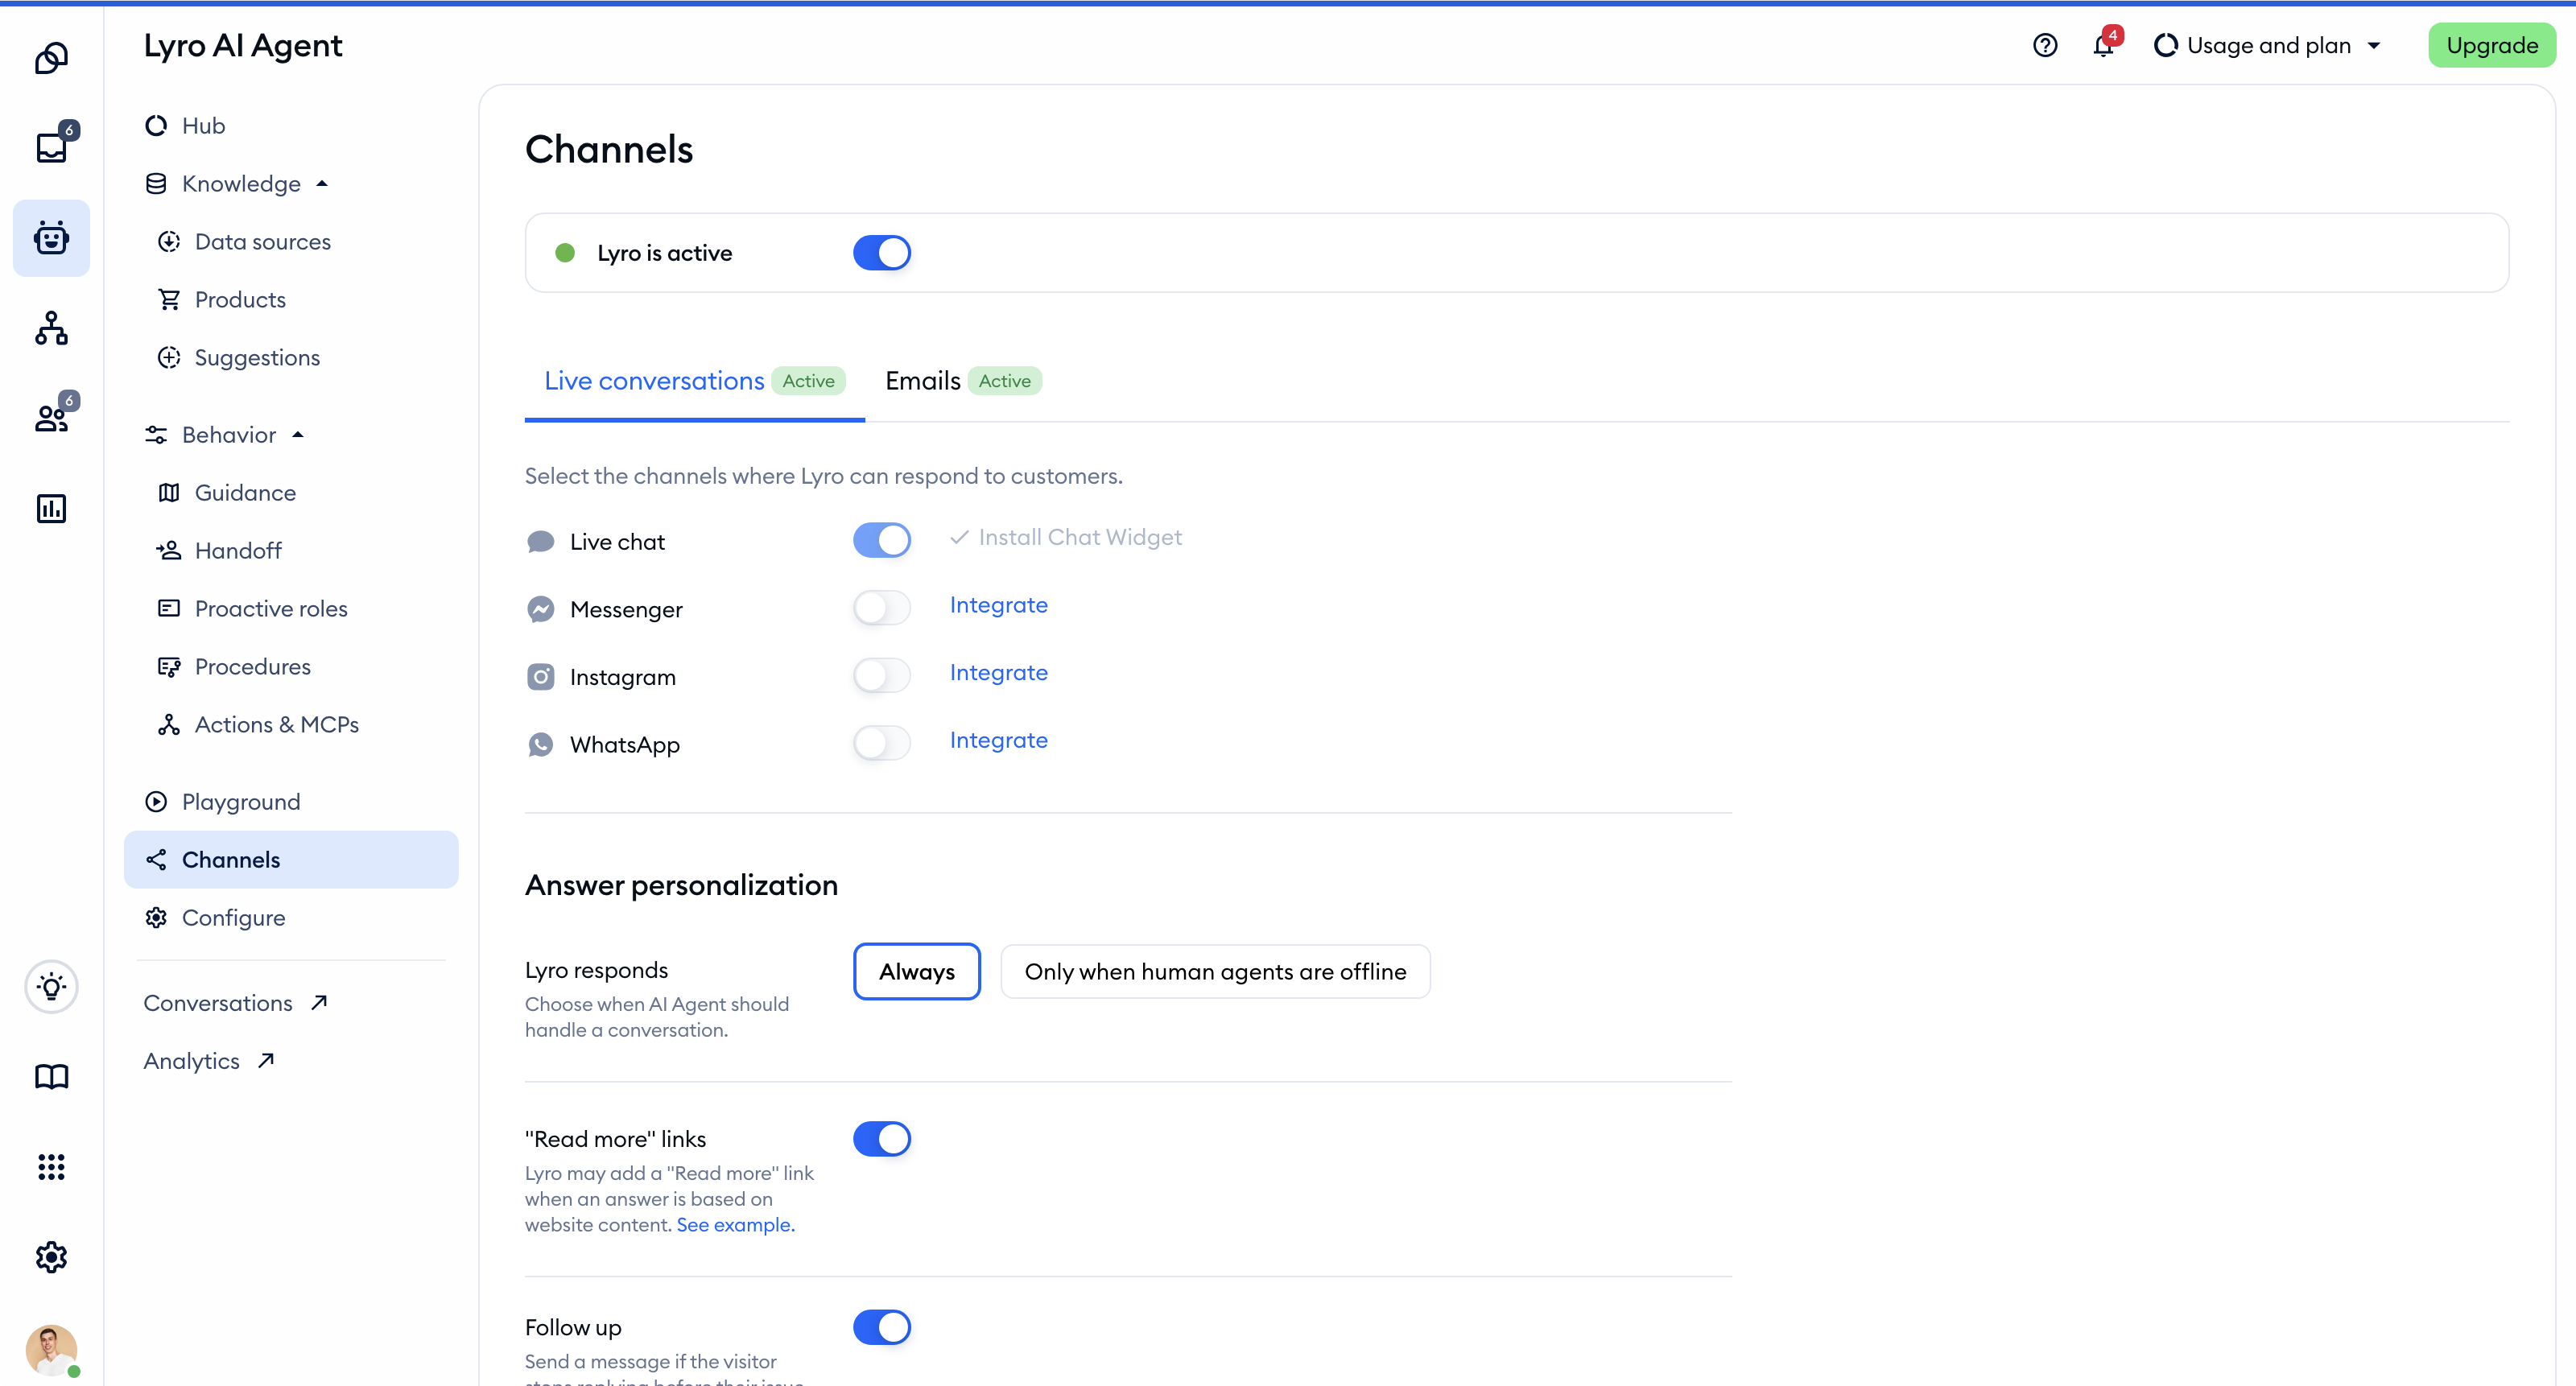
Once you’re satisfied with Lyro's performance and general setup, it’s time to go live! Click on Select and launch Lyro AI on your channels in the checklist, or head over to Channels:
Activate Lyro
At the top of the Channels page, turn on the switch next to Lyro is inactive - it changes to Lyro is active. If the switch is grayed out, hover over it: To activate, first add knowledge in the Data sources tab means Lyro has no knowledge yet.
Once Lyro is active, it answers in your Live chat. On the Live conversations tab, you can also turn on Messenger, Instagram and WhatsApp - if a channel isn't connected to Tidio yet, click on Integrate next to it first.
Please note: when you enable Lyro, any Visitor says flows you currently have will be disabled. This is to make sure visitors' messages do not interfere with how Lyro works in live conversations. However, you can enable your Visitor says flows back again anytime, even if Lyro is active. Only agents who can edit Flows in their permissions can activate Lyro.
Let Lyro answer emails
Lyro can answer your customers' emails, too. Open the Emails tab in Channels, turn on the Email switch and pick the mailboxes Lyro should answer from. Starting October 26, 2026, Lyro answers the whole email thread - including your customers' follow-up emails. For the details, please see Lyro on email: answering whole email threads.
Monitor conversations
Even after going live, keep an eye on the conversations Lyro is handling. Click on Conversations in Lyro's menu to see them in the Inbox - you can join in if necessary or let Lyro manage on its own. Analytics, just below, takes you to Lyro's reports. Analyzing Lyro's performance is essential if you want to provide quality responses in the long run.
You can see more details in Lyro Analytics.
Step 4: Take it to the next level
Create Actions
The Lyro AI agent isn’t just about answering questions - it can also perform specific, tailored tasks, like looking up an order. Head over to Behavior > Actions & MCPs, click on Create in the top-right, and choose Create from scratch or Create from template. From the same menu, you can also Add MCP server to connect Lyro with your other tools.
Please see Lyro Actions, Lyro Action templates and Connect Lyro with MCP servers for details. Projects that already used Lyro Tasks can find them as Simple Actions - please see Lyro Simple Actions (legacy).
Instruct Lyro with Guidance
You can create sets of detailed instructions for Lyro - prompts that will inform Lyro how to communicate and behave in particular situations. On top of that, you can decide about other aspects of Lyro's behavior, like the use of emojis or the general tone. You can have up to 5 active pieces of Guidance (up to 10 on the Plus plan).
Please see Lyro Guidance for more details on this feature.
Engage visitors with Proactive roles
Lyro doesn't have to wait for a visitor's question. In Behavior > Proactive roles, you can let Lyro start the conversation, based on what visitors do on your website. Proactive roles are great for lead capture, collecting feedback, onboarding users, or upselling.
You can see more details in Lyro - Proactive roles.
Advanced configurations
If you see Procedures in Lyro's menu, you can give Lyro step-by-step instructions for specific cases - see Lyro Procedures. You should also take advantage of Lyro's detailed settings in Configure, like its languages and audiences.
Feel free to browse our available articles on Lyro here.
Conclusion
Setting up Lyro in Tidio is a quick and efficient way to automate customer interactions on your website (and other channels). With just a few steps, you can have a smart, responsive agent working for you, providing support and even generating leads or booking meetings.
Every Tidio project gets 50 lifetime Lyro conversations at no cost - during the 7-day trial and on the Free plan after it - so you can see how Lyro works for you. To learn more, please see The Lyro AI agent limit. For any advanced settings or assistance, feel free to reach out to Tidio support anytime.
Further reading
- Lyro - the conversational AI agent
- Data sources - Lyro's knowledge base
- Test Lyro before it goes live
- Lyro on email: answering whole email threads
- Lyro Guidance
