In order to function properly, Lyro needs knowledge; in Tidio, this knowledge is stored and managed as data sources. As the person responsible for Lyro's setup, you need to provide all the necessary data associated with your products and/or services, so that Lyro can respond to incoming questions appropriately.
There are several different ways to add and handle data sources, which we will cover below.
In this article, you will learn:
- How to manage your data sources
- How to add knowledge based on Lyro's suggestions
- How to add knowledge from websites
- How to add knowledge manually
- How to add knowledge via file import (CSV, PDF)
- How to add knowledge directly from unanswered questions
- How to collect knowledge automatically from chats
- How to import knowledge from your Zendesk Help Center (and other platforms)
- How to synchronize your webstore products (Shopify, WooCommerce, API)
- How to use your Help Center articles as knowledge
- How to use custom audiences for data sources
- How to send us feedback about Lyro's responses
Managing your data sources
Here, we go over the general layout of the Data sources panel and how to manage Lyro's knowledge overall. If you'd like to learn more about the two main methods of managing Lyro's knowledge, feel free to jump to the sections below:
... or use the table of contents at the start of this article, and go straight to the details of different methods!
Please note: If you are subscribed to the Plus package and you have access to Tidio's OpenAPI, you can upload data sources via API - as described in our developer references. OpenAPI also allows you to export a full list of all your current data sources, as described here.
Managing Lyro's knowledge
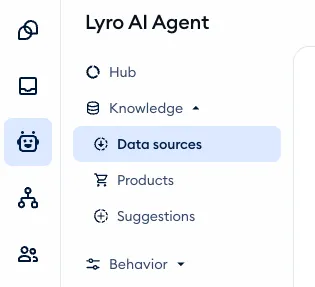
You can manage all your Lyro data sources in the main Lyro AI Agent section, specifically under Knowledge > Data sources:
In there, you will see all the knowledge you've gathered for Lyro:
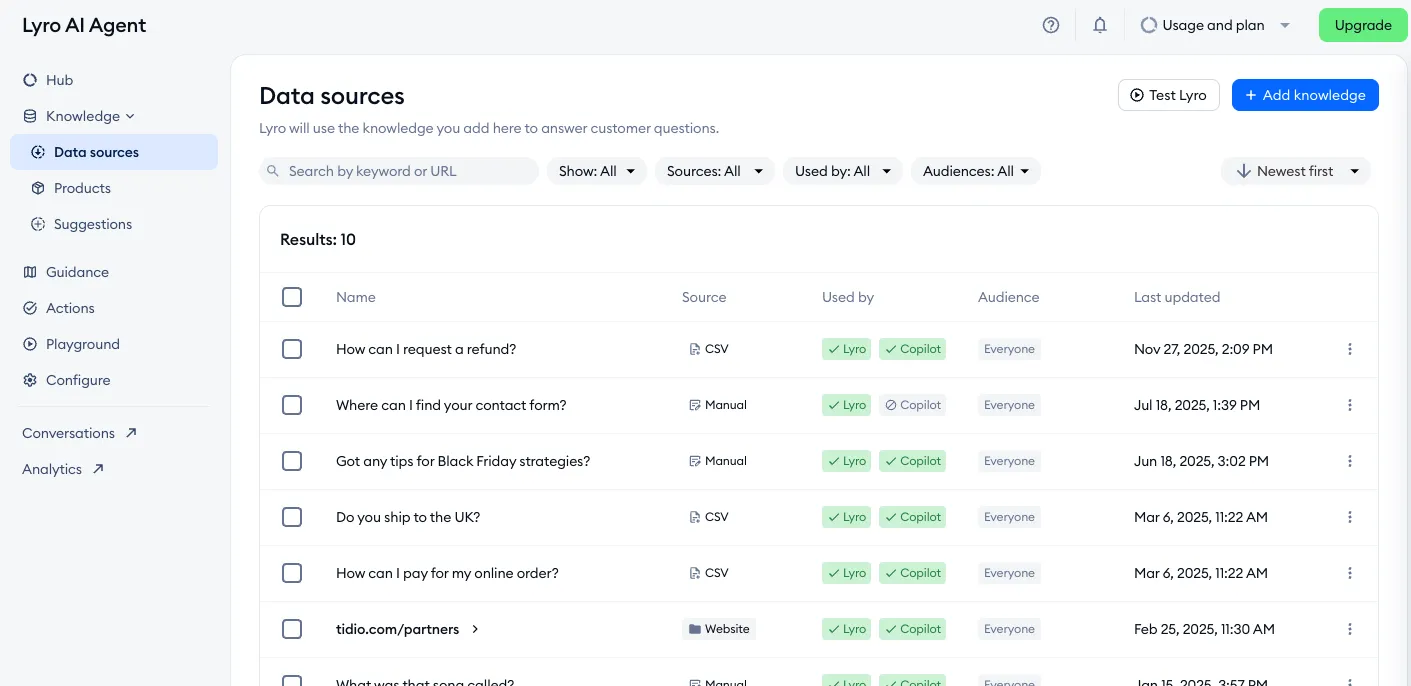
You can use the three-dot menu on the right to delete any question-and-answer pair (or website) you no longer wish to use at all.
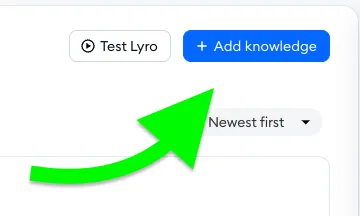
You can quickly add new knowledge by clicking the Add knowledge button in the top-right:
Once you click on it, you will see the Add more knowledge popup, with six options to choose from: Website URL, Add manually, Upload CSV, Upload PDF, Upload Zendesk articles and Sync products:
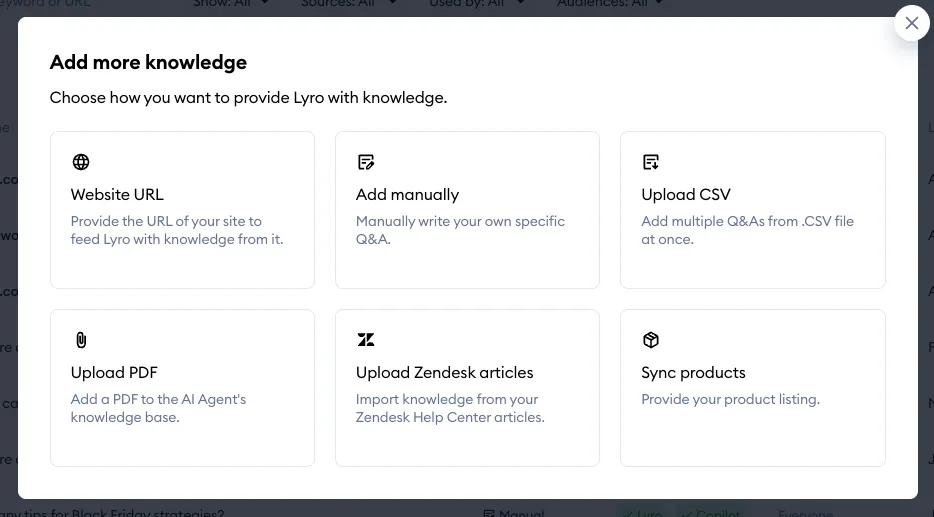
Naturally, you see the same options if you're adding data sources for the first time.
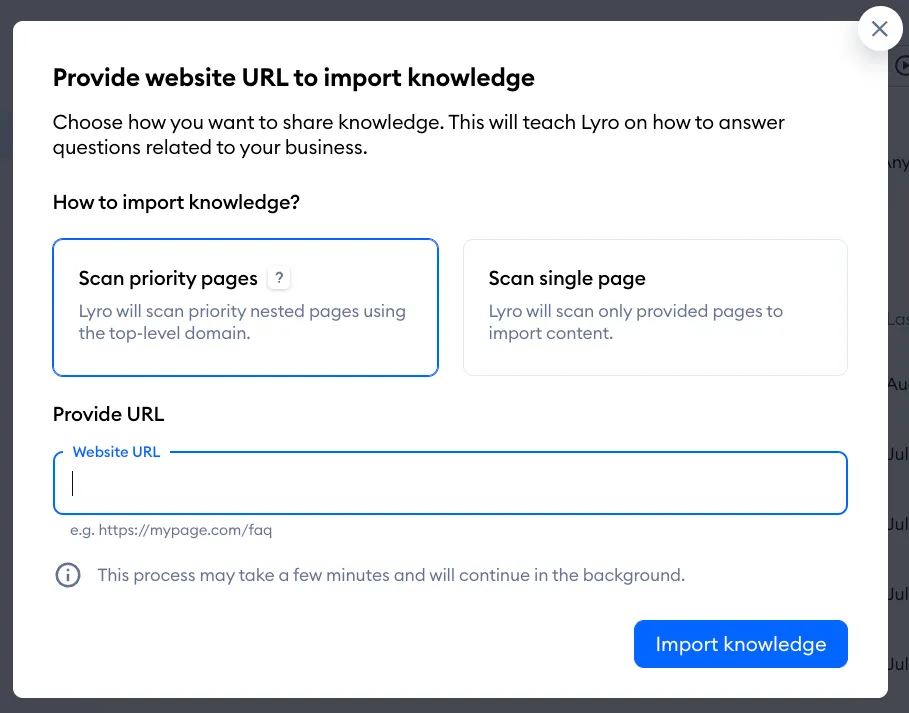
If you select the Website URL option, you will be able to add several web page addresses, or your entire website (so that Lyro can scan all of the relevant content automatically). Make sure you select the option you prefer: Scan priority pages or Scan single page. Lyro will scan these URLs and extract the available knowledge; you can later browse (and modify!) it all as question-and-answer pairs.
Please note: the Scan priority pages option is limited to scanning up to 100 pages.
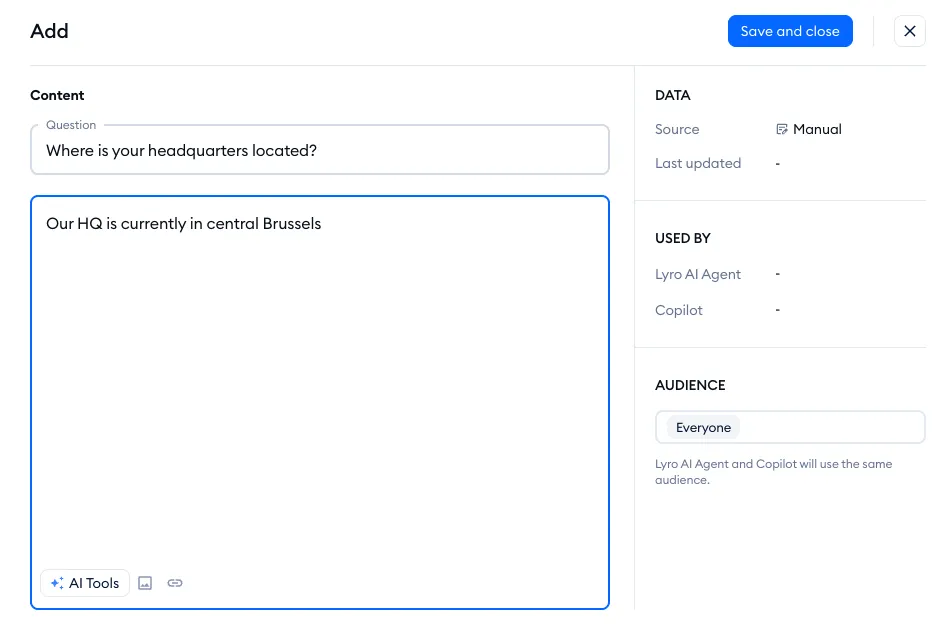
If you select the Add manually option, you will be asked to create a question-and-answer (Q&A) pair from scratch - that means composing the question and the answer individually:
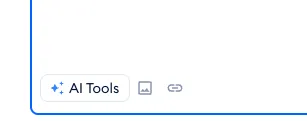
Note that at the bottom of the answer field you can use several available AI Tools (Rewrite, Elaborate, and Shorten), as well as add images or hyperlinks.
Of course, you can continue adding more Q&A pairs (and websites or CSV files, etc.) as needed so that Lyro has all the required data. Feel free to jump to one of the further sections of this article for details about the available methods:
- Adding knowledge from websites
- Adding knowledge manually
- Adding knowledge via file import (CSV, PDF)
- Adding knowledge directly from unanswered questions
- Collecting knowledge automatically from chats
- Importing knowledge from Zendesk (and other platforms)
- Synchronizing your webstore products (Shopify, WooCommerce, API)
- Using your Help Center articles
In most cases, whenever Lyro responds to a question according to your data sources, it includes a link (or several) at the bottom of the response:
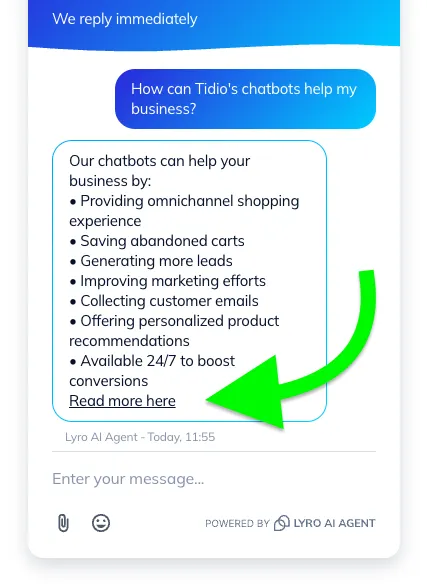
If you prefer, you can disable this feature as described in this guide.
The Search tool, filters, and sorting options
If you wish to update specific information, simply search for the keyword or phrase (by using the Search by keyword or URL field) - and you should be able to find the respective results. You can also search by typing in any URL that may have been used in the response, question, or as the source of information. The tool searches through both questions and answers, allowing you to find what you need efficiently.
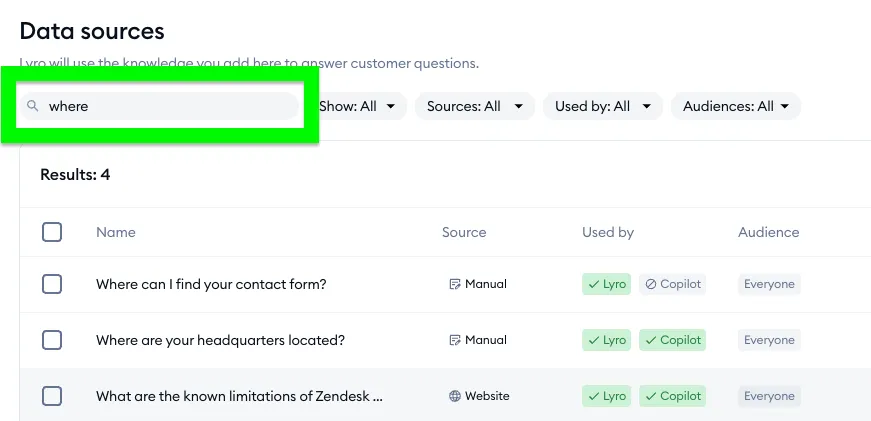
To the right of the search tool, you can see several more options for browsing and sorting your data sources:

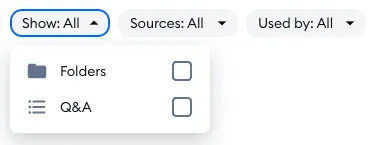
The first option on the left allows you to display either all the data sources at once, or just the folders, or just the particular Q&As (question-and-answer pairs). Note that the folders option simply shows any websites (and Zendesk help centers) you've added, while the Q&A option will let you see everything - including the particular Q&As that are found inside the website (and Zendesk) folders.
Next is the Sources filter. You can select between the different sources (or any combination):
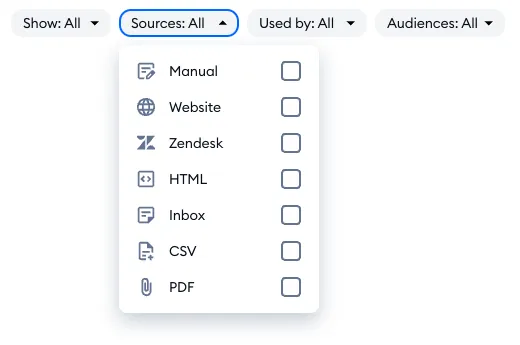
Manual
This label is used when you create a Q&A pair either directly from this tab, or from a chat where Lyro failed to answer. In both cases, you basically create the Q&A from scratch.
Please see this section of the article to learn about adding Q&A pairs manually.
Website
Any website URL you add will be listed here, along with its current status (whether the URL is still being scanned or not, or if any issue was encountered). You also get the option to re-synchronize the data source (e.g. if you've updated your website).
Please jump to this part of the article to learn the details of adding and managing website URLs.
Zendesk
If you upload any public Zendesk help center of yours, it's going to be labelled this way.
Please go to this section of the article to learn about adding Zendesk articles.
HTML
This label is used when you add a website data source through API.
Uploading data sources via API is only available if you are subscribed to the Plus package and you have access to Tidio's OpenAPI.
Inbox
This label is used when you add a Q&A pair that Lyro extracted automatically from a solved live chat.
Please see this section of the article for more details on this feature.
CSV
This label is used for any Q&A pairs that have been imported through a CSV file upload.
Please see this section of the article for more details on importing data through files.
This label is used for any Q&A pairs that have been imported through a PDF file upload.
Please see this section of the article for more details on importing data through files.
Article
This label is used for articles from your Tidio Help Center that you've made available to Lyro or Copilot.
Please see this section of the article for more details.
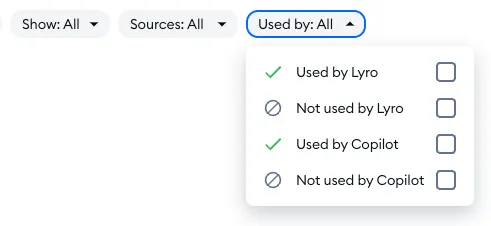
Another option available here is the Used by filter; you can decide to show only those Q&As that are currently being used (or not) by Lyro, by Copilot, by both, or just ignore this usage (which is the default):
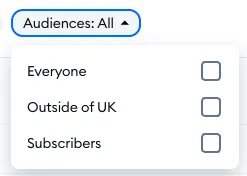
The Audiences option allows you to browse your data sources based on the custom Audiences you may have added (the default target audience being 'everyone' for all your data sources):
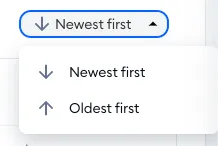
The last option allows you to sort your Q&As from newest first or oldest first:
Reviewing Lyro's responses
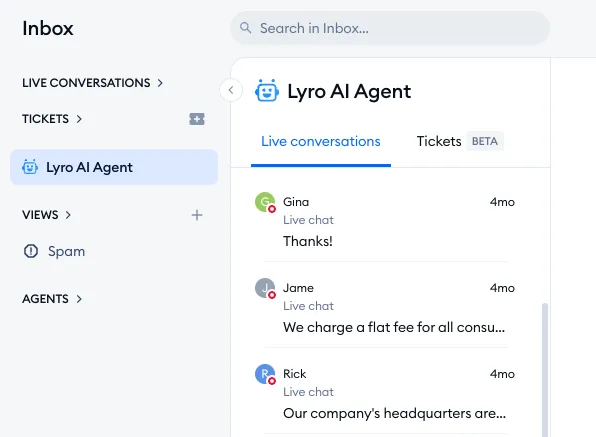
You can find your current Lyro conversations (and tickets) in the dedicated Lyro AI Agent folder, available just underneath the Tickets folder and above the Views folder - on the left in your Inbox:
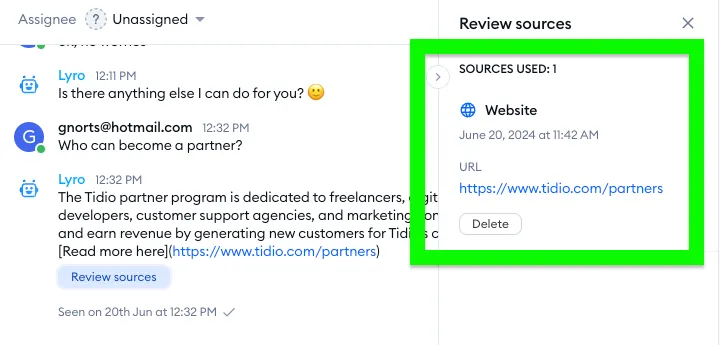
Inside a conversation, whenever Lyro responds according to its knowledge, you can use the Review sources button:
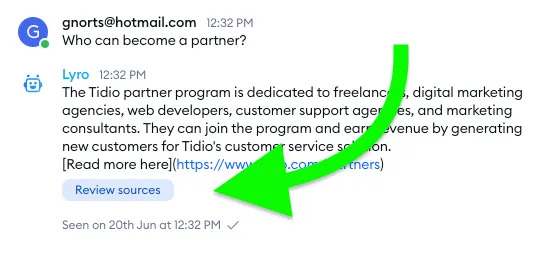
This allows to you view the exact data source Lyro used to provide this particular response. If the source was a web page you uploaded, you can see the exact URL (and even delete it, if you wish):
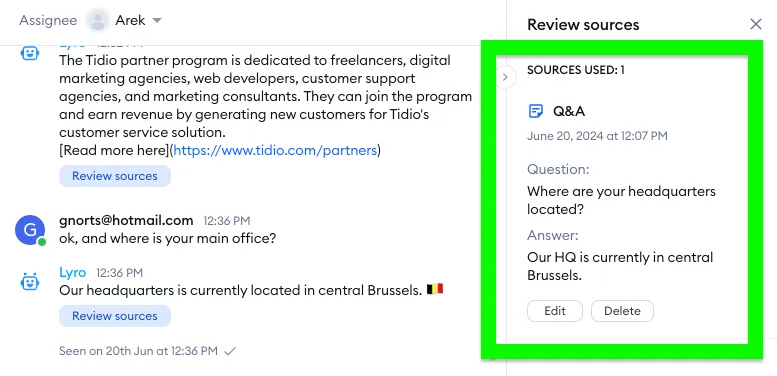
If the source was one of your question-and-answer pairs added to the Q&A list, you will see the details of that particular pair - in addition to the edit and delete options:
Taking advantage of Lyro's suggestions
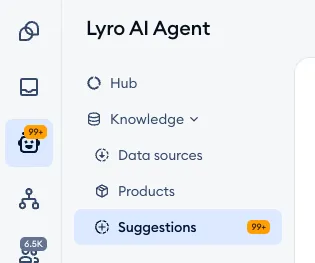
A very useful tool that you should check out is the Suggestions section - it can help you create new Q&As quickly:
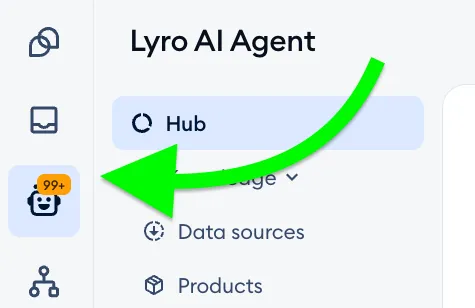
If there are any suggestions already available, you’ll see an orange notification in the main menu - with the number of suggestions displayed directly on the Lyro AI Agent section icon itself as well:
The Suggestions section lists any questions that Lyro was unable to answer successfully when chatting with visitors live. This list allows you to address each such question individually, and add a proper answer for Lyro to use in the future.
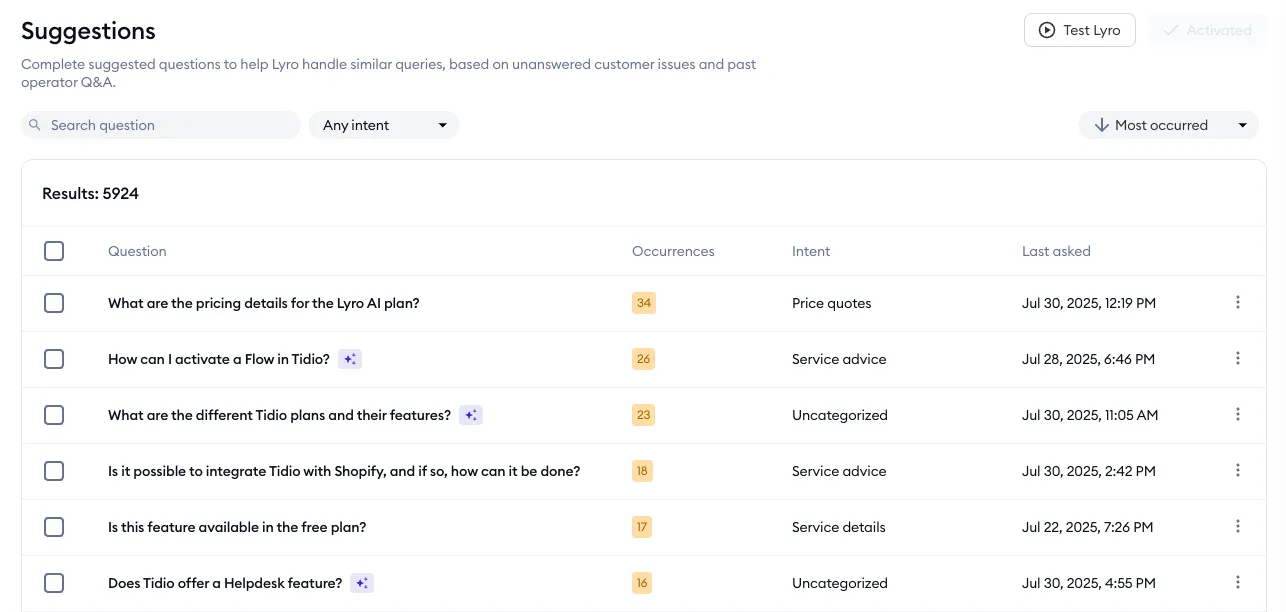
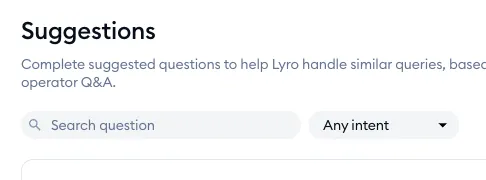
You can use the search tool in the upper-left to search for suggestions that include specific keywords or phrases. You can also filter the list by intent:
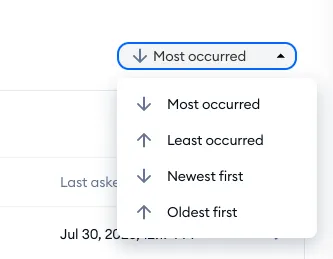
You'll see more options further to the right: you can sort the suggestions by the number of occurrences or by date (of the most recent occurrence):
The suggestions listed will display the question, the number of occurrences, the detected intent, and the most recent date when the question was asked:

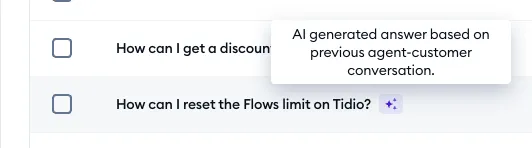
Some questions may get suggested pre-filled answers, based on what Lyro was able to find in previous conversations between visitors and agents (you can see more about this feature in this section of the article):
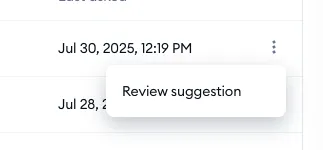
To manage a suggestion from this list, click on the listed question itself or hit the Review suggestion option available in the three-dots menu on the right:
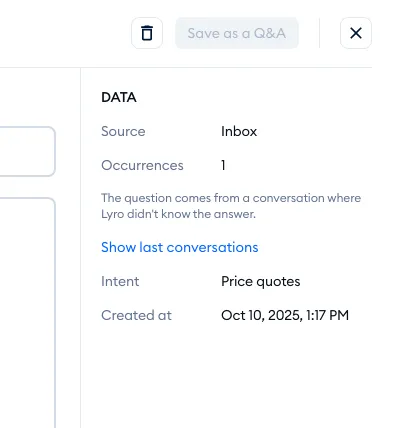
In the panel that appears, you will be able to modify the suggestion and see other details - like the source, number of occurrences, detected intent, and creation date:
You can also click the 'Show last conversations' link to see a list of (up to 10) threads where the suggestion stems from:
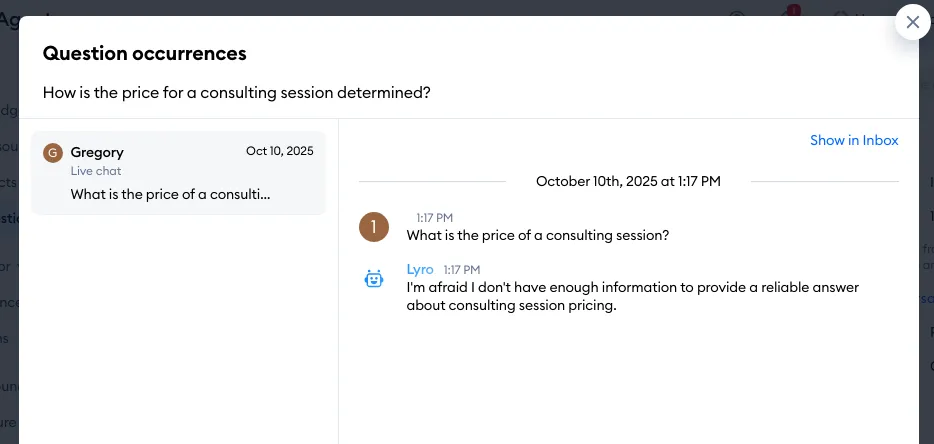
Inside each listed thread, there is a 'Show in Inbox' link as well, letting you go directly into the full conversation where the interaction took place.
Please note: If the suggestion comes with a pre-filled suggested answer, the 'Show last conversations' link will be replaced with a direct link to the specific Lyro conversation where the suggestion came from.
You can ignore the suggestion if it is irrelevant, which lets you remove it entirely.
Naturally, to use the suggestion, complete the Answer field (if not already completed automatically by Lyro itself) and hit the Save as a Q&A button.
Once added, the new Q&A will be listed under the Data sources tab (and labelled as Manually added), available for Lyro to use if the same question is asked again in the future.
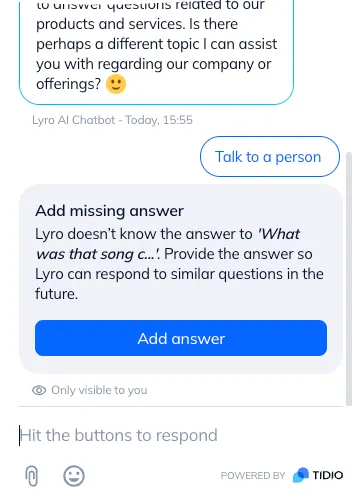
Please note: you can also add new Q&As directly from the Playground section! if you ask Lyro a question that it doesn't know the answer to, you can use the Add answer button directly inside the test widget:
Adding knowledge from specific web pages
If you click on the Add button in the Data sources section and select Website URL, you get the option to expand Lyro's data source with specific web pages - or even entire websites in one go!
In the window that pops up, you see a few relevant tips, and you get to select the option you prefer: Scan priority pages (allowing you to provide just one top-level address, so that Lyro can scan the pages included under it - but 100 is the maximum) or Scan single page (allowing you to list specific URLs, one by one).
Please note that you cannot provide a URL that links to a file (like a PDF or an image, etc.). Instead, use the Upload CSV or Upload PDF option if you wish to upload a file.
You can add up to 500 URLs overall. Once you get there, you'll see You've reached the 500 URL limit and can't add more. Contact us to request more or remove unneeded URLs. If you need more, simply contact us.
Once a URL is loaded and ready to use in Lyro, you will see it listed in the Data sources list as a website folder:
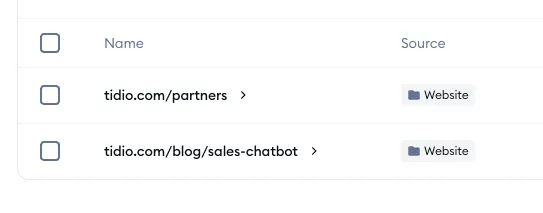
By clicking on any of these added URLs, you can see more details - all the individual question-and-answer pairs that Lyro has generated automatically from that particular web page:
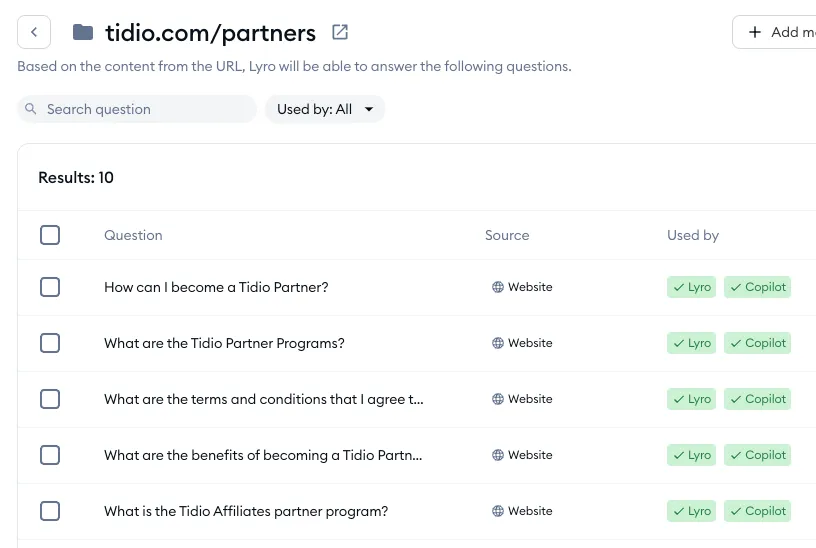
Inside this detailed view, you can click on any of the Q&As and modify them according to your needs. When you're editing a particular Q&A, you will see all the relevant information (in addition to the question and answer), including the last update time and the source URL that Lyro scanned.
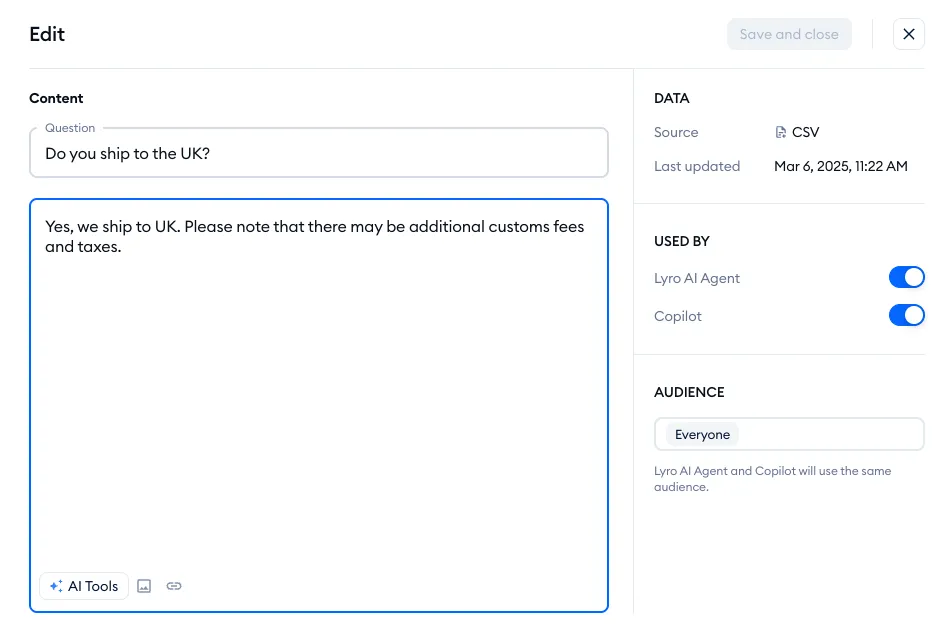
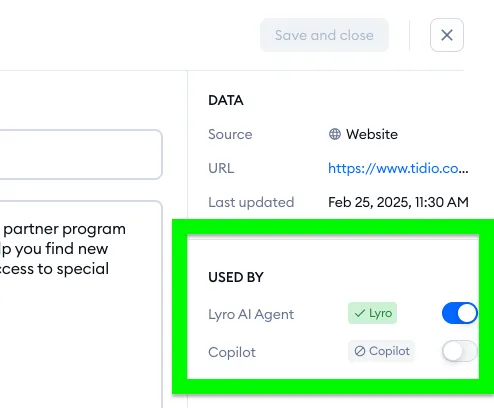
Remember that you can disable any individual Q&A pair from Lyro or Copilot usage, without deleting them permanently! In order to disable a Q&A from a specific usage, deactivate the blue toggle next to Used by:
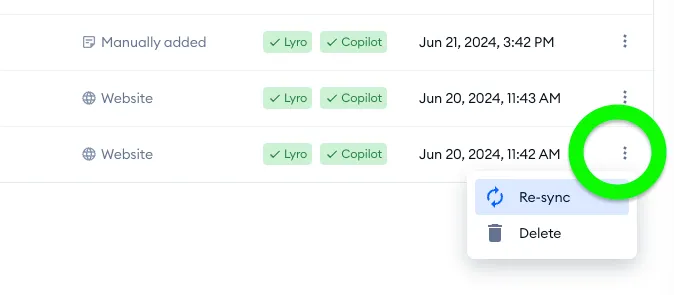
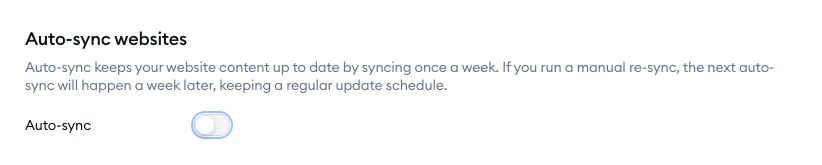
Back in the general Data sources view, you can also re-synchronize any added URL. This is very useful if the information on the website in question has been updated, and you'd like to keep Lyro's knowledge up-to-date as well.
Click on the three dots next to any website data source, and use the Re-sync option:
Adding question-and-answer pairs manually
Another method of expanding Lyro's data source is adding individual question-and-answer pairs manually, one by one. Whenever you use this option (by using the Add button in the Data sources section, and selecting Add manually), you will need to compose a question and an appropriate response yourself:
Note that at the bottom of the answer field you can use several available AI Tools (Rewrite, Elaborate, and Shorten), as well as add images or hyperlinks.
Naturally, you can edit (or remove) any of the pairs, by accessing the options menu for each pair individually - on the right. By using the Edit option, you will see the question and answer once again, available to customise. You can also disable the given Q&A without removing it completely - simply deactivate the blue toggle next to the Lyro and/or Copilot label:
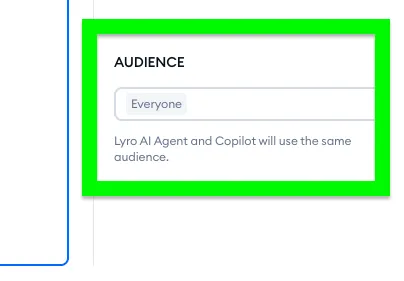
You can also decide about any available custom Audiences for this particular Q&A (if you've created any Audiences already):
Adding knowledge by importing files (CSV, PDF)
It is possible to expand Lyro's data source by importing a CSV or a PDF file into Tidio.
Upload CSV
Use the Upload CSV option if you'd like to import knowledge from a properly formatted CSV file.
You can simply drag and drop a file containing two columns, one for the questions and another one for the associated answers - or you can browse for the file on your computer:
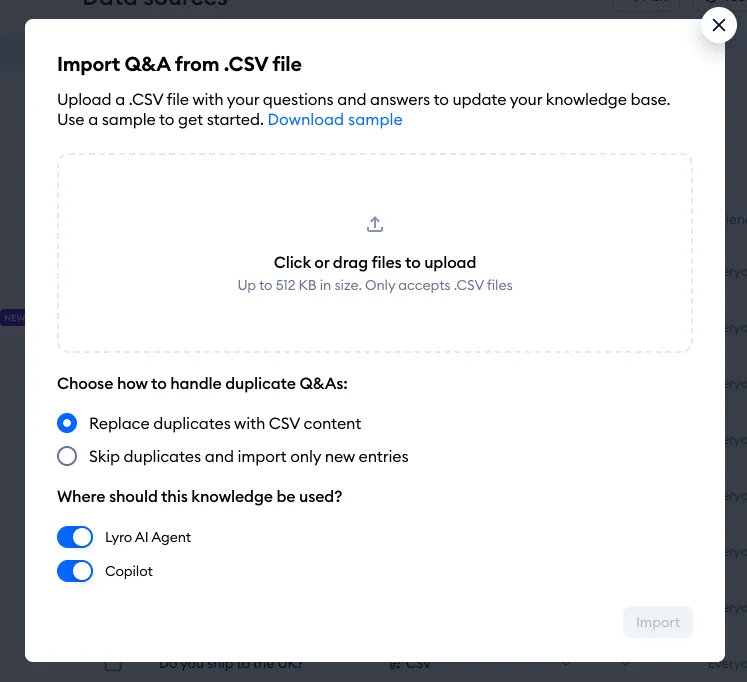
When you use that option, you can also download a sample CSV file that shows you the proper formatting. You also get two options under Choose how to handle duplicate Q&As: - Replace duplicates with CSV content or Skip duplicates and import only new entries (keeping the old version).
Additionally, under Where should this knowledge be used? you can immediately decide if the imported Q&As should be used by Lyro, Copilot, both, or neither. Of course, you can change this setting later on as well.
Upload PDF
Use the Upload PDF option if you'd like to import knowledge from an existing PDF file.
You can simply drag and drop your PDF or browse for the file on your computer:
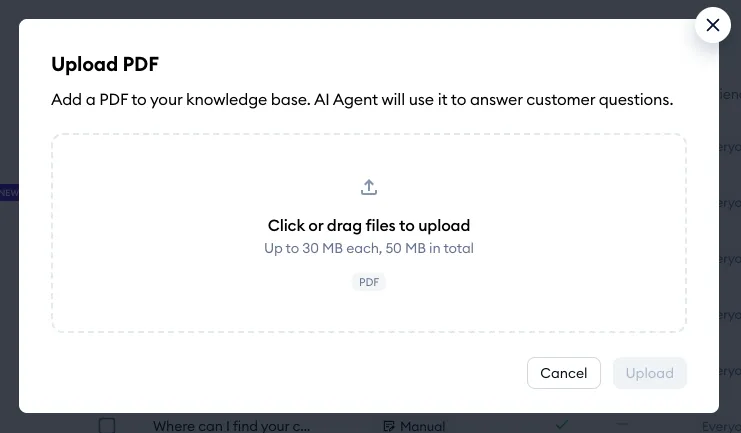
You can upload up to 10 PDF files at a time, up to 30 MB each and 50 MB in total. There are no formatting requirements for PDF files; Lyro will be able to read and interpret all the information present in the file, including images. Please note, however, that the images will not be imported in the Q&As - but Lyro will understand them and use them to compose its responses.
To get a copy of a PDF you've uploaded, use the Download file option in its three-dot menu in the Data sources list.
Adding knowledge directly from unanswered questions
One more useful way of updating Lyro's knowledge is adding it directly from live conversations. Whenever Lyro doesn't know the answer to a question, you get the option to fix that without accessing Lyro's configuration. If you find a situation where Lyro failed to respond, you will notice the Create answer button:
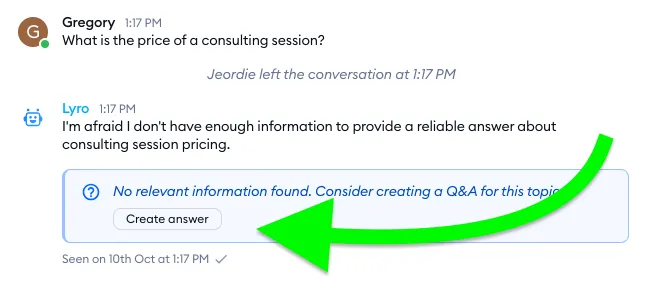
Click on that button to bring up a new window; that will let you create a new question-and-answer pair for Lyro's data source. The question field will be pre-filled with the visitor's message (which Lyro had trouble with), although you can modify it any way you need. The answer field is available for you to complete with an appropriate response for Lyro to learn:
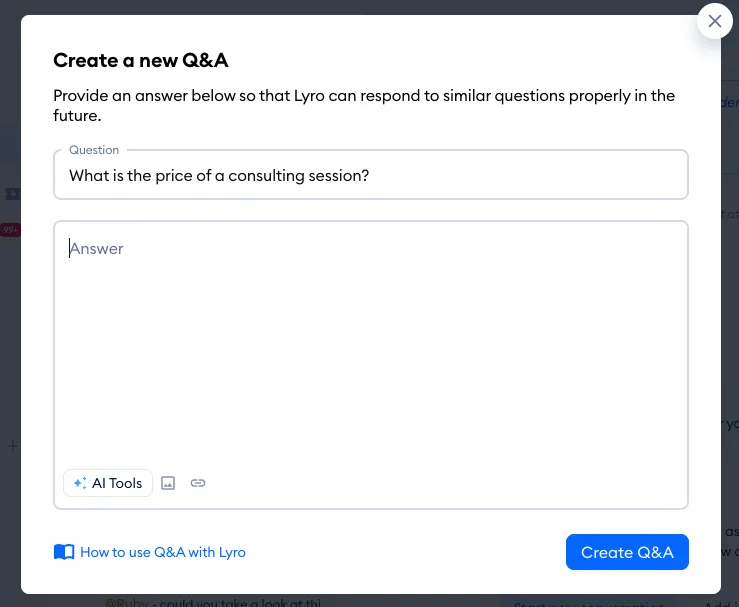
Hit the blue Create Q&A button to save your new response, and return to the conversation right away.
Please remember that you can find your current Lyro conversations (and tickets) in the dedicated Lyro AI Agent folder, available just underneath the Tickets folder and above the Views folder - on the left in your Inbox:
Collecting knowledge automatically
A very useful feature that Lyro has is the ability to automatically gather data from live conversations you (or your other agents) have had. This lets you review and add knowledge that Lyro may have been missing before your live conversation. Please note that tickets (emails handled in the panel) are not scanned by Lyro for knowledge this way.
Whenever an agent finishes a live conversation by using the Solve option, Lyro scans it for any useful knowledge. Any such data will be extracted by Lyro and listed in your Suggestions section, tagged with the Pre-filled label:
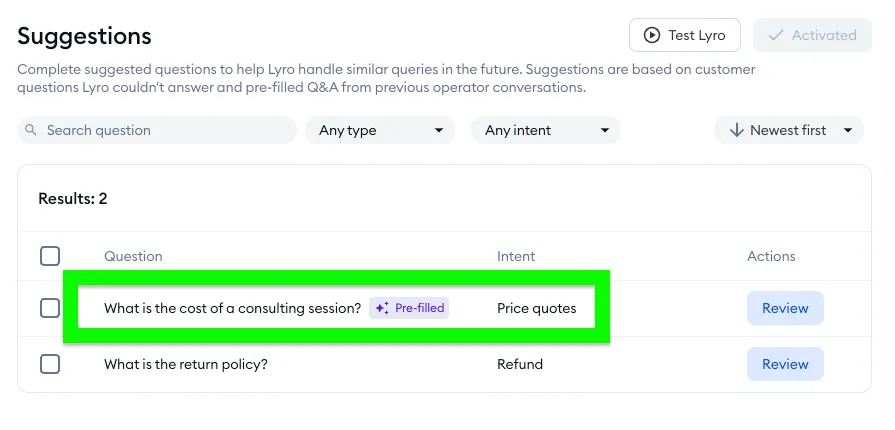
Such an extracted Q&A pair will be disabled by default, allowing you to review them all individually first. This way, you can make sure the extracted information is correct and suitable for your business.
Once you click on a pair to review it, you can modify the question and answer - and activate it by clicking on the Save as a Q&A button:
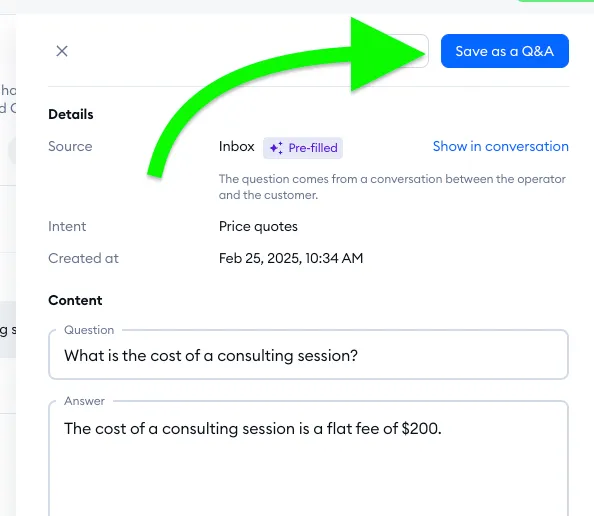
Note that you can take a look at the live conversation itself by using the Show in conversation link! This lets you see the source of this knowledge in context.
Once you activate the Q&As you like, they will start being used by Lyro in future conversations.
Of course, we recommend you periodically check your Suggstions section in order to keep track of any new automatically-generated knowledge, so that you can review and activate it.
Importing Zendesk articles, and more
There is also a unique option for uploading knowledge from an existing Zendesk Help Center, so that you can use your Zendesk articles as a data source in your Tidio project. You can see this option when you hit the Add knowledge button inside your Data sources section:
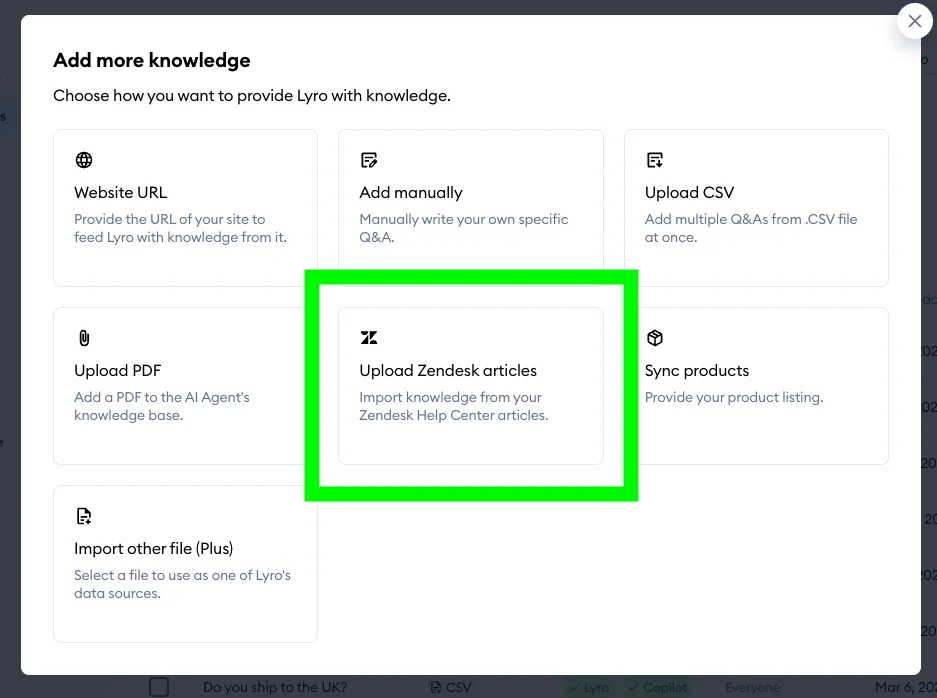
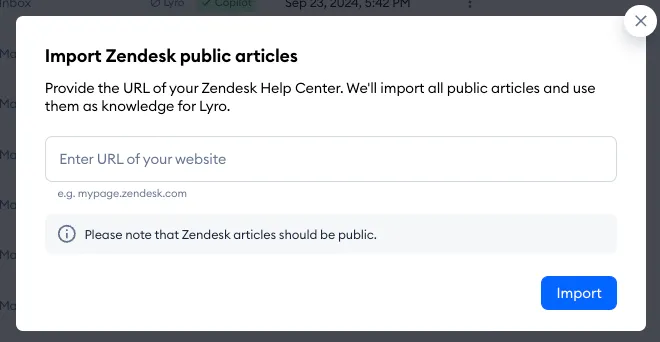
Once clicked, you will be able to import the content your public articles by providing the URL of your Zendesk Help Center:
There are also methods for importing your Zendesk tickets into Tidio, as well as data from Gorgias and Intercom. That can be achieved directly with the assistance of our team, and requires an active Lyro AI Agent subscription.
Please see this article for more details on these methods.
Synchronizing your webstore products
In addition to importing knowledge from your website or adding Q&A pairs, etc., you can also integrate your store's product listing. This allows Lyro access to information about your existing products directly from your database, which can be a great way to help your customers looks for specific products and compare them, and get recommendations from Lyro.
Once you select the Sync products option (after hitting the Add knowledge button), you will be taken to the Knowledge > Products section, where you can use one of the available options:
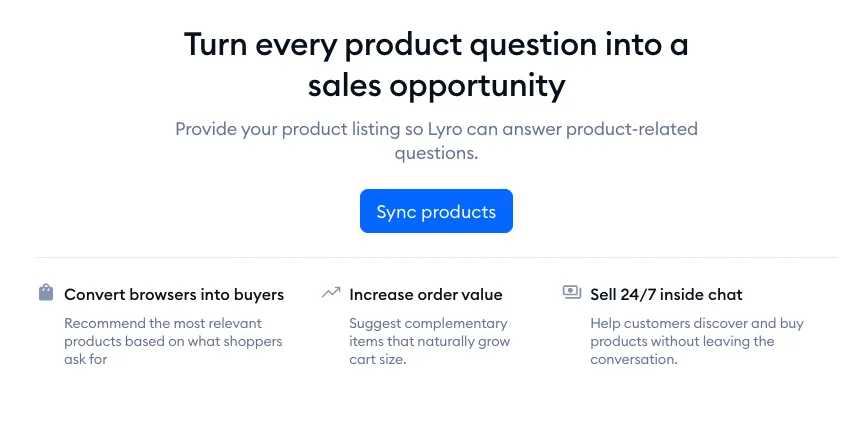
Depending on the store platform you're using, or on your preferences, you can choose the option that suits you. Please see our dedicated guides on each of the available options below:
Please note that the Product feed upload option is only available to Plus subscribers, and allows uploading your entire catalog without the use of API.
Using your Help Center articles
If you run a Help Center in Tidio, its articles can become knowledge for Lyro (and Copilot) as well - there's nothing to import or re-sync, as Lyro works from the published version of each article.
Please note: using Help Center articles as knowledge is part of the Help Center add-on. If your plan no longer includes it, the article editor says Your plan no longer includes the Help Center add-on, so this article is not used by Lyro AI Agent or Copilot.
You choose the articles in the Help Center section, not in Data sources. Open an article in the editor, and find the Lyro AI section on the right ("Make this article available to Lyro AI Agent and Copilot"). Switch on Lyro AI Agent, Copilot, or both, and pick the Audience if you'd like the article to be used only for some of your visitors:
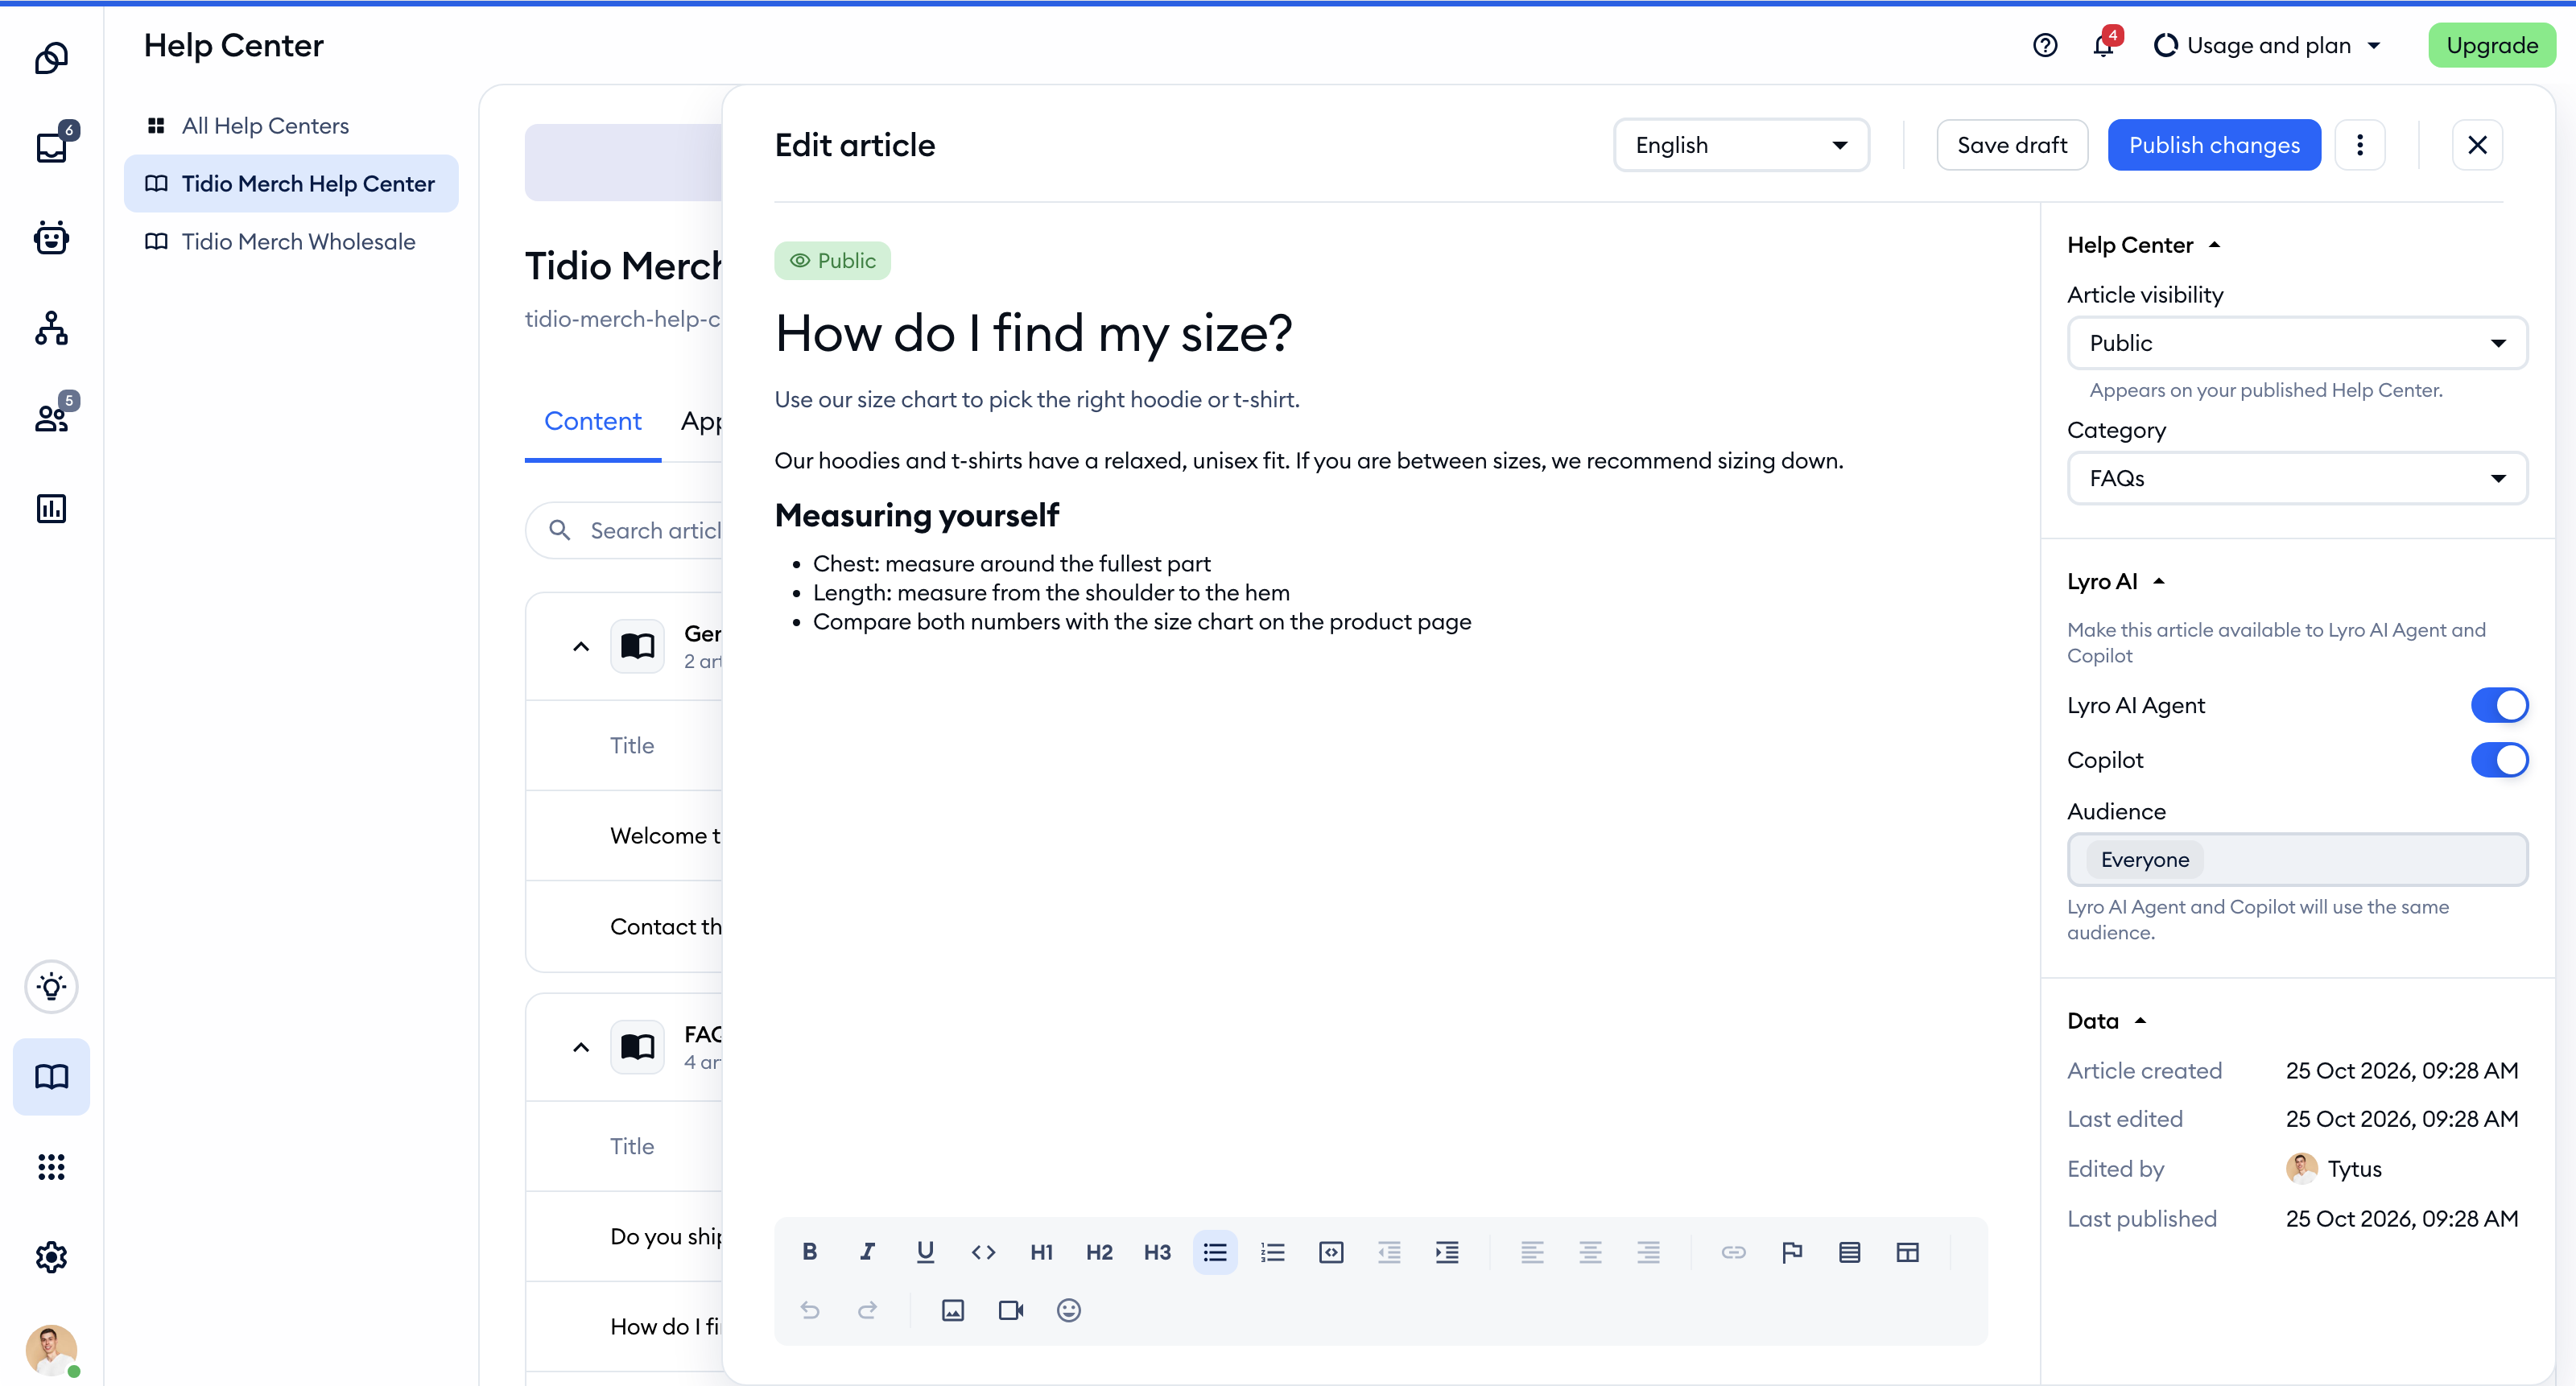
In the same sidebar, the Article visibility field lets you write Unlisted articles too: they're "Not published in your Help Center. Available only to Lyro, Copilot, and human agents." - a handy place for internal know-how.
Articles you've shared with Lyro or Copilot show up in your Data sources list with the Article label (you can also pick Article in the Sources filter). Click on one to see its language versions and whether each of them is used:
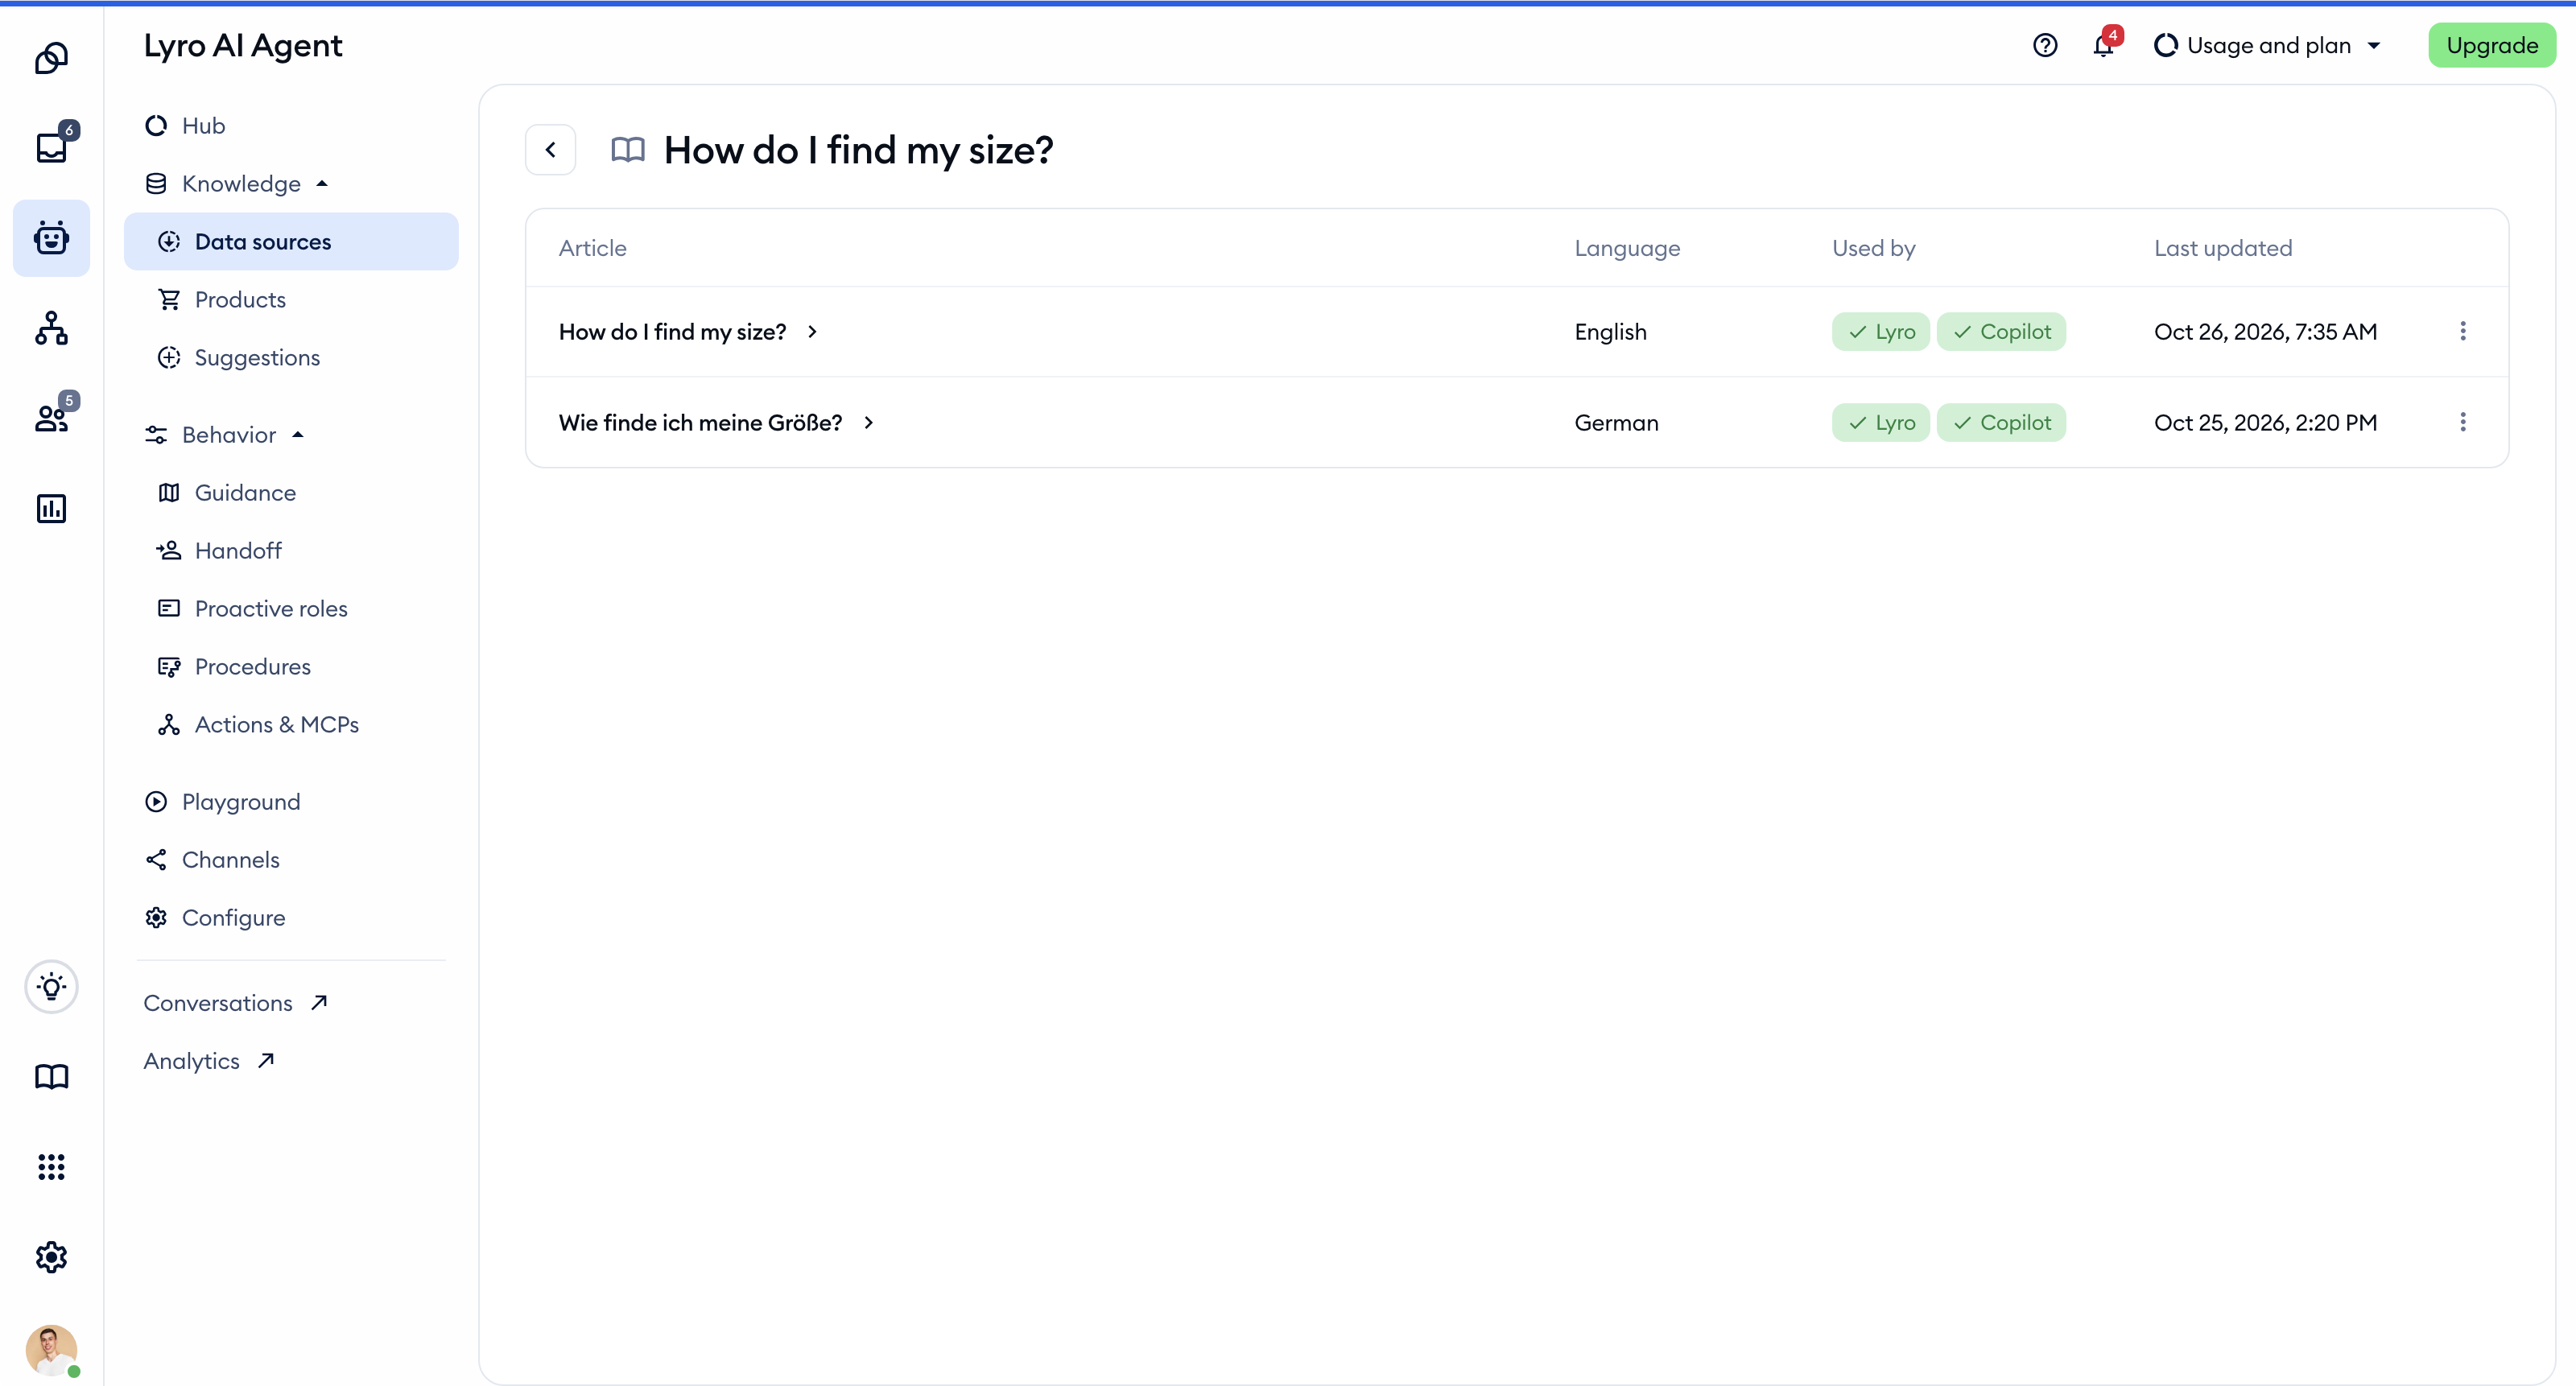
To change the article itself, use Edit in Help Center in its preview. To stop Lyro and Copilot from using it, open the three-dot menu, select Delete, and confirm with Stop using in the Stop using this article? window. Don't worry - the article stays in your Help Center, and you can switch it back on there anytime.
Using Audiences for data sources
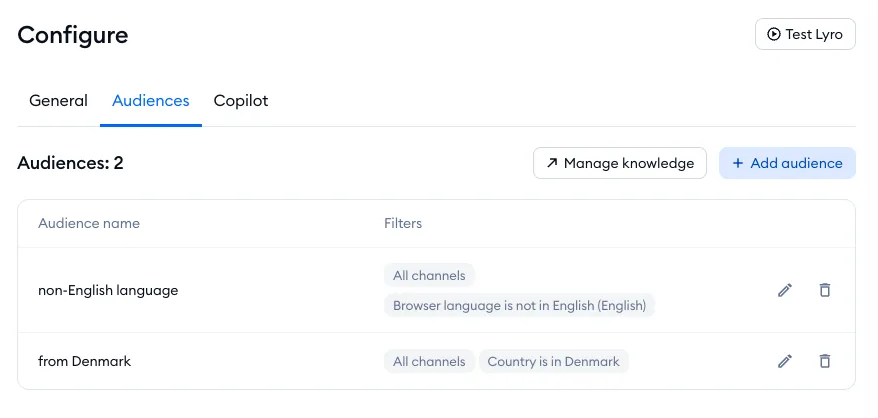
In the Audiences tab of the Configure section, you can create custom audiences for Lyro. This allows you to decide which portions of Lyro's knowledge will be used for particular target audiences, as well as decide if Lyro should immediately transfer such users to your live agents (please see this separate guide for more details on this particular feature, as we only cover data source audiences here).
Creating and managing custom audiences
In the Audiences tab, you can see two buttons in the upper-right: Manage knowledge (which is a shortcut to your Lyro data sources section) and Add audience. If you've already added any audiences, they will be listed here as well. Any audiences you create can be used for targeting your Lyro knowledge, but also for instant handoff (this is configured separately, in the Handoff tab).
When you click on Add audience, you will see the audience creator, where you can name your new audience and set up different conditions:
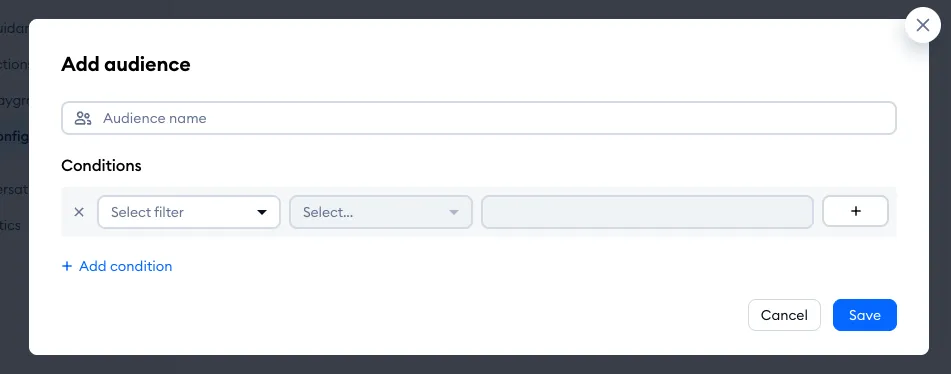
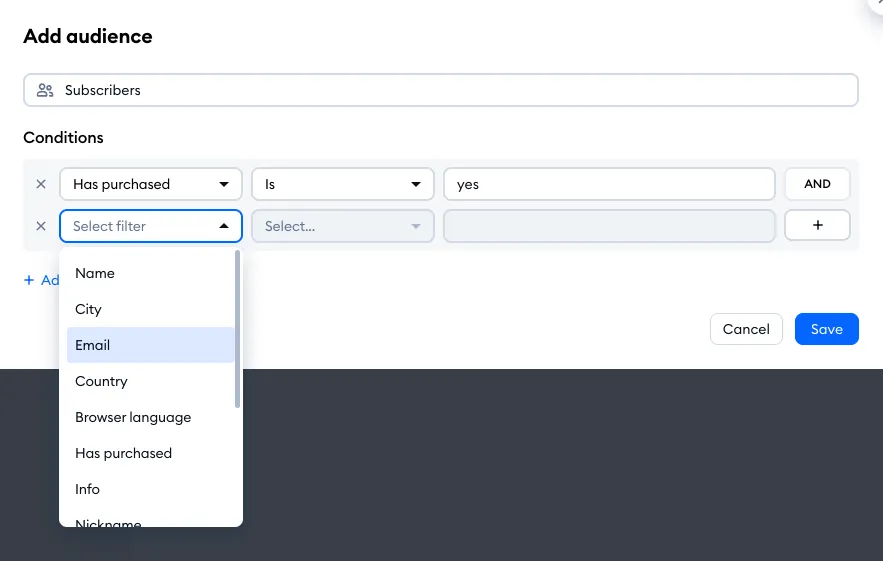
You can create sets of conditions that need to be met in order for the audience to be identified. Select one of the available filters (these include basic Contact Properties as well as any custom ones you may have created, and the available communication channels) and set up the values according to what you need.
Please note that you can use the plus (+) button on the right to add another filter to your condition; this way, you can set up more restrictive conditions, as each filter you add this way will be used together with the others. This will be made clear by the word 'and' appearing on the right:
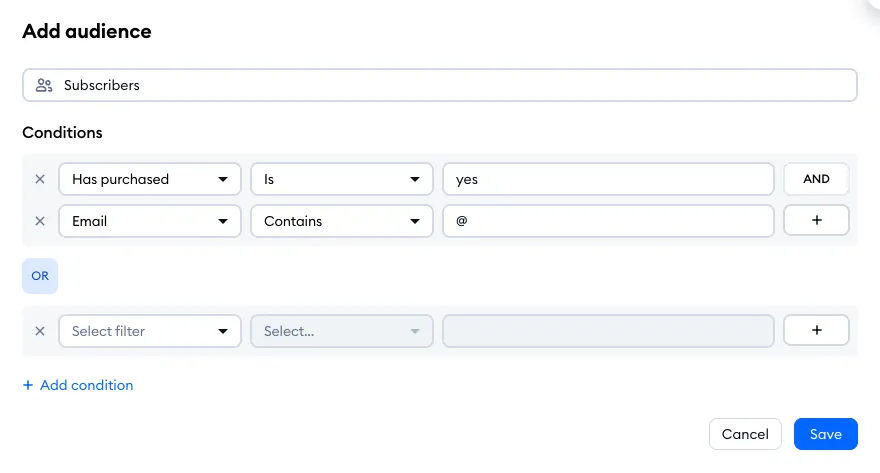
You can also add another set of conditions to the audience, if you'd like to use 'or' logic instead. This way, you can have different sets of filters that are considered separately, and the audience will work if at least one of the sets is satisfied. To achieve this, use the Add condition option at the bottom instead of the plus (+) button on the right:
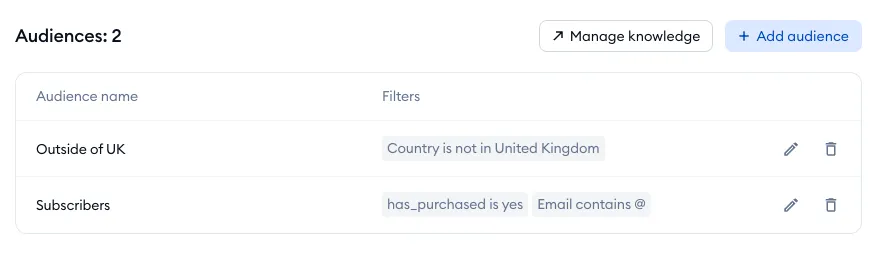
Once you've created your audiences, they will be listed along with their conditions inside the Audiences tab. From this point, they will be available to use in your Lyro data sources and Lyro handoff options. Please note that we only cover using audiences for data sources in this guide (see this separate article for details on using it for handoff).
Audiences for data sources
Once you've created at least one custom audience, you can use it to limit how Lyro uses its knowledge.
Go to the Lyro AI Agent > Data sources section (you can simply use the Manage knowledge shortcut inside the Audiences tab), and edit one of your listed data sources. You will notice the Audience field in the lower-right:
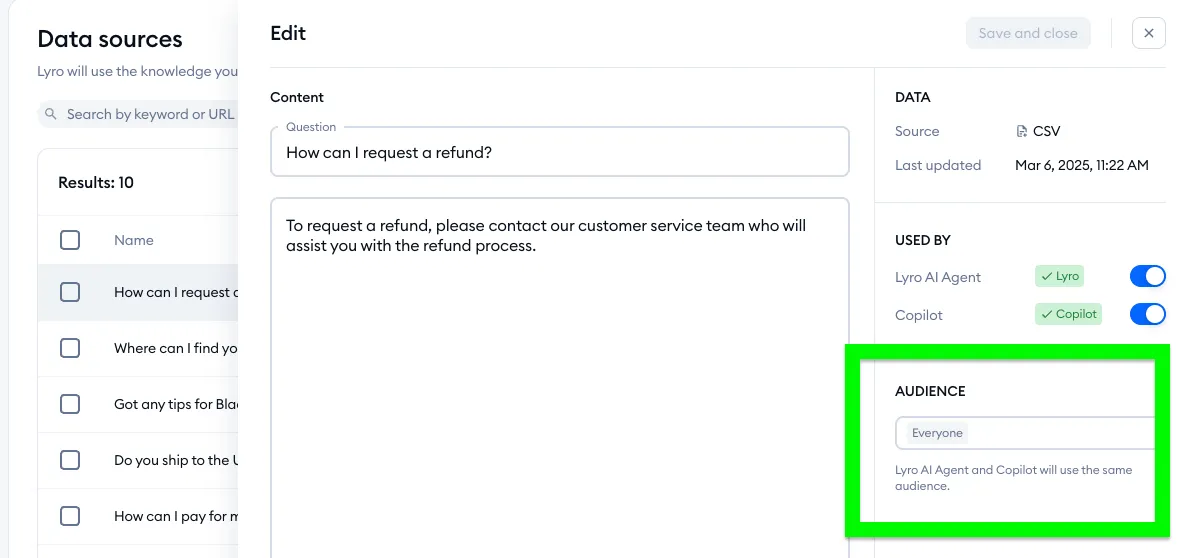
By default, it is set to 'everyone', meaning that this particular data source will be used for any user who interacts with Lyro (or for any agent that uses Copilot).
You can click on the field and select any of the available audiences, as well as reset them back to default, or access the Audiences tab once again:
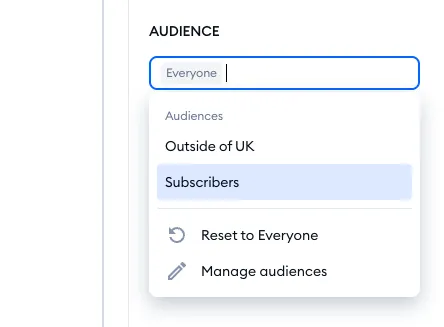
Once you hit the Save and close button for the data source, your audience settings for this particular data source will be saved.
Sending feedback about Lyro responses
As an agent, you get the option to provide feedback on any response that Lyro gives in your project. This is a strictly internal feedback system; our dedicated team receives all this feedback (it's not available for you to review). This allows us to better understand the ups and downs of how Lyro is working for users such as yourself!
While viewing a conversation where Lyro has responded, you'll see the thumbs up and thumbs down buttons underneath the message:
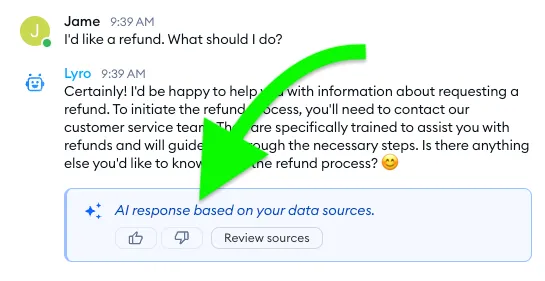
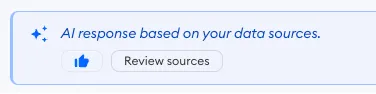
If you click on the thumbs up button, that means you agree with Lyro's response and you'd like to send us positive feedback about its performance in this particular interaction.
If you click on the thumbs down button, that means you'd like to send us negative feedback regarding this response. You'll get several reasons to select from (you can choose multiple):
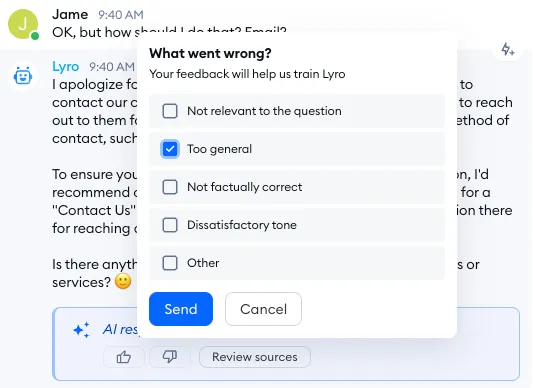
If you select other, you cam additionally provide more details or a comment:
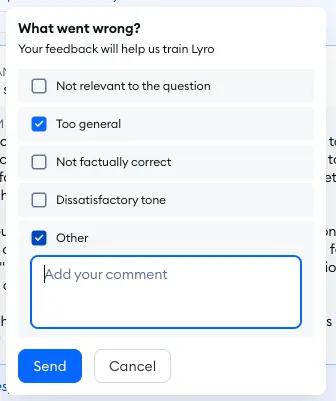
With the feedback you provide, we'll be able to keep improving Lyro further!
