It is possible to add your very own domains in Tidio, and use them for ticketing. This feature can help your emails look more professional in general, but also allow to avoid common issues with deliverability to your customers.
In this article, you'll learn:
- How to add your domains for use in Tidio
- How to troubleshoot if you're using Cloudflare
- How to configure DMARC
- How to configure Ticketing
Adding and verifying your own domain
This setting allows you to specify a domain that you own, and configure your own DNS records. For each domain you add and successfully verify, you can add custom aliases as well. By default, the connection is attempted automatically (through an app called Entri), but if that proves impossible, you will be asked to connect manually instead.
Please note: You need permission to edit email settings to add domains and sender addresses. If the button is unavailable, ask your project admin to check your permissions.
Connect automatically
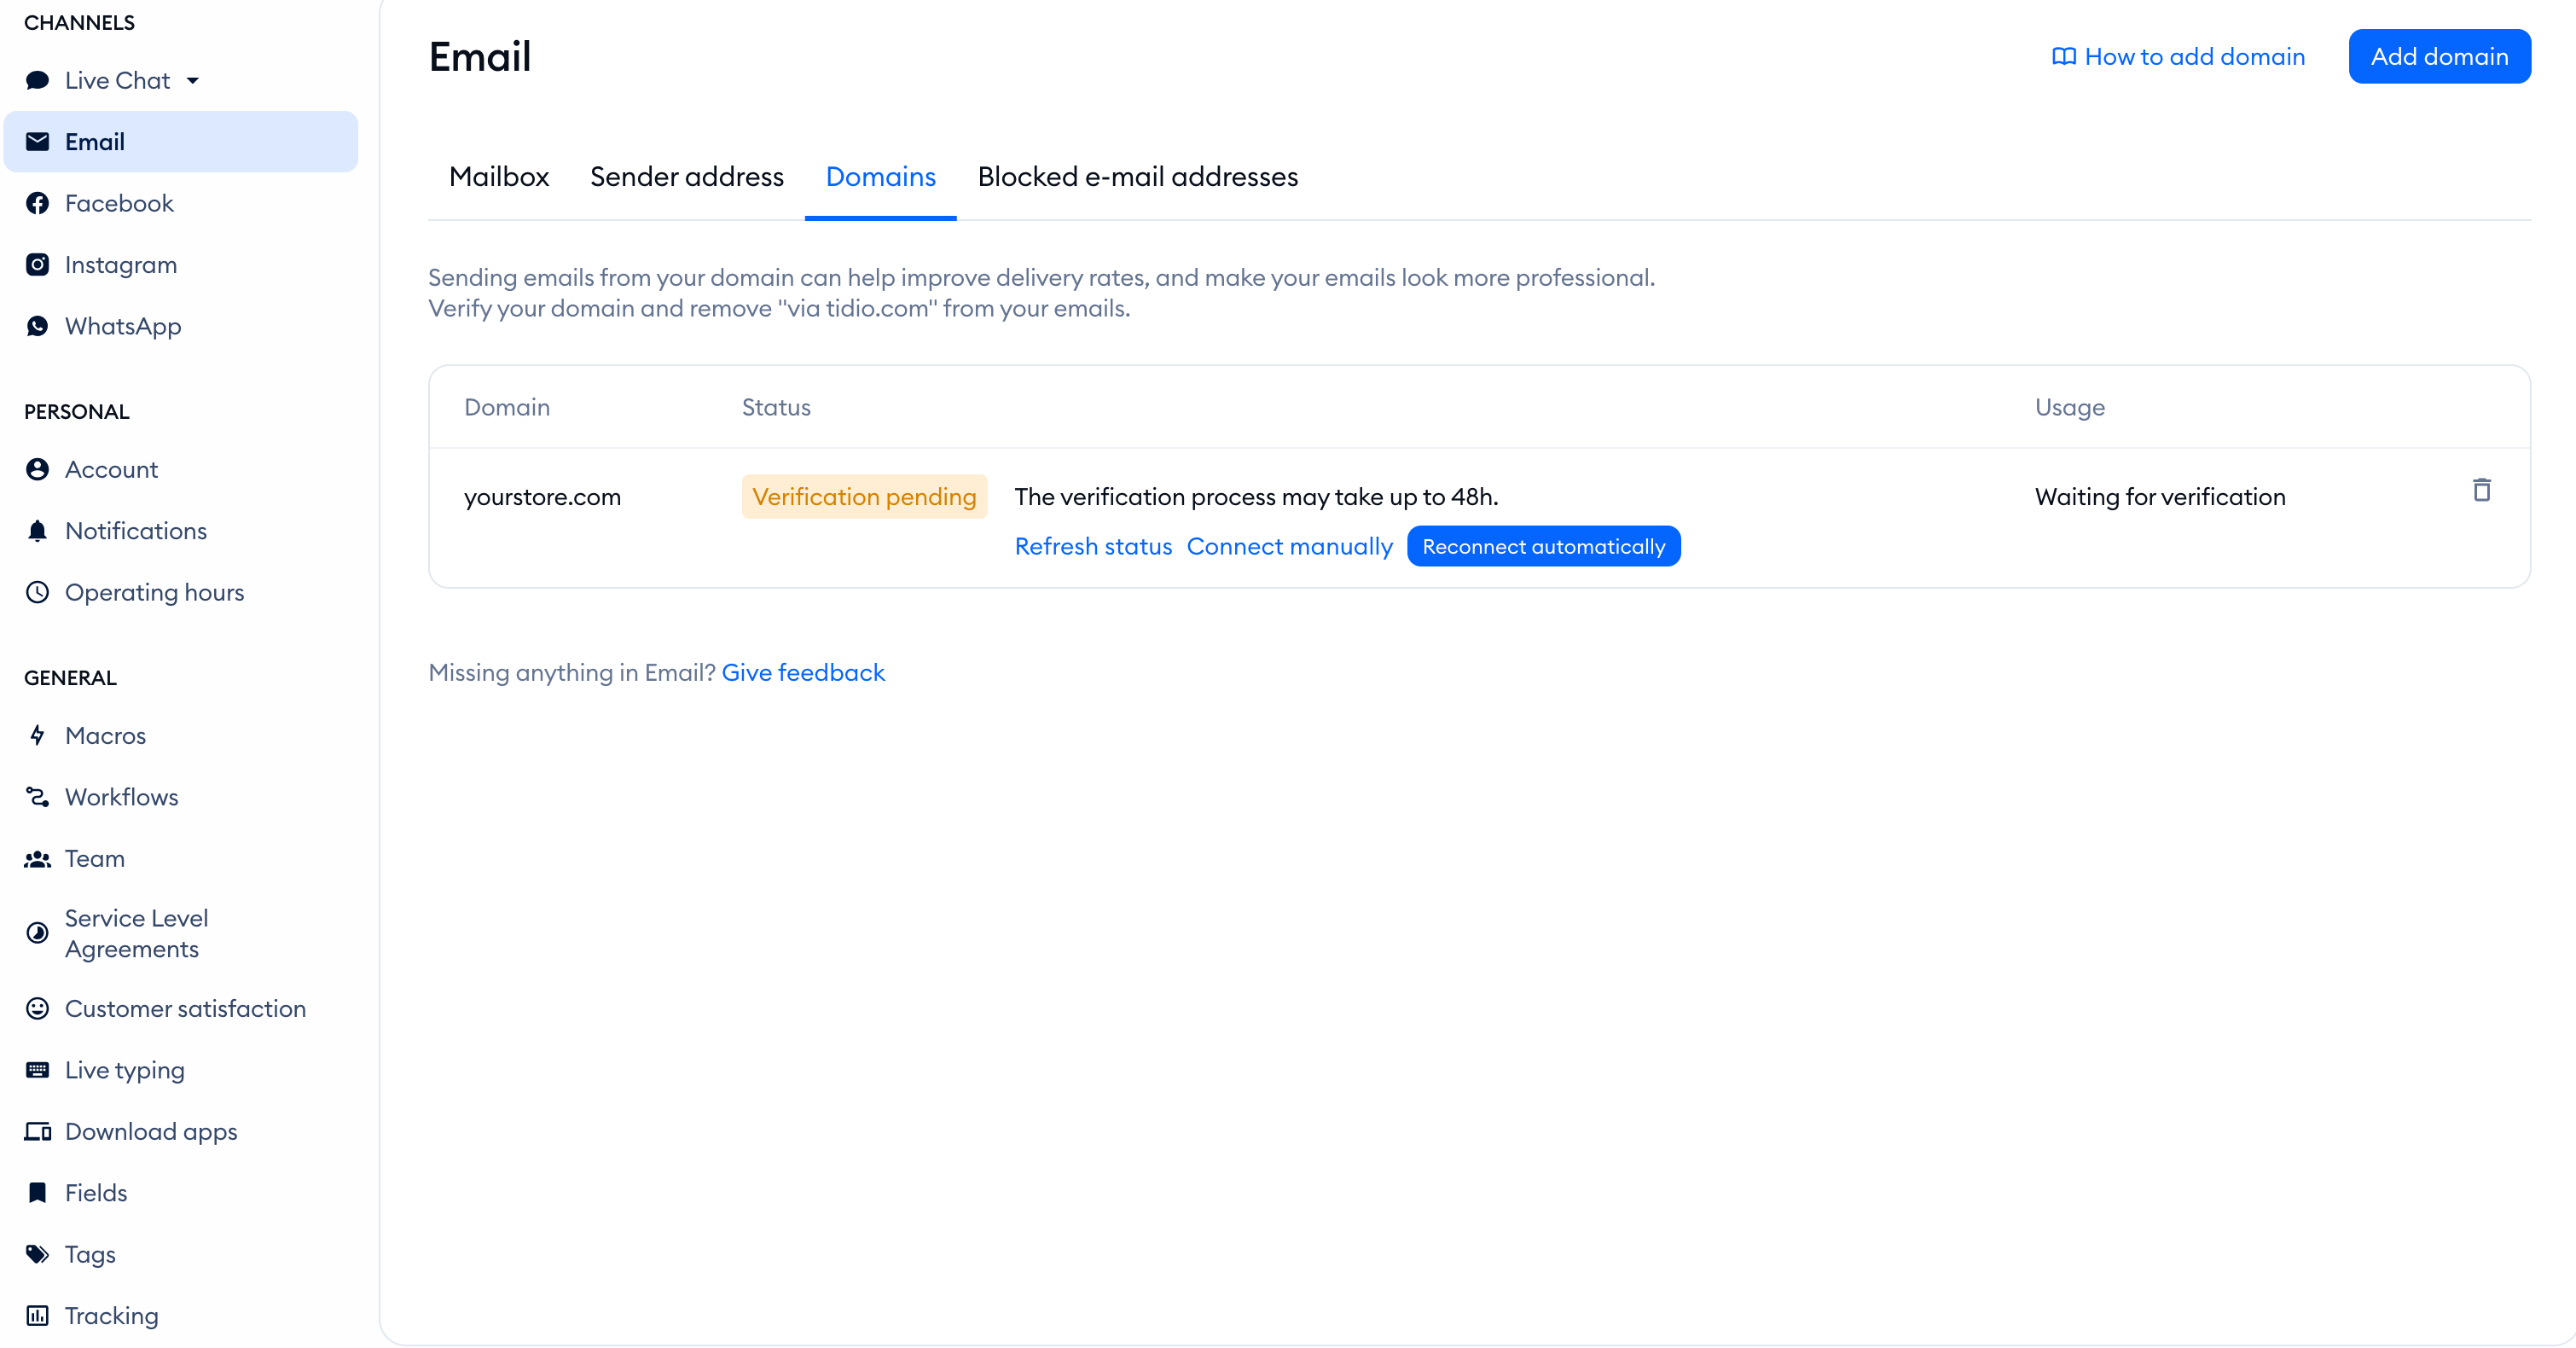
Head over to Settings > Email, and go to the Domains tab - then click on the Add domain button:
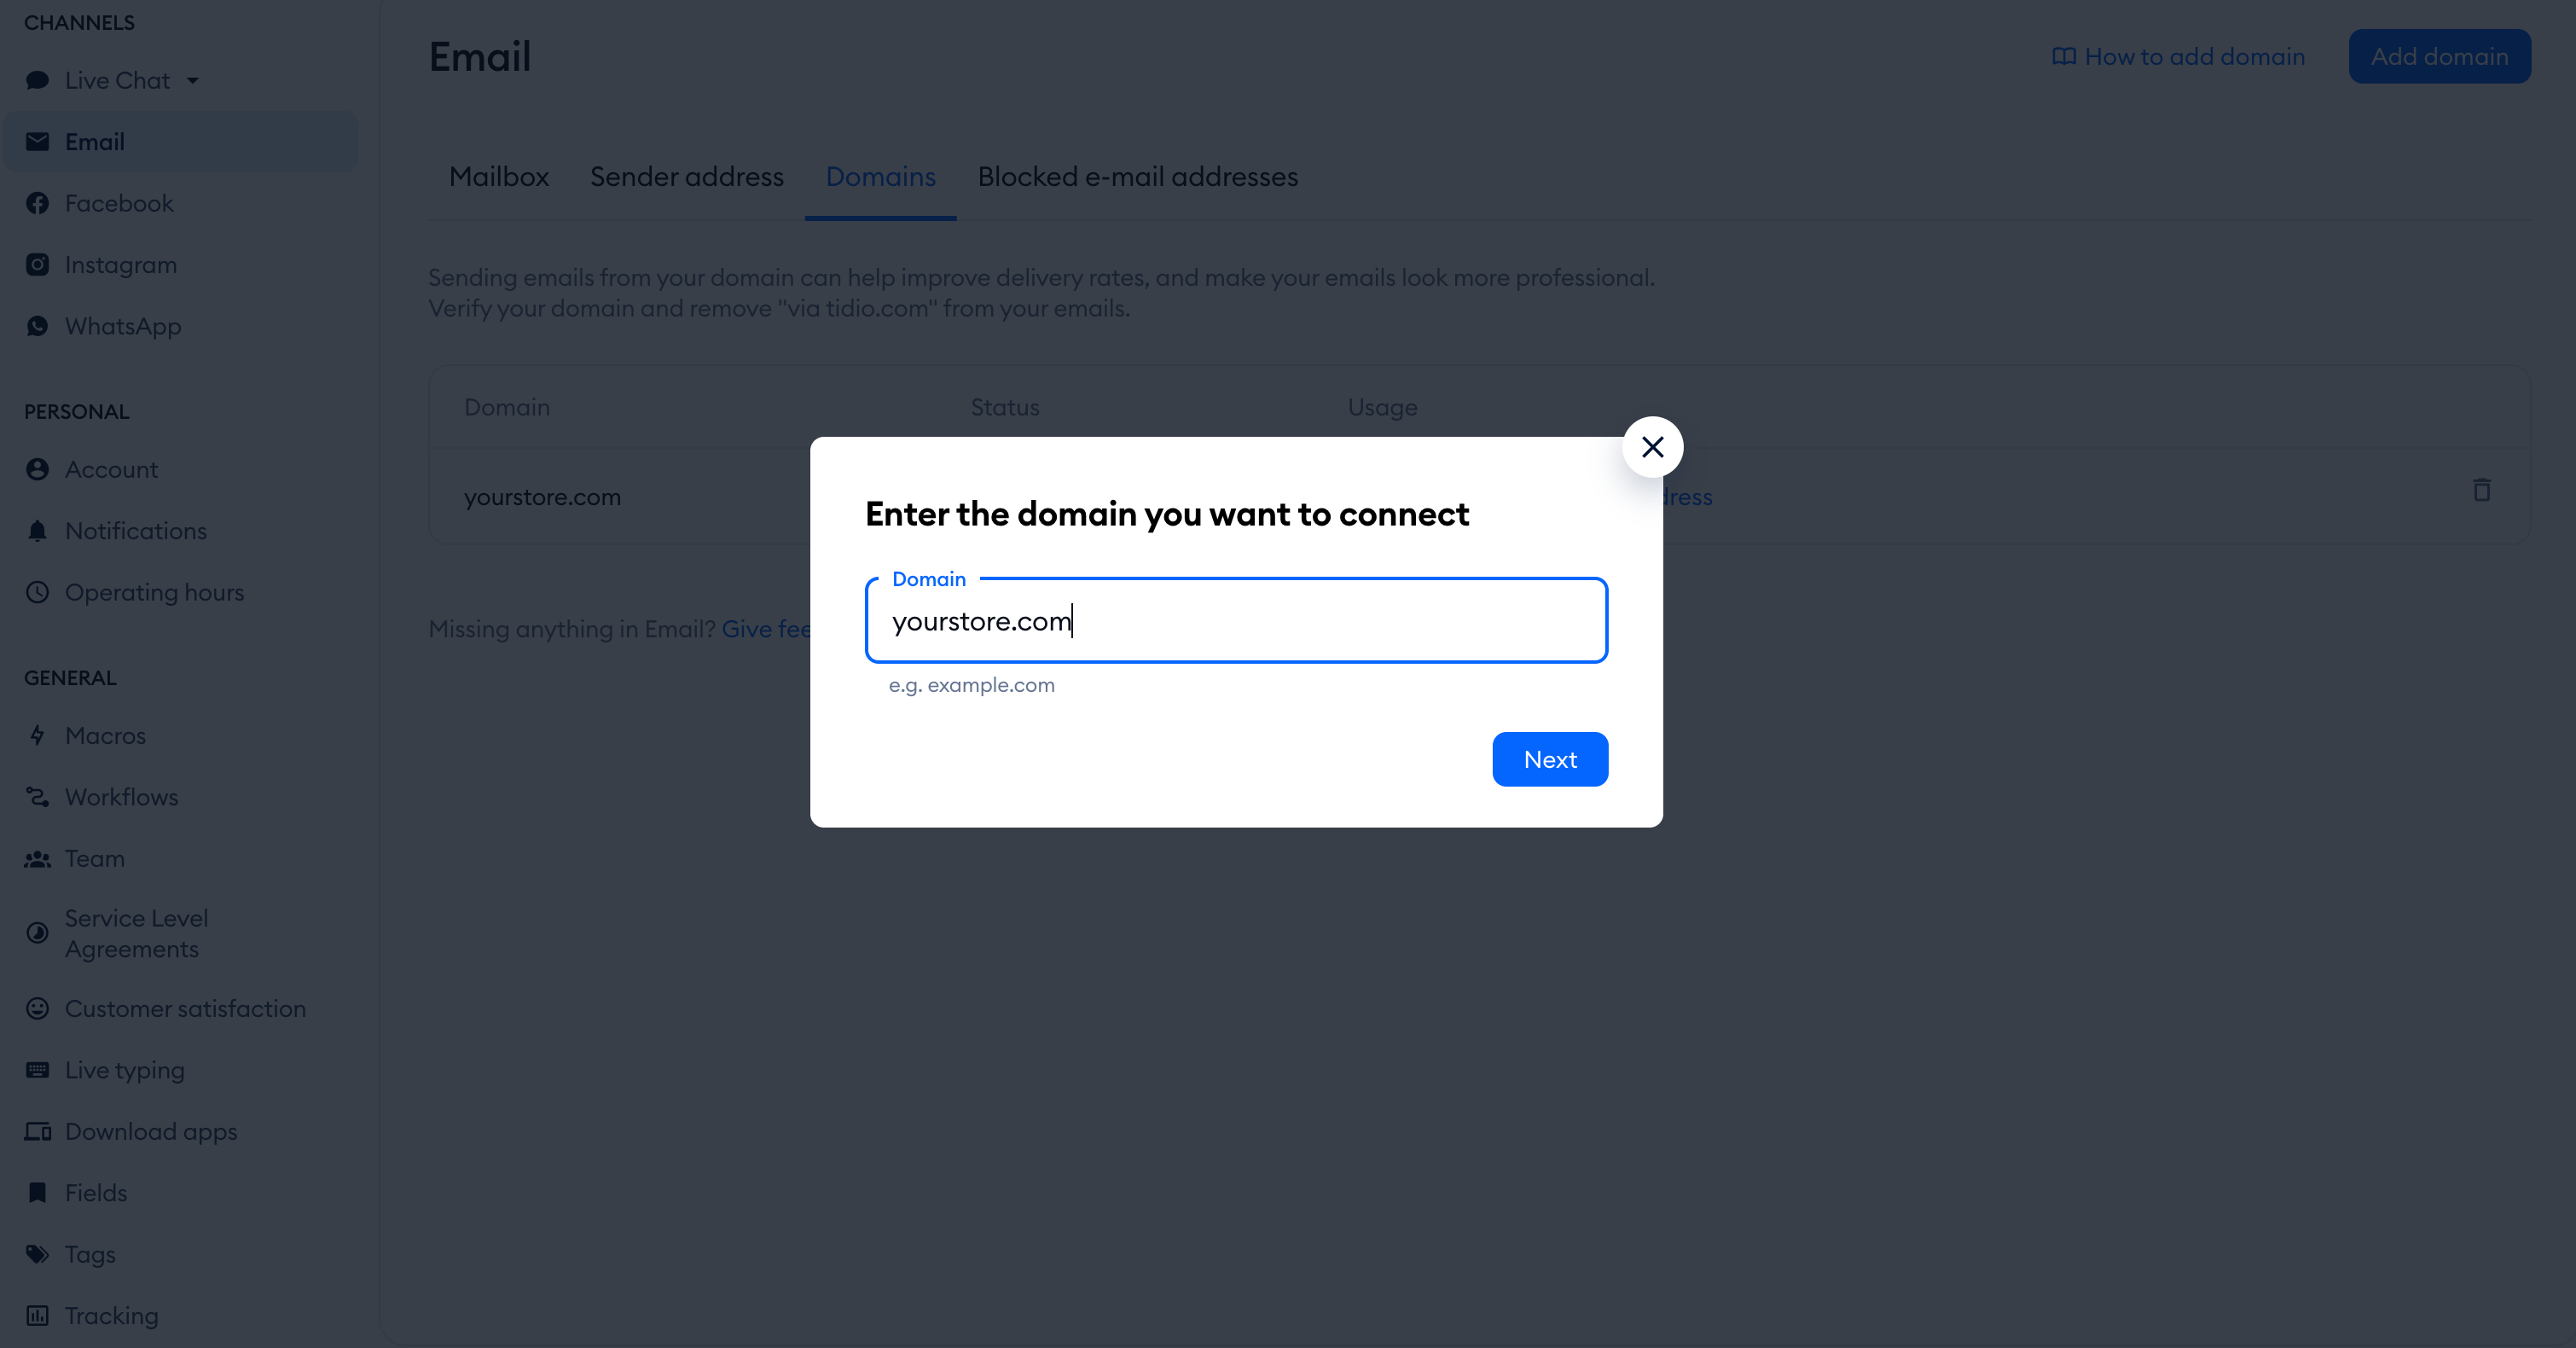
In the new window that pops up, enter your domain in the Domain field and click Next:
This will let you proceed to the automatic domain connection, which is powered by Entri. This specialised app will assist you in connecting your domain in a few simple steps (as long as your domain provider is supported by Entri, which you can check here).
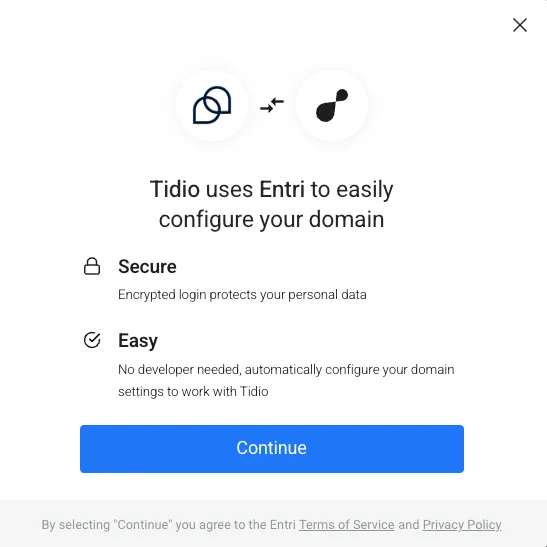
Once you continue, the domain will be analyzed for all the relevant details - all in order to allow a secure and smooth connection. During this process you will be asked to input your provider login details, in order to properly allow Tidio to connect with your domain. You will most likely need to confirm the connection request with a security code sent via email.
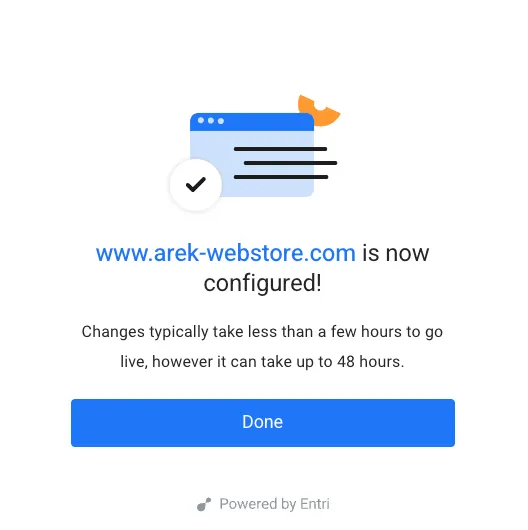
Once you successfully verify everything that's necessary, you will see a confirmation screen:
Please note: in some cases where your domain provider is not supported for automatic connection by Entri, you will be given all the necessary DNS records to implement manually into your domain settings instead.
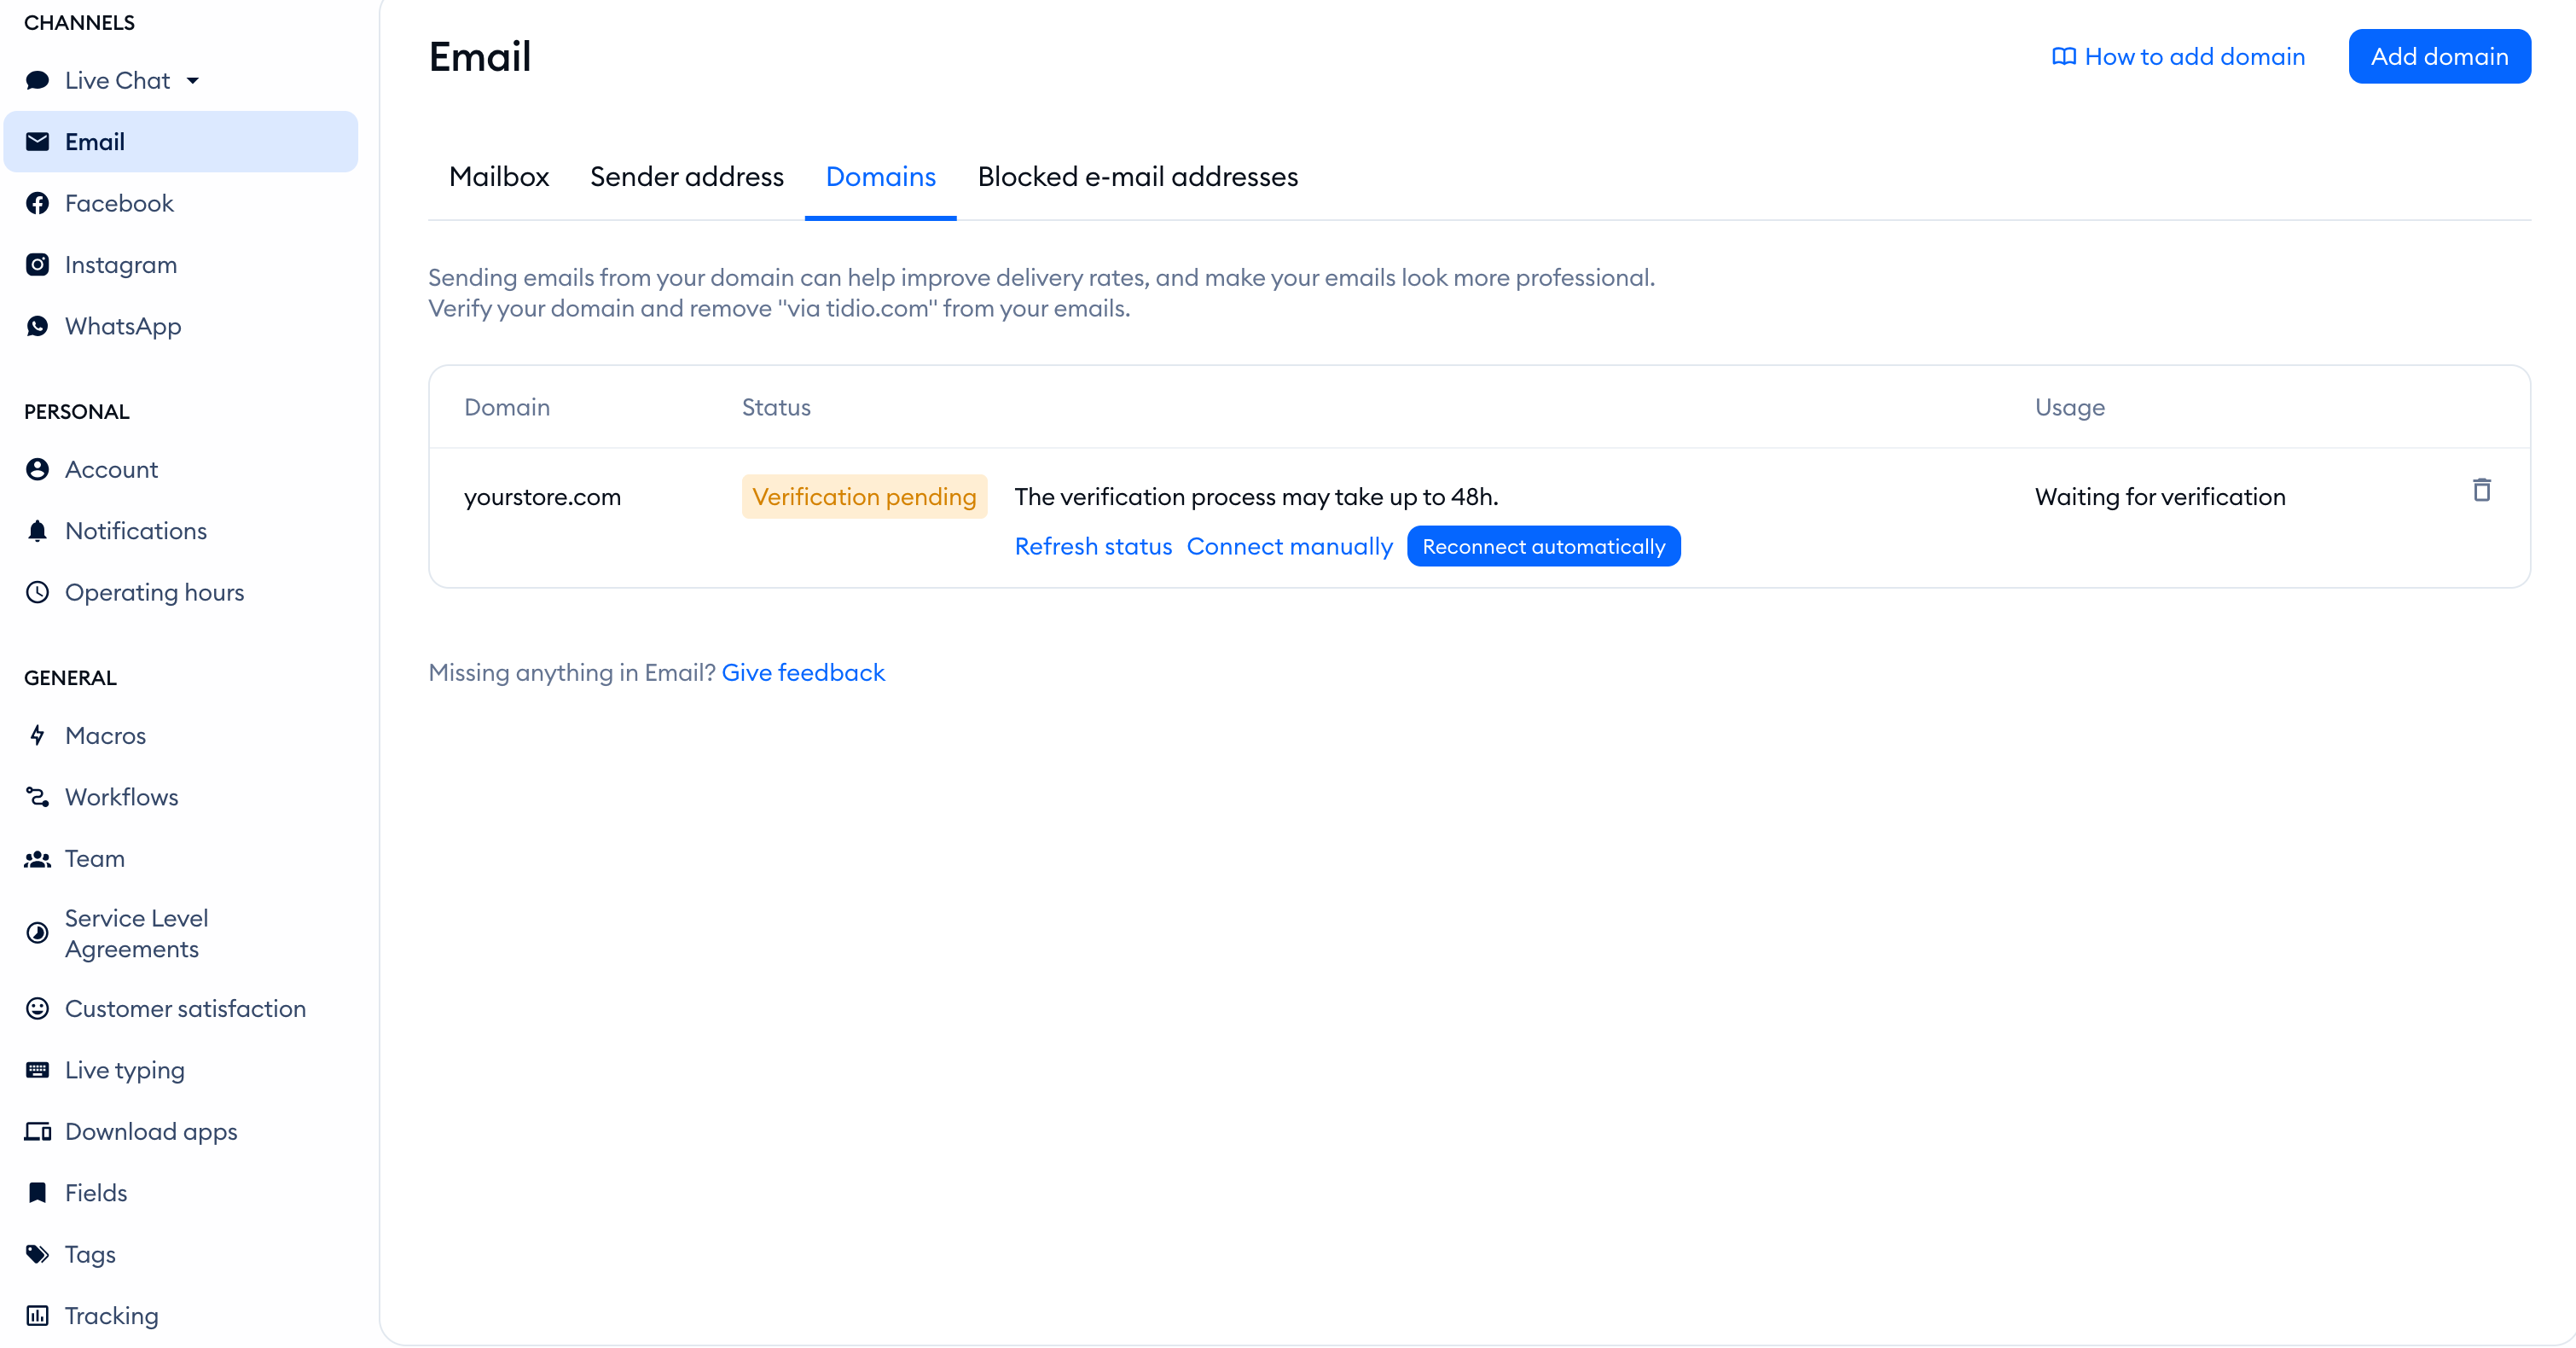
Once the domain is added, you will then see it listed in the Domains tab, with the appropriate Status label showing you the current state of the connection. While verification is pending, the panel says it may take up to 48 hours. Click Refresh status to check again. You can also choose Reconnect automatically or Connect manually:
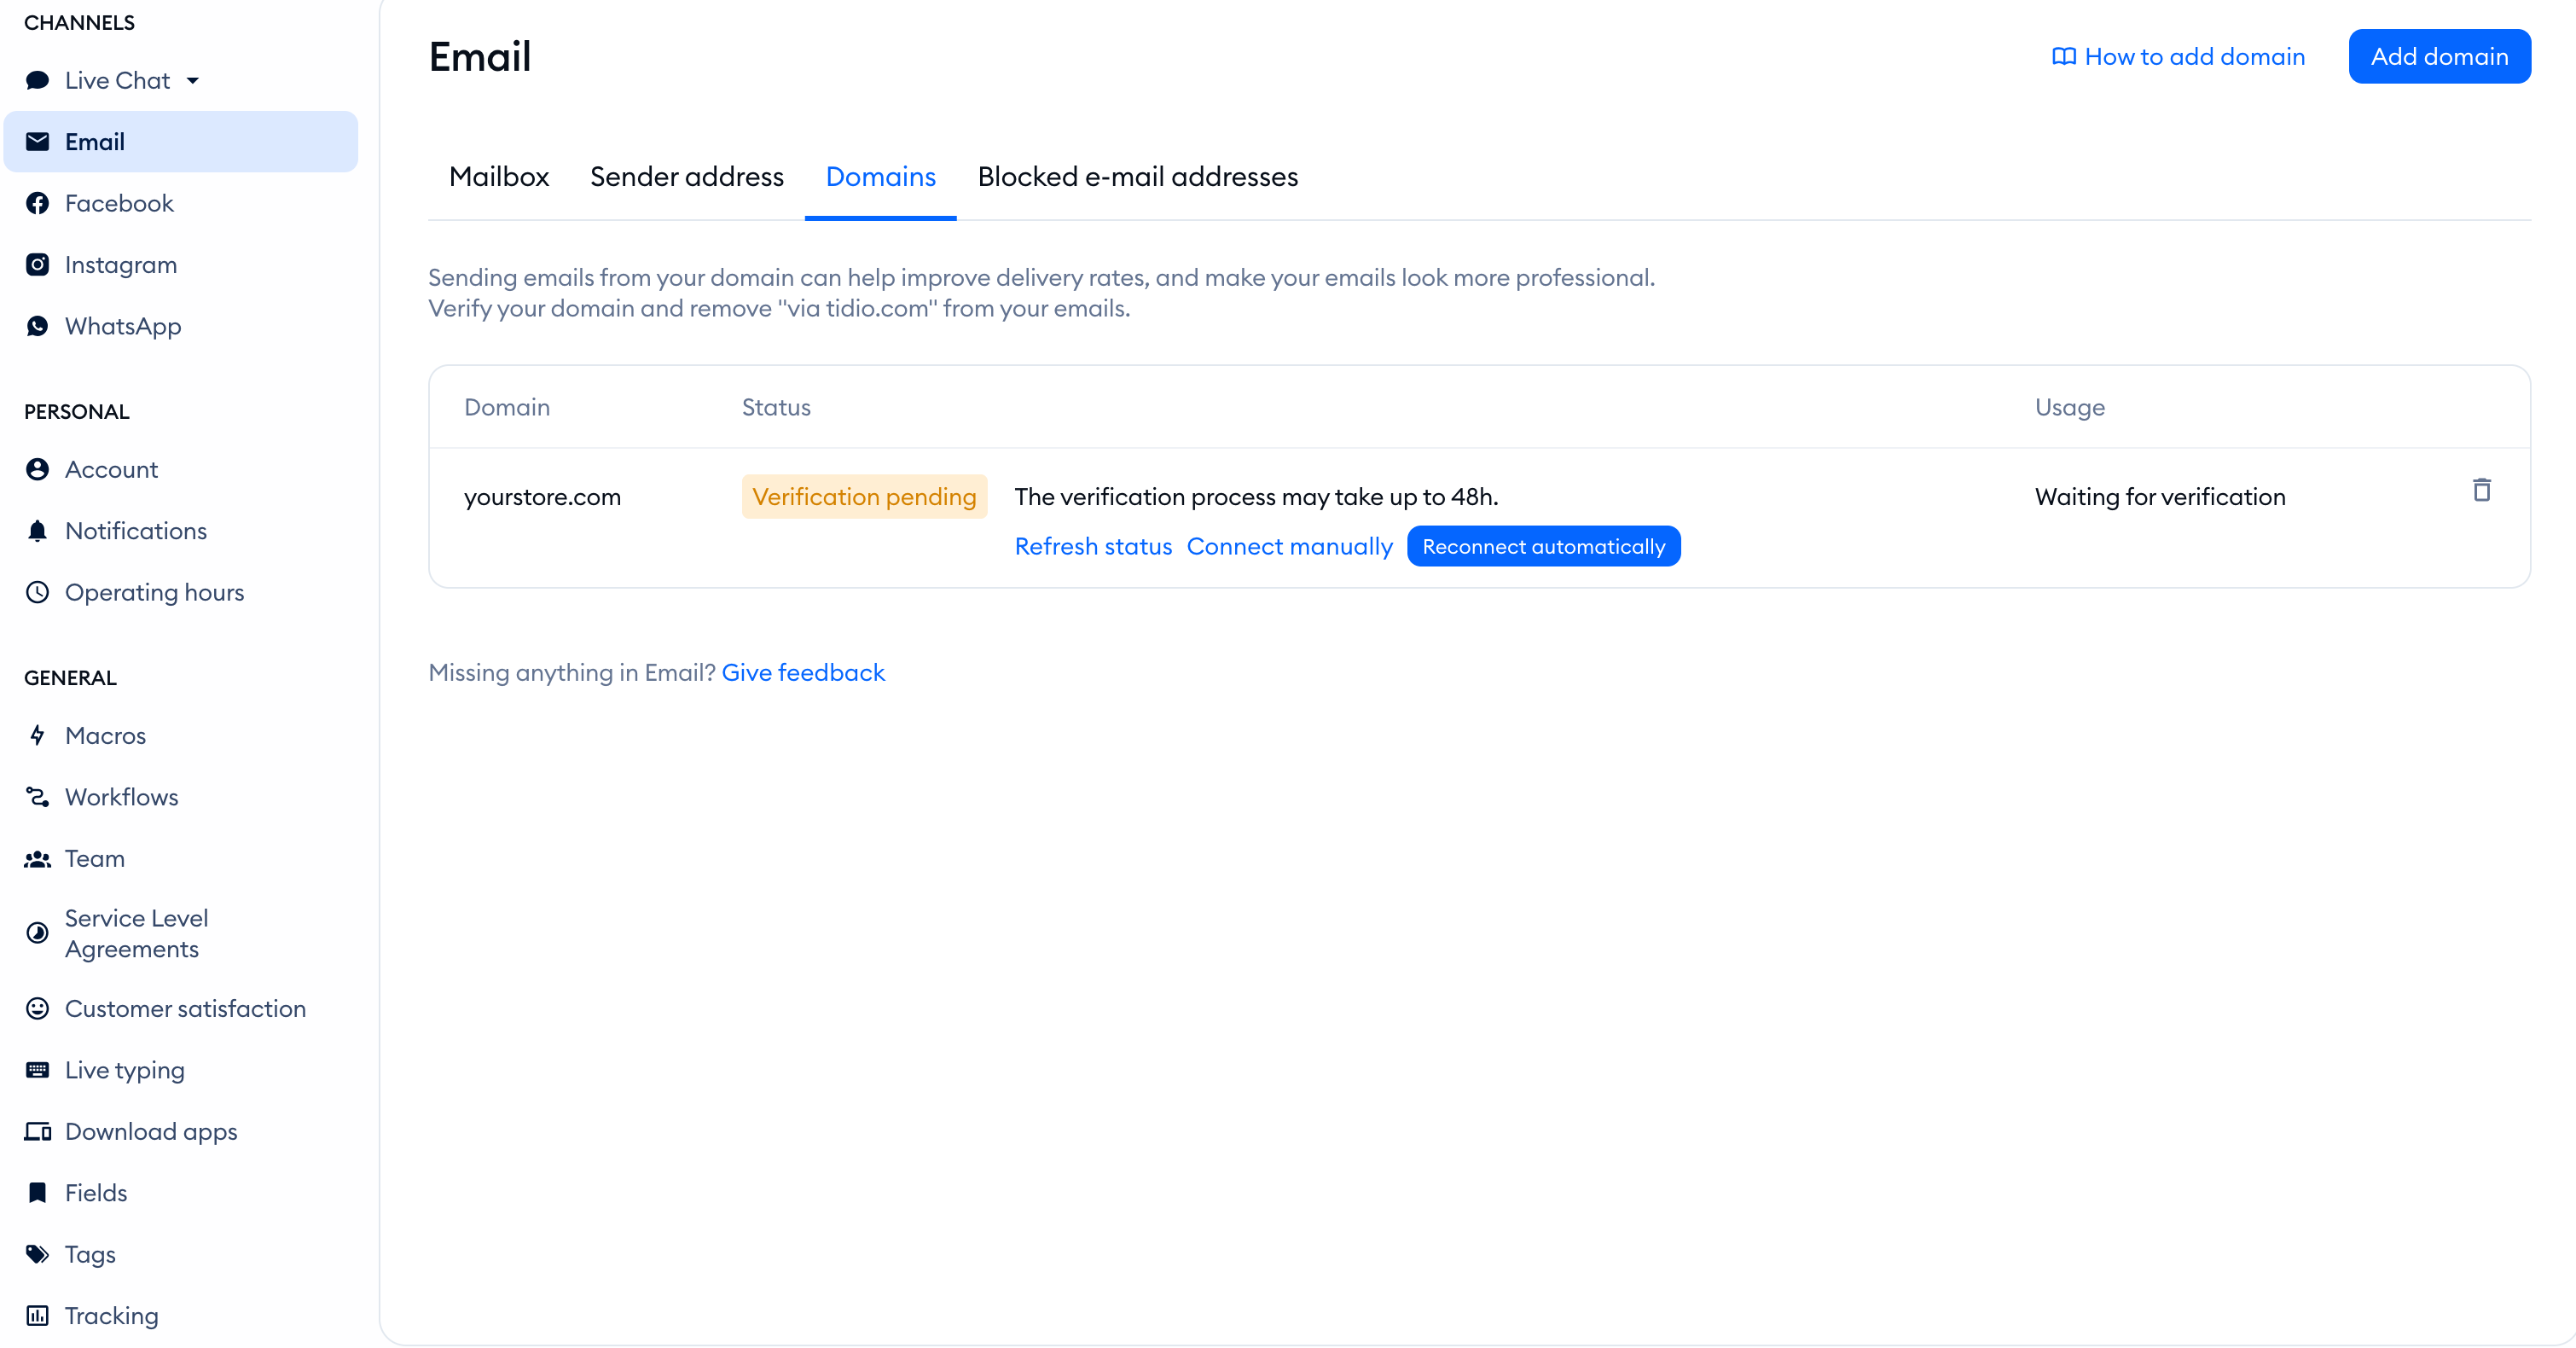
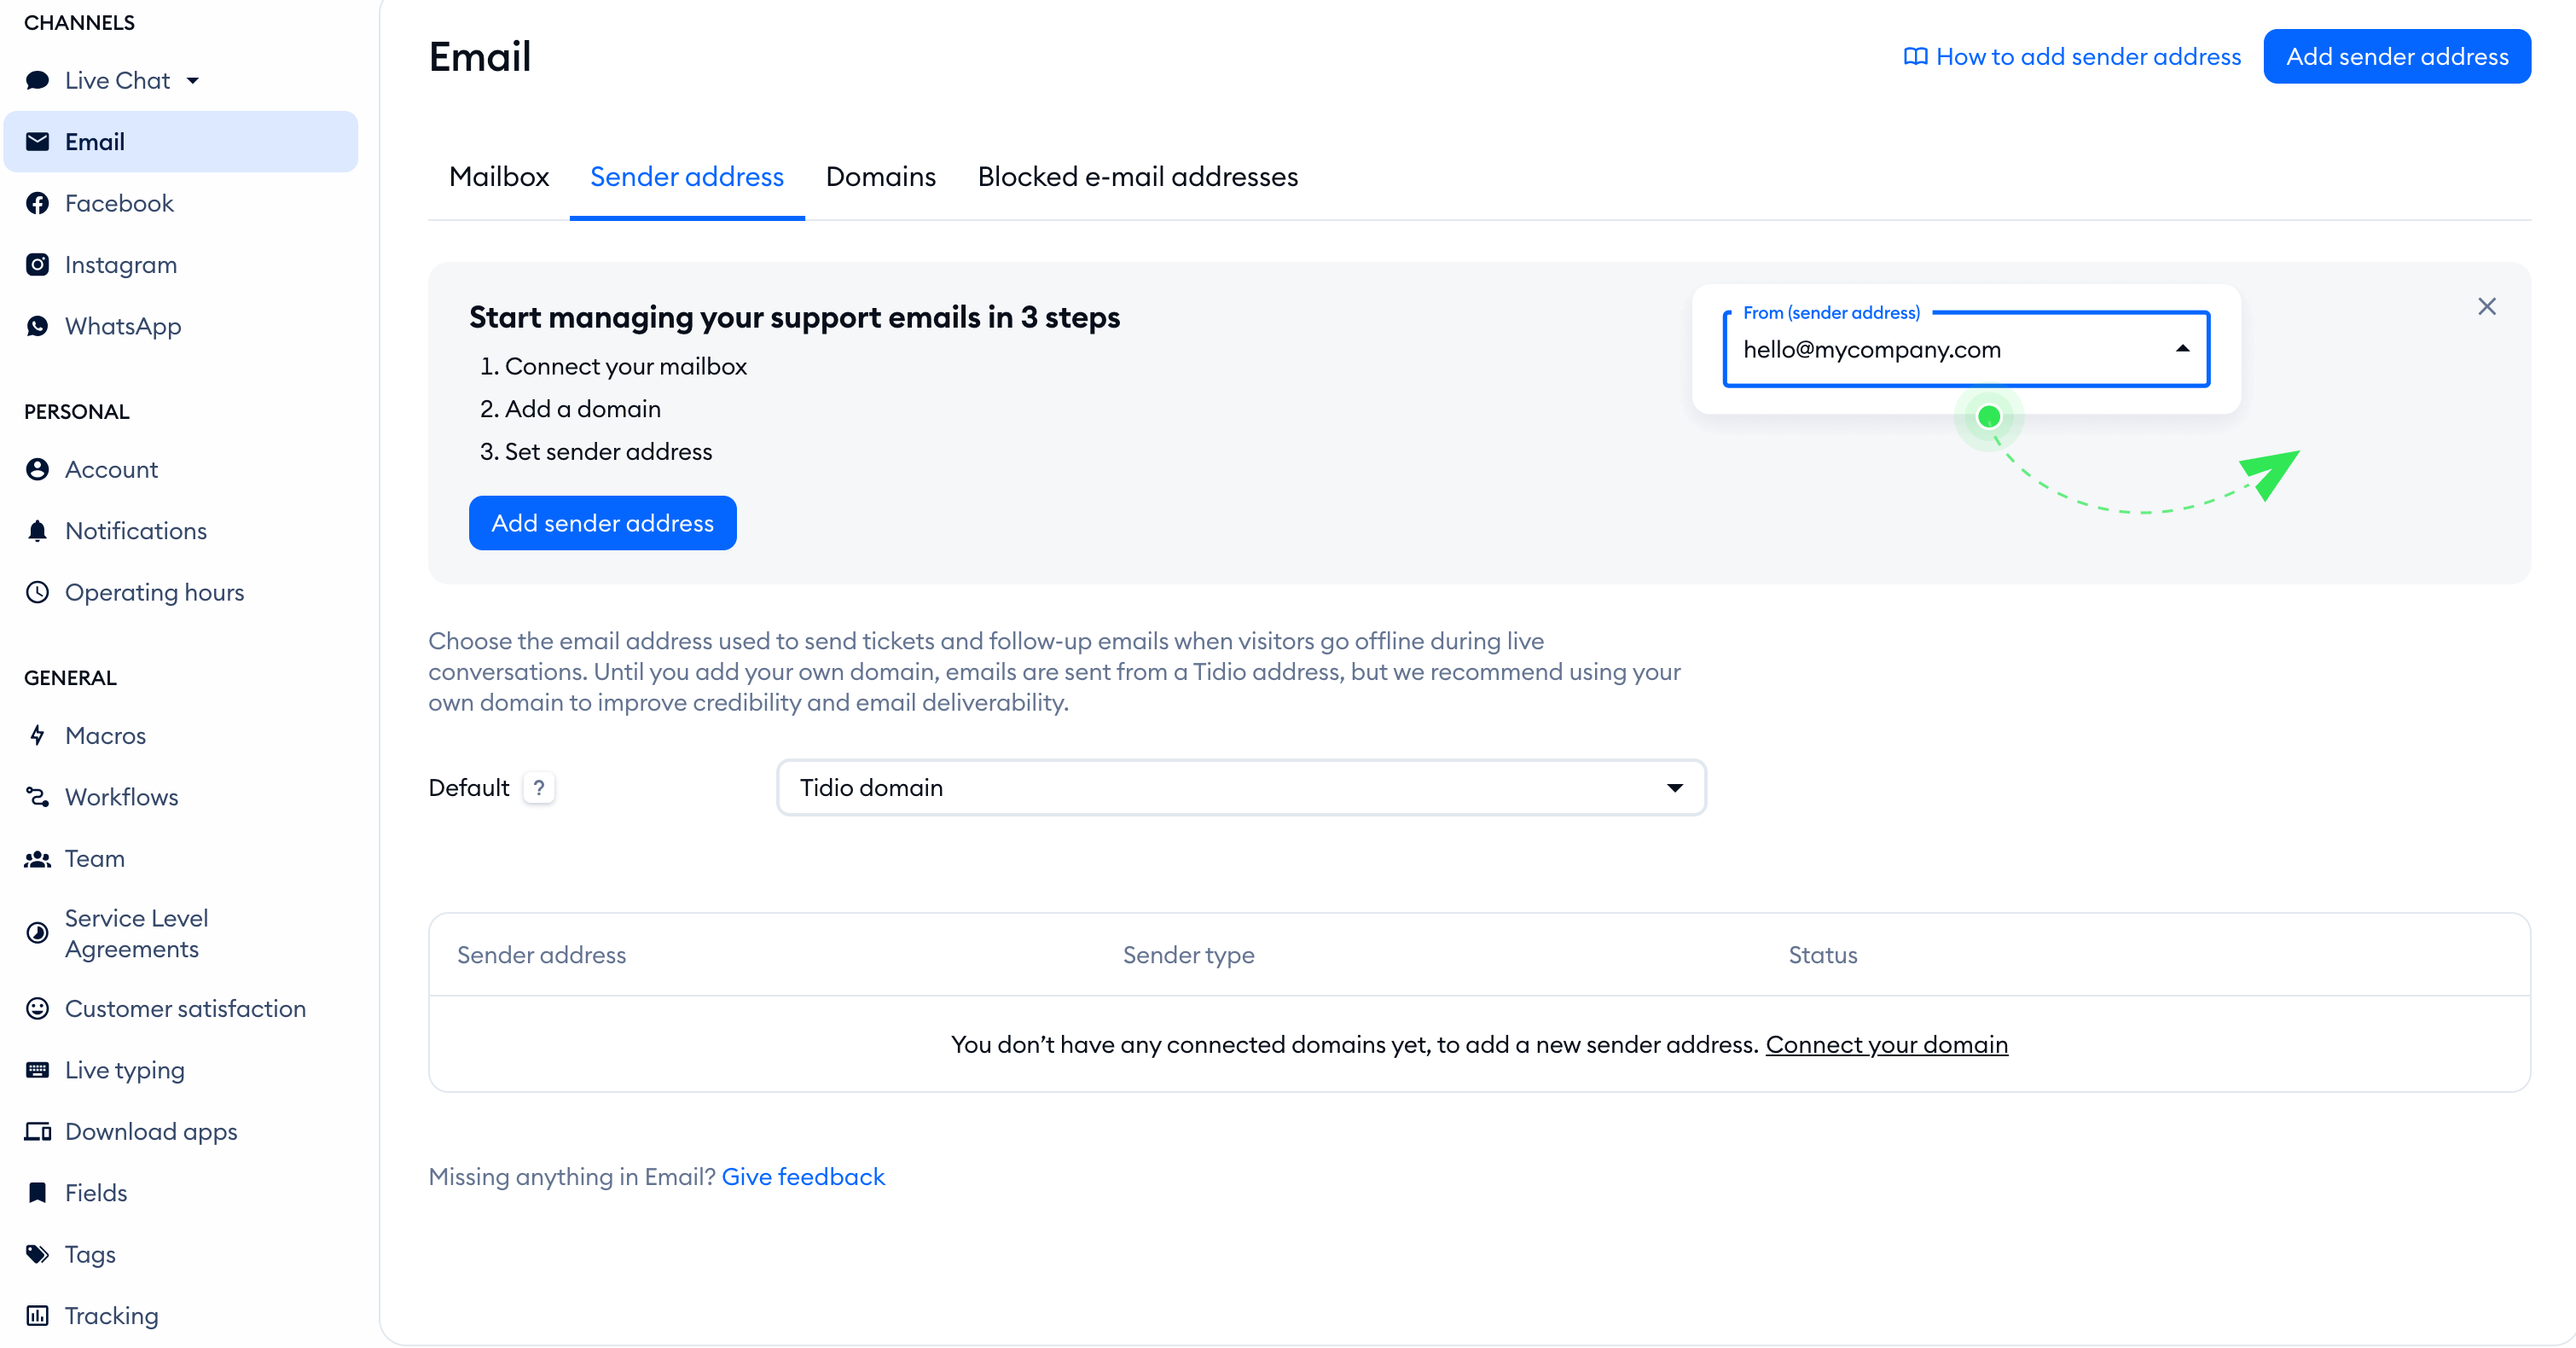
Once a domain is verified, it will become available for you to select when adding a new sender address in Settings > Email > Sender address. Click on the Add sender address button in the top-right:
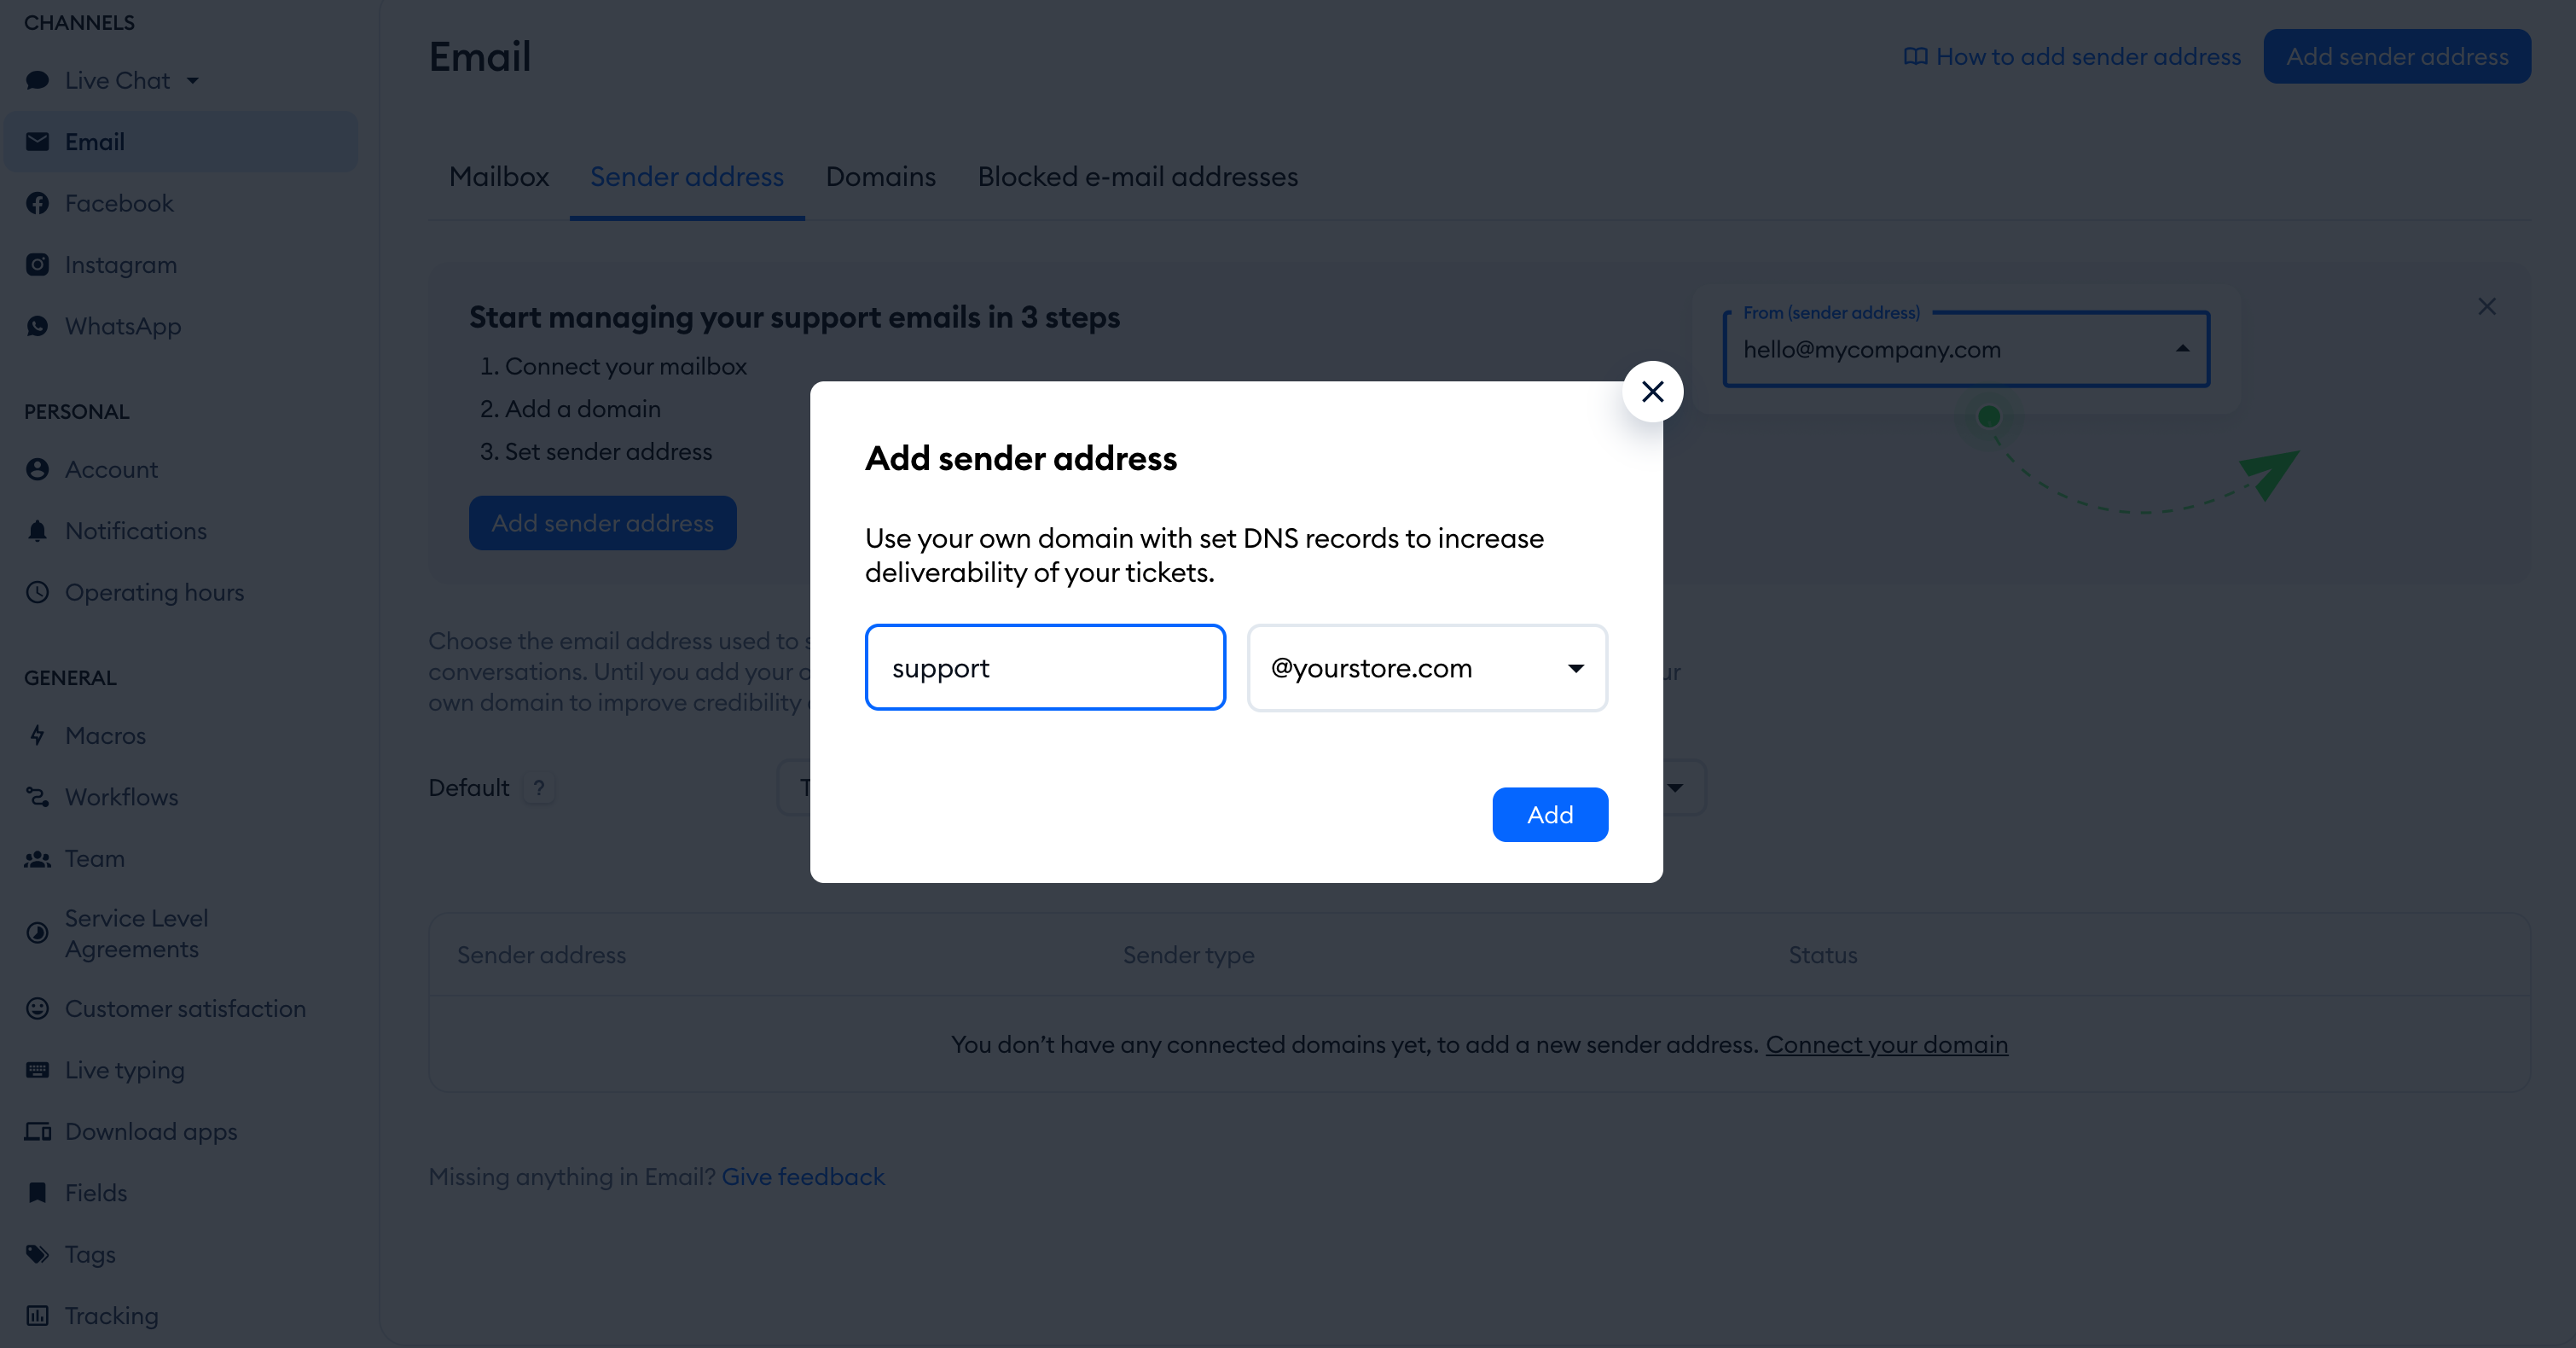
In the popup, you will be able to select any of your verified domains, and enter an Alias to use with it. Click Add to save the address:
Connect manually
With the manual method, you will get a set of instructions: the DNS records necessary to connect your domain with Tidio. The records will be shown to you right away if your domain provider isn't available to connect automatically via Entri, but you can also see these instructions by clicking on Connect manually right next to your domain, while it's pending verification:
You will see your unique DNS records - use them in your domain provider's DNS settings as instructed, and that's it!
Use the records shown for your domain. This example contains two TXT records and one CNAME record:
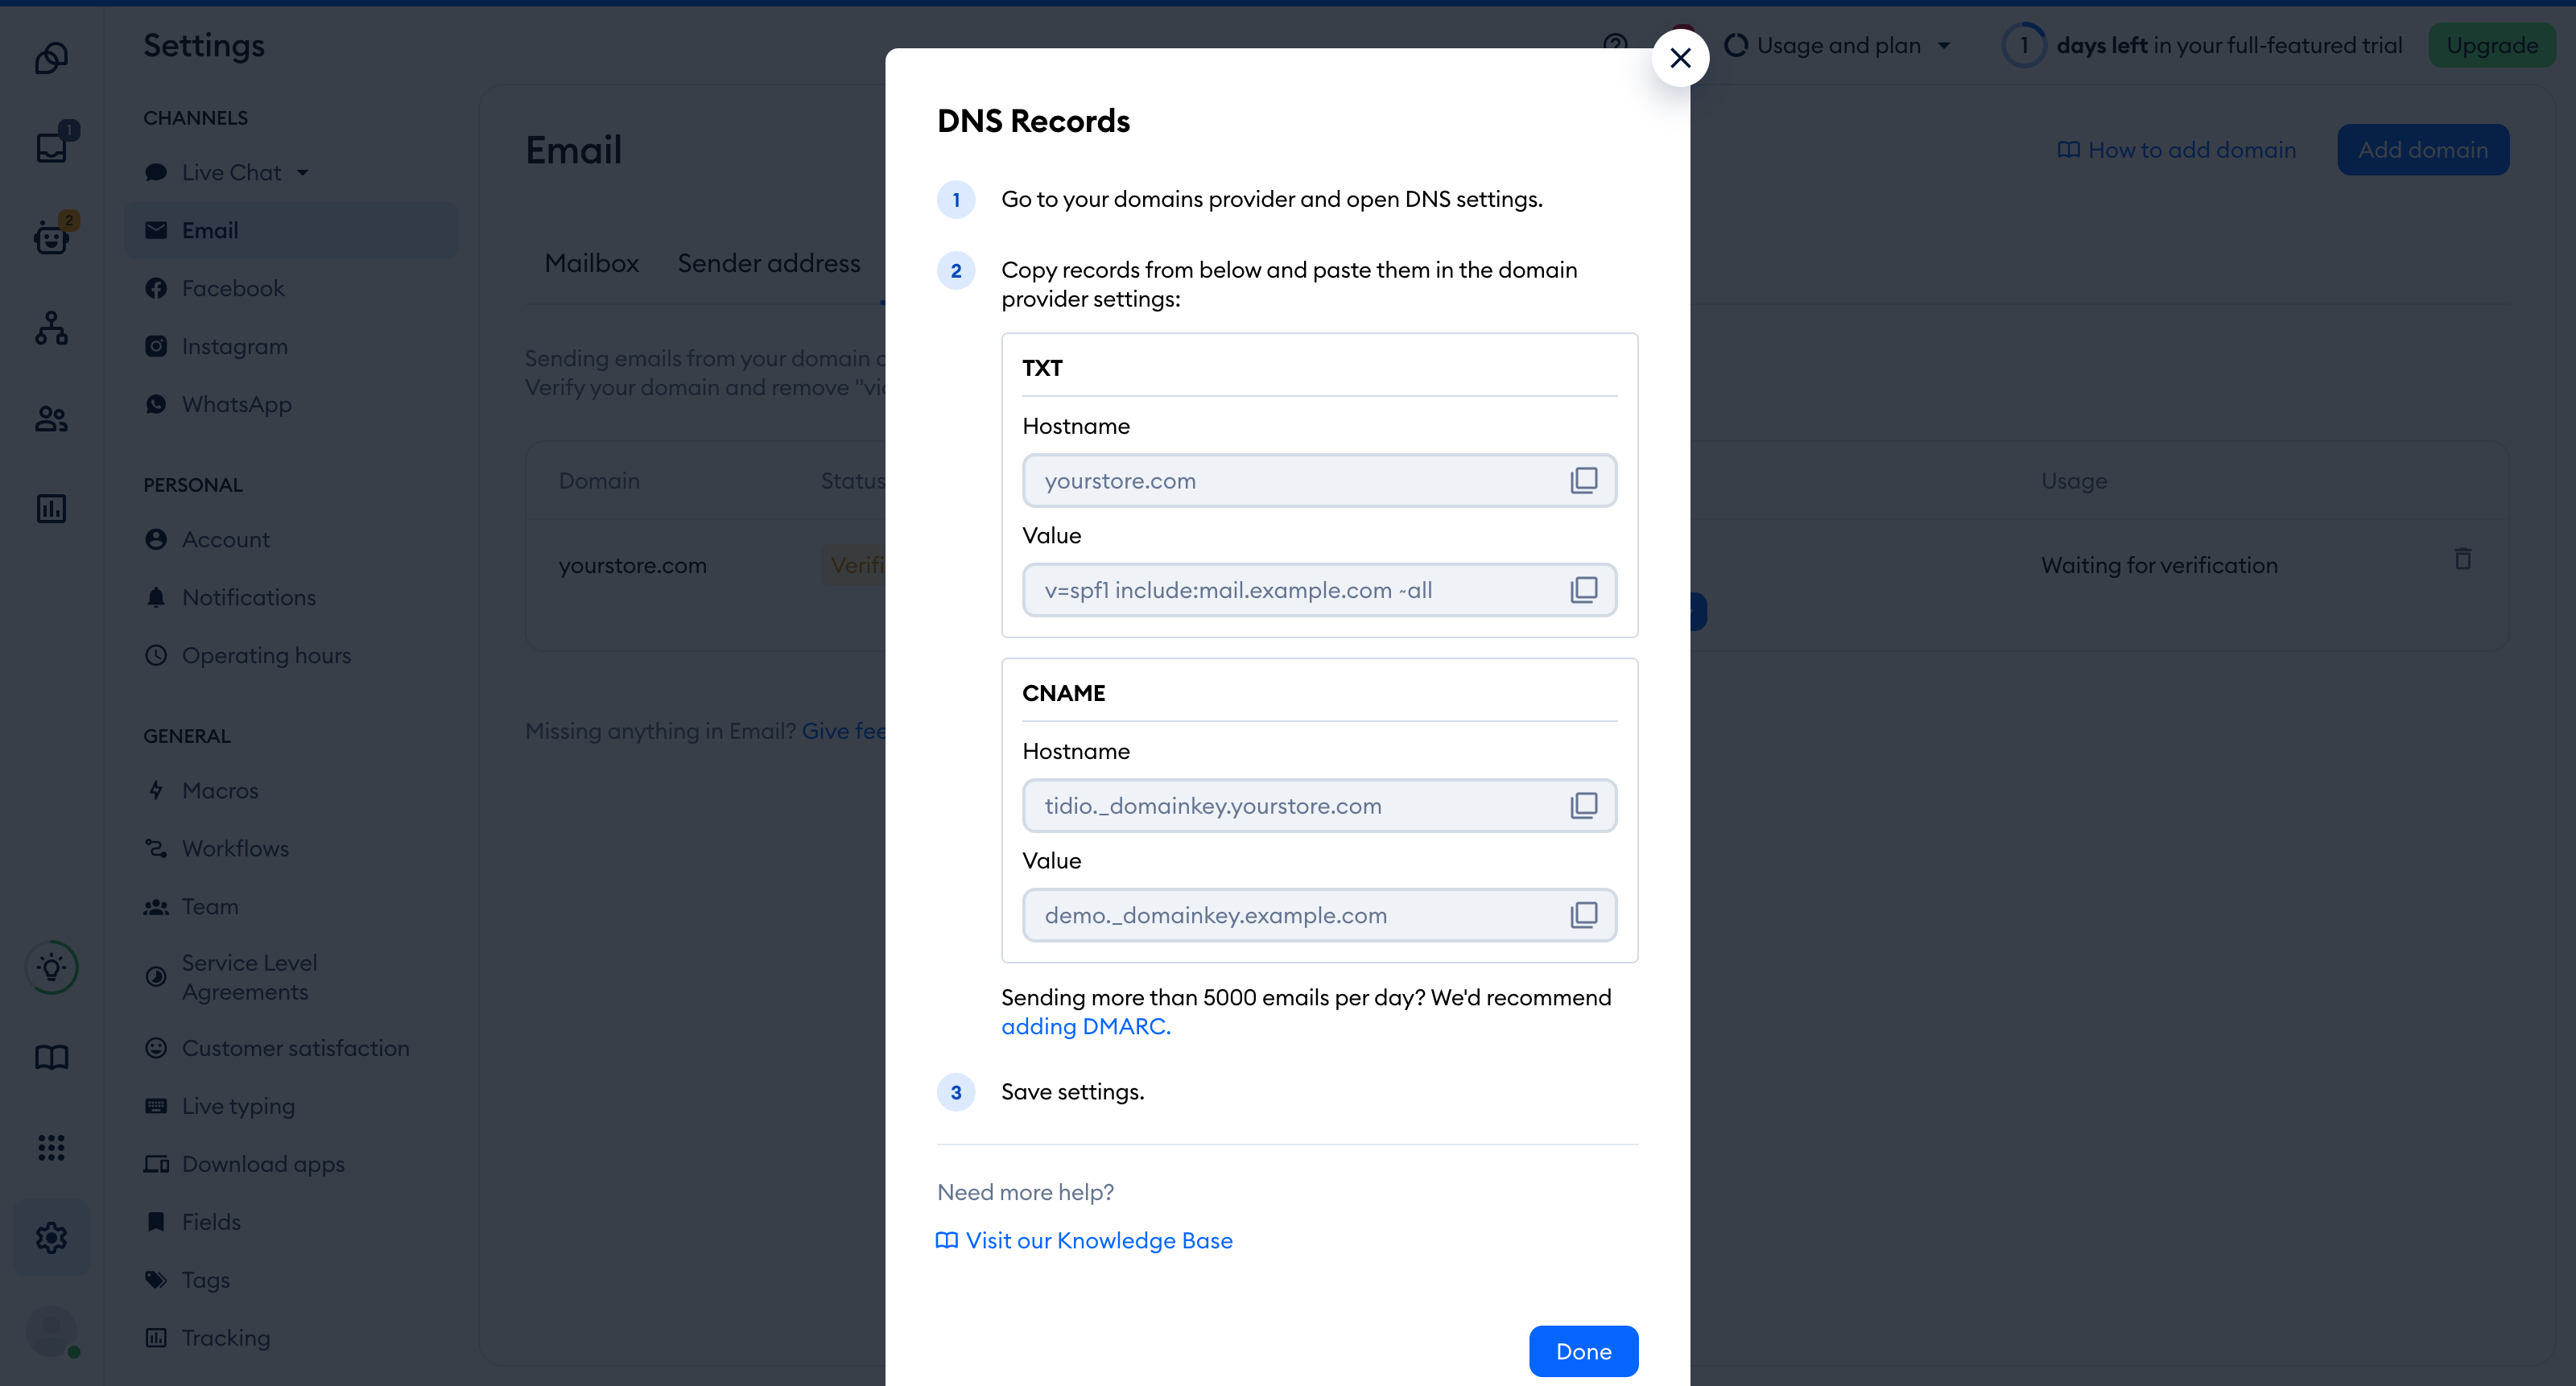
-
mailo._domainkey.example.com(this can be different for your domain!)
example.comemail.example.com
mailo._domainkey@email
Of course, the value fields for all hostnames should remain unchanged.
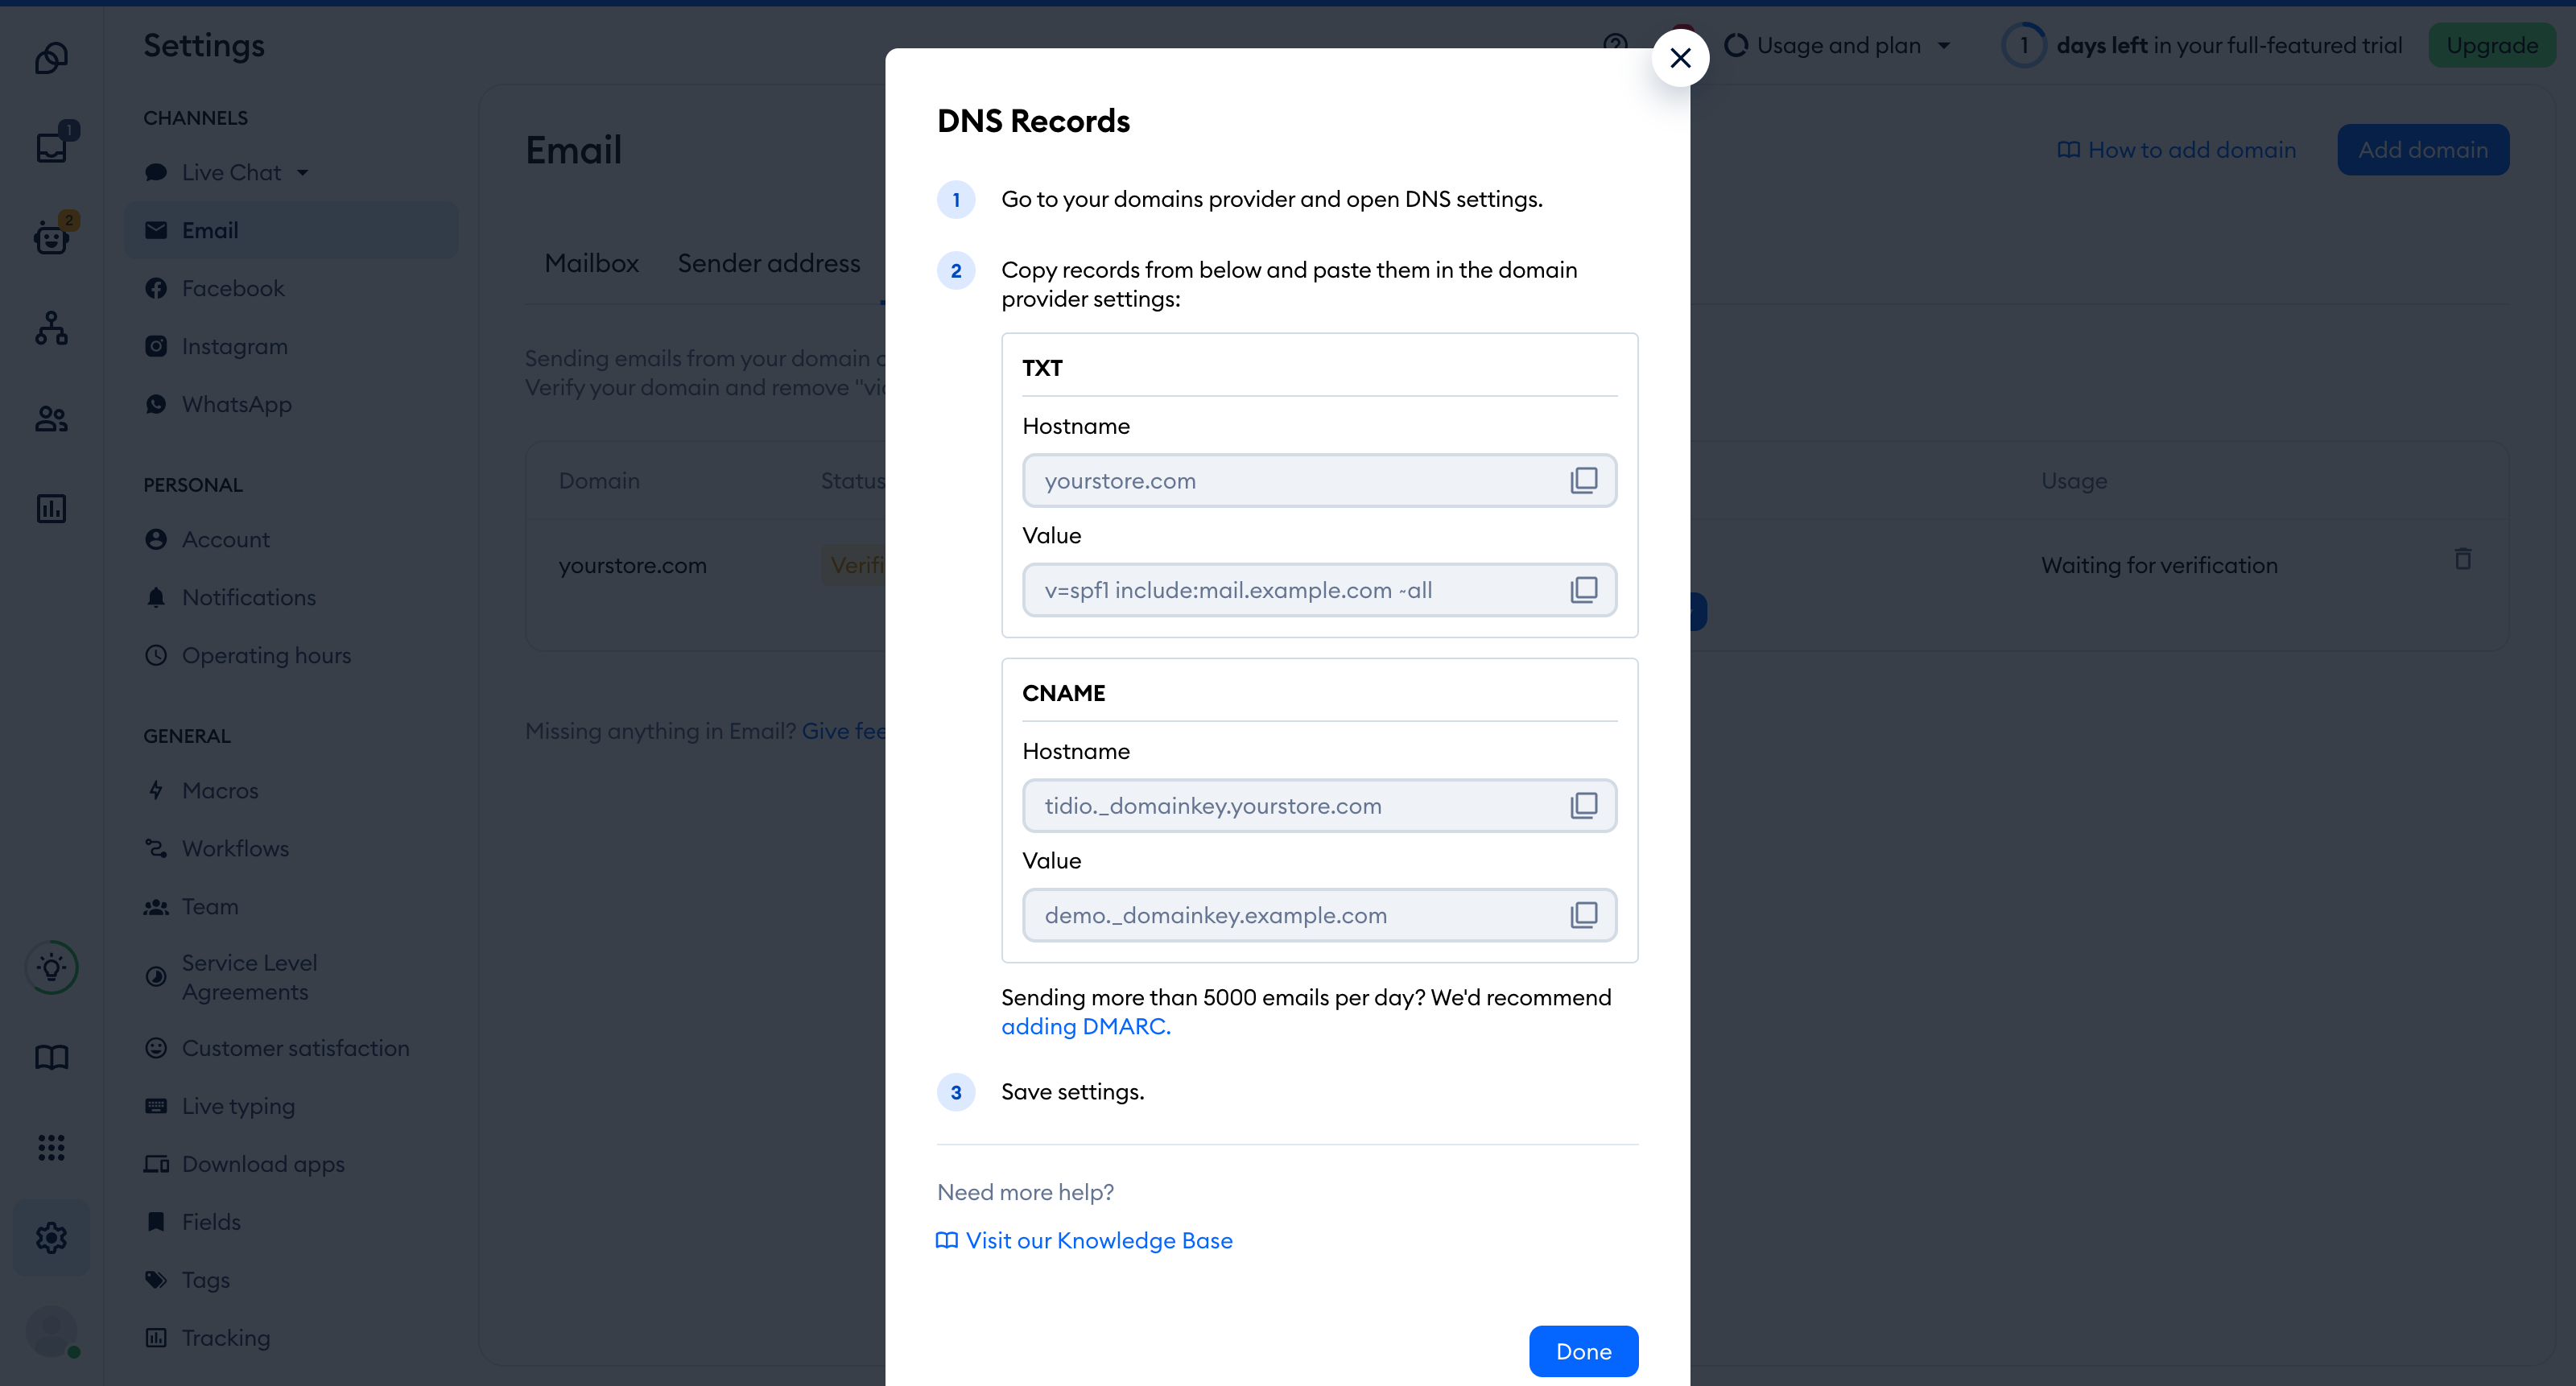
Please see another example of DNS records below, with the domains themselves highlighted in each hostname field:
Checking your DNS setup
Cloudflare - troubleshooting
If you're using Cloudflare, you may encounter an issue with verifying the domain connection with Tidio. Below are several steps you can take to make sure this won't be an issue.
To make things work correctly, the CNAME record should be configured properly. To proceed with your verification, you need to disable the proxy in your Cloudflare settings. This step is necessary as per Mailgun's setup guide, which requires the domain to be set to "DNS only" for successful verification.
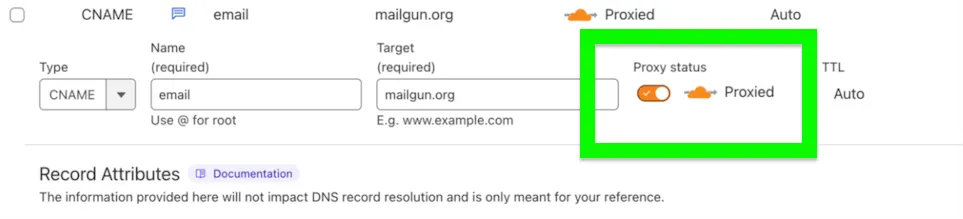
Follow these steps to disable the proxy:
- Log into your Cloudflare account and navigate to the DNS settings for your domain.
- Edit the relevant CNAME record and turn off the orange-cloud proxy toggle, then save the record.
- You should see the text DNS only appear next to the gray cloud.
Once you have applied this change, return to Tidio and click Refresh status. The panel advises that verification may take up to 48 hours.
Implementing a DMARC record into your DNS settings
There is one more DNS record that you may need to implement into your DNS settings. It is a mailing security standard that Google and Yahoo started to require in early 2024, and it applies to large-scale email senders.
What is DMARC?
DMARC (Domain-based Message Authentication, Reporting, and Conformance) is an authentication method for outgoing emails. By implementing DMARC, you enhance your email security, protect your sender identity, and contribute to improved deliverability.
In the short guide below, we will only focus on the most basic form of DMARC implementation. If you are interested in the details or more advanced configuration, please see external guides like this one.
How to add your DMARC record
Similarly to the DNS records covered in the first section of this article, DMARC should be added as a TXT record into your DNS settings. Start with a monitoring policy, such as the example below. Check SPF and DKIM alignment for all legitimate senders before changing to quarantine or reject, which can block legitimate mail:
Hostname:
_dmarc.example.com

Value:
v=DMARC1; p=none; rua=mailto:john@example.com
Of course, the hostname should be using your domain instead of example.com.
In the value, make sure you use a working email address (instead of john@example.com). We strongly recommend that you do not use your official business email, or even your personal email, as this address will be used to receive XML reports from various mailing providers. It would be best to have a dedicated mailbox just for this purpose, as you can expect to receive many such reports once you start sending emails.
In general, the value is something you can modify to an extent - but we will not be covering these options here. If you'd like to learn more, feel free to check out Mailgun's guide (as linked earlier).
DMARC is only one part of sender requirements. Check your mailbox providers' current guidance for authentication, alignment, spam rates, and unsubscribe requirements.
Configuring Ticketing
Once your own domain (or several) are added and verified, they will become available to use with your custom sender addresses, which allows you to reply to incoming tickets in a more professional way.
Please see this detailed article on setting up and using Ticketing.
