The ability to create custom views is very useful tool that you can help you organise your Tidio tickets.
By default, the panel only features three general folders: Unassigned, My open, and Solved. However, with views, you can create your own filters; this allows you to see different kinds of tickets separately, based on the conditions you configure.
It's a practical way to sort your tickets into different categories, and quickly access the type of tickets you're looking for.
In this article, you will learn:
- How to create custom views
- How views for live conversations work
- How views work in practice
- How to manage your views
Creating custom views
You can see the Views list in the menu on the left of your Inbox, below your Tickets folders and the other folders, like Mentions and Spam:
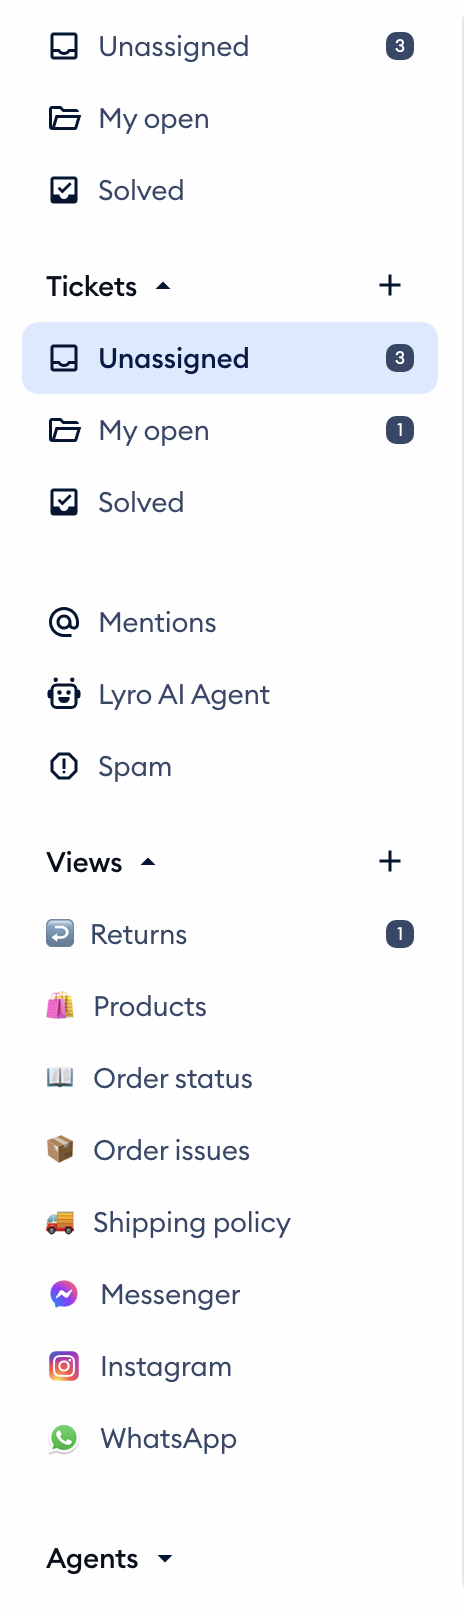
Add a new view
That is where you can create all your custom views, and later browse them. Click on the plus (+) sign (Create view) next to Views:
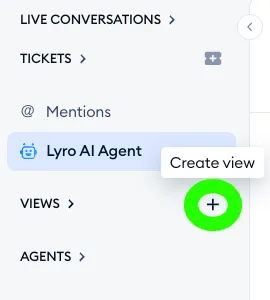
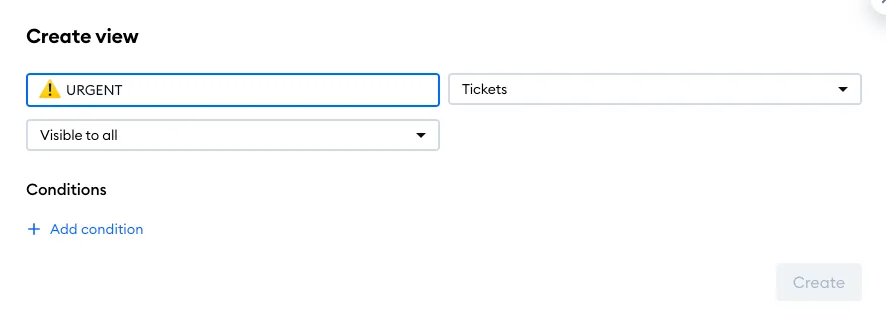
The Create view window will open right away, with the view configuration options. That is where you set up the new view's basic settings (such as name and visibility), as well as the conditions that determine which tickets the view will list.
Define the view's basic settings
Here, you should choose a name for your view, as that's how it's going to appear in your Views list. You can (and should!) choose an emoji that will serve as the view's icon in your Tickets inbox, for quick visibility. Make sure to select Tickets as the source in this case (selecting Live conversations creates a view of your chats instead, which works differently - see below). You must also choose who the view is going to be visible to: Visible to me, Visible to all (all agents in your project), Visible to selected agents, or Visible to selected departments.
Please note: you can't change a view's source once it's created - to switch, delete the view and create a new one. Also, the Visible to selected departments option is available with Departments, on the Plus plan and above.
Define the view's detailed conditions
The next step is setting up the conditions for your new view. The conditions are basically different ways of filtering your tickets, and they can be based on the following:
- Agent (one or more of your agents, or Unassigned)
- Contact Property (any contact property assigned to the recipient)
- Creation date (the date when the ticket was originally created)
- Custom field (any of your custom ticket fields)
- Customer email (the email address of the recipient)
- Department (the department which is currently assigned to the ticket, if any)
- Last message (the most recent message exchanged in the ticket thread)
- Mailbox (if you have more than one mailbox connected)
- Message (the most recent message, including internal notes)
- Priority (the urgency level of the ticket)
- Source (mailbox, panel, widget, API, flow, Lyro, Facebook comment, Instagram comment)
- Status (Open, Pending, or Solved)
- Subject (the text content of the subject itself)
- Ticket tag (any tag added to the ticket)
You also get the option to suggest a new filter that you would find useful in the future - just choose Missing a filter? at the bottom of the list, and tell us about it in the chat that opens!
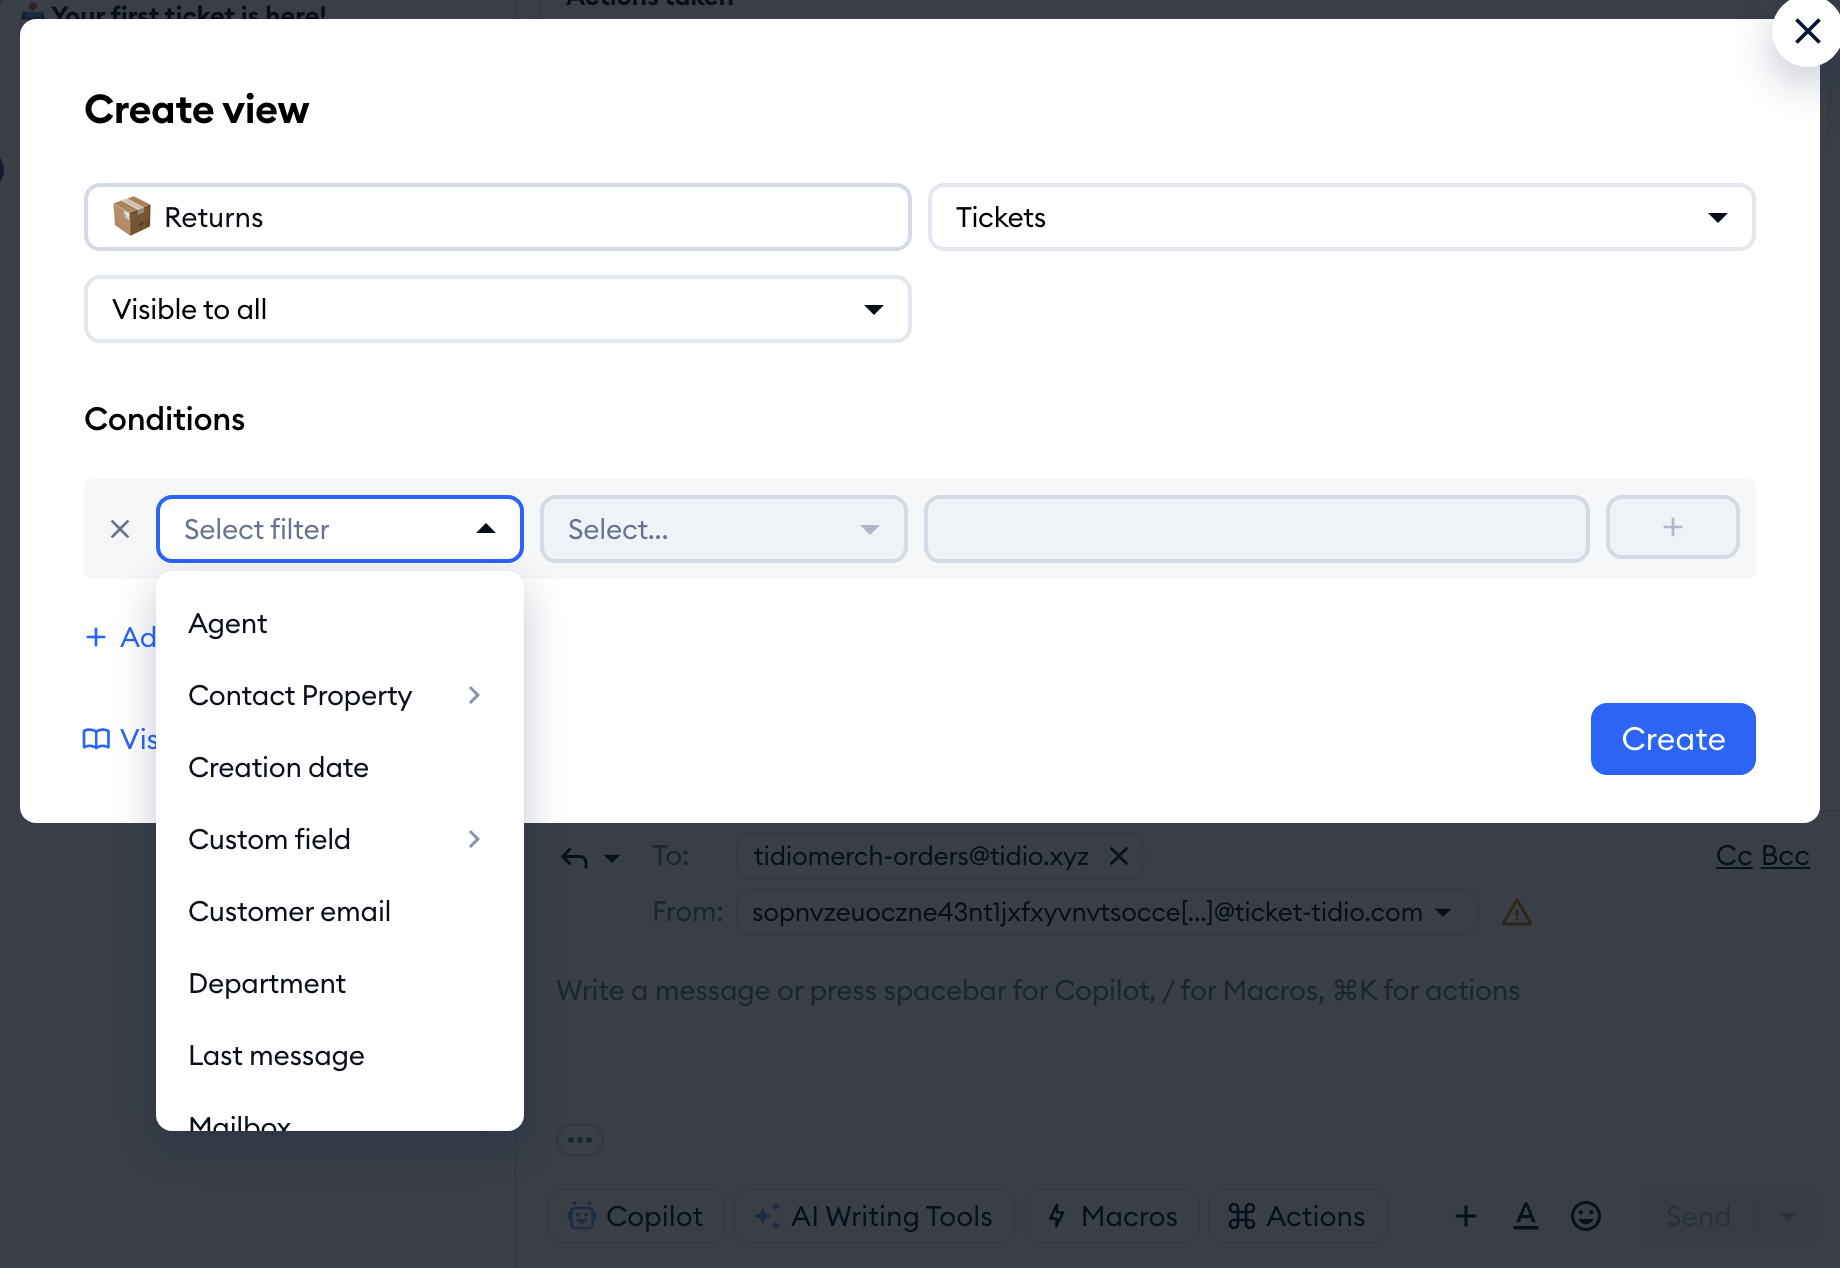
Once you choose a filter, define what the filter should look for - e.g. which ticket status should (or should not) be considered, or which words should be part of the email's subject.
Use AND/OR logic for multiple conditions
If you add multiple filters, you can take advantage of AND/OR logic - this allows you to define more complex conditions for your custom view.
When you use AND between two different filters, you combine them into a condition that makes sure both filters are used equally. The condition is only met if both filters are successful. On the other hand, OR allows you to create a condition where only one of the filters needs to be successful.
In addition to the above, you can also use AND/OR to define entire separate groups of filters for more complex conditions (e.g. you can define one set of filters that needs to be successful, and then define a second set that will be used if the first set is not successful).
Let's take a look at two different view configuration examples below.
Example setup #1
As an example, let's create a simple Returns view, for filtering out only those tickets that deal with returning damaged or incorrect products. The view will show tickets that are either "open" or "pending," and the email subject must contain at least one specific word or phrase.
After adding one Status filter, use the plus (+) button on the right:
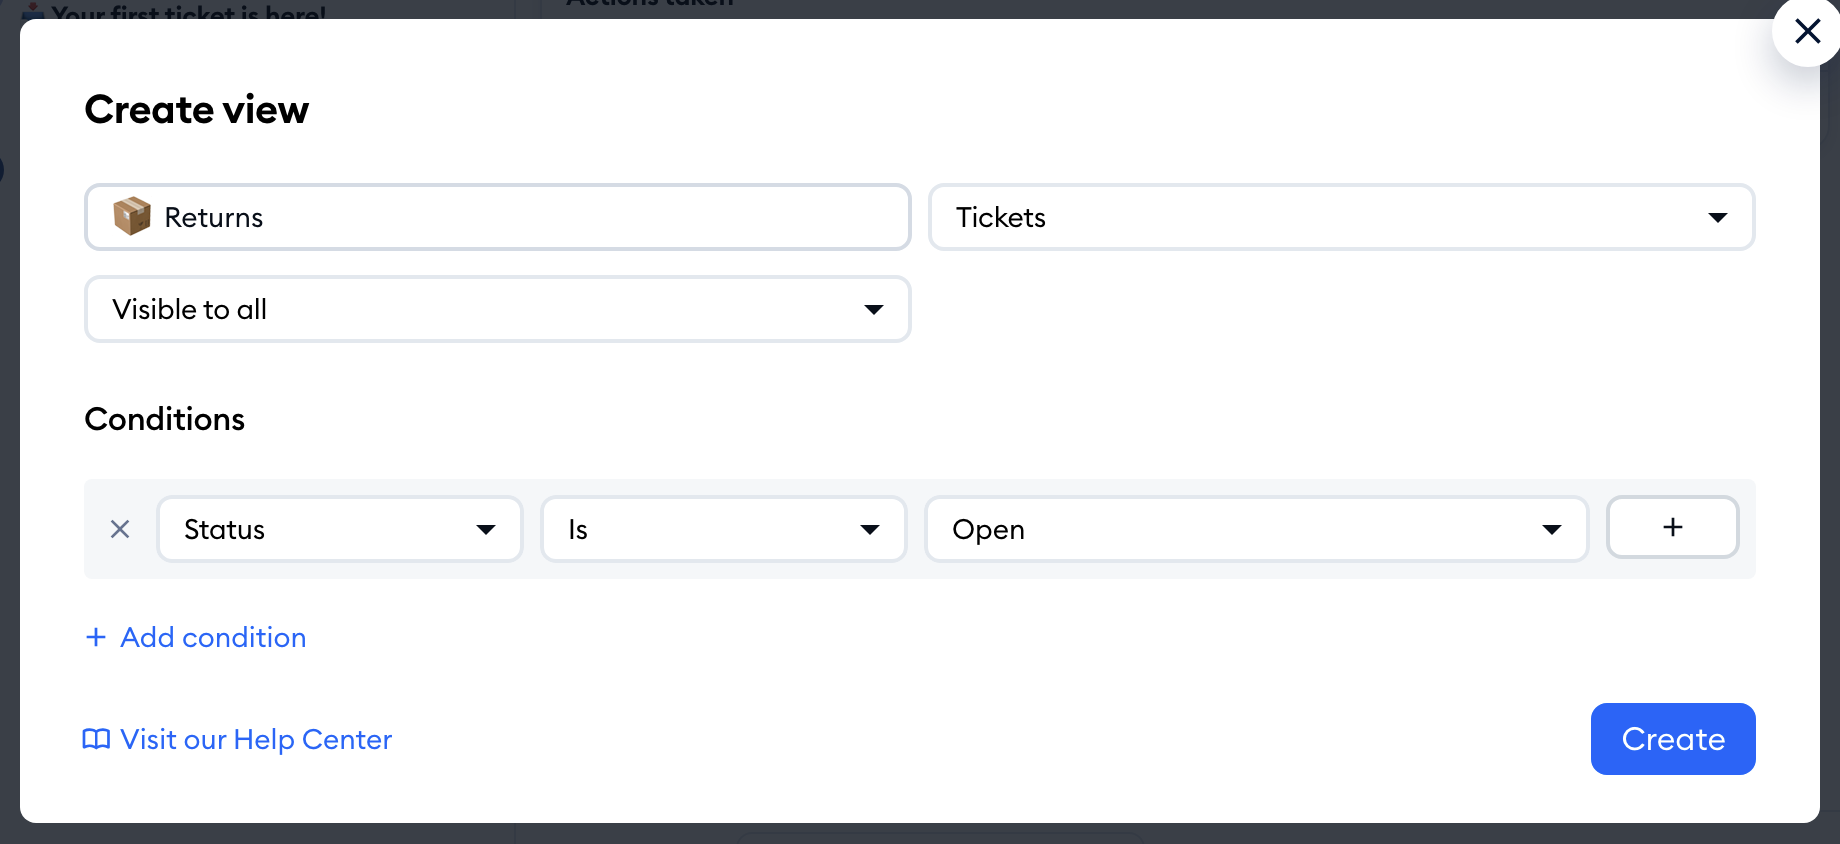
You can now add another filter, and decide if these two filters must both be successful - or if just one of them needs to be successful. In this case, we will use OR, so that the ticket's status will need to be either "open" or "pending."

These two filters work together as a condition for your new view. Now you can add another group of filters by clicking Add condition below your existing filters:
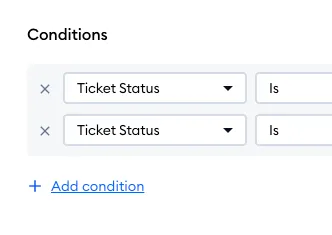
You need to decide between using AND or OR here as well (for our current example, we need AND), and then add the other filters as needed. In this case, we're adding the Subject filter several times, connected with OR logic; this makes sure the subject contains one of the listed specific words or phrases:
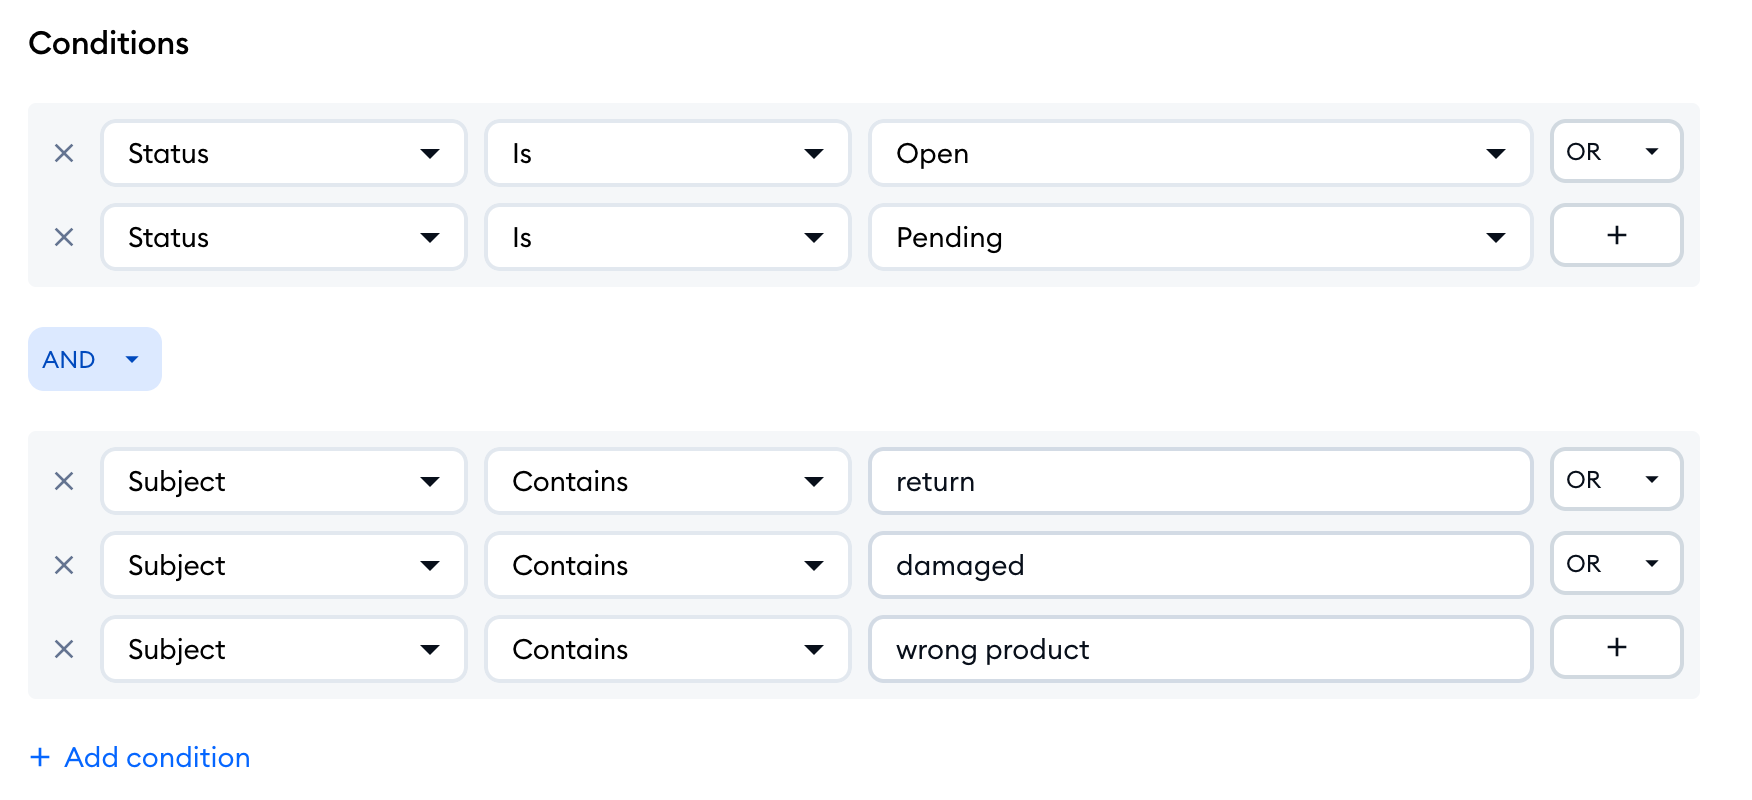
With a setup like the one above, the view will list any open or pending tickets whose subject contains a specific word or phrase.
You can achieve the same result by using the AND/OR logic in a slightly different way. You can create another version of this Returns view with a setup like below, and it will have the same basic effect:
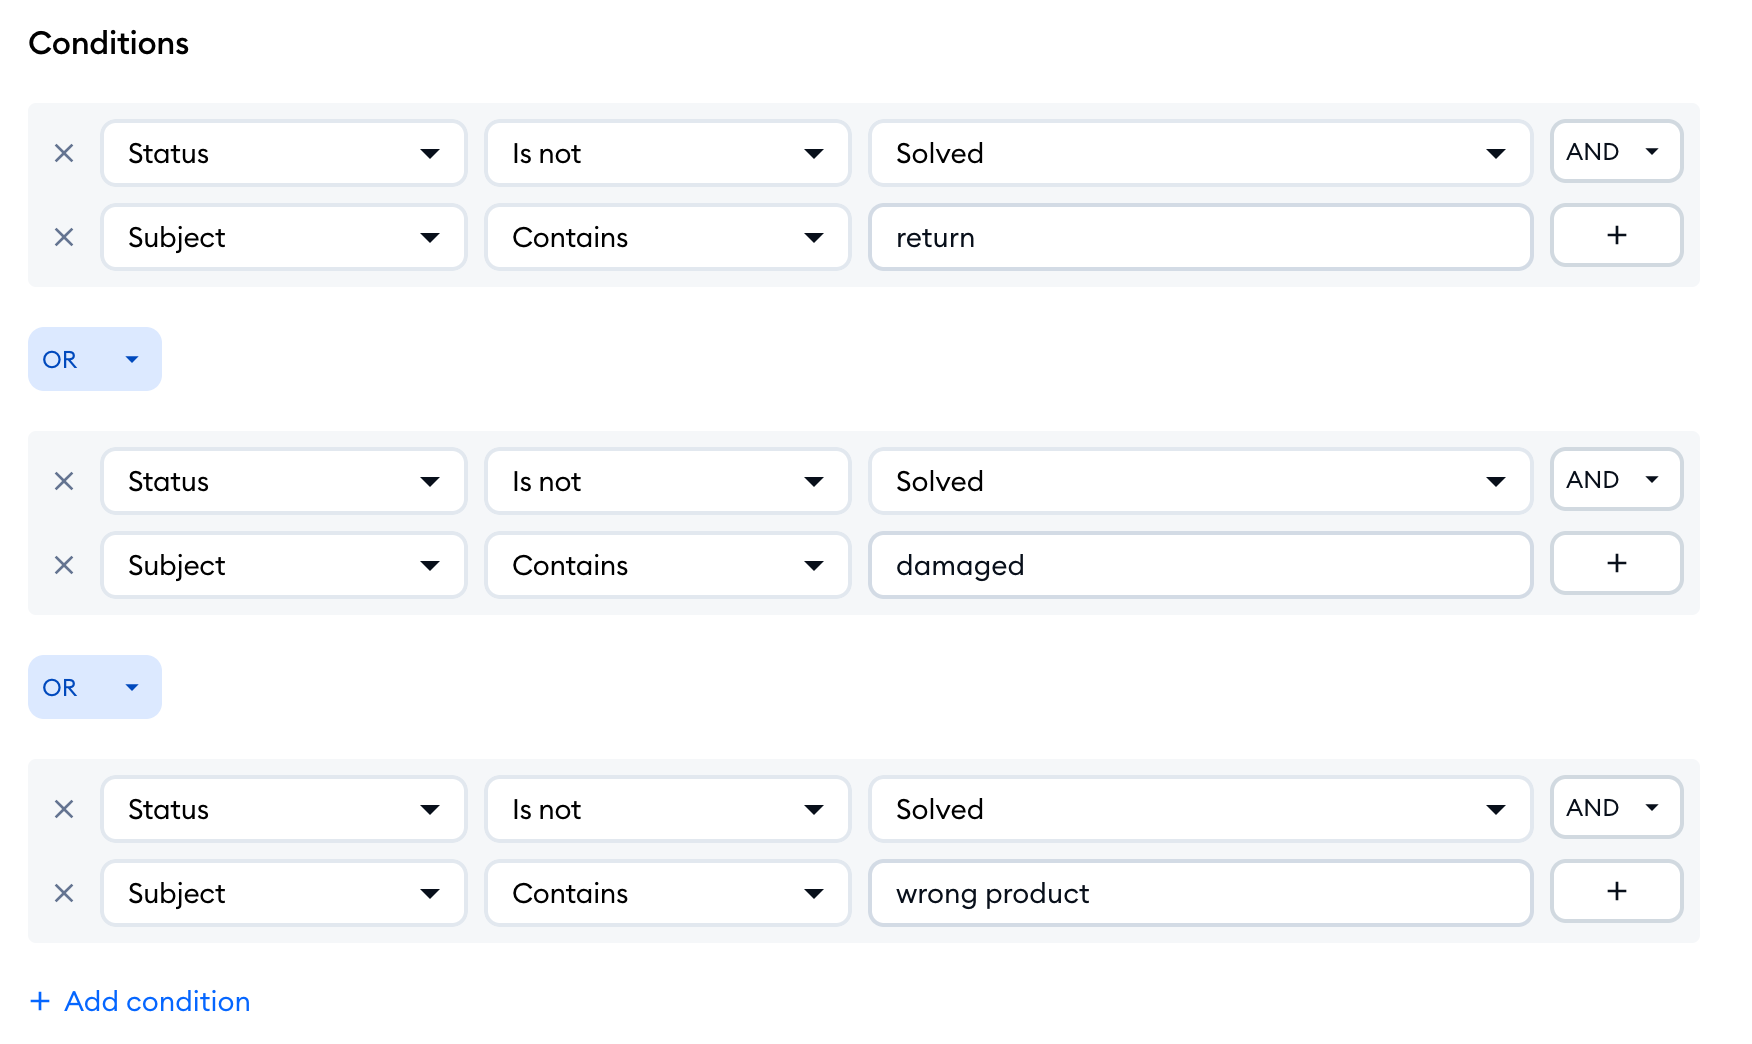
This version of the Returns view does the same thing: lists all open or pending tickets (in other words: all tickets that are not yet solved) whose subject contains one of the three listed words or phrases.
Example setup #2
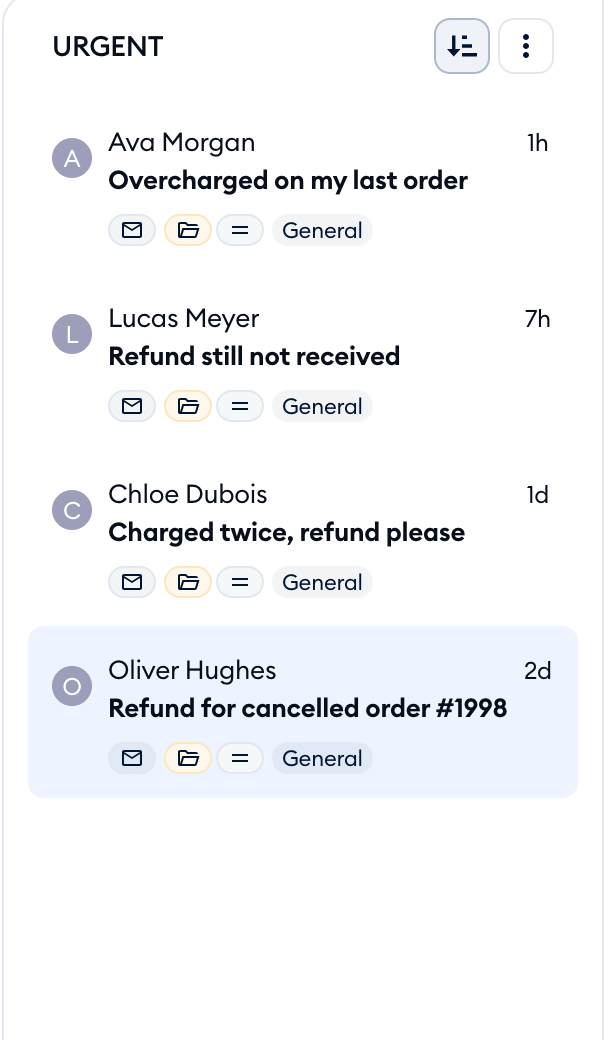
In the example below, the custom view is for gathering tickets that are urgent; in this case, that means tickets that are new (status: open) and containing either the word "overcharged" or "refund" in their subject:
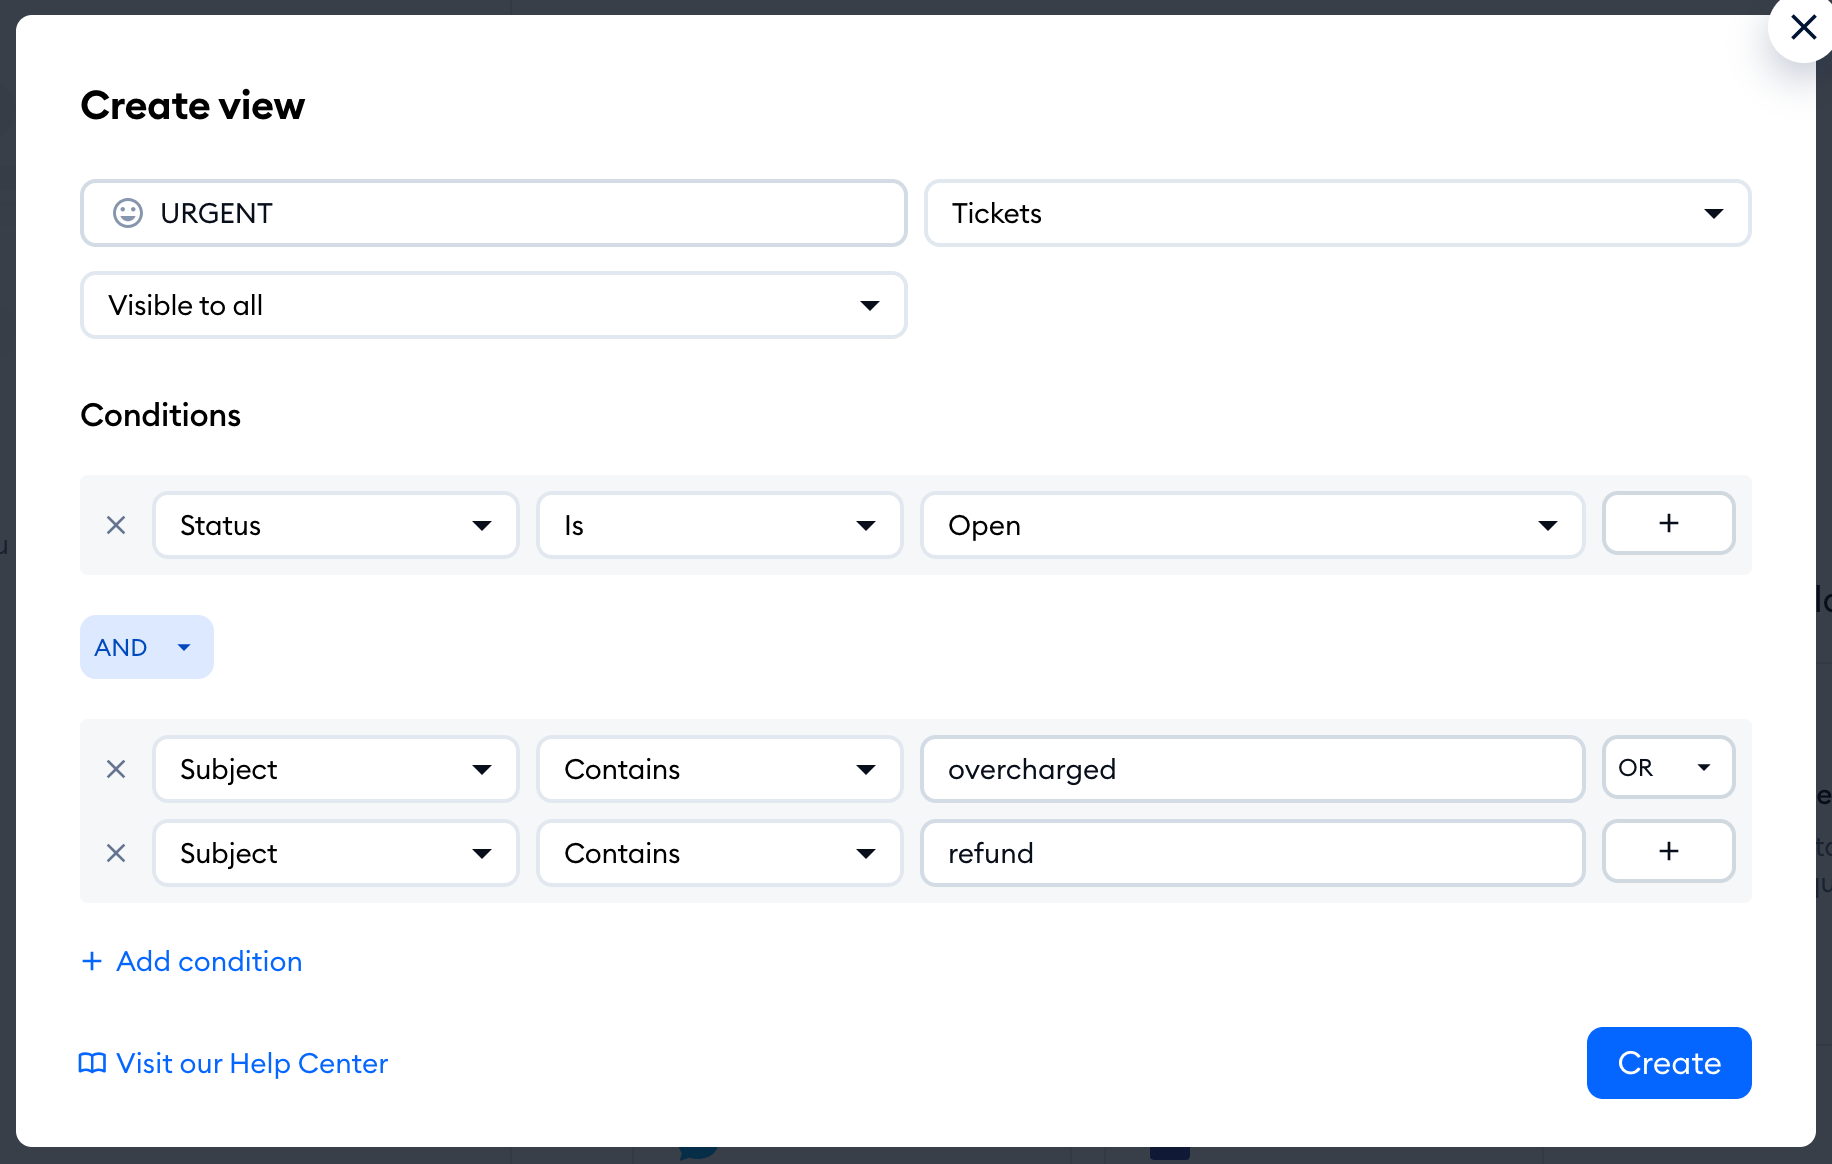
Once you're done with the view's setup, hit the Create button to add the view to your inbox. Tidio will open your new view right away.
Views for live conversations
If you choose Live conversations as the source, the view will list your chats instead of tickets. These views work a little differently:
- They use one condition only: Channel (Messenger, Instagram or WhatsApp) or, if your business is an online store, Intent (the topic of the visitor's message, recognized by AI).
- They're always Visible to me - you can't share them with your team.
- They always list the matching chats that are unassigned or assigned to you.
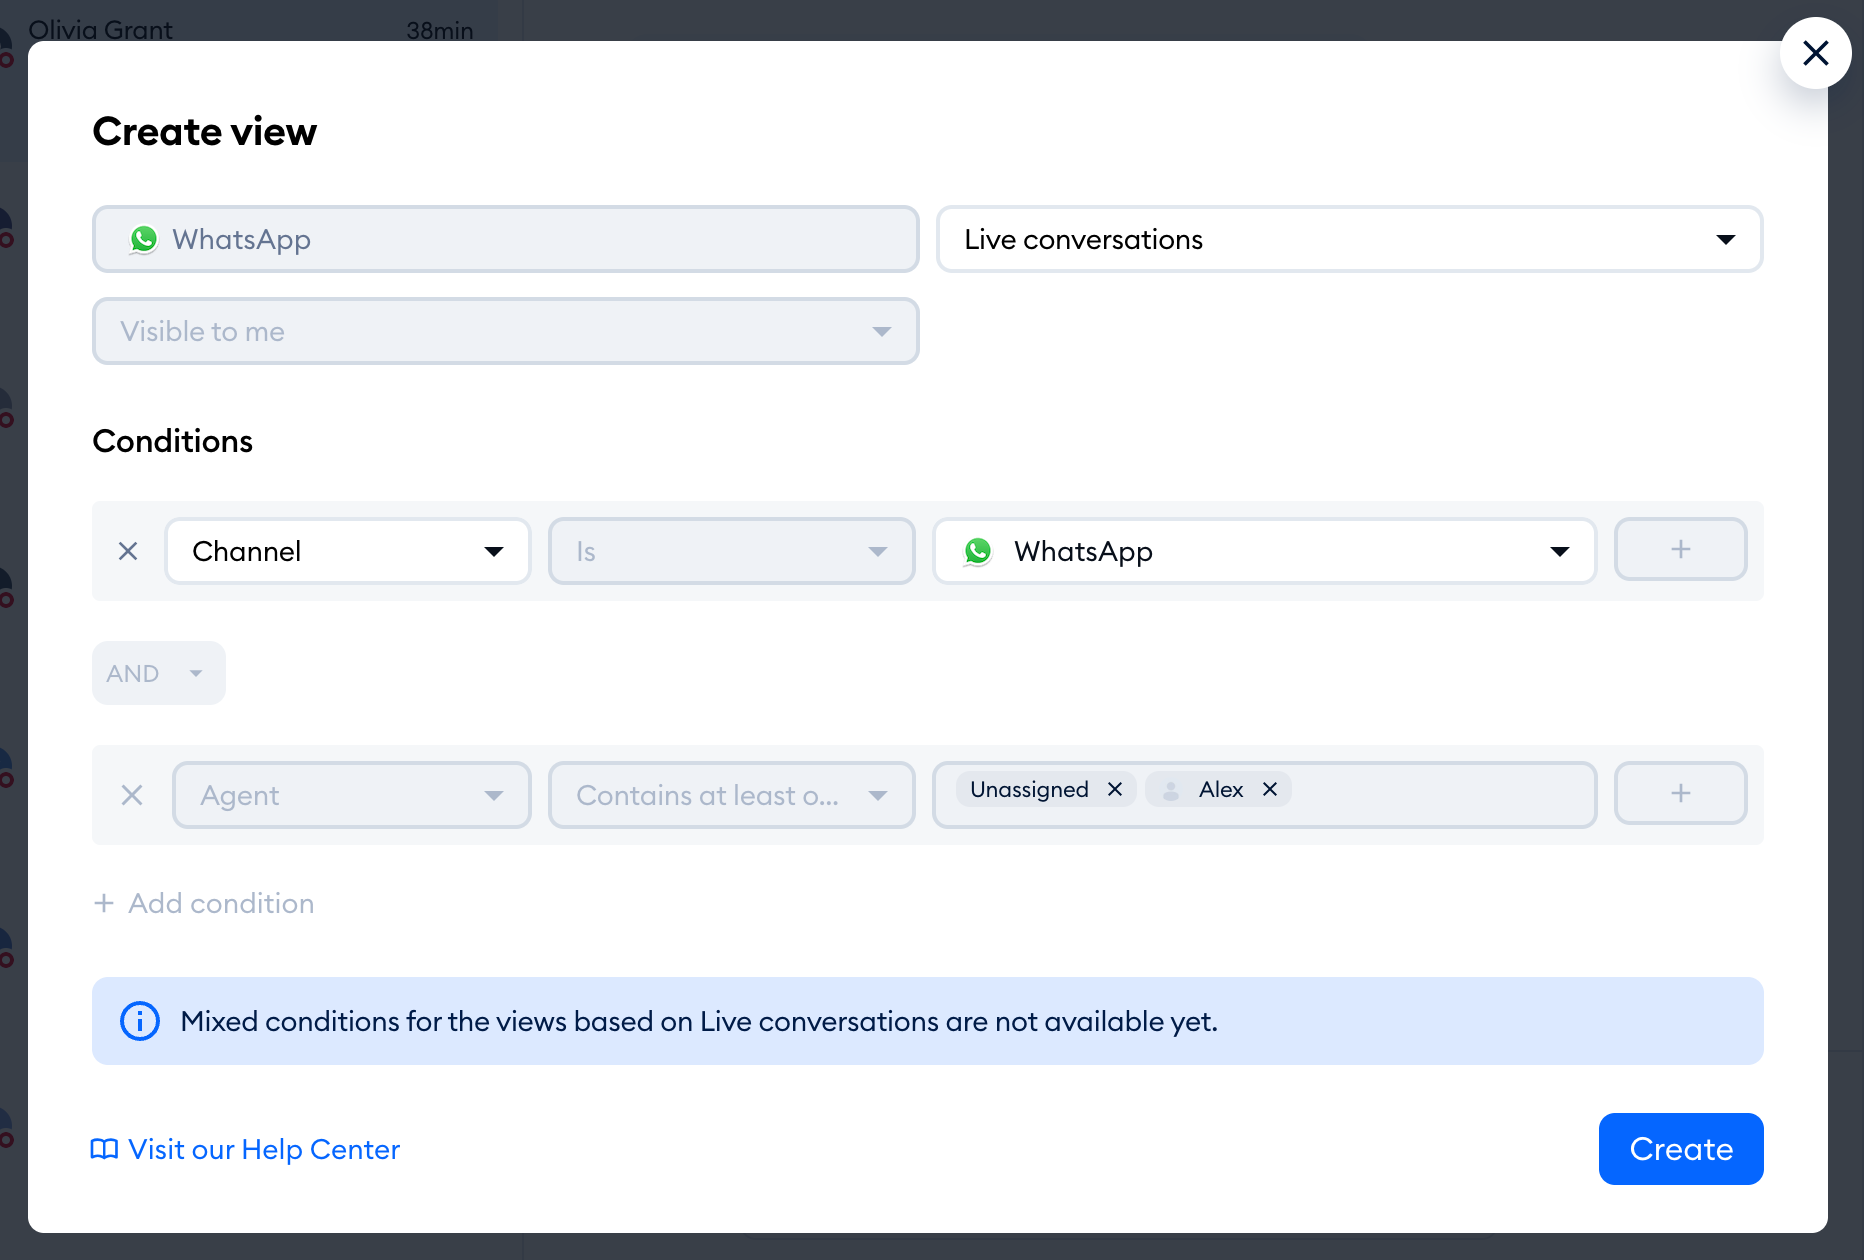
You can learn more about live chat views in our Create custom views in the Inbox article.
An example of views in practice
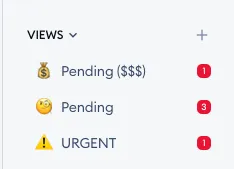
Below you can see several custom views in action - the URGENT view, and two slightly different Pending views:
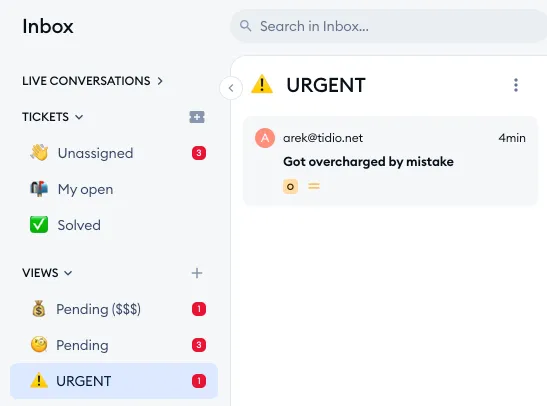
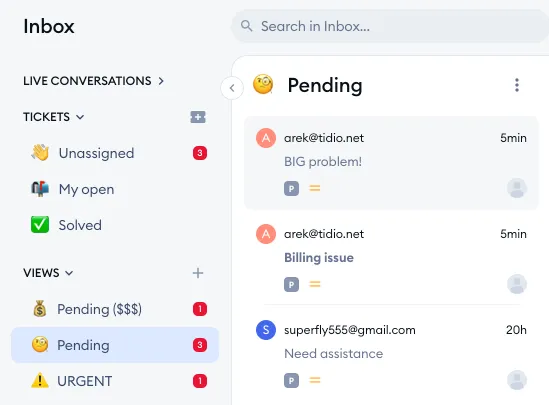
As mentioned earlier, the URGENT view shows any tickets that are new and whose subject contains either the word "overcharged" or "refund." In the example above, the two Pending views are both showing tickets where an agent has already changed the status to "pending" - but they are both a little different.
The general Pending view simply lists every single ticket whose status is "pending:"
The Pending ($$$) view, however, is more specialized - it's only for pending tickets whose subject contains words associated with billing or money:
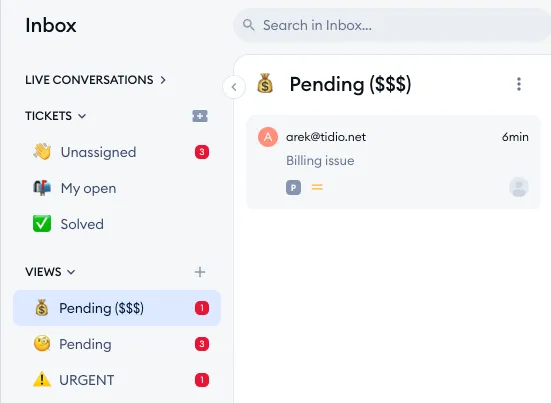
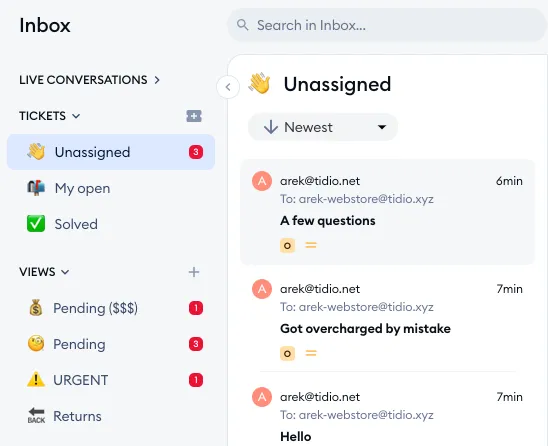
Notice how one single ticket can be listed in multiple views at the same time; that's because the views you create can have overlapping conditions. This can be very useful for managing the many different types of tickets you may be receiving, or for organising your team's work in detailed ways.
Also, please keep in mind that all your tickets are actually kept in one of the three main folders: Unassigned, My open, or Solved. Your custom views are just categories that let you filter tickets for easier visibility:
Managing your views
If you want to change how one of your views works (or if you prefer to delete it), you can make the changes anytime. Open the view you want to modify, and click on the three-dots View options menu at the top of the list:
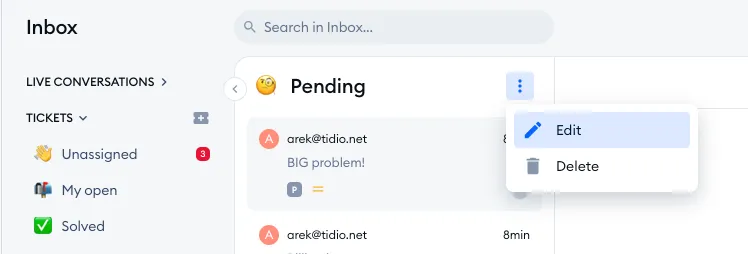
This lets you either Edit the current view (via the same configuration window you used to create the view - just hit Save when you're done), or completely Delete it.
To change the order, hover your cursor over the view you'd like to move, and click on the icon that appears on the right - and drag it up or down to the position you prefer:
If you modify or remove a view (or change its visibility settings) - the associated tickets will not be affected directly. All your tickets are always available in your general Tickets inbox, unless you decide to delete a ticket itself.
Note that you can also sort each view's contents by date, just like the regular ticket folders: click on the sorting button next to the view's name to switch between Newest first and Oldest first: