Is your Inbox getting busy? With Views, you can build your own lists of tickets and live conversations, based on the conditions you choose - for example, every open ticket from one mailbox, every urgent ticket for your billing team, or every chat coming in from WhatsApp.
Views don't move anything around. Each ticket and conversation stays in its usual folder (Unassigned, My open or Solved), and a view simply shows you the ones that match its conditions. That's why one ticket can appear in several views at the same time.
In this article, you'll learn:
- How to create a view
- How to add conditions to a ticket view
- How to share a ticket view with your team
- How to create a live chat view
- How to edit, reorder and delete your views
Creating a view
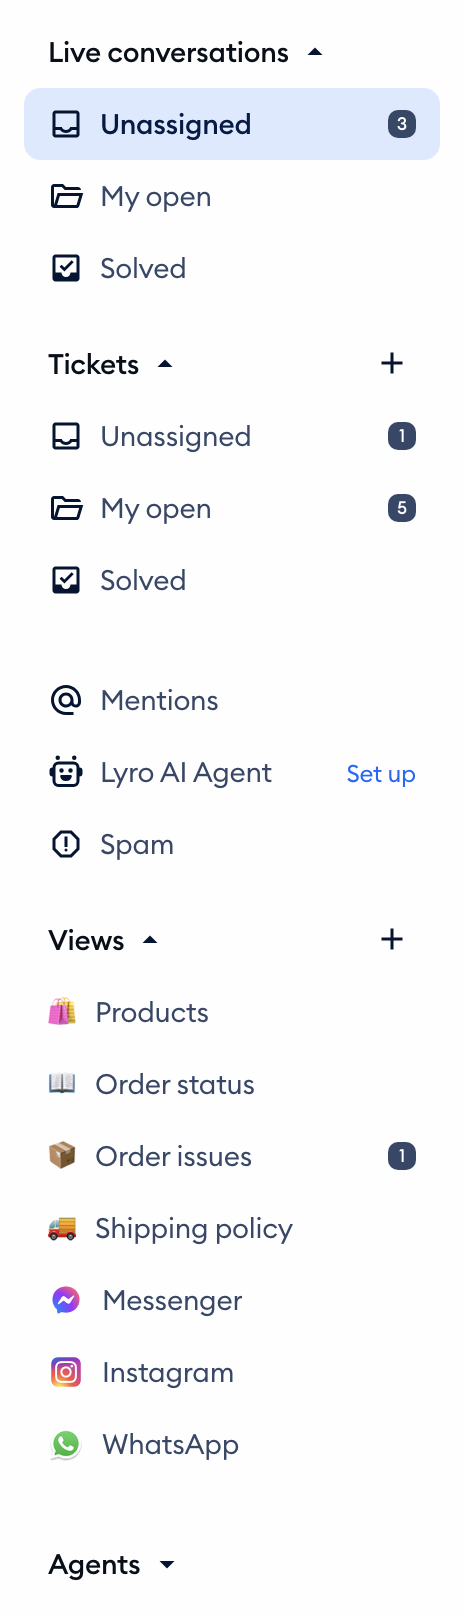
Head over to the Inbox, and click on the + next to Views in the menu on the left:
The Create view window will open. Start with the view's basic settings at the top:
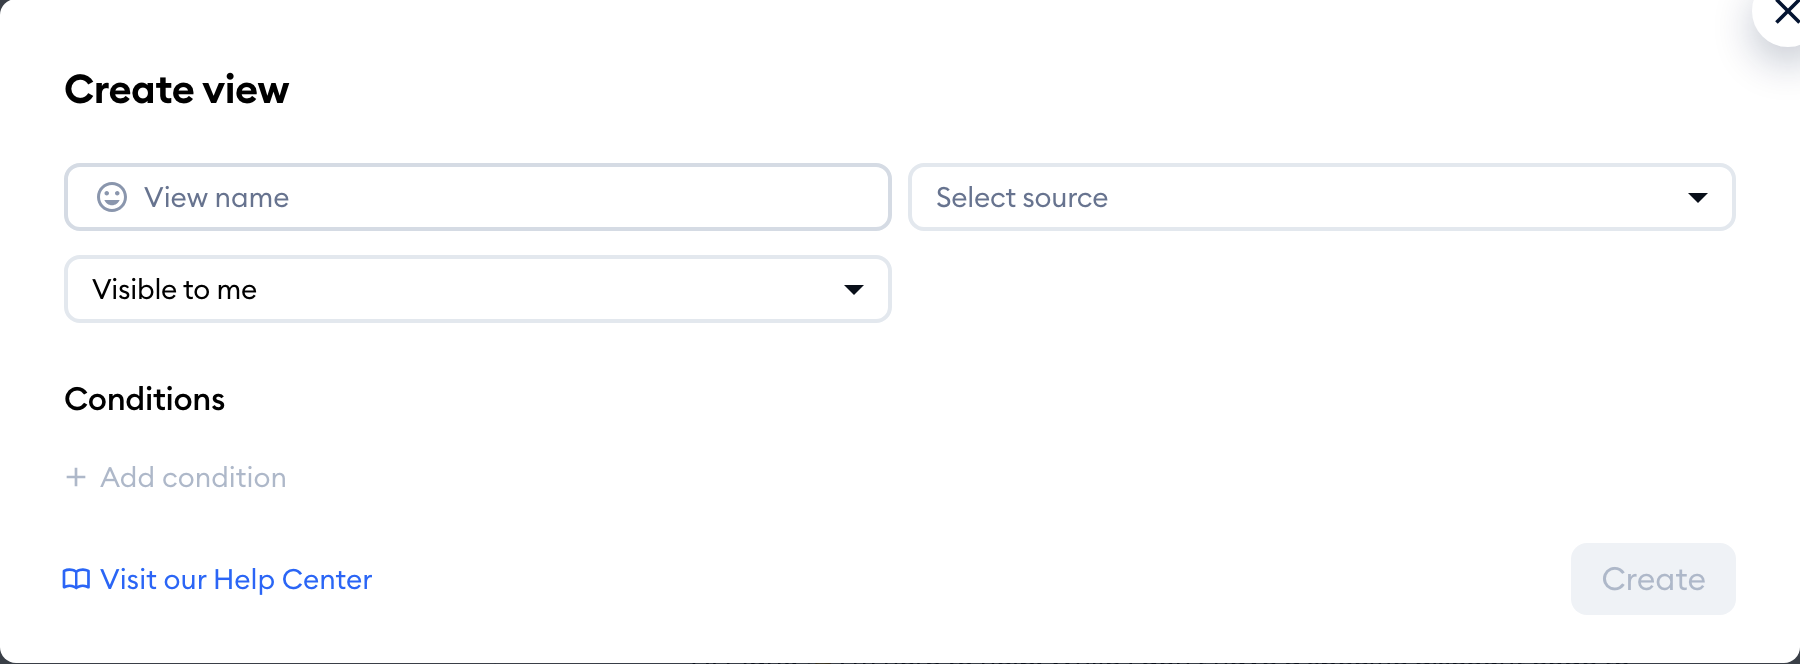
- View name - this is how the view will appear in your Views list. Click on the icon to the left of the name to pick an emoji for it, for quicker recognition.
- Select source - choose Tickets to create a view of your tickets, or Live conversations to create a view of your chats.
- The visibility list - who's going to see the view. Visible to me is selected by default; you can share ticket views with your team (see below).
Next, add the conditions that decide what the view will list (see the sections below), and hit the Create button. The button stays greyed out until you've added at least one condition.
That's it! Tidio will open your new view right away, and it will be listed under Views in your Inbox menu.
Please note: you can't change a view's source once it's created. If you need a ticket view instead of a live chat view (or the other way round), simply create a new one.
Adding conditions to a ticket view
With Tickets selected as the source, click on Add condition, and open the Select filter list to choose what the view should look at:
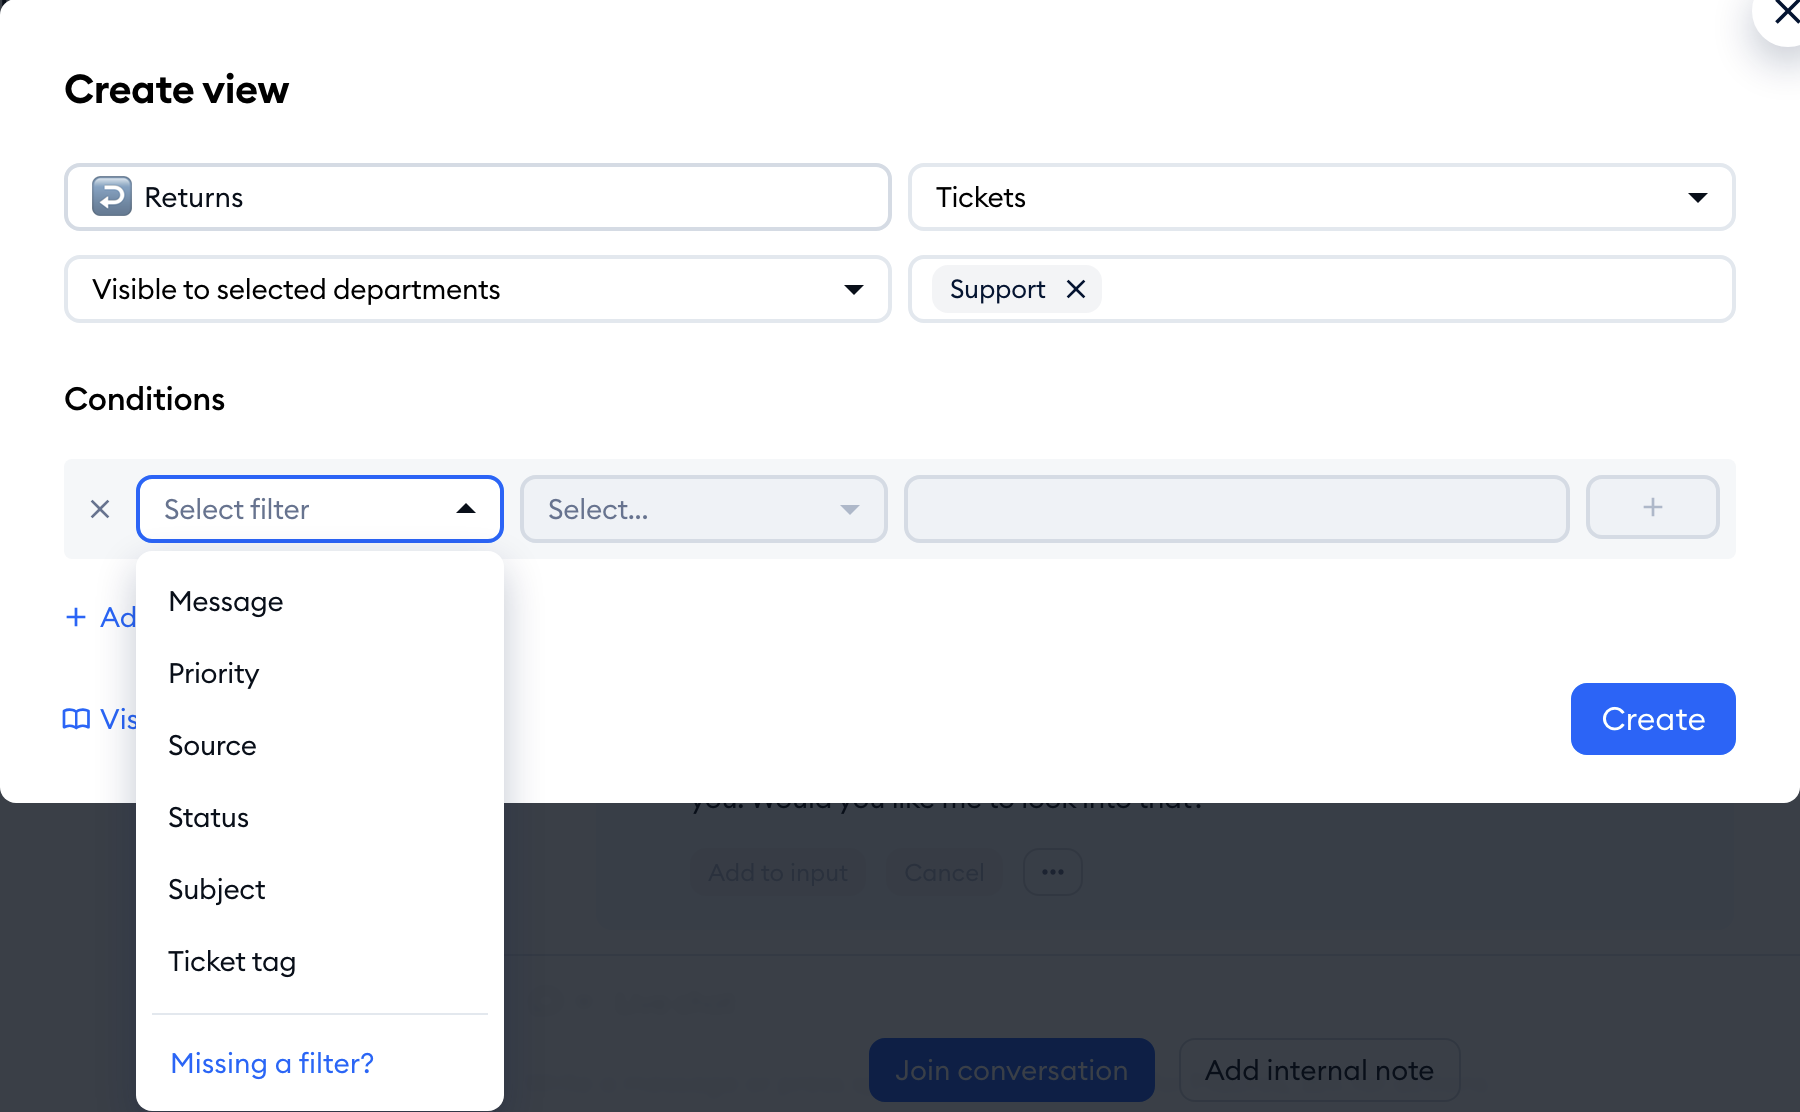
These are the filters you can use:
- Agent - one or more of your agents, or Unassigned
- Contact Property - any property of the customer's contact (pick the property, then the value to look for)
- Creation date - the date when the ticket was created
- Custom field - any of your custom ticket fields (for dropdown fields, you can pick from the field's values)
- Customer email - the customer's email address
- Department - the department the ticket is assigned to
- Last message - the date of the most recent message in the ticket
- Mailbox - the connected mailbox the ticket came to
- Message - words or phrases in the ticket's messages
- Priority - the ticket's priority
- Source - how the ticket was created: Created from mailbox, Created from panel, Created from widget, Created from API, Created by Flow, Created by Lyro, Created from Facebook comment or Created from Instagram comment
- Status - Open, Pending or Solved
- Subject - the text of the ticket's subject
- Ticket tag - any tag added to the ticket
Once you pick a filter, choose how it should match, and the value to look for. Depending on the filter, you'll see options like Is, Is not, Contains, Does not contain, Starts with, Ends with or Contains at least one of the following. The two date filters use Is, Is older than and Is newer than, with dates in your project's timezone:

Can't find the filter you need? Choose Missing a filter? at the bottom of the list - it opens a chat with our team, so you can tell us what you're missing.
Using AND/OR logic
To add another condition to the same group, click on the + on the right of the last condition. Between the conditions of a group, you can then choose AND (every condition must match) or OR (at least one of them must match). The choice applies to the whole group:

For more complex rules, click on Add condition again, below your first group. This creates a separate group of conditions, and you can connect the groups with AND or OR as well (once again, one choice for all your groups).
For example, here's a view for open or pending tickets about returns. The first group checks the status, the second checks the subject, and the two groups are connected with AND:
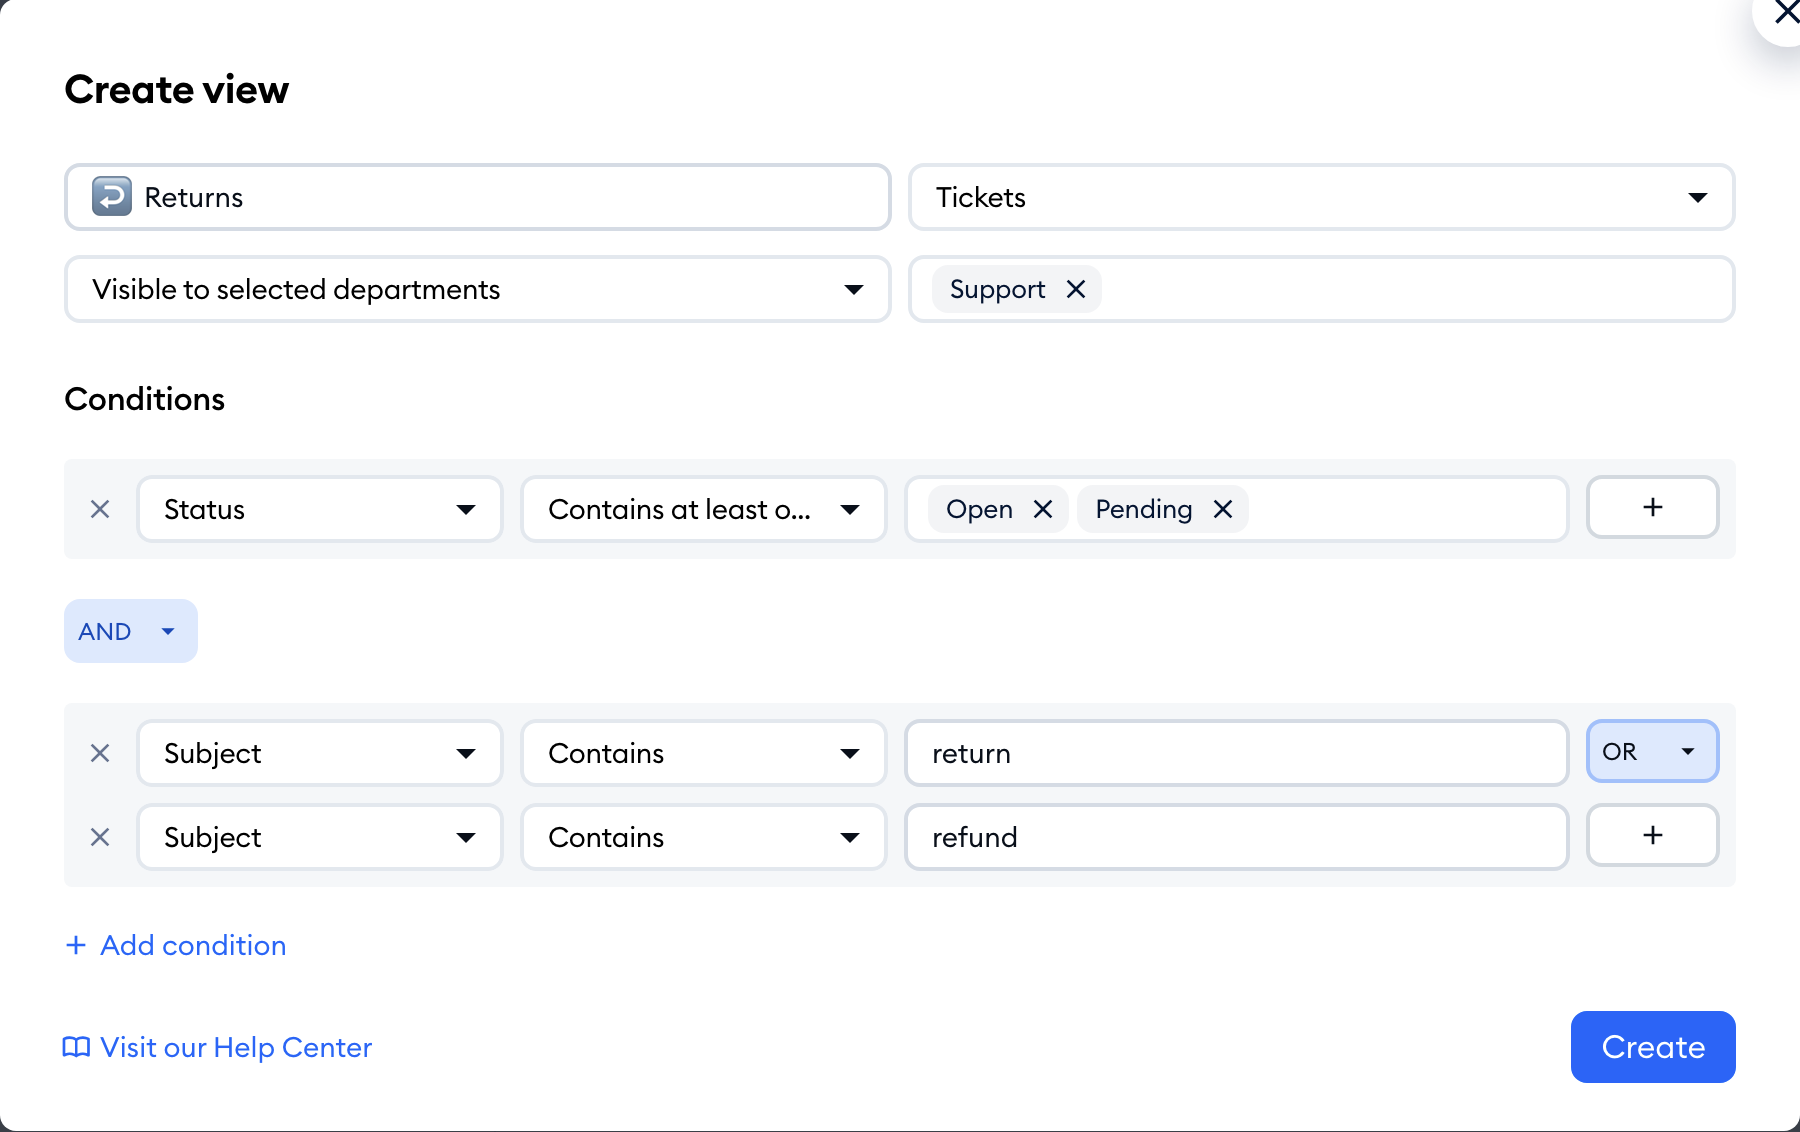
To remove a condition, click on the cross icon on its left (Delete condition).
Sharing a ticket view with your team
A ticket view can be just for you, or for your whole team. Use the visibility list next to Select source to decide:
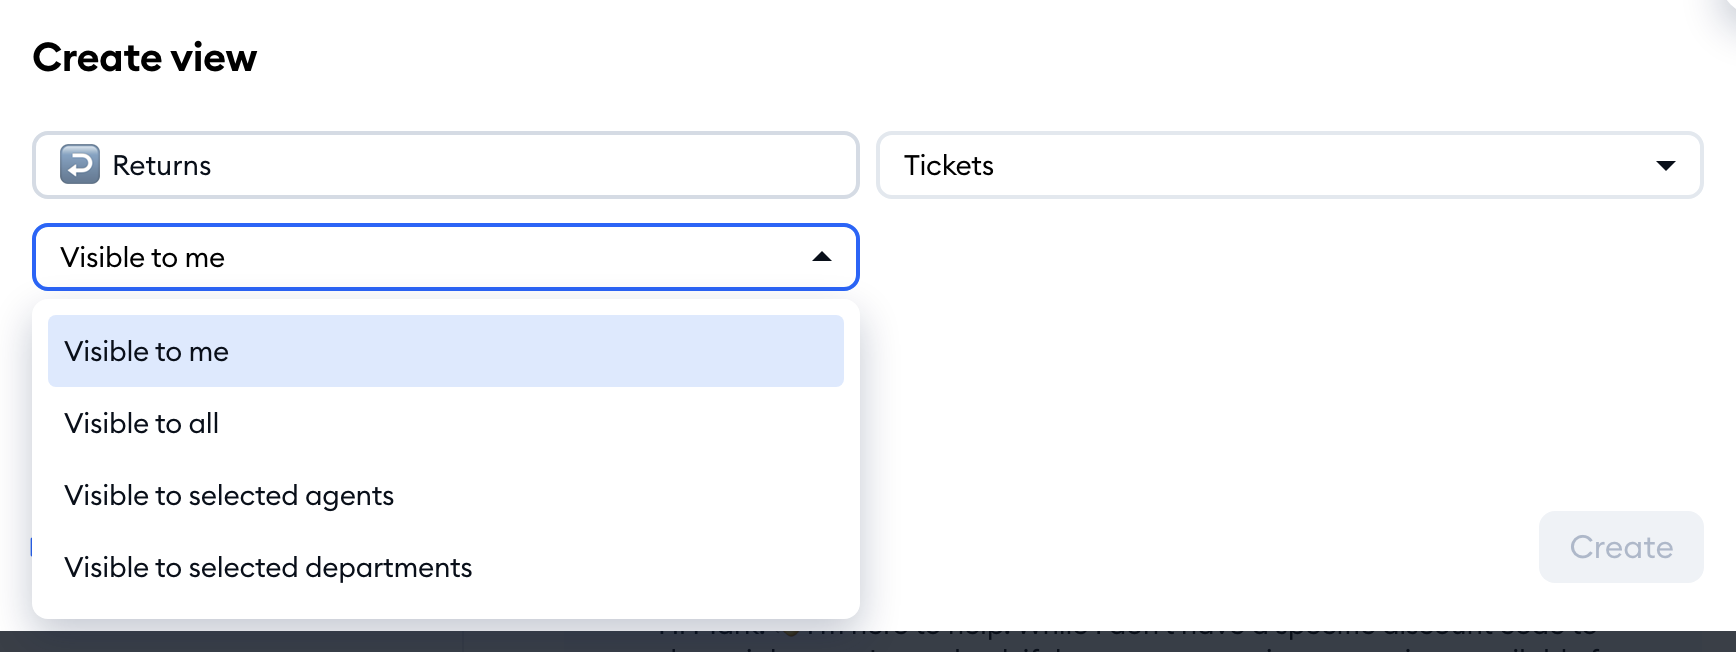
- Visible to me - only you will see the view
- Visible to all - every agent in your project will see it
- Visible to selected agents - choose the agents in the Select agents field that appears
- Visible to selected departments - choose the departments in the Select departments field that appears
You can change who sees a view at any time by editing it.
Please note: the Visible to selected departments option is available with Departments, which are part of the Plus plan and above.
Creating a live chat view
Choose Live conversations in Select source to create a view of your chats. Live chat views work a little differently from ticket views:
- They use one condition: you can't add more conditions or groups.
- They're always Visible to me - every agent creates their own live chat views.
Click on Add condition and pick one of two filters:
- Channel - Messenger, Instagram or WhatsApp. The view automatically takes the channel's name and icon. Each channel can have one view, so a channel that already has a view won't be on the list.
- Intent - the topic of the visitor's message, recognized by AI: for example Order status, Refund or Shipping policy (28 topics in total). Use Is for one topic, or Contains at least one of the following to group several topics in one view.
Below your condition, you'll see a greyed-out one: Agent - Contains at least one of the following - Unassigned and your own name. That's because a live chat view always lists the matching chats that are either unassigned or assigned to you:
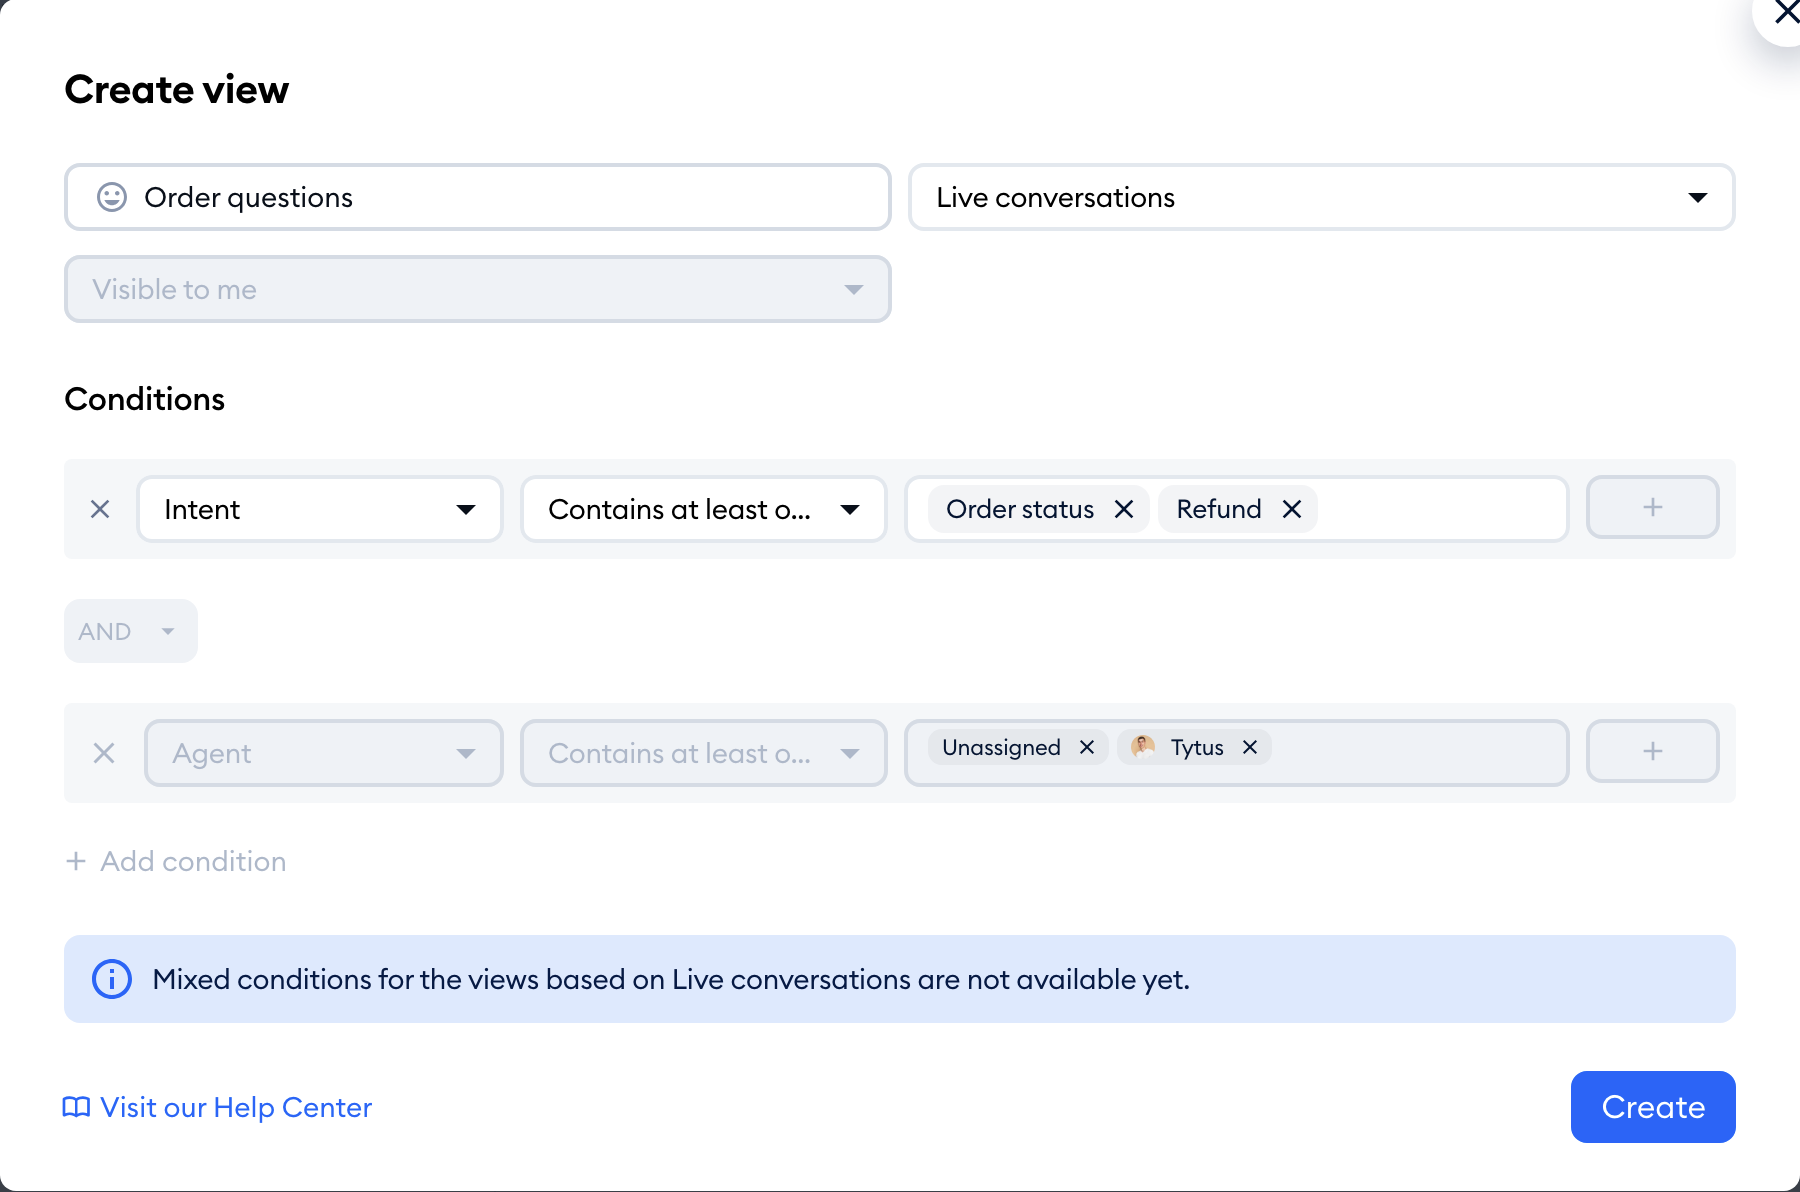
Please note: the Intent filter is only available if you chose an online store as your type of business. For now, Tidio's AI classifies intents only for English conversations in online stores. If your project is an online store, you may already see a few ready-made intent views in your list, like Products, Order status, Order issues and Shipping policy.
Managing your views
Click on a view in the Inbox menu to open it. Just like your folders, views show a counter next to their name in the menu. In a ticket view, you can also use the sorting button at the top of the list to show the Newest first or the Oldest first.
Editing a view
Open the view you'd like to change, click on the three-dots View options menu at the top of the list, and choose Edit:
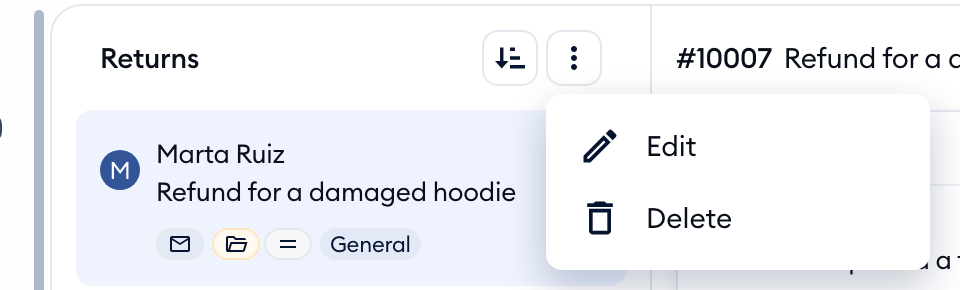
The Edit view window will open, with the view's current settings. Make your changes, and hit Save.
Channel views (Messenger, Instagram, WhatsApp) can't be edited - their menu only has Delete.
Deleting a view
Choose Delete in the same menu, and confirm with the Delete button. Deleting a view doesn't affect your tickets or conversations: they stay in their folders, and you can create the view again at any time.
Reordering your views
Hover your cursor over a view in the Inbox menu, and a drag icon will appear on the right (in place of the counter). Click on it and drag the view up or down to the position you prefer:
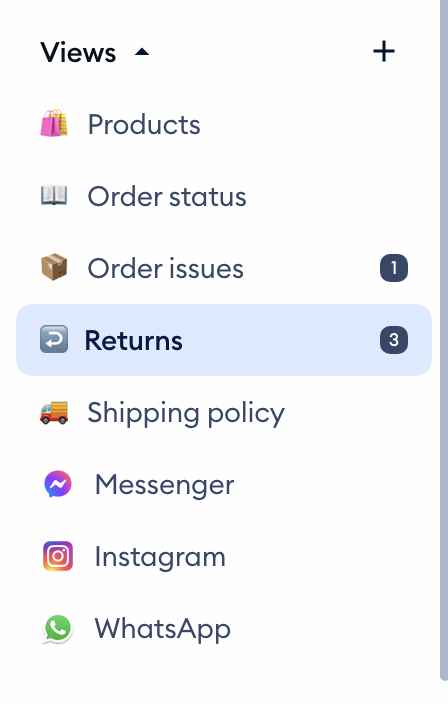
Please note: the order of your views is your own setting - changing it won't change the order for your teammates. Your views are also available in the menu of the Tidio mobile app.
