Ticketing systems are exceptionally useful tools for customer service, letting you manage incoming emails, keep track of communication, and reach out to your leads via email directly. In just 15 minutes, you can start using Tidio's own fully functional ticketing - a great companion tool to live chat. This guide will walk you through the steps to get Ticketing up and running in your project.
In each step, we will also provide links to other articles that cover each topic in much more detail.
In this article, you will learn:
- How to connect your first mailbox
- How to use your own domain and sender address
- How to manage your tickets
- What further steps you can take
Step 1: Connect your first mailbox
The first step to start receiving emails in your Tidio inbox is to connect at least one external mailbox. This mailbox can be something you've already been using for your customer support purposes, set up via Gmail, Outlook, or any other provider - or it can be a brand new address that you've just configured.
Integrate your existing mailbox
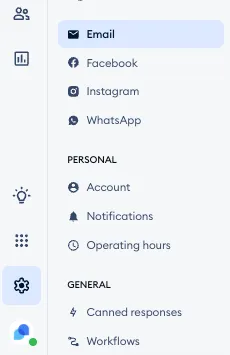
Head to the Settings > Email section in your Tidio admin panel:
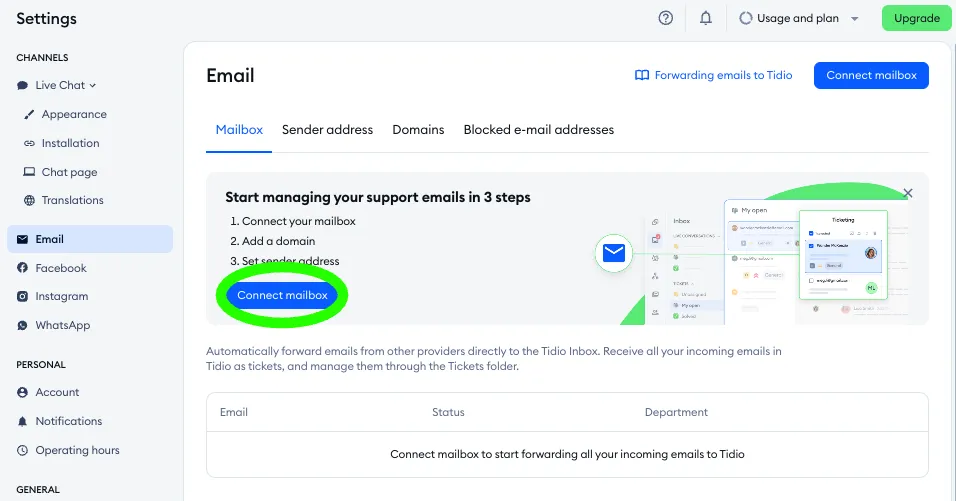
In the Mailbox tab inside, hit the Connect mailbox button to start the process:
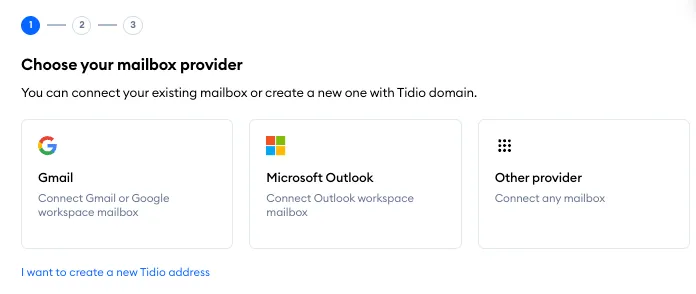
You will see a pop-up with three options - Gmail, Microsoft Outlook and Other provider - and the I want to create a new Tidio address link at the bottom. Select Other provider, provide the address itself, and hit Next. Please note: if you want to connect a Gmail (or Google Workspace) address, it's much quicker to use the dedicated Gmail option, which needs no forwarding at all; for an Outlook address, the Microsoft Outlook option shows you step-by-step forwarding instructions for Outlook.
Finally, you will receive your unique Tidio forwarding address - this is what you need to copy and paste into your mailbox forwarding settings. This is the most important step, as it allows your incoming emails to be forwarded to Tidio.
Once your forwarding is saved in your mailbox, hit the Send test email button at the bottom of the setup window. Tidio sends a test email to your mailbox, and you will see the Check your Tidio Inbox window:
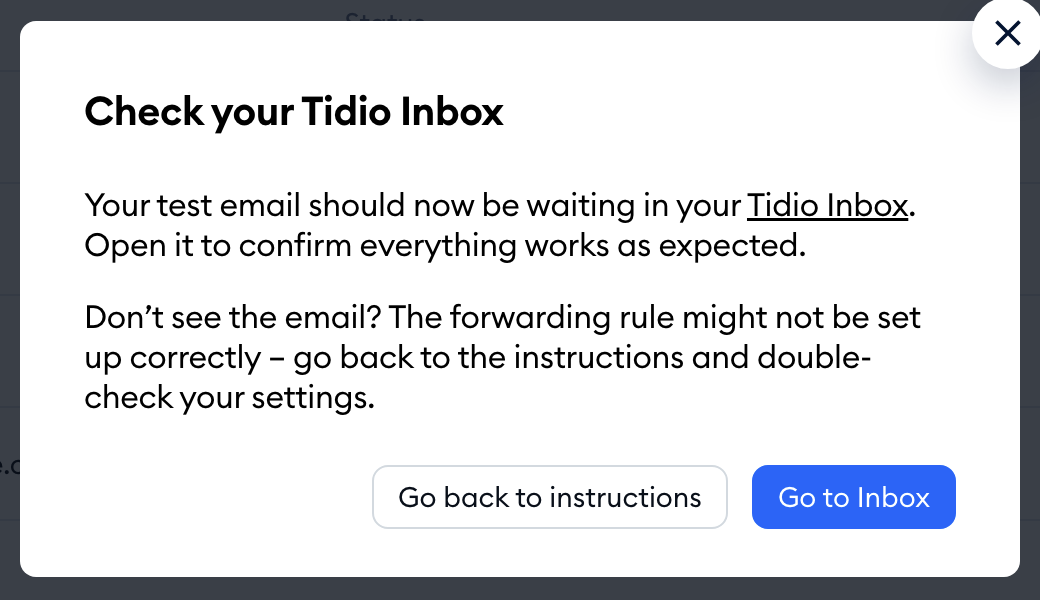
Click on Go to Inbox and check that the test email has arrived in your tickets. If it hasn't, the forwarding rule might not be set up correctly - use Go back to instructions to double-check your settings.
You can find more details on adding your different mailboxes in this guide.
Verify your mailbox connection
With some providers (like Gmail or Proton), you are required to additionally verify your new forwarding setup. Please note: verifying with Gmail is not necessary if you've selected the dedicated Gmail option earlier! This verification is your email provider's own step, separate from Tidio's test email.
In cases where verification is required, right after you add your Tidio forwarding address into your mailbox settings, you should receive a verification email inside your Tickets inbox inside Tidio. Open it, and follow the instructions inside - that is usually a link you need to access, or a button you need to click.
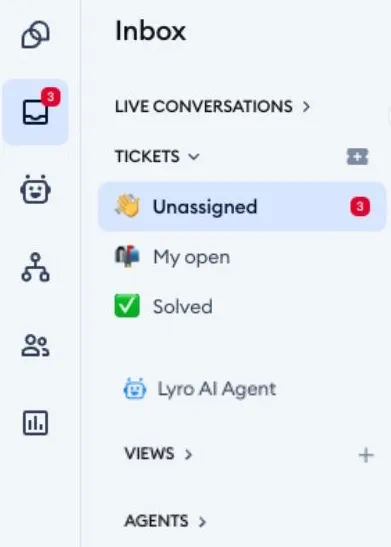
Please note: in some cases, it's possible that this verification email can be automatically marked as spam. If you can't find this email, make sure you check the Spam folder in your Tidio inbox!
If you encounter any other issues with forwarding, please check out this troubleshooting guide - it covers the most common problems.
You can see more detailed information and guidelines in this general Ticketing article.
Step 2: Set up your own domain and sender address
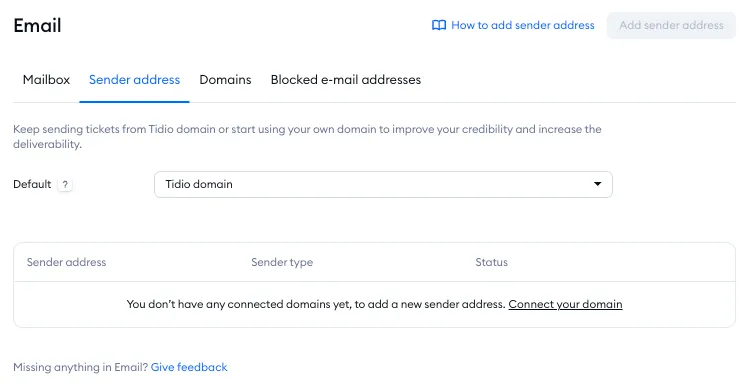
By default, Ticketing uses Tidio's own domain as the sender address of your emails. You can, however, improve your professional credibility (and customer experience) by configuring your own custom address. This will also help with the deliverability of your emails in general.
Connect your own business domain
The best available way is to connect your own domain with your Tidio project, and use that as the basis of your sender address. By default, the domain connection is done automatically through an app called Entri; but manual connection is possible as well (especially if your domain provider is unable to work with Entri). We'll only cover the automatic method here.
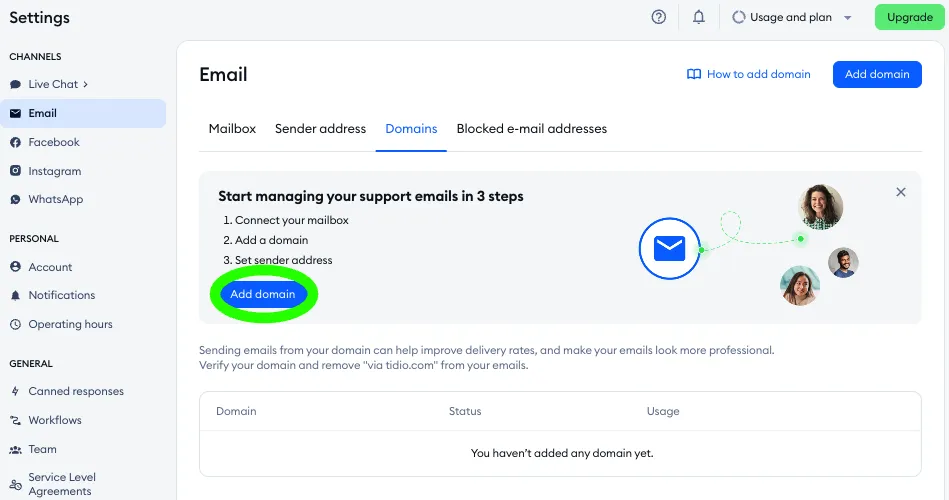
Head over to Settings > Email, and go to the Domains tab - then click on the Add domain button:
In the new window that pops up, provide the domain you'd like to connect:
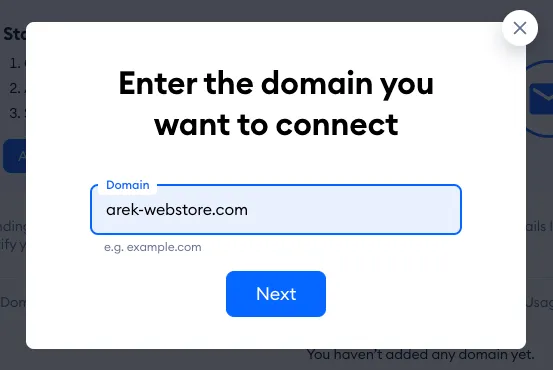
This will let you proceed to the automatic domain connection, powered by Entri.
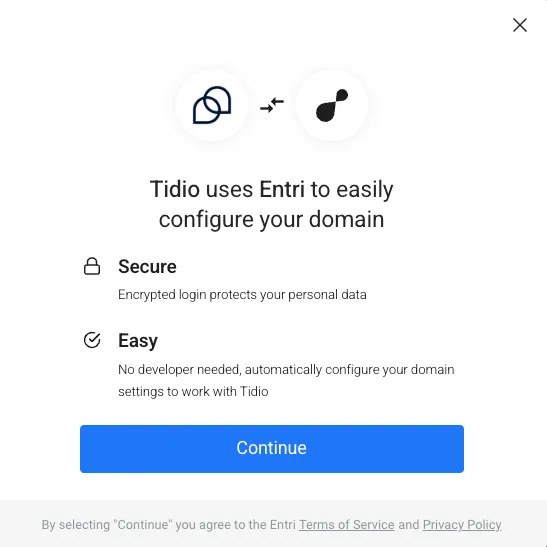
Once you continue, the domain will be analyzed for all the relevant details - all in order to allow a secure and smooth connection. During this process you will be asked to input your provider login details, in order to properly allow Tidio to connect with your domain. You will most likely need to confirm the connection request with a security code sent via email as well.
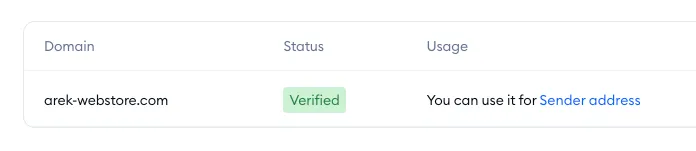
Once you successfully verify everything that's necessary, you will see a confirmation screen. Once the domain is properly connected, it may take up to 48 hours to fully verify. Finally, the domain will be listed as verified in the Domains tab:
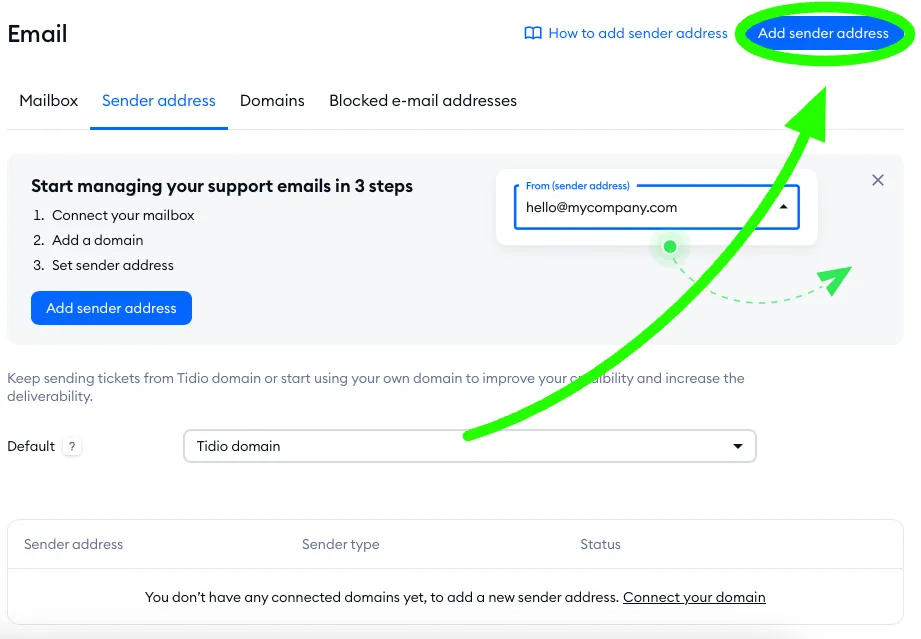
When the entire process is finished, you will be able to select your own domain as the sender address inside the Sender address tab (in Settings > Email), and determine the exact email alias you'd like to use - just click on the Add sender address button in the top-right:
You can see more details on connecting your business domain in this guide.
Step 3: Start managing your tickets
Now that you've connected your chosen mailbox (or several), Ticketing is up and running - and you can start receiving tickets, creating new ones from scratch, and responding to incoming emails.
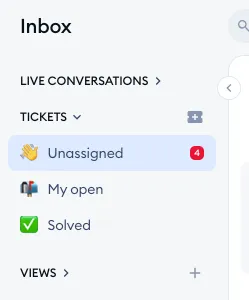
Navigate your ticket folders
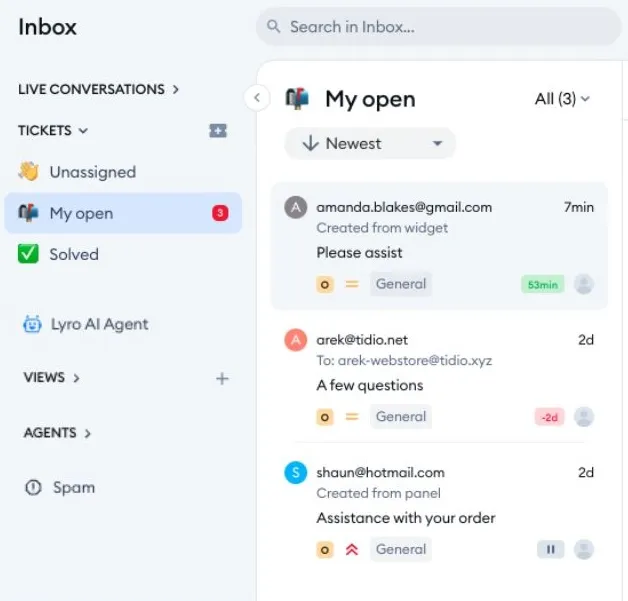
All the tickets forwarded to your Tidio mailbox will be shown in the Unassigned folder. Whenever you are assigned a ticket (either by yourself or by someone else), the ticket becomes visible in the My open folder. The Solved folder holds all of the tickets you (and your team) have closed. You will see basic information next to each ticket, wherever it currently is.
Browse individual tickets
Click on the chosen ticket to open it. At the top bar of the ticket, you can see (and change) the current assignee, status, and priority. The other options are in the three-dots menu on the right: mark the ticket as spam; merge tickets from the same sender (if any such tickets are available); block the sender's email address entirely; and the option to delete the current ticket (if your permissions allow deleting tickets).
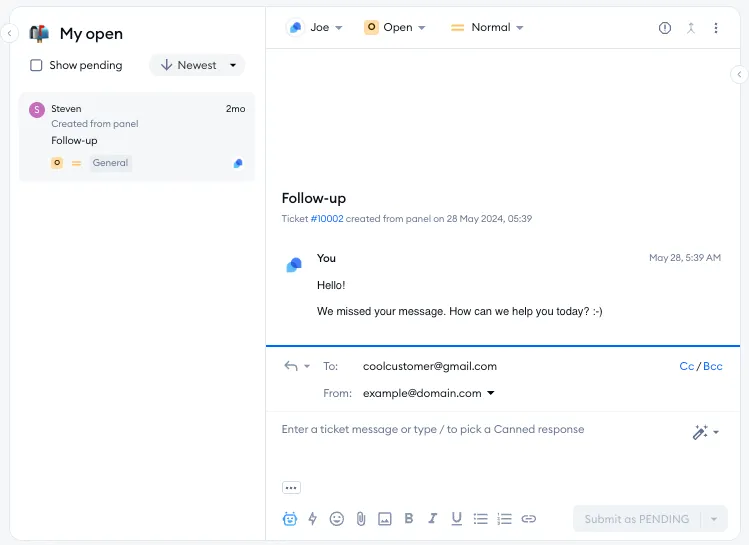
Respond to tickets, leave internal notes, forward emails
When viewing a ticket, you can respond to it directly, leave internal notes for your team, or forward the ticket to another recipient (or recipients). Naturally, you can also select the sender address that you wish to use when responding to this ticket. You can see these different options inside each ticket; you can also use the additional Cc and Bcc options if you need to add more recipients.
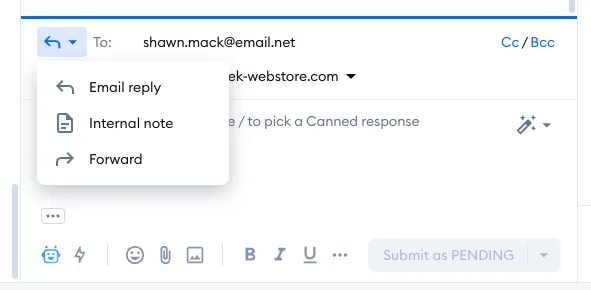
Create new tickets from scratch
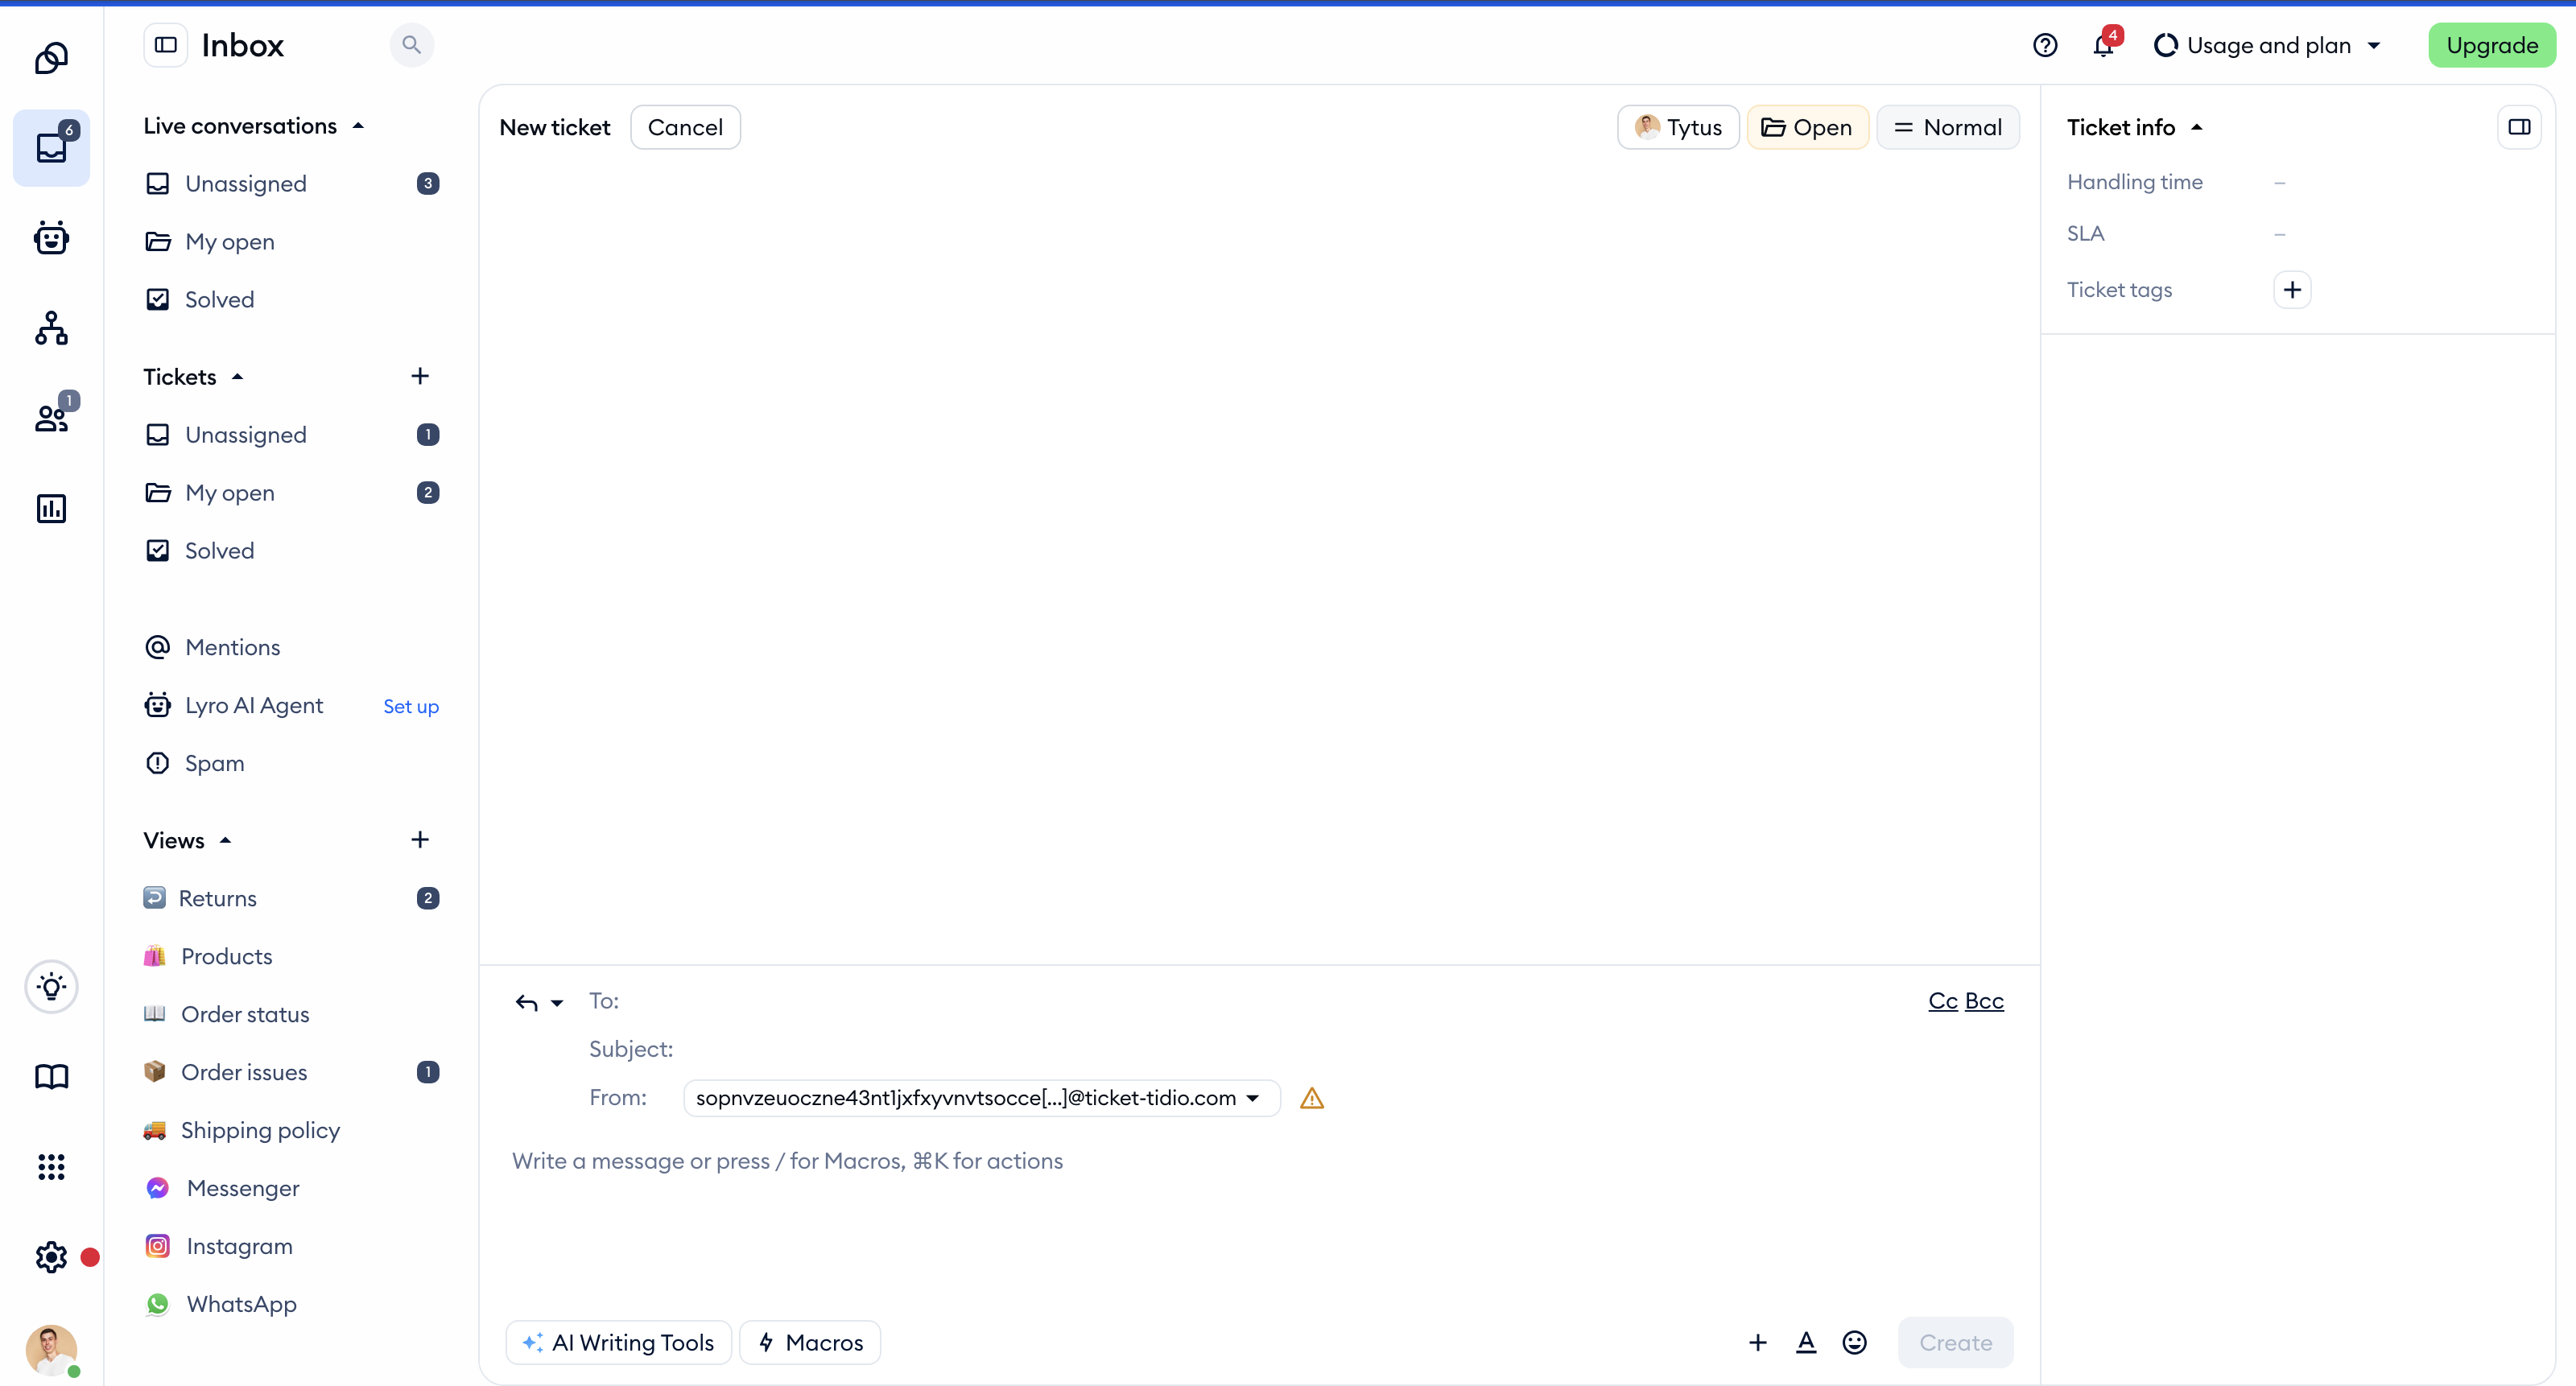
To create your own ticket from scratch, click on the + icon (Create ticket) next to Tickets in the Inbox menu. The New ticket view opens, where you compose your new ticket, providing details such as the subject, recipient, sender, priority, assignee. Of course, you also need to compose the actual message (or internal note), and select the ticket's initial status.
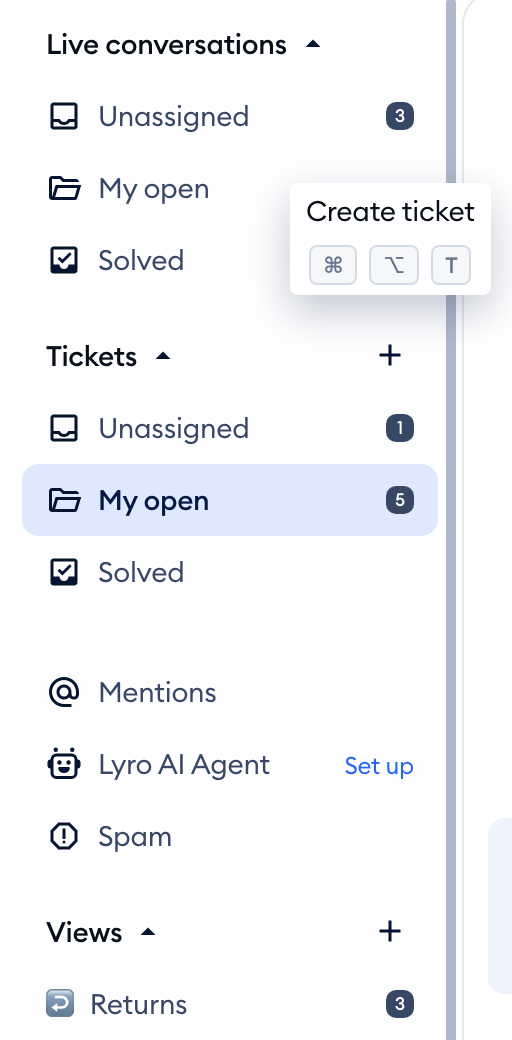
Use ticket statuses
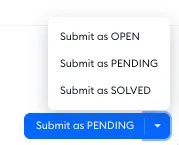
You have three different statuses to use when managing your tickets: Open, Pending, and Solved. You can select a new status whenever a change is necessary, but all new incoming tickets start out as open. A ticket is usually pending when you're awaiting a response, or when the ticket is simply not solved yet. You should mark the ticket as solved when no more communication is necessary in that particular thread.
To learn about every aspect of managing your tickets in detail, see this dedicated guide.
Step 4: Take it to the next level
Now that you've set up the basics of Ticketing, it may be time to configure some additional settings that will help you and your business. These details can take your ticketing to the next level, so they are well-worth exploring!
Automatic response
Whenever someone sends you an email, they can receive a pre-prepared automatic reply from your panel. In Tidio, this is a Workflow template: navigate to the Templates tab inside Settings > Workflows, and find the Send automatic ticket reply template.
Please note: Workflows are available on the Growth plan and above. Learn more in our Workflows article.
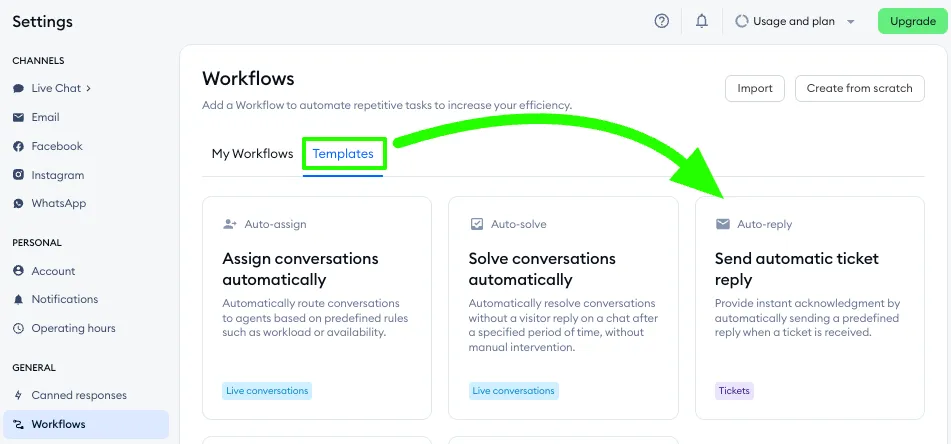
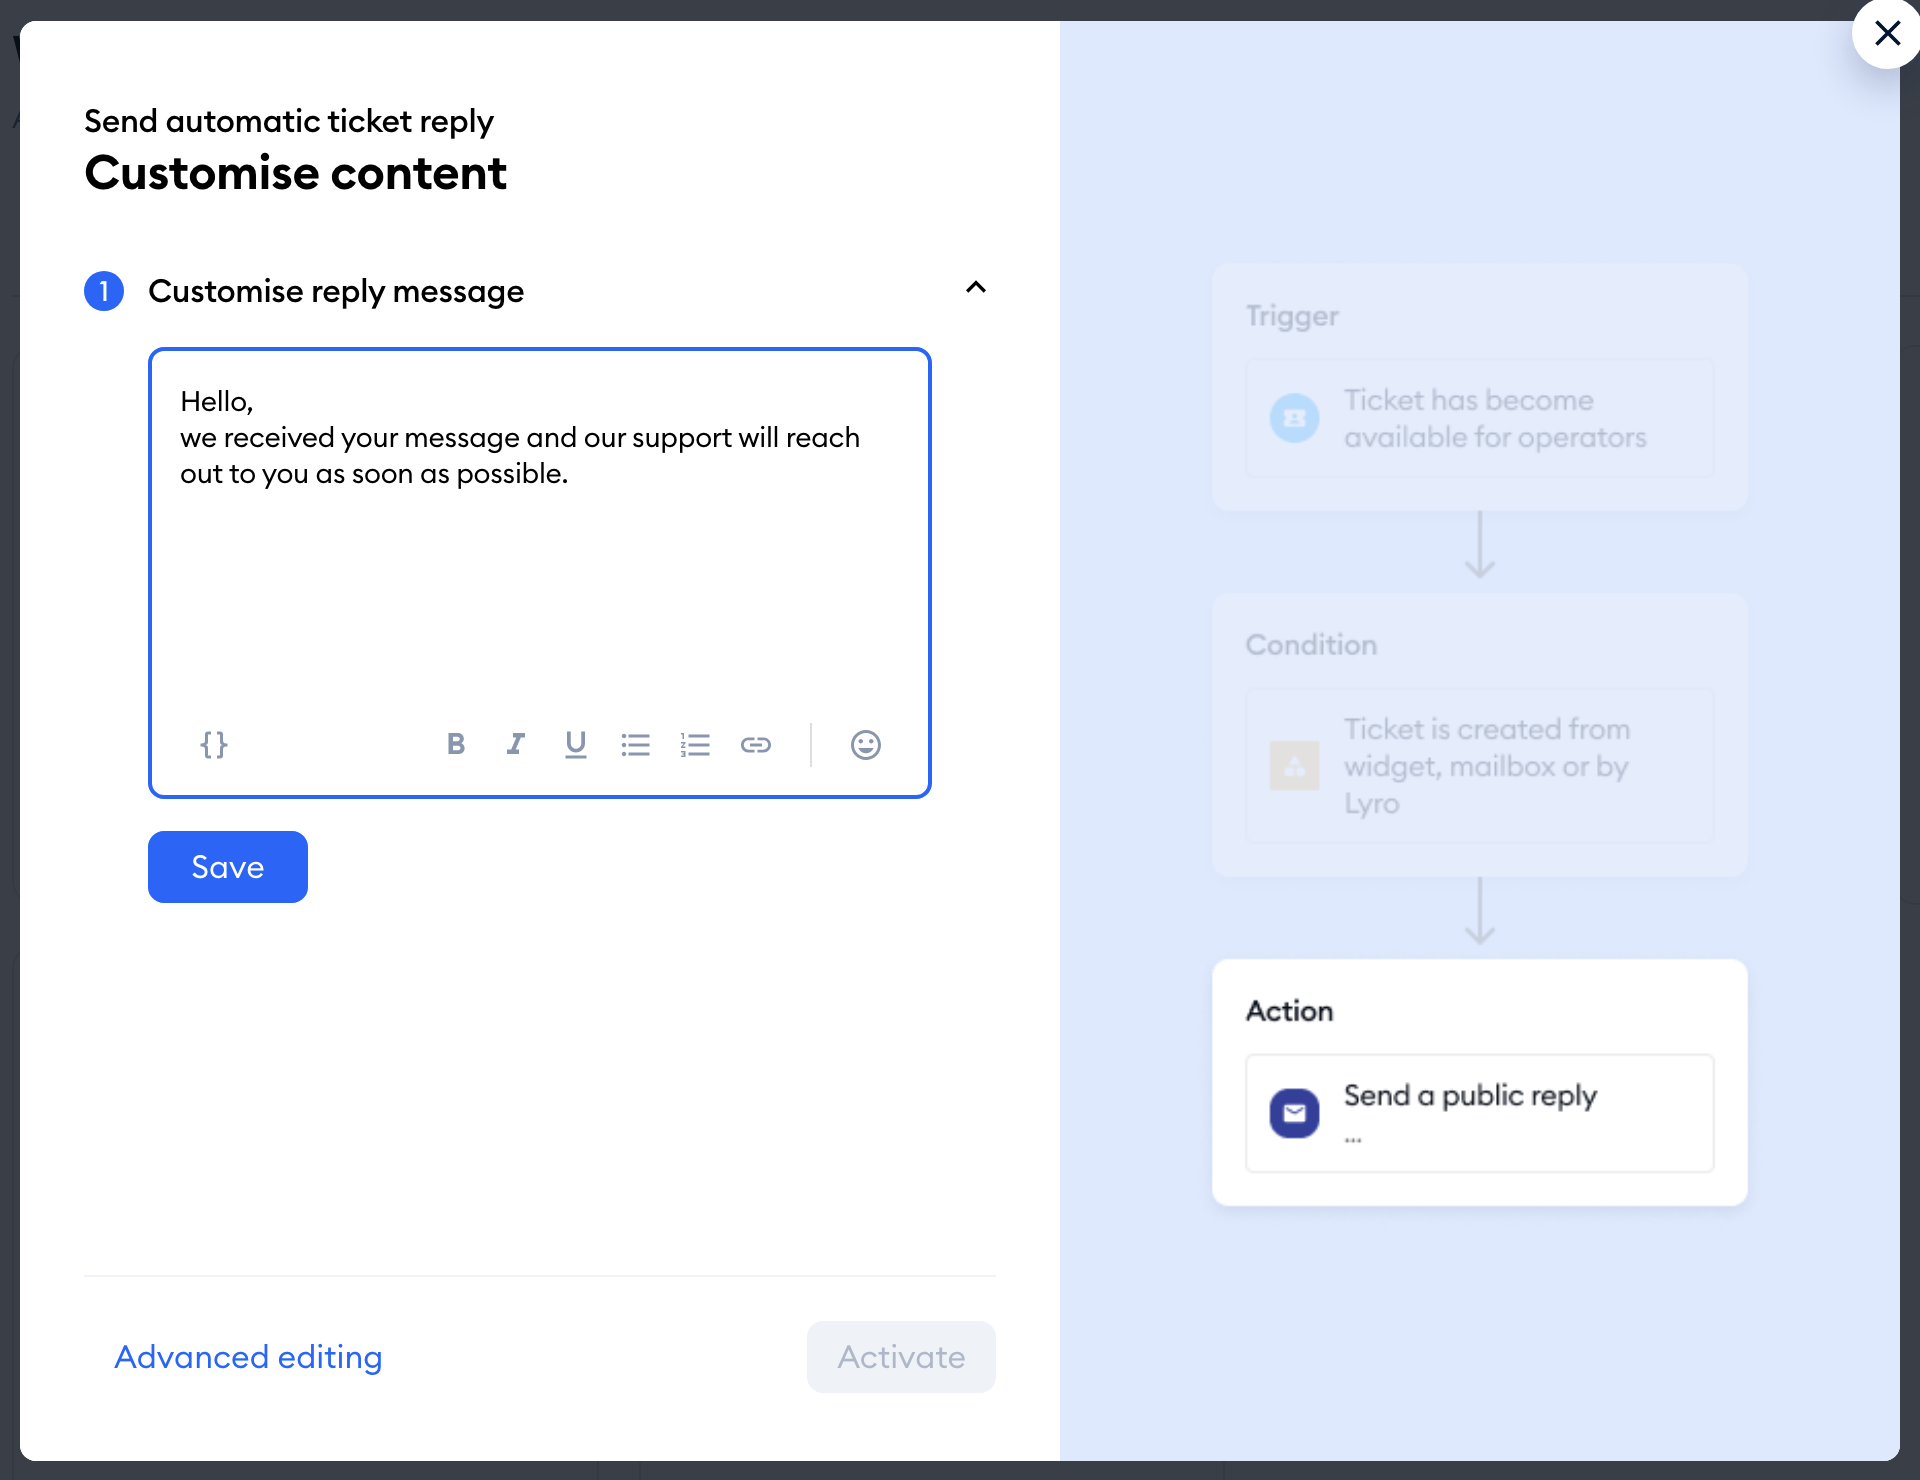
Hover over the template and click Learn more, then Use template - this will allow you to compose the message itself. When it's ready, hit the Activate button (or use Advanced editing to change more details of the workflow in the editor).
Custom email signature
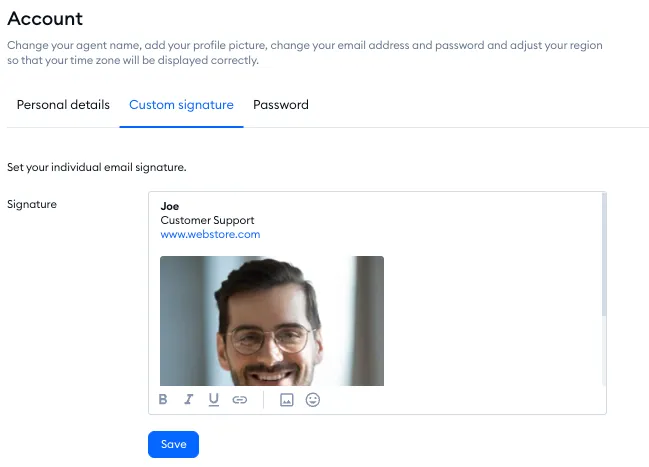
Each agent can add their own signature in the Custom signature tab, inside Settings > Account. You can add text with basic formatting options (including hyperlinks) as well as images (when adding multiple images, they can only be placed vertically).
Custom views
By default, you can only see three general folders: Unassigned, My open, and Solved. However, you can create your own filters, allowing you to see different kinds of tickets separately, based on the conditions you configure. You can sort your tickets into different categories automatically, and quickly access them whenever needed.
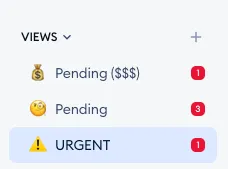
To add your first custom view, click on the plus (+) sign next to the Views list (Create view). In the Create view window that pops up, you configure the new view's basic settings (such as name and visibility), as well as the conditions that determine which tickets will be listed in the view.
To see all the details of this process (as well as practical examples), take a look at this dedicated guide.
Customer satisfaction survey
Whenever you solve a ticket, an automated satisfaction survey can be sent to the customer via email. You can manage it on the Tickets tab of Settings > Customer satisfaction, with separate switches for tickets solved by your agents (Send survey for tickets handled by agent) and by Lyro (Send survey for tickets handled by Lyro). We recommend you modify this survey and tailor it to your needs.
Please note: the automated satisfaction survey is available on the Growth plan and above. On other plans, switching it on opens an upgrade window.
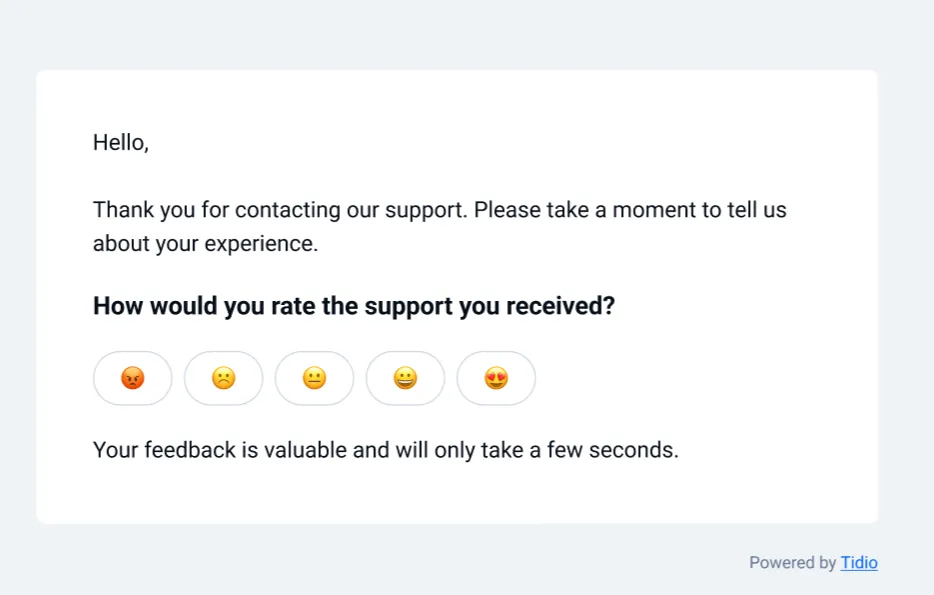
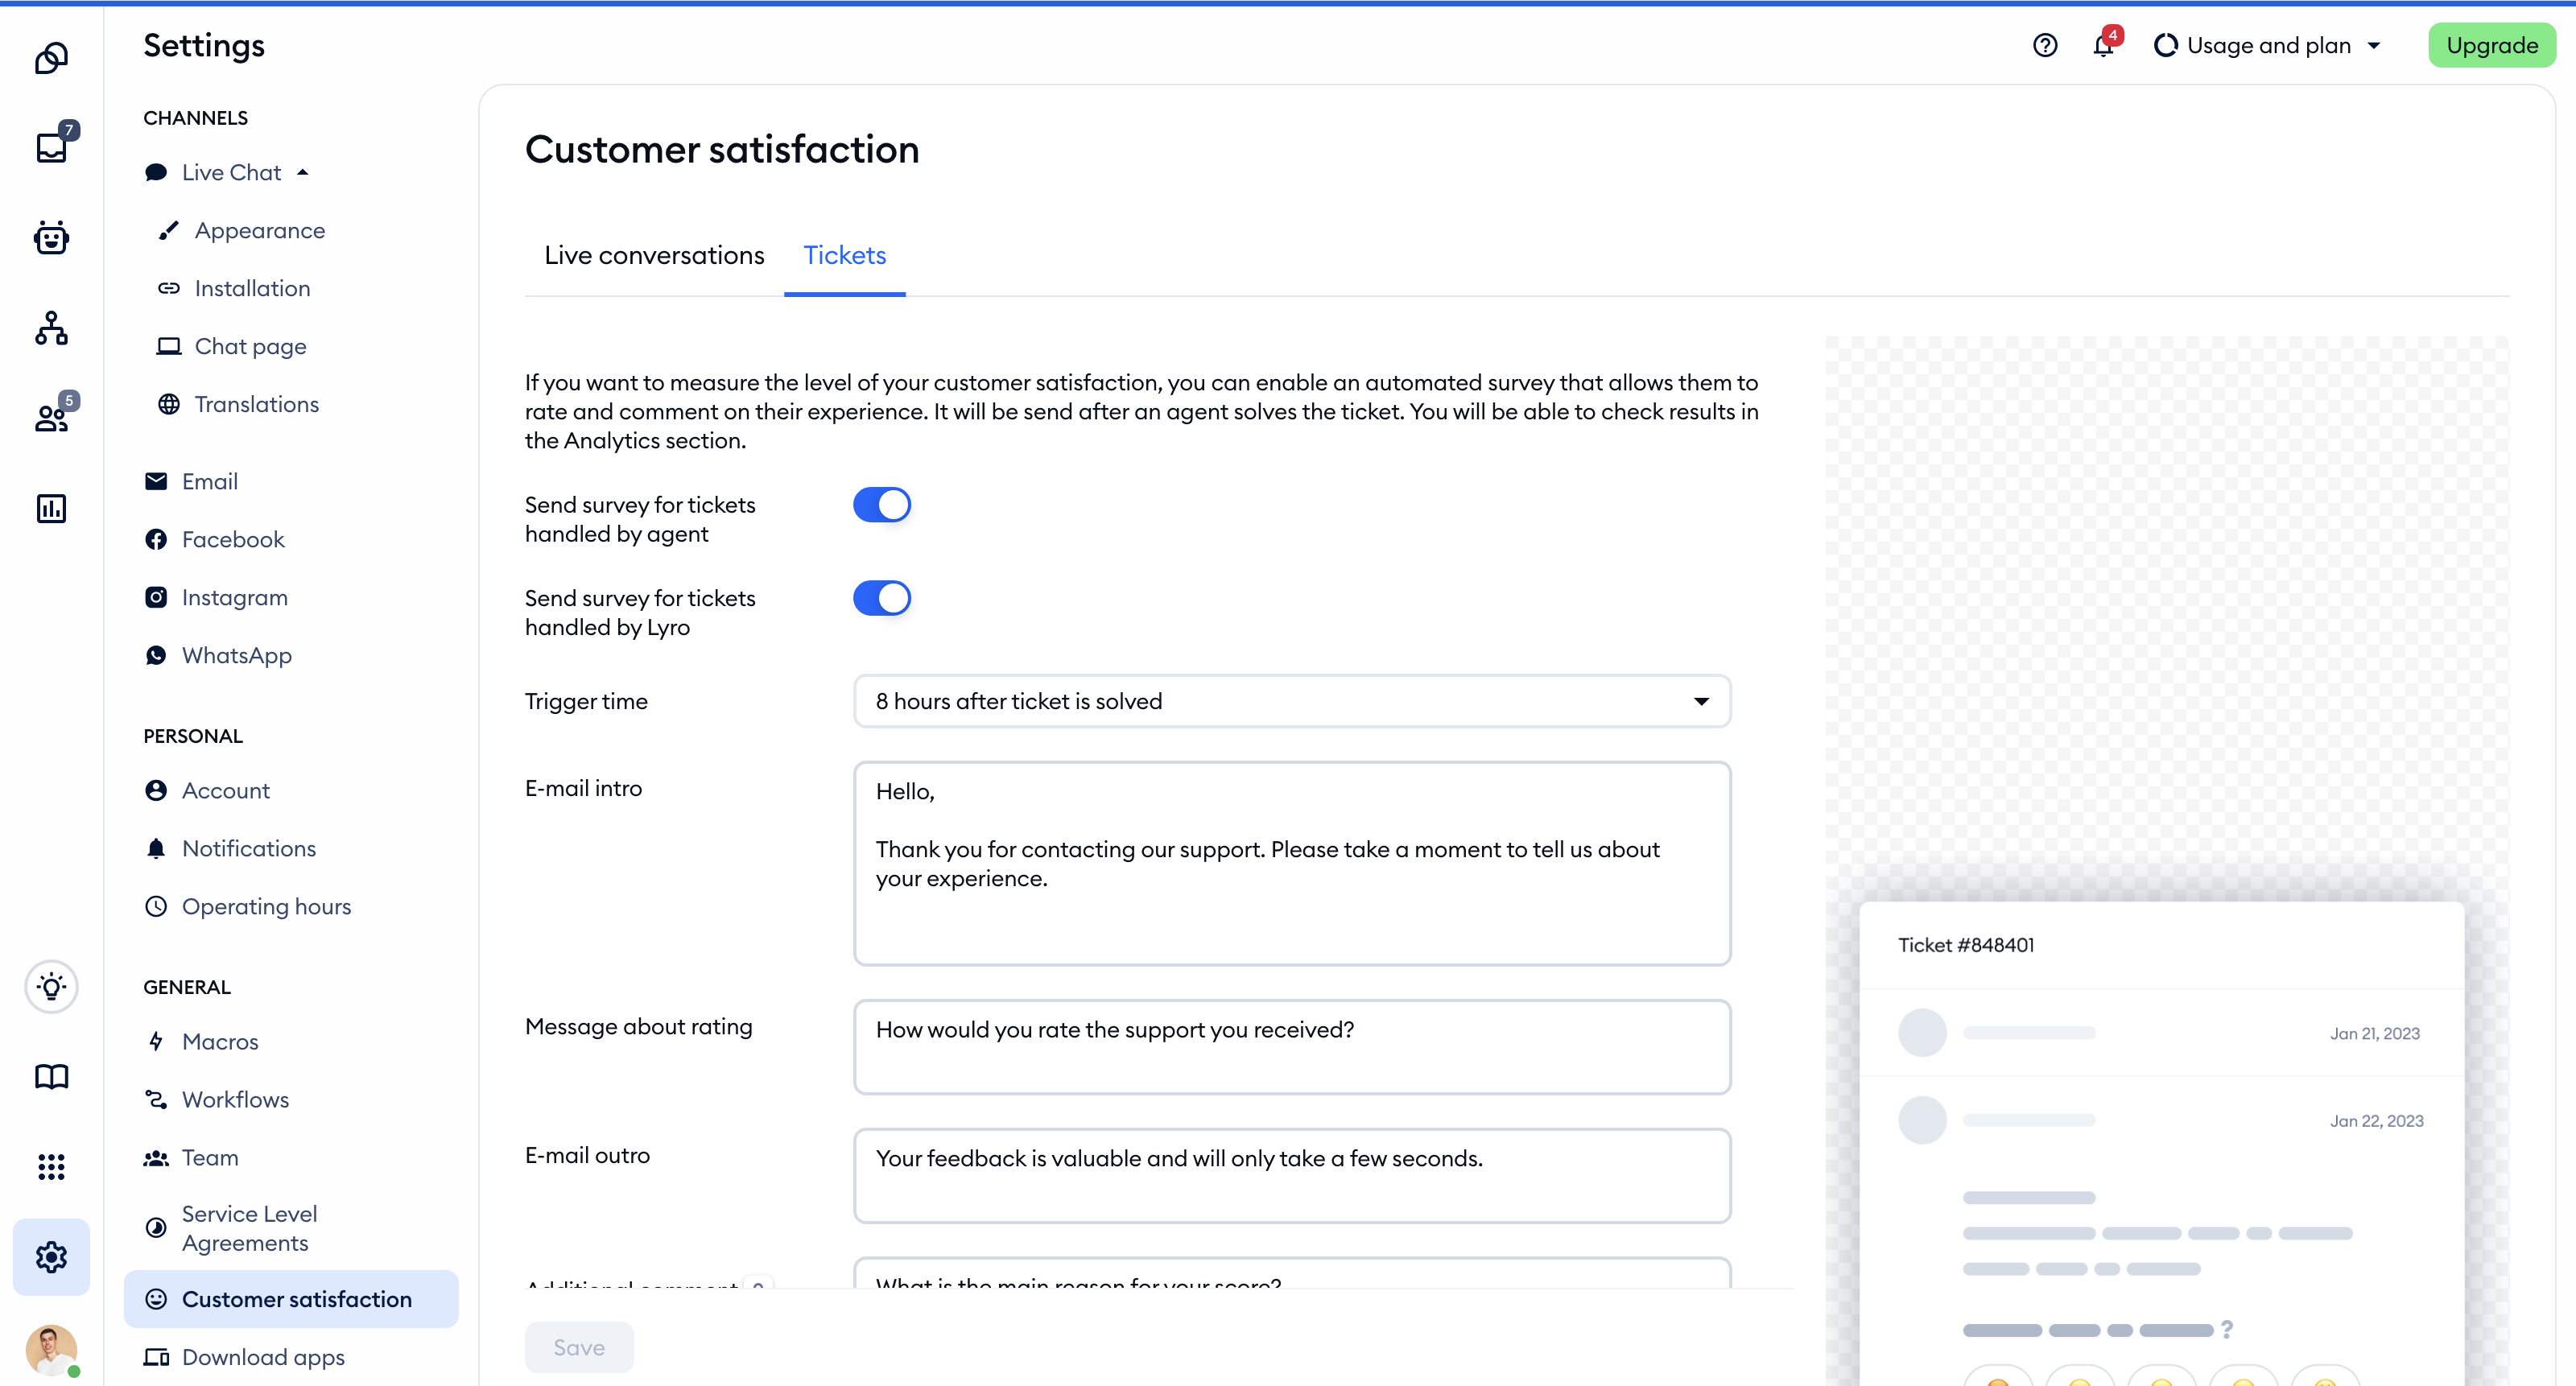
This satisfaction survey allows the recipient to select one of five options (emojis), and leave feedback if their choice wasn't positive. You can modify all the text, as well as how soon the survey is sent. You can later check all your survey results as well.
You can learn more about collecting customer feedback via tickets in this guide.
Conclusion
Setting up Ticketing lets you manage much more communication within Tidio directly, and as a result - increase your efficiency. Using the steps above, and the detailed configuration options shared for further reading, you can start providing better support in a way that suits your business.
For any advanced settings or assistance, feel free to reach out to Tidio support anytime.
Please see this Help Center section for everything associated with Tidio's Ticketing.
Further reading
- Forward emails to Tidio
- Connect Gmail with one click
- Email (Ticketing)
- Workflows
- Collect customer feedback
- Lyro on email: answering whole email threads
