Tidio's live chat conversation panel empowers you to engage with your website visitors in real-time to provide exceptional customer support. In this article, we will guide you through the functionalities of Tidio's conversation panel, helping you become an expert in live chatting.
In this article, you'll learn:
- How to access chat conversations
- How to respond to messages
- How to check whether the message was read by the visitor
- What are the communication channels
- How to transfer the chat to another agent
- How to add internal notes and mentions
- How to solve and leave conversations
- How to use the other actions at the top of a conversation
- How to delete a conversation
- How to use the Actions menu (Search actions)
- How to manage multiple chats (bulk actions)
- How to find the chat history or archived chats
- What information on visitors is available
Accessing conversations
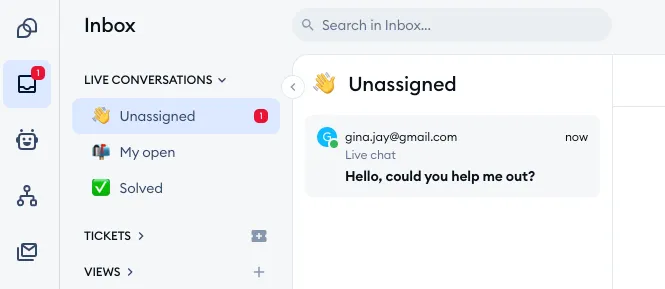
To access the Tidio conversation panel, click on the Inbox icon in the top-left corner of the Tidio menu bar. This will open up the Inbox section, where you can engage with the users who are messaging you:
To learn more about the Inbox in the general, please see this detailed guide.
All new, unassigned conversations will be visible in the Unassigned folder in the Live Conversations section. You can also enable the automatic assignment feature if you wish the chats to be assigned to agents automatically.
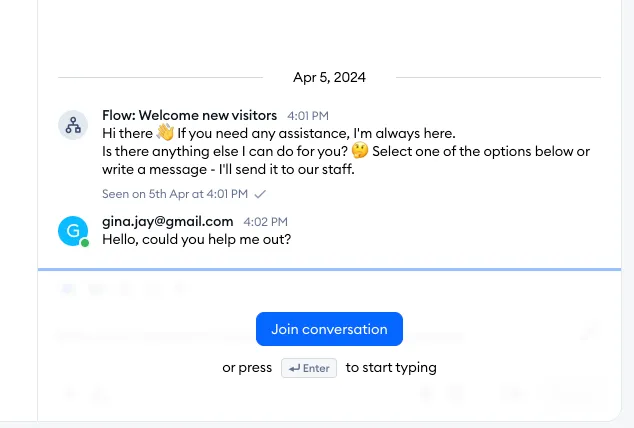
To pick up the conversation, you'll need to click on the system/browser notification that pops up (whenever you get a new incoming chat if you're online) or choose a chat from the Unassigned folder. To join the conversation, click on the blue Join conversation button (or simply press Enter). The agent who is assigned to the conversation will be responsible for that chat. If you only want to leave a comment for your team without joining, use Add internal note next to it.
Responding to messages
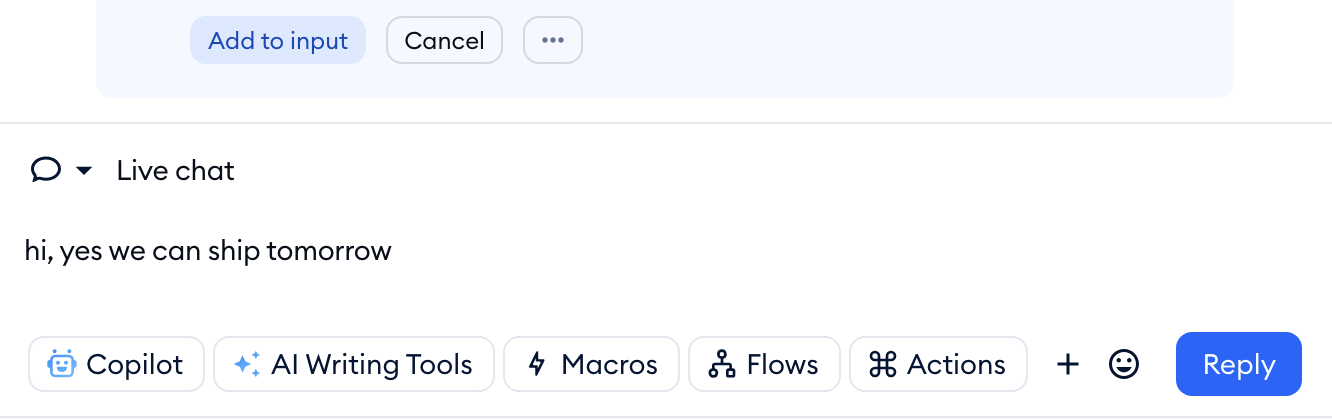
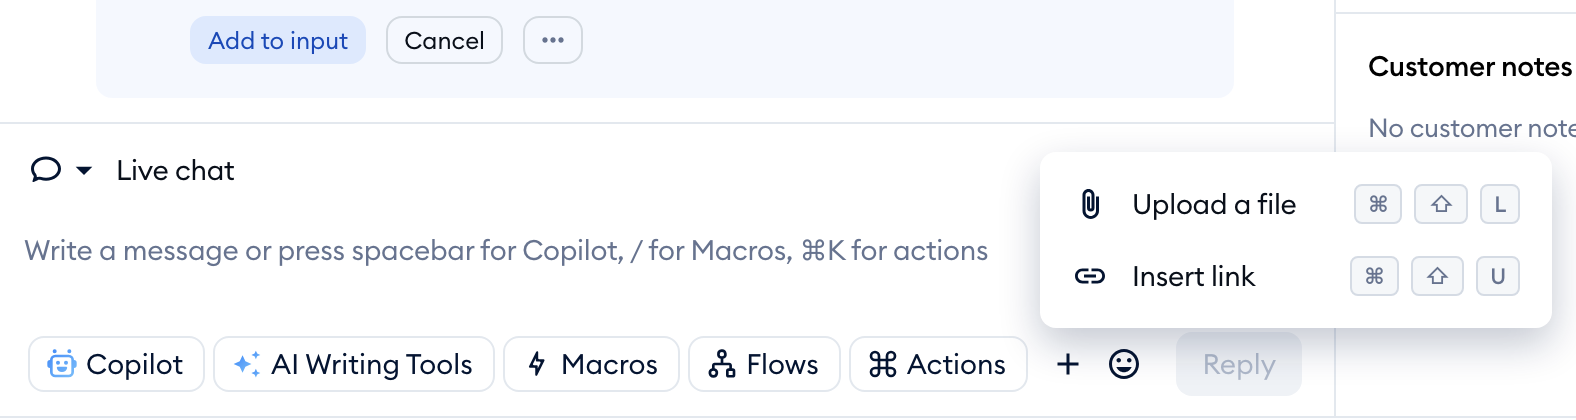
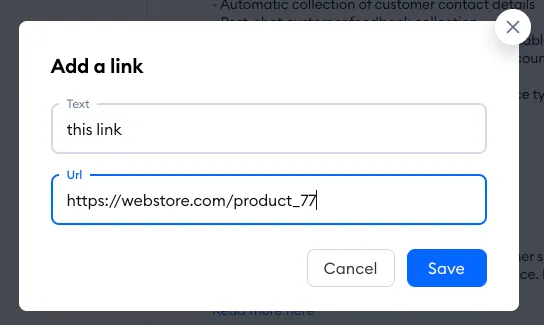
To respond to a visitor's message, simply type your reply in the conversation window and hit Enter on your keyboard or the Reply button on the right of the reply box. You can also send files or pictures during the conversation - click on the + button (Add to message) at the bottom of the reply box and choose Upload a file, or simply drag and drop the file into the conversation. Visitors can also share files from their end, enhancing the communication experience.
At the bottom of the reply box, you'll also find Copilot, AI Writing Tools, Macros, Flows and Actions - more on these below:
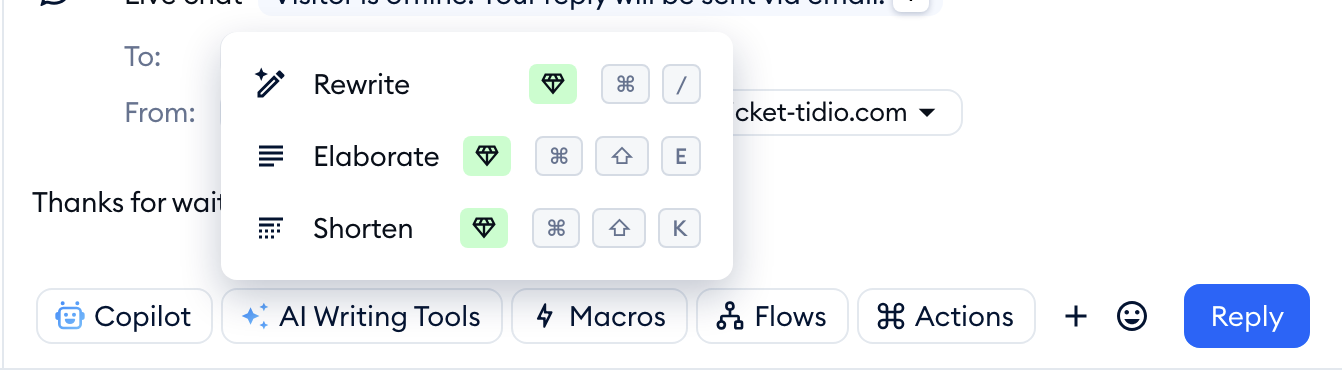
To enhance your messages, try AI Writing Tools - a kind of reply assistant designed to help customer service agents deliver high-quality, well-composed replies to customers faster. You can access them by clicking the AI Writing Tools button at the bottom of your reply box, right next to Copilot.
With the power of AI, these tools can generate good-looking responses from the input provided by the agent. The available options allow you to Rewrite, Elaborate or Shorten your text input.
Please note: if AI Writing Tools aren't included in your subscription, you'll see a small diamond badge next to each option - choosing one opens the upgrade window. In the panel, AI Writing Tools are part of the Inbox AI add-on.

The "seen" message status
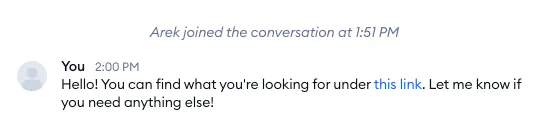
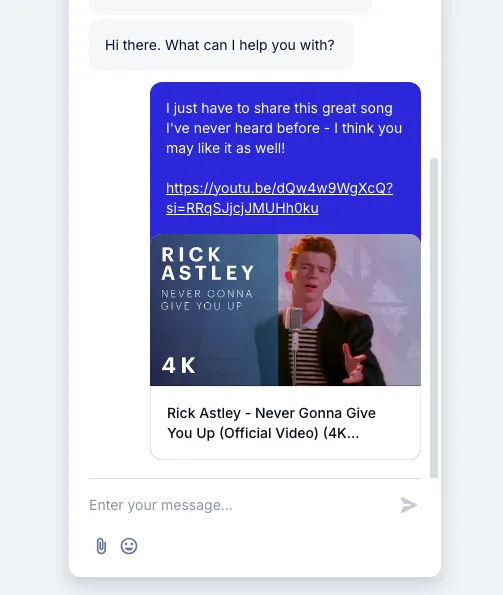
Tidio's Inbox lets you see whether visitors read the agent's messages. It's a one-way feature: visitors won't see if agents read their messages. Currently, it's exclusive to the live chat channel - not available on channels like Messenger, Instagram, or Whatsapp, or email.
Communication channels
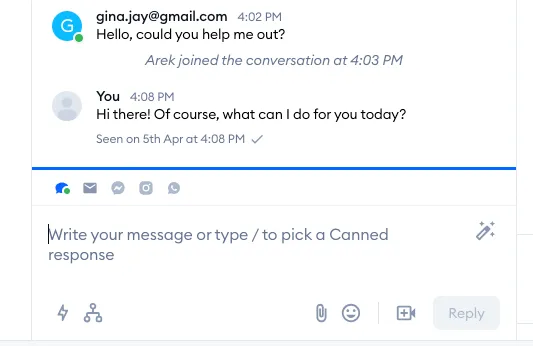
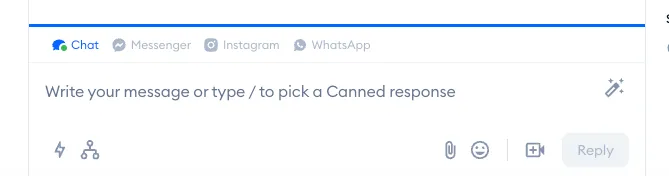
At Tidio, you can receive four types of messages in your conversations tab of the panel. A normal live chat message, Facebook Messenger message, an Instagram message (or story reply), and a WhatsApp message:
Chat
Every chat message will always have the ID assigned based on the first letter/email of the user's name. When responding to a chat, your choice should always be to respond via the Chat mode; this is the default choice.
The red dot on the Chat icon indicates that this visitor is not present on your website at the moment.
Messenger
When you have your Facebook Page integrated with your Tidio account all the messages sent to your page will also appear in Tidio. They might reflect the user's profile picture instead of the letter or a numeric and also have a Messenger Icon to indicate that the message came from the Messenger.
Learn more about Tidio integration with Messenger.
You can integrate your Instagram Business account into your Tidio account; all the messages and sections sent to your Instagram will also appear in Tidio.
Learn more about Tidio integration with Instagram.
If you've integrated WhatsApp with Tidio, you will also be able to respond to incoming WhatsApp messages.
Learn more about Tidio integration with WhatsApp.
Transferring a chat to another agent
At any point, the conversation can be transferred to another agent if you need to step out for a minute or your workload is too heavy at the moment, or if a different agent is better suited to help the visitor.
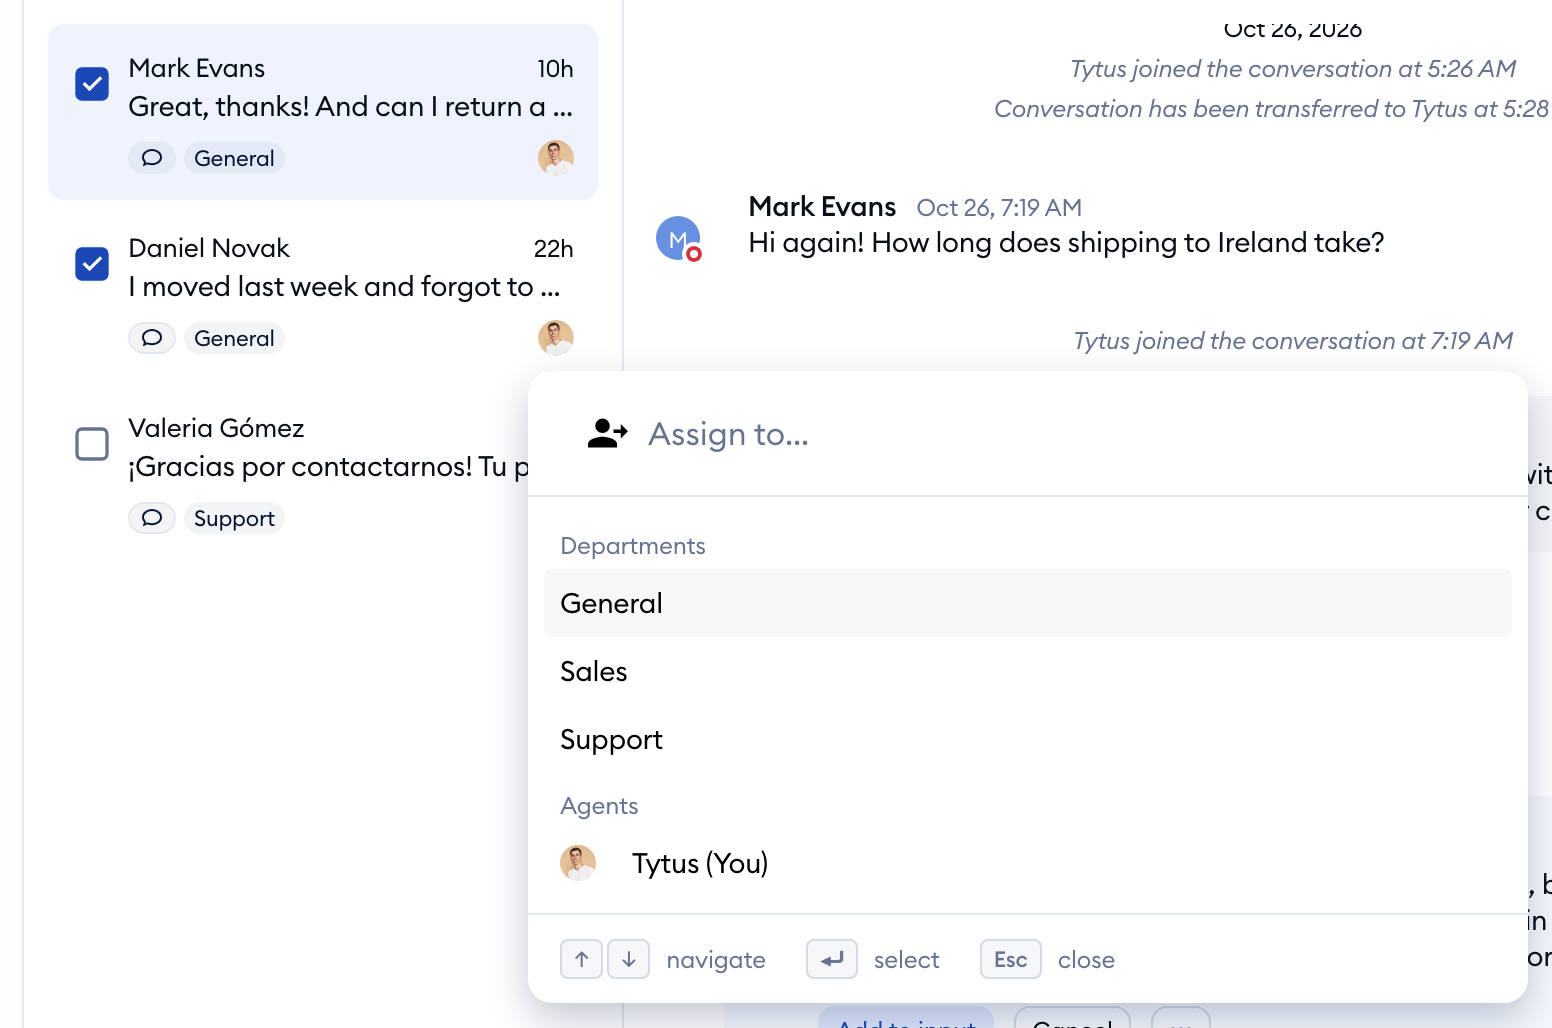
To transfer a conversation, click the three-dots menu next to the conversation in the list and select the Reassign option (or Assign, if the chat is still unassigned). The Assign to... panel will open, where you can search for an agent (or a department) and click on their name:
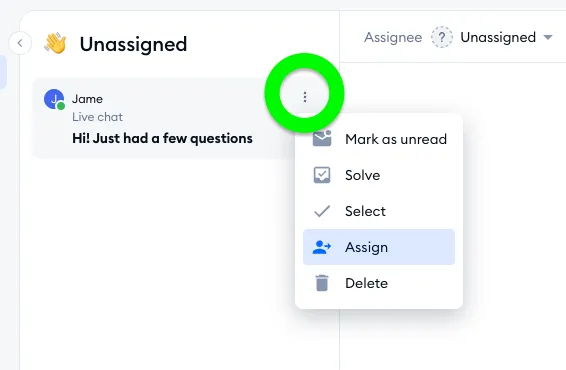
You can also use the Select option from the menu, choose multiple conversations and reassign them all at the same time. Once you're done, use the Reassign icon (Assign in the Unassigned folder) in the bar at the top of the list:
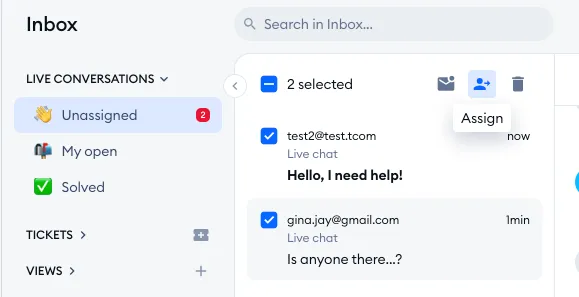
From there, simply click on the appropriate person (or department) in the Assign to... panel - the conversations are transferred right away:
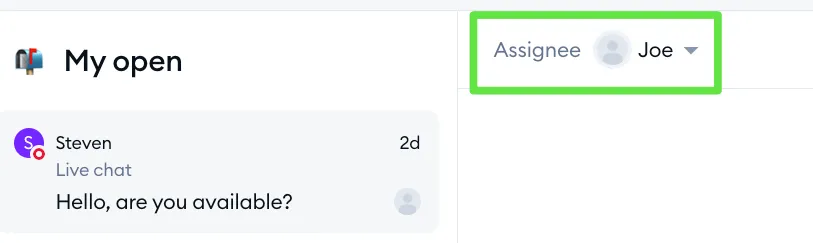
You also have the option to reassign a chat by selecting it from the Assignee list at the top of the conversation itself:
Please note that there are other methods of assigning chats (and tickets), including automatic assignment. Please see this guide for more details. Automatic chat assignment is available on the Growth plan and above.
Adding internal notes and mentions
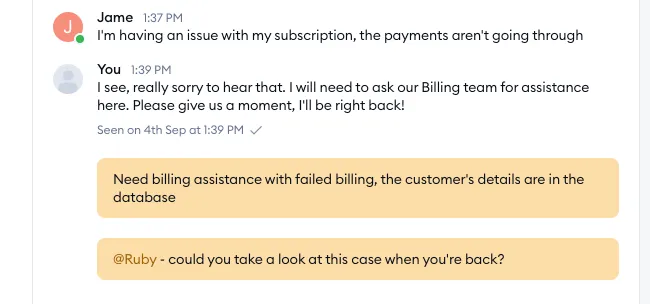
It is possible to add internal notes inside live conversations, similarly to how they work for tickets. This allows you to leave information or comments that will be invisible to the customer, but visible to any agent who views the conversation. You can also use internal notes to mention agents directly, pinging them to view the conversation (without actually transferring the chat to them completely).
Please see this short guide for more details on using internal notes and mentions in general.
Solving and leaving conversations
Finally, when you consider the conversation finished, you can un-assign yourself from the chat at the top of the conversation panel. You can do that by clicking on the Solve button located at the top-right of your panel:
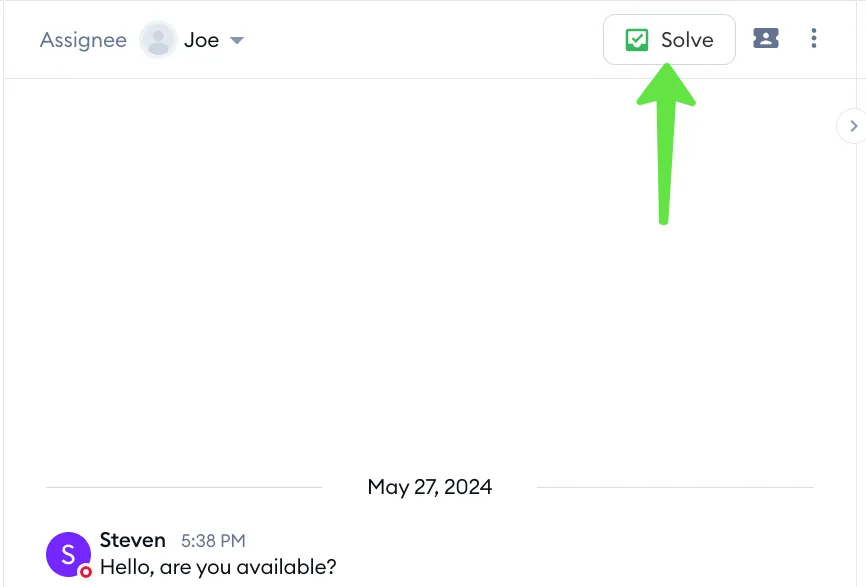
The Solve option allows you to close the conversation (this works for both assigned and unassigned conversations) and mark it as solved in our system.
When there's more than one agent assigned to a conversation, you can also leave it. Click on the three-dots icon (More options) at the top of the conversation and choose Leave. This allows you to step out of the chat while the other assigned agents stay in it - another agent can later mark the chat as solved when the conversation is finished and resolved:
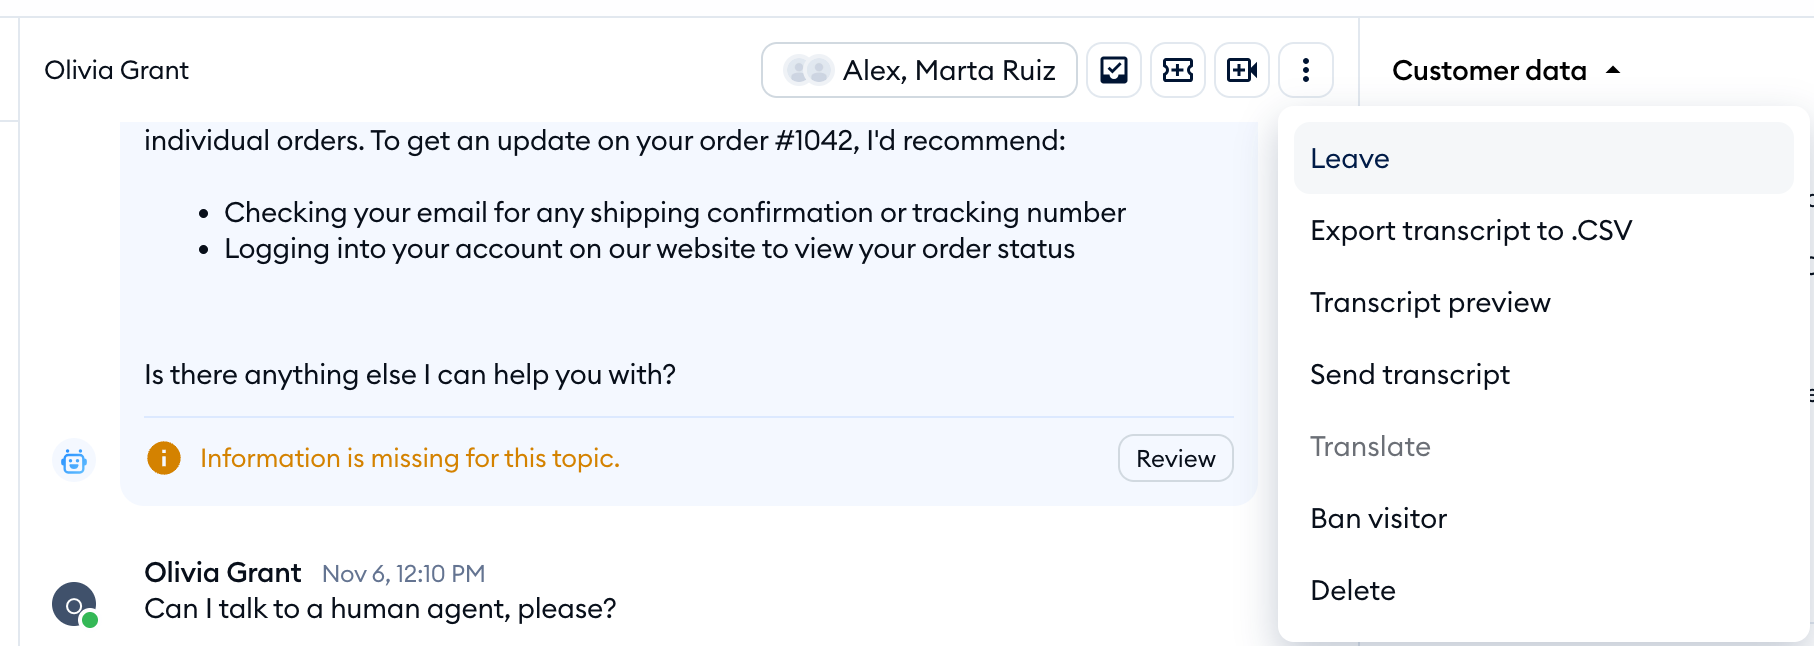
If all agents have left the conversation, the next time the same visitor sends you a message, it will be displayed in the Unassigned column, just like any other incoming chat. All agents who are currently online will see the notification and will be able to jump right into the conversation.
Please note: live conversations older than 30 days without a visitor's reply get solved automatically, even if you don't use the Workflow that solves conversations.
It is also possible to solve chats (and tickets) automatically. Please see this guide for more details.
Other actions at the top of a conversation
Next to the Solve button, the bar at the top of each conversation gives you a few more handy options:
- Create ticket (the ticket icon) - turns the chat into a ticket, with the visitor's email filled in if you have it. Handy when the issue needs a follow-up by email.
- Start video call (the video camera icon) - invites the visitor to a live video call. You won't see it in Messenger, Instagram or WhatsApp conversations.
- More options (the three dots) - here you'll find Leave (when more agents are assigned), Export transcript to .CSV, Transcript preview, Send transcript, Ban visitor and Delete.
- Show details (the panel icon on the far right) - opens the visitor's details on the right, if you've hidden them. See Information on the visitor below.
And when you'd like to come back to a conversation later, use Mark as unread in the three-dots menu next to the conversation in the list.
Deleting conversations
To delete the conversation, click on the three dots next to the conversation and press Delete (you'll also find Delete in the More options menu at the top of an open conversation):
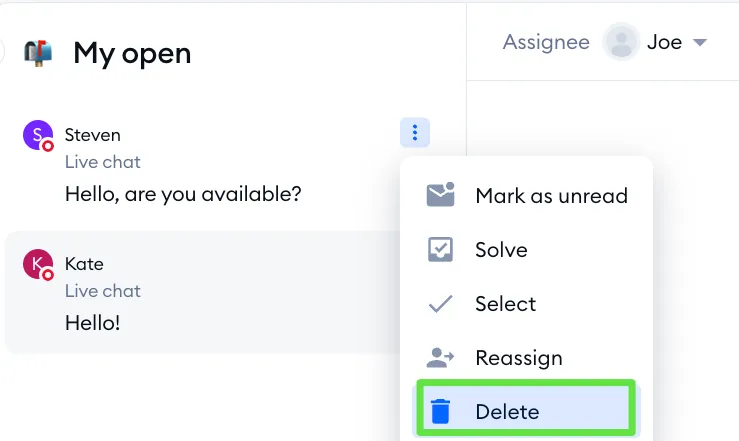
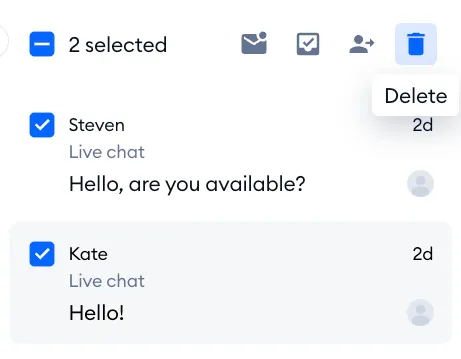
To delete multiple chats from your list, click on the three dots next to the conversation and press Select (or just hover your mouse over a chat and check the box that appears). You can either select multiple chats or hit Check all from the bar at the top:
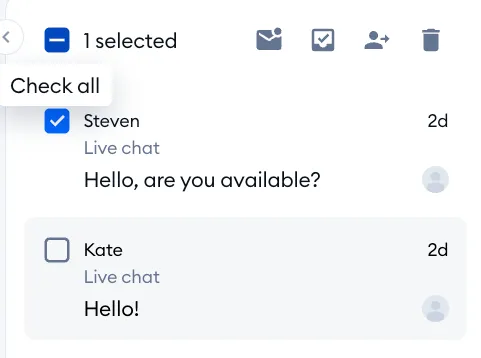
... and then, you can use Delete:
Using the Actions menu (Search actions)

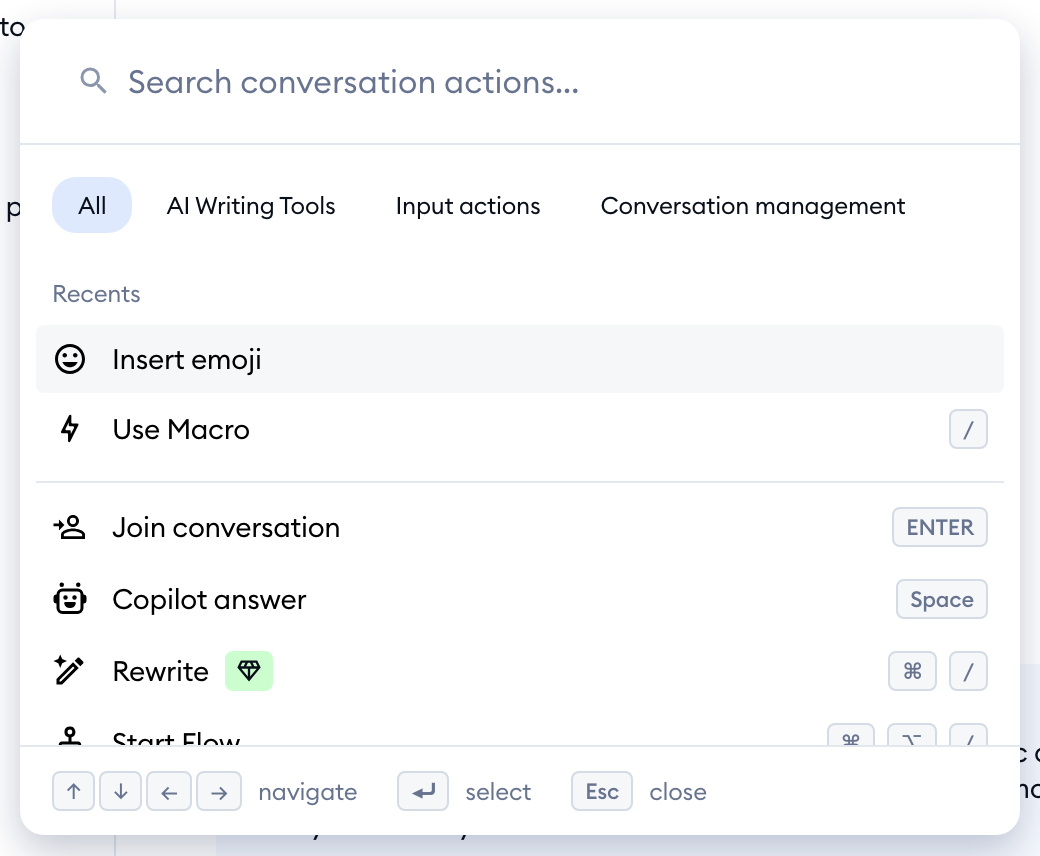
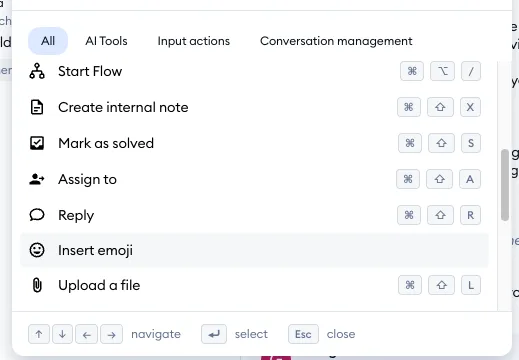
You can browse through all the available common actions, including (but not limited to) using Macros, starting Flows, creating internal notes, solving conversations, or re-assigning to other agents.
You can navigate the entire menu using your keyboard, and perform most of the actions using keyboard shortcuts.
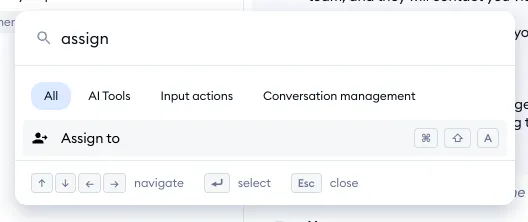
If you know the action you're looking for, you can also use the search tool at the top:
You can browse the actions via separate tabs as well.
- The All tab lists all of the available actions, with the ones you used most recently on top, under Recents.
- The AI Writing Tools tab lists only AI-driven actions, like Copilot or Rewrite.
- The Input actions tab only includes actions associated with chatting directly, like using Macros, emojis, links, or sending files.
- The Conversation management tab, on the other hand, lists actions that are associated with handling chats and managing your workload, e.g. solving, tagging, creating tickets, or leaving notes.
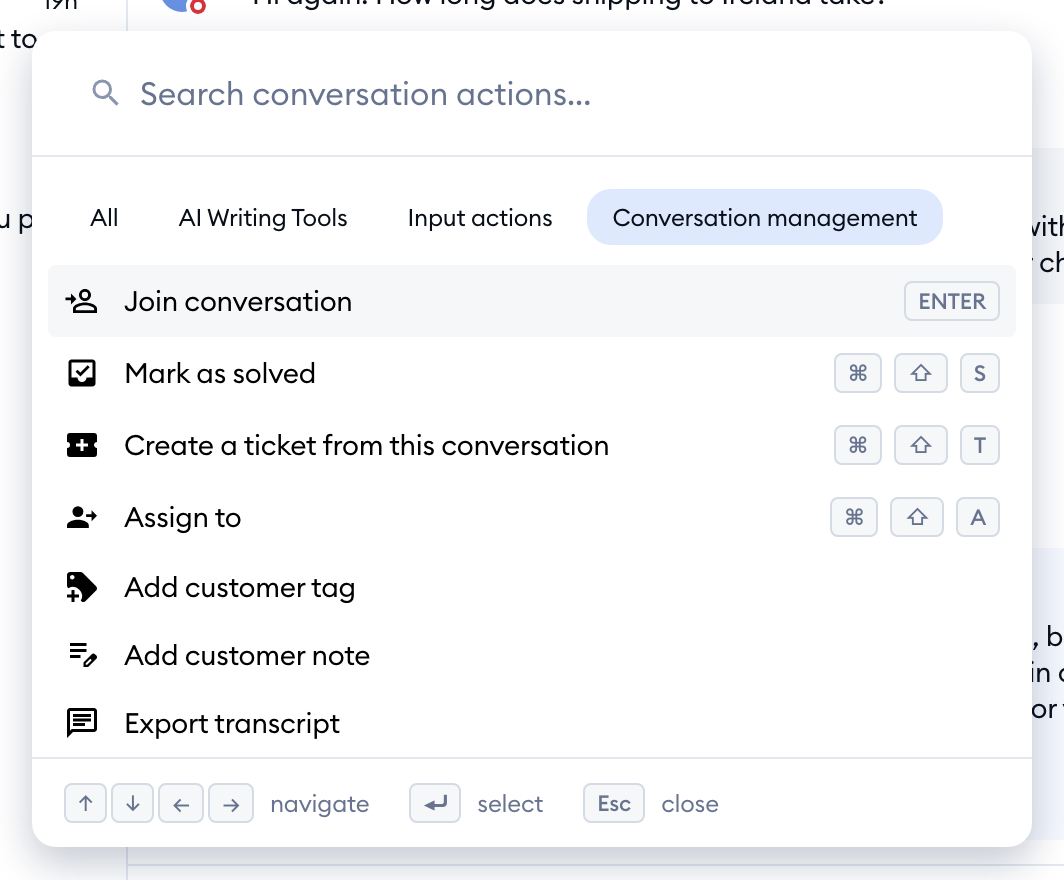
When you choose a specific action and click on it, it will be performed immediately; the same happens when you use the associated keyboard shortcut. For the full list of shortcuts, see Keyboard shortcuts and the Search actions menu.
Bulk actions
You are not limited to performing certain actions just on single chats, one by one - you can manage multiple chats in bulk as well!
You need to start by selecting just one chat first. In your My open folder, hover your cursor over a chat you'd like to select, and you'll notice a box appear on the left - click on it to select the conversation:
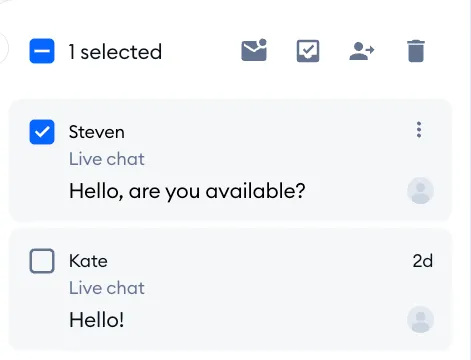
Alternatively, you can click on the three dots menu next to a given chat, and hit the Select option:
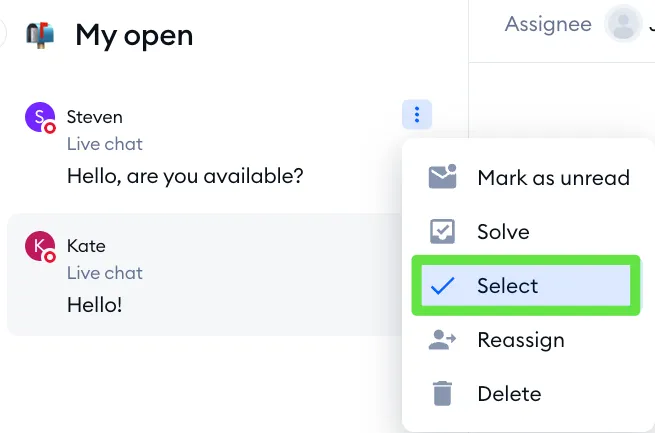
That way, you will be able to manually select any of the other chats that are currently assigned to you. You will also notice a new set of options at the top:
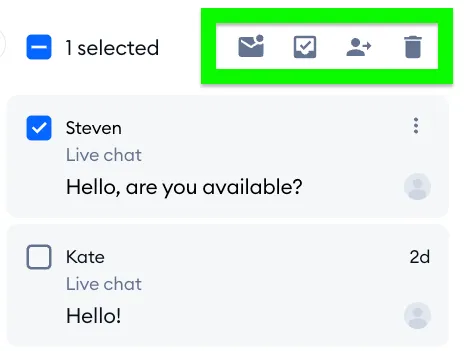
You can use the Check all option (on the left) to automatically select all of your currently assigned chats. This way, you can perform the actions you need (marking the chats as unread, solving, reassigning or deleting them) to all those selected chats at once.
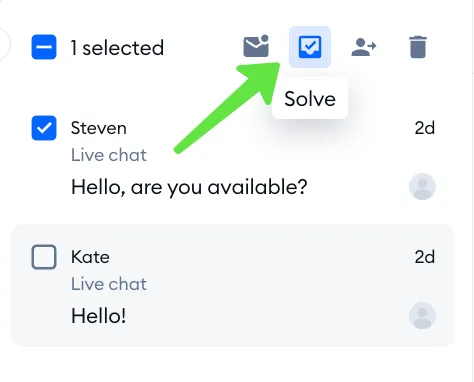
You can do the same for chats that have not been picked up by anyone yet - in the Unassigned folder. Use the checkboxes (or the three dots menu) to select one unassigned chat, and then either select other chats manually or use the bulk-action options at the top, same as with earlier examples.
Here, you can Assign multiple chats with the method above, Solve the ones that don't need an answer, or - if you wish - delete the selected unassigned chats permanently right away.
Chat history
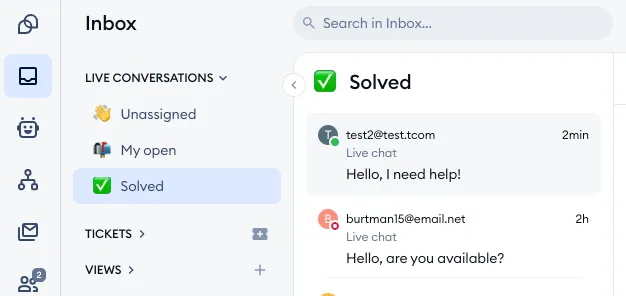
You'll see all archived conversations that you've solved in the Solved folder under the Live conversations section. Of course, you will find a similar Solved folder for your email communication - in the Tickets section.
If you would like to learn more about how to search for your archived chats, see our article about chat history.
Information on the visitor
You'll find everything about your visitor in the details panel on the right of the conversation. If it's hidden, click on the Show details icon in the top-right of the conversation (or press ] on your keyboard); to hide it again, use Hide details.
The Customer data section shows the visitor's name, email and phone number, their tags and contact properties, as well as their Location (with a link to the map), Browser and IP Address. If the Pre-Chat Survey is enabled, all information that the survey collected will display there (e.g., a phone number). Below, you'll find the visitor's Chat history, their Customer satisfaction rating, and - depending on your plan and integrations - sections like Shopify:
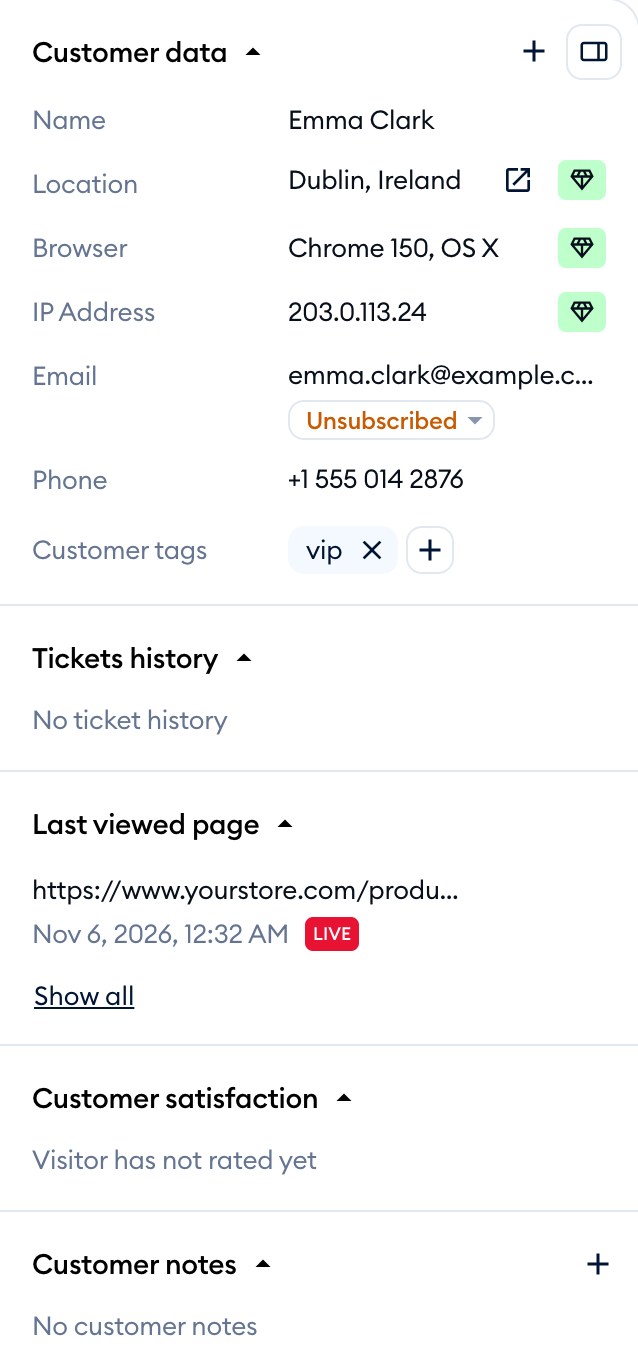
Please note: if the location, browser and IP address are blurred, visitor info isn't included in your current plan - click on a blurred field to see how to unlock it.
Viewed pages
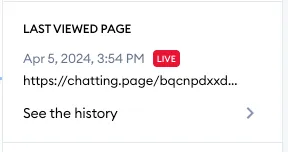
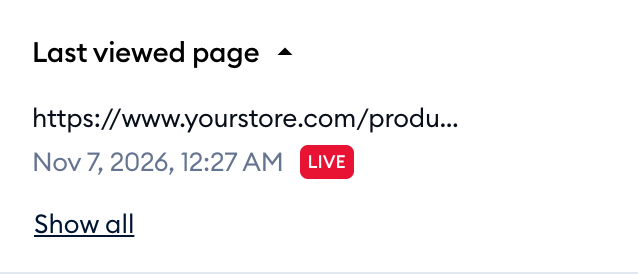
The Last viewed page section displays the most recent page accessed by the visitor within your website (as long as Tidio is installed there), with a Live badge while they're online. This allows you to identify what the visitor is browsing, like a particular product page. Click on Show all to see the full history - the list also includes a timestamp for the specific page's visit.
Please note: the viewed pages history is available on the Growth plan and above - on other plans, the page addresses are blurred.
Customer notes
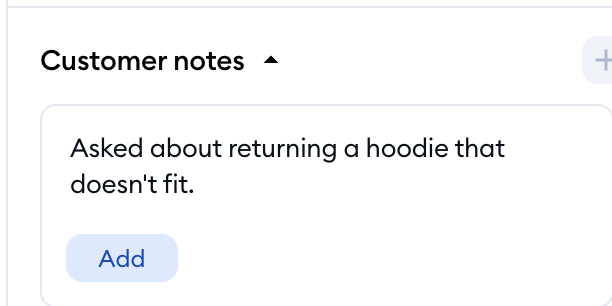
The Customer notes section allows you to leave useful notes and comments about the customer - click on the + icon (Add customer note) to write one. That way, you can include important information about the customer, which may be helpful for other agents later on. Customer notes are available on the Growth plan and above.
Further reading
- The Inbox - a powerful interface for managing your conversations
- Keyboard shortcuts and the Search actions menu
- Macros
- Internal notes and mentions
- Live Video Calls
- Chat history
- Allow notifications in your browser
