Macros are a great way to answer your customers more efficiently. You can prepare short messages, links, or even entire paragraphs in your database and call upon them anytime during a chat or ticket responses (or when composing an internal note). Macros can be labelled or made private for easy grouping and categorization, and you can also add a degree of automation to your macros (reassigning, changing ticket status, or adding tags).
In this article, you'll learn:
- What the benefits of macros are
- How to manage your macros
- How to use macros in chats and tickets
- How to save a message as a macro
- How to use automated actions in macros
- How to start a flow from inside a conversation
Macros and their benefits
Macros are essentially pre-defined responses to the most common questions your website visitors or customers may have. Of course, macros can also be used for internal notes. Using macros comes with several main benefits:
Save time
Pre-defined macros can improve your efficiency and reduce your chat handling time while using them when handling tons of questions every day.
Confidence
Boost your team's confidence in solving the most common customer issues. Help your agents be prepared for your customer's questions with ready-to-use answers.
Control
Your brand voice matters, and so do the messages your agents send on behalf of the business. A macro can help you set the tone of the messages to ensure customer satisfaction.
Easy management
You can organize your macros with labels that allow you to create separate categories for easy management and increased searchability. Macros can also be set as private, so that each agent can have a set of their own macros as well.
Automation
You can add some basic automatic actions to your macros, and they will be performed upon use. For example, a macro can reassign the current chat or ticket to a specific agent, or add a tag to the customer; in tickets, it can also change the ticket's status and add a ticket tag.
Please note: Macros are available on the Growth plan and above (see Which upgrades do I need?). On a lower plan, clicking on Create macro, or opening your macros in a conversation, shows the upgrade window instead.
Who can create and edit macros depends on each agent's role - it's the Macros permission (see Permissions). Agents who can only view macros will see the Create macro button grayed out.
Navigating the Macros section
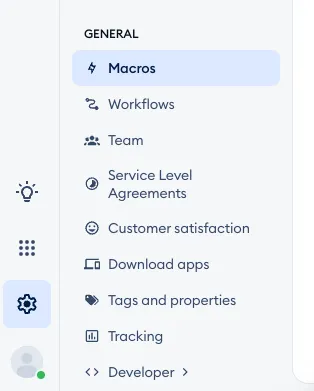
To manage all your macros, head over to the Settings > Macros section:
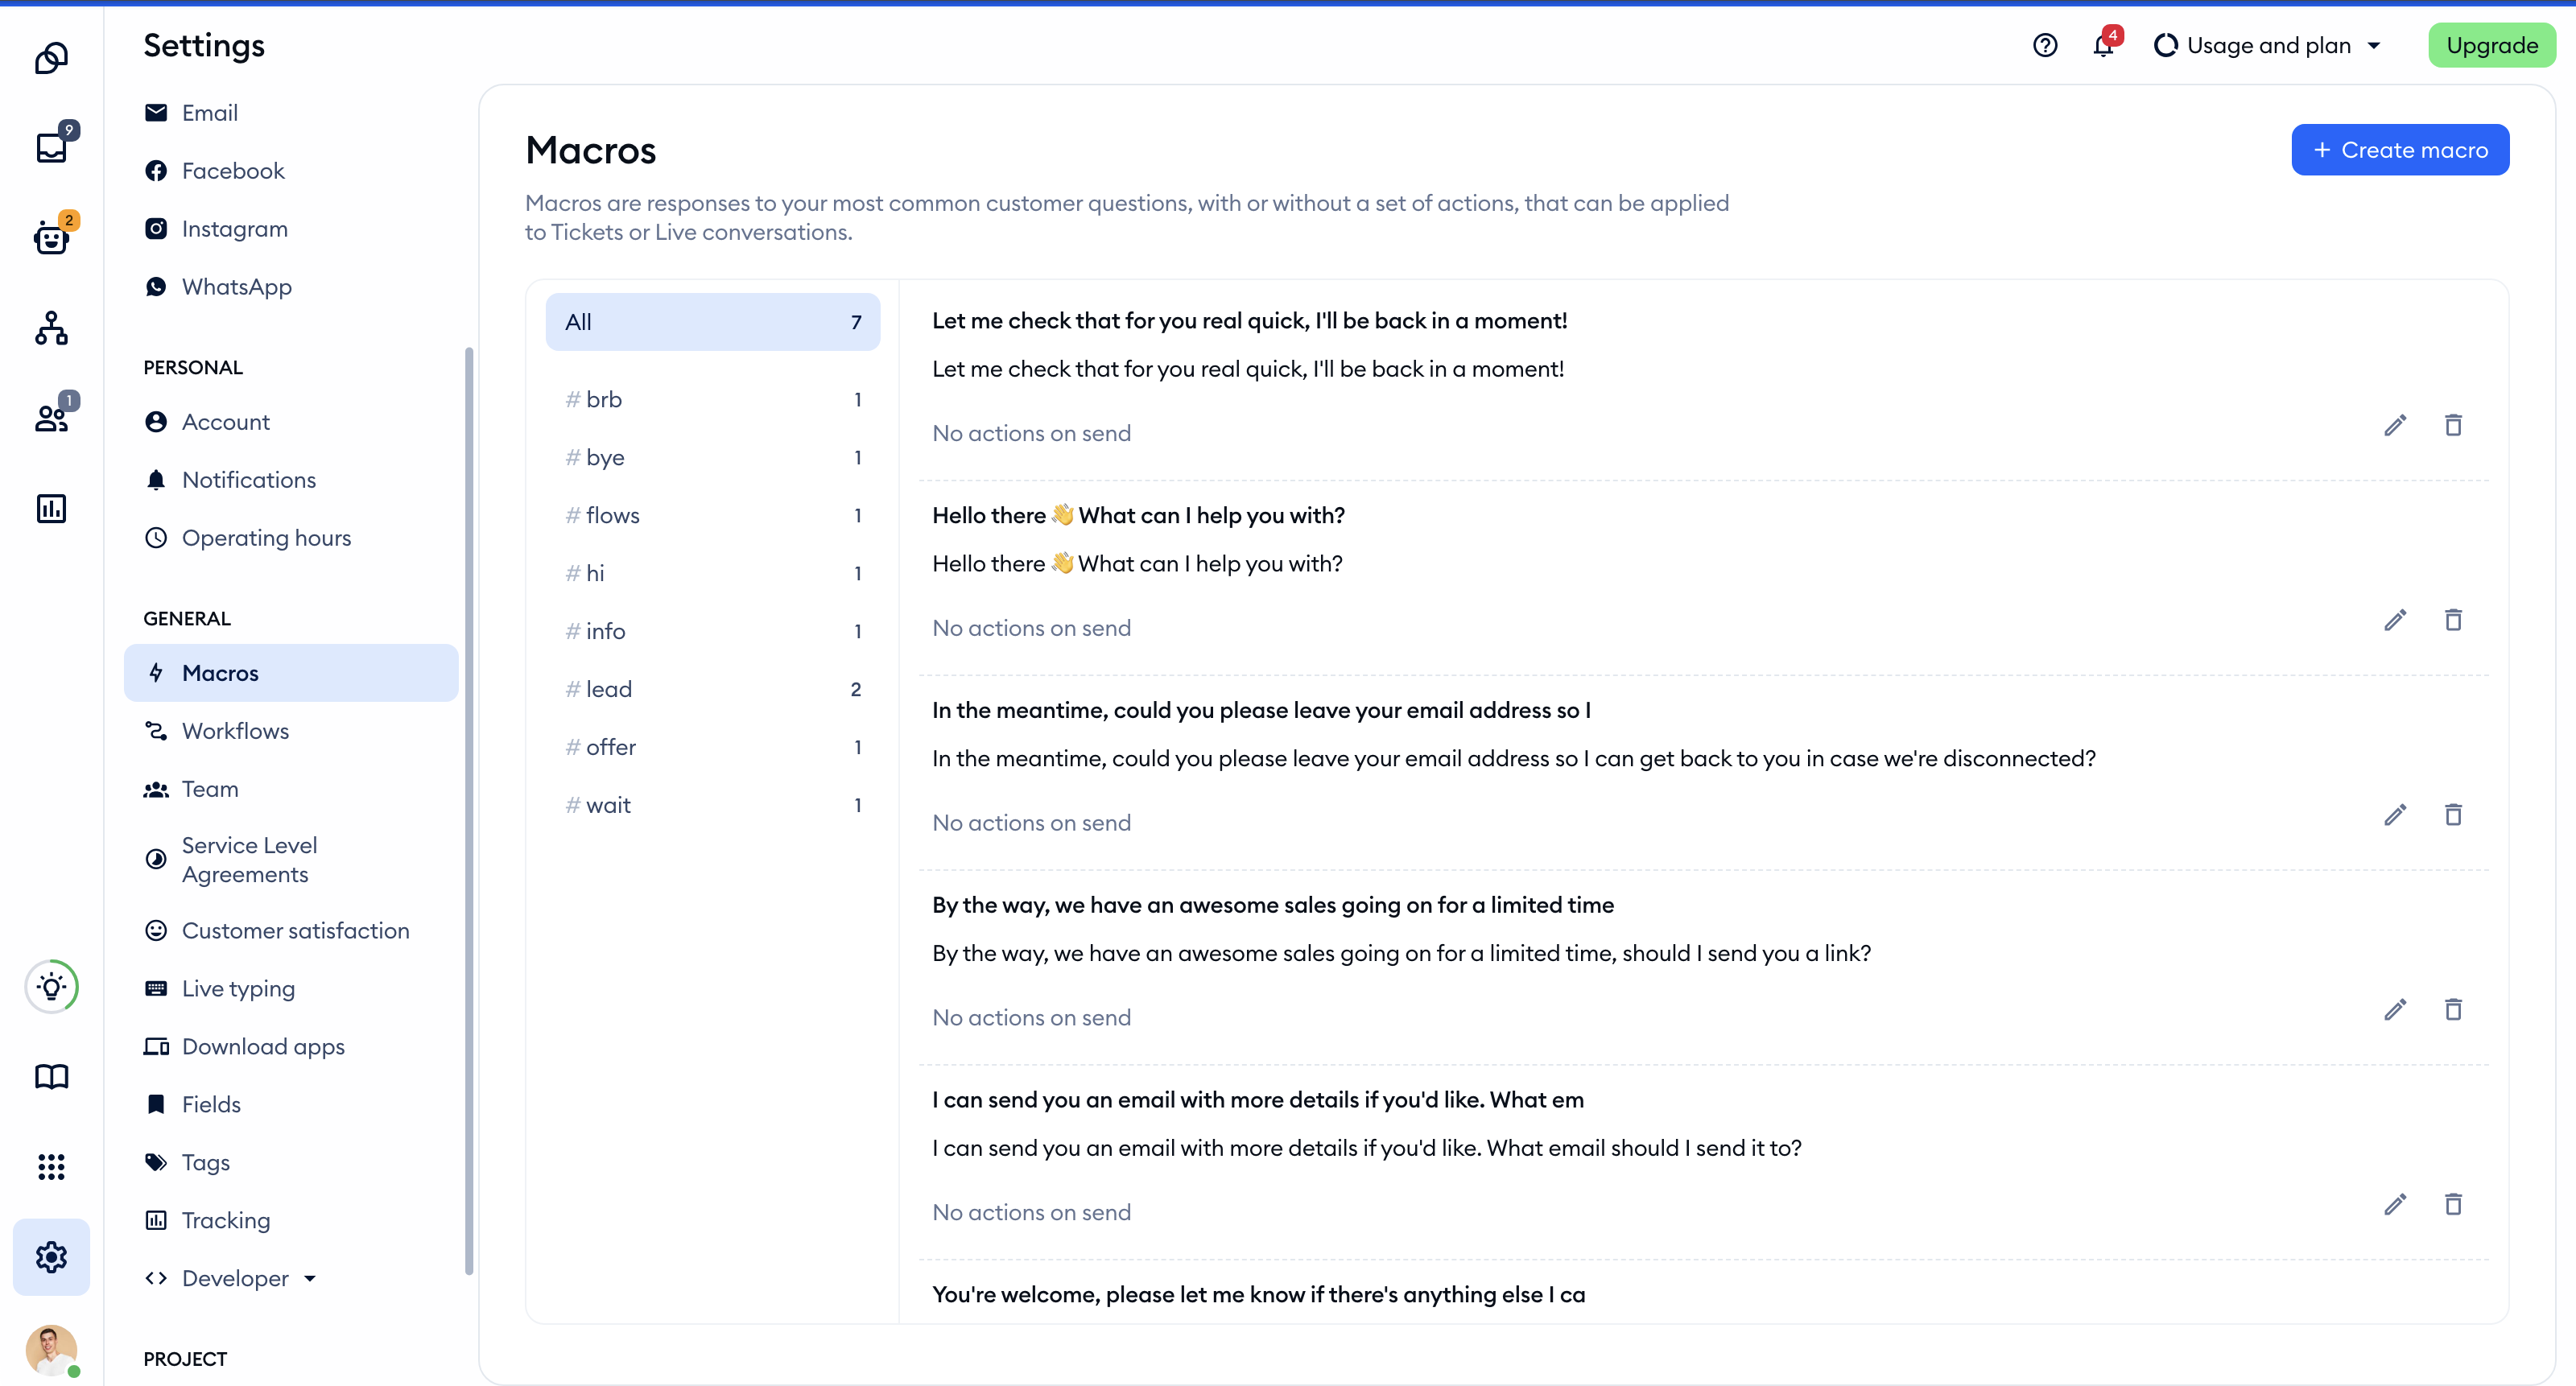
Inside, you will see a list of all your existing macros, which you can also browse by labels for easier navigation. Naturally, you can add new macros, and edit or remove the existing ones.
Click on the Create macro button in the top-right to add a new one from scratch:
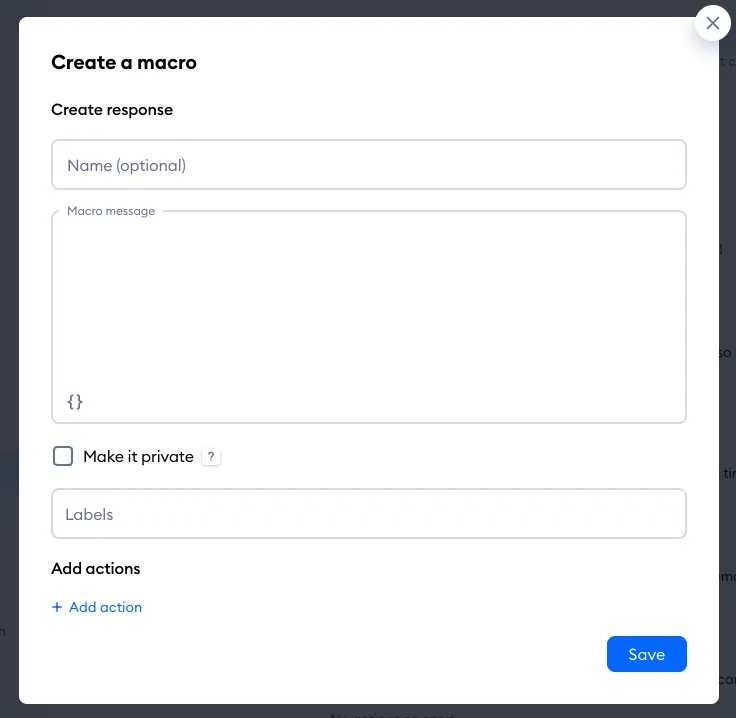
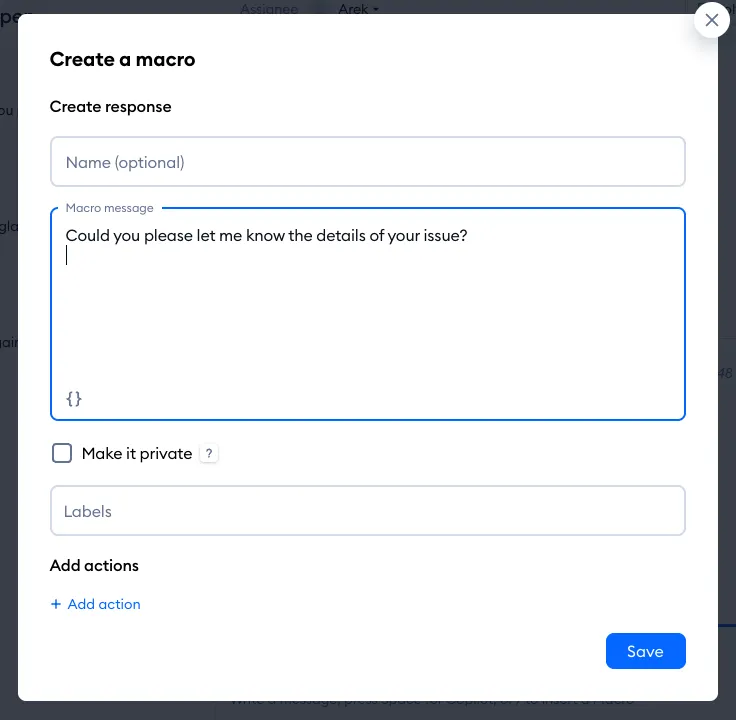
You'll see the Create macro window, where you can give your macro a name (Name (optional)), type in the Macro message itself (at least 5 characters), and decide whether you wish the macro to stay private with Make it private (visible only to you) or visible to all agents. You can also add Labels for quicker browsing later on, or even add basic actions to be performed by the macro under Add actions:
While a macro name is optional, it may prove very useful: it allows you to find the macro just by typing in the name during a conversation (or when composing a ticket response). You can take advantage of this by naming your macros in a short and clear way. Without a name, the macro can only be found by browsing the list manually, or by typing in one of the words used inside the macro content itself. We cover these options in this section of the article.
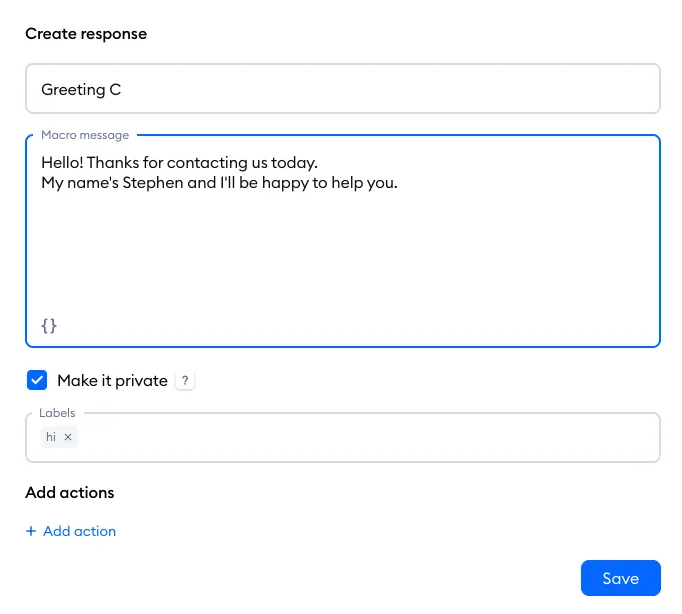
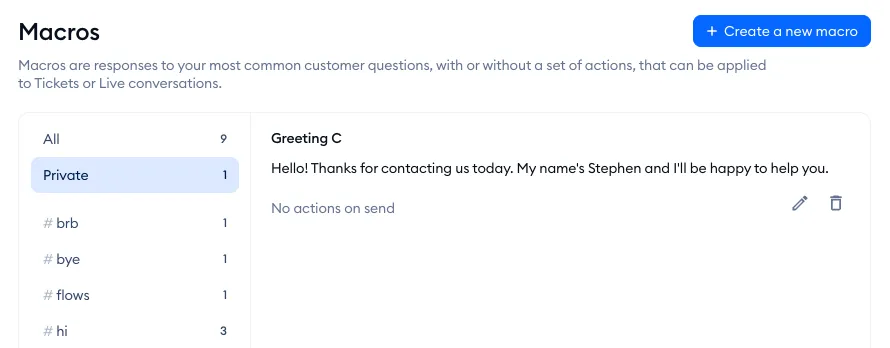
If you've marked any macros as private, they will be shown in their own category, visible only to you:
You can use labels to organize the macros into categories based on the customers' questions, to find them quickly when working on a reply. You can the choose already existing labels from the drop-down list after clicking on the Labels field:
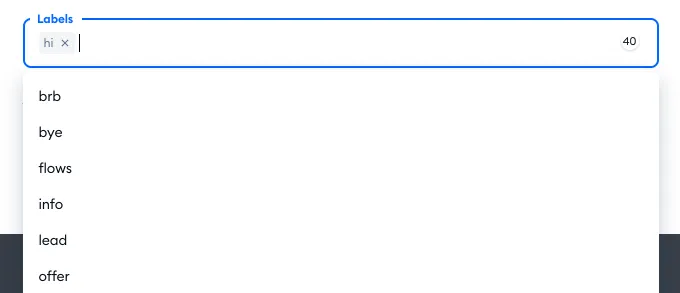
... or create a new label by typing it in:

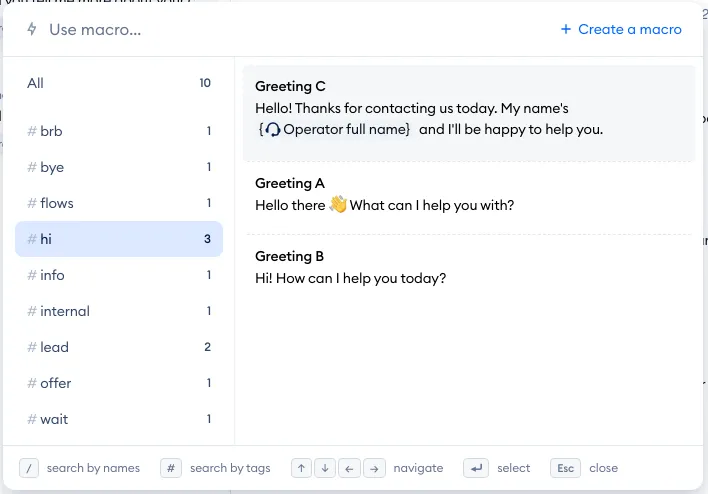
Apart from letting you organize your macros overall, labels help you find the right macro faster when browsing your list, especially if you have many different macros:
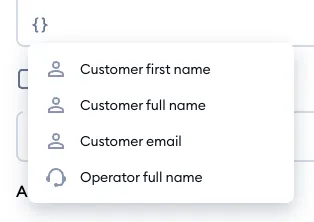
In the macro message, you can also add certain variables - click on the curly brackets icon (Add variable) in the bottom-left of the message field:
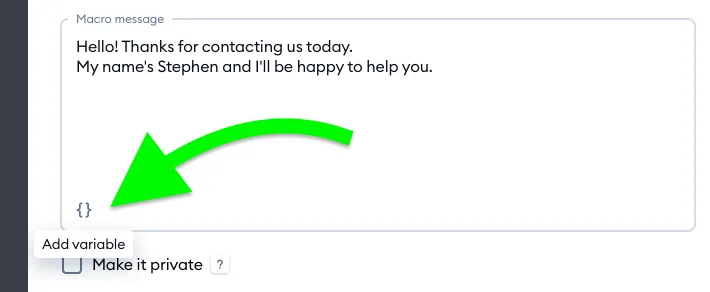
Variables allow you to add information that is saved in your database. There are four of them: Customer first name, Customer full name, Customer email and Operator full name (the agent who uses the macro):
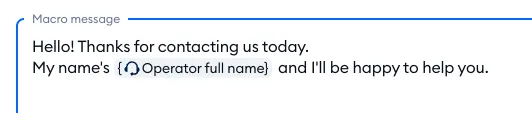
This way, your macro will dynamically fill in the information (if available) upon use - which lets you create more flexible macros for a variety of situations. If a piece of information is missing (e.g. the customer hasn't shared their email yet), that variable is simply left blank, so it's worth reviewing the message before you send it.
Using macros
You can use your macros for both live conversation and ticket responses; they are equally available for both channels. You can also use macros for your internal notes, allowing your agents to quickly compose and fill out the necessary details.
Macros can also perform certain simple actions, which we cover in this part of the article.
You'll also find Use Macro in the Search actions menu (Cmd + K, or Ctrl + K on Windows) - see Keyboard shortcuts and the Search actions menu. And of course, your macros are available in the Tidio mobile app as well.
Chat
To send a macro during a chat with your customer, click on the Macros icon on the lower-left of your conversation:
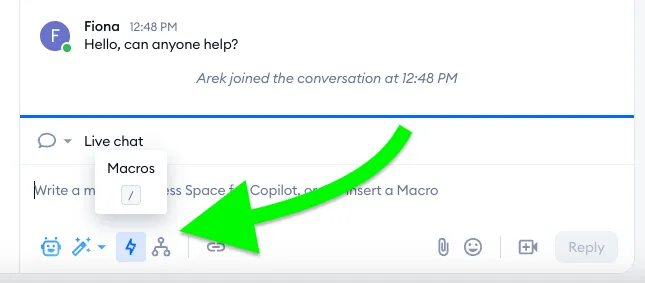
... or type in the "/" (forward slash) into the text box in your conversation panel.
You can now choose a macro from the full list, or look for the categories on the left to quickly find what you need:
- /hello will find you all the macros that include the word "hello"
- /order delivery will find you all the macros containing the phrase "order delivery"
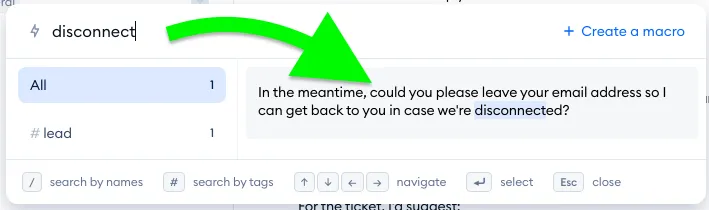
Please note that using a single forward slash key ("/") will let you find macros based on their content only - not based on their label, and not based on their title.
While you cannot search by label this way (labels are only used for browsing the list manually), you can search your macros by name. To do that, you need to type in two forward slashes ("//") into your message input field instead (or, if the Macros list is already open, add a single forward slash to the search at the top) - this allows you to search your macros by their names only:
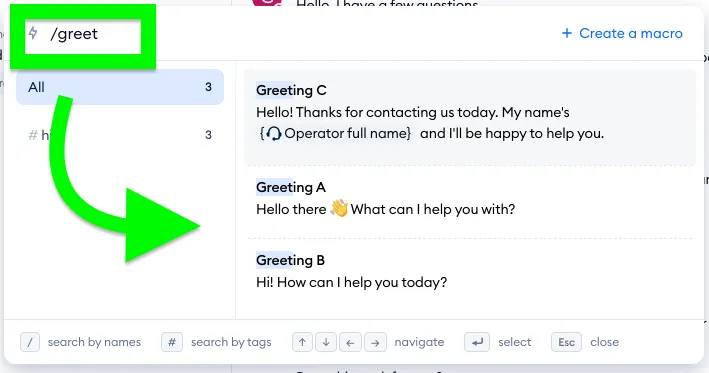
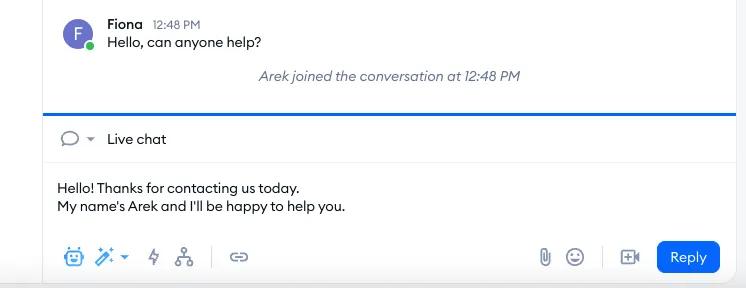
When you find the macro you need, simply click on it - and the message will be added to your text input field. You will be able to review it and change anything you like, and then send it as you would send any other chat response.
Tickets
You can also use macros when composing emails in Tidio (either responding to existing tickets or creating new ones). In general, the feature works the same way as it does in live conversations (covered above).
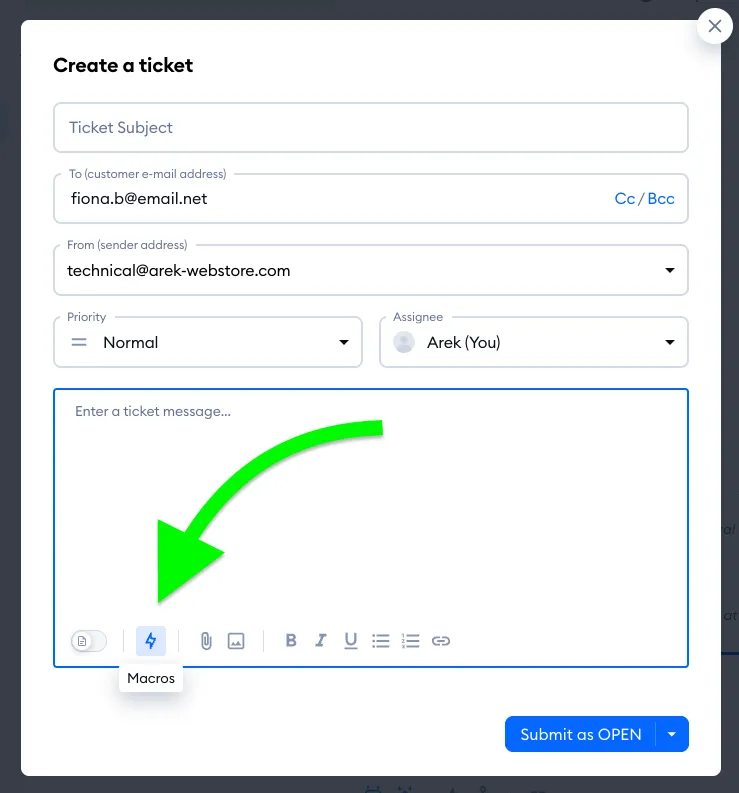
Inside the ticket creation view, you will find the Macros icon in the bottom-left:
You will find the same icon available when replying inside existing tickets:
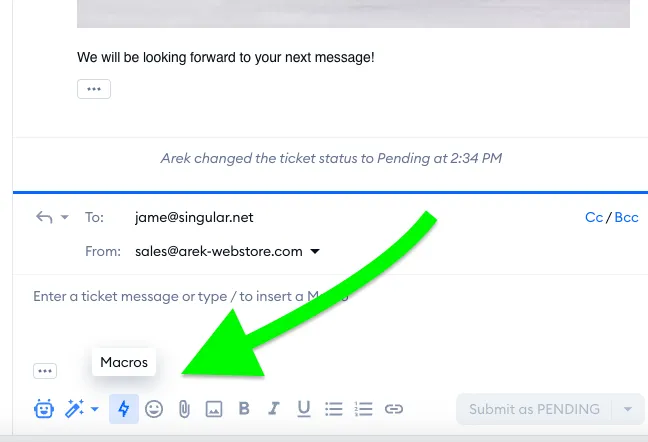
Naturally, you can also use the forward slash ("/") method for quicker macro browsing, just like you would during live conversations.
Internal notes
One more use for macros is for composing internal notes more quickly. This can be especially useful if you regularly need to leave specific information in this form, or if your internal notes need to be structured in a specific way each time. In the long run, using macros for these types of notes can save you a lot of effort.
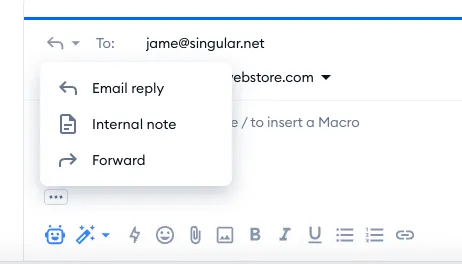
As a quick reminder, you can compose an internal note by selecting it from a list - after you click on the icon in the top-left of your live chat or ticket response. You can learn more about internal notes in this separate guide.
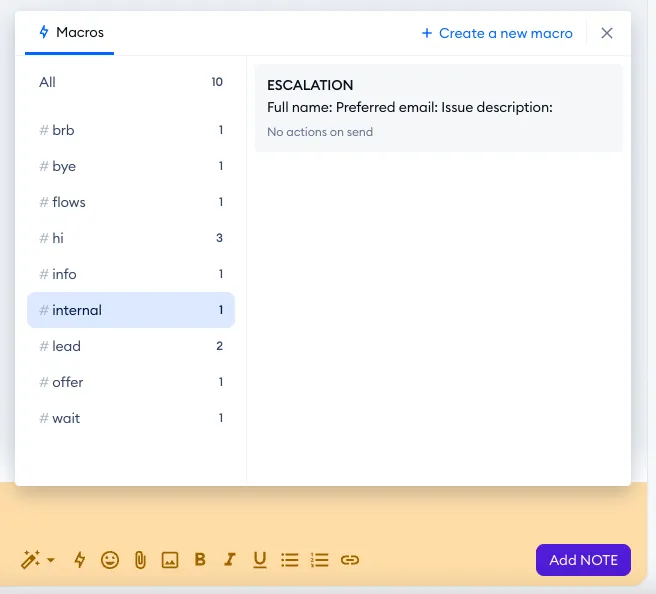
You can find and select a macro using the same methods as covered earlier - either by browsing the Macros list manually, or by typing in the forward slash key:
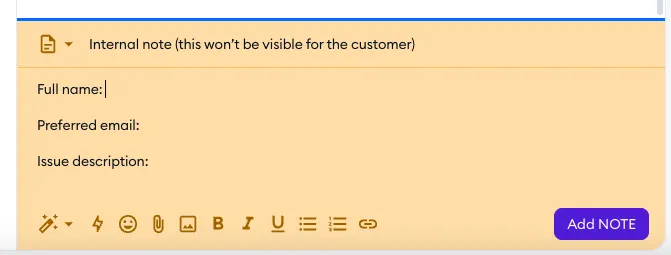
In this example, the macro is basically a form for the agent to fill out with necessary data. You can change the text, e.g. by filling out any relevant details about the customer or your communication with them:
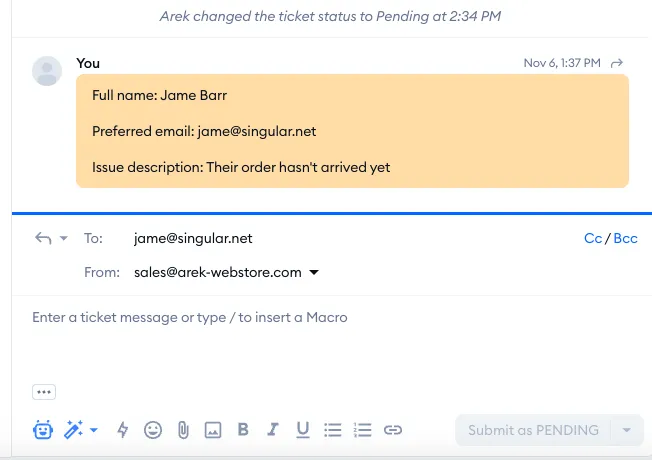
Once the note is added, it becomes visible in the conversation (or ticket thread), with all the text you've composed:
Creating a macro from within a conversation
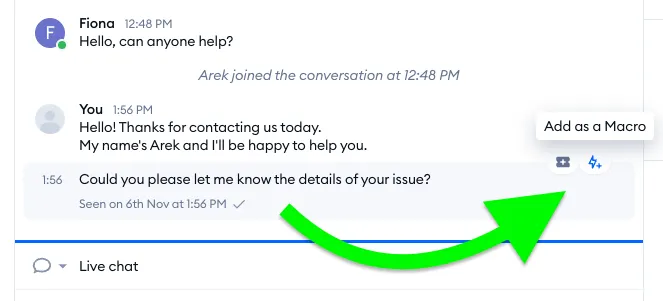
Apart from creating macros from inside the Settings > Macros section, you can also create them directly from your live conversations. Please note that this is not available for ticket responses.
To add a new macro from a live conversation, hover the mouse over a message that has already been sent (either by an agent or by the customer) and click on the icon on the right - its tooltip reads Add as a Macro:
You'll see the usual macro creation window pop up, allowing you to edit the macro in detail:
Using automated actions
Macros give you the option of adding simple actions that can save you even more time and effort than a basic macro would on its own.
When creating (or editing) a macro, notice the Add actions section at the bottom:
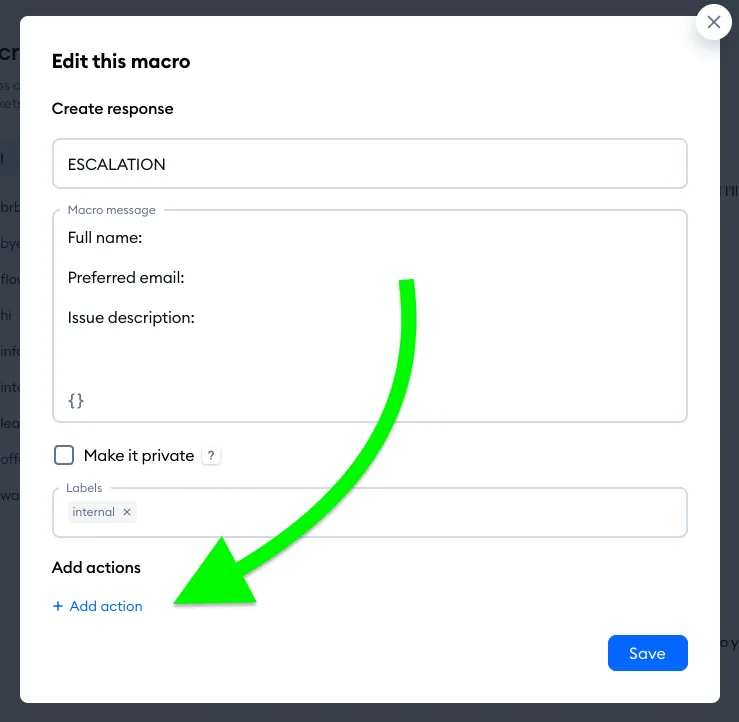
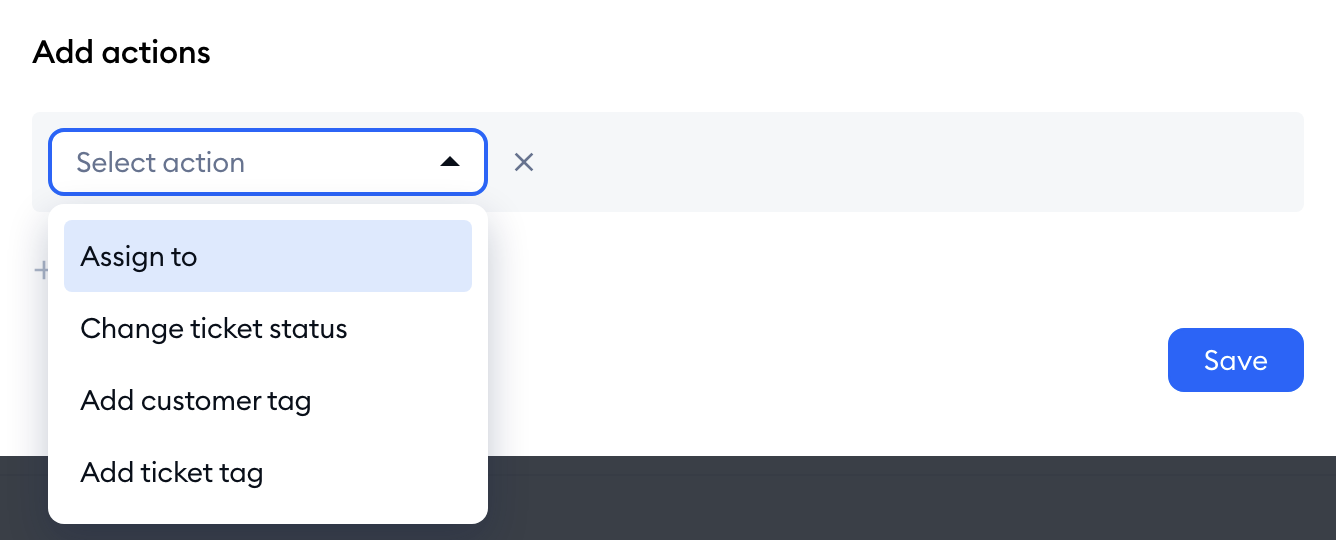
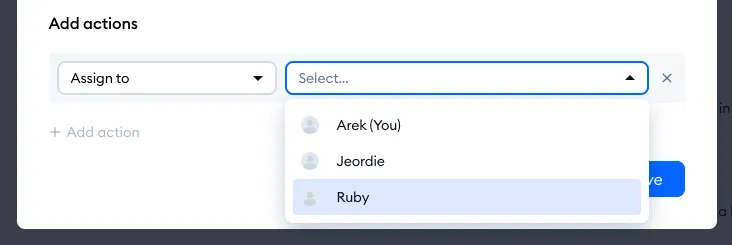
Click on Add action, and you will see a list of available actions to choose from:
- Assign to
- Change ticket status
- Add customer tag
- Add ticket tag
Please note: in live conversations, a macro only runs Assign to and Add customer tag. Change ticket status and Add ticket tag work in tickets only - when you use the same macro in a live conversation, these two actions are skipped.
For example, the Assign to option allows the macro to re-assign the current conversation (or ticket) to a specific agent. This can be useful when you need to escalate an issue to a particular team member.
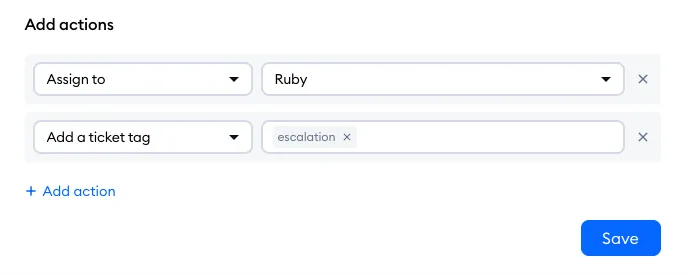
You can add multiple actions to a single macro - like adding a ticket tag:
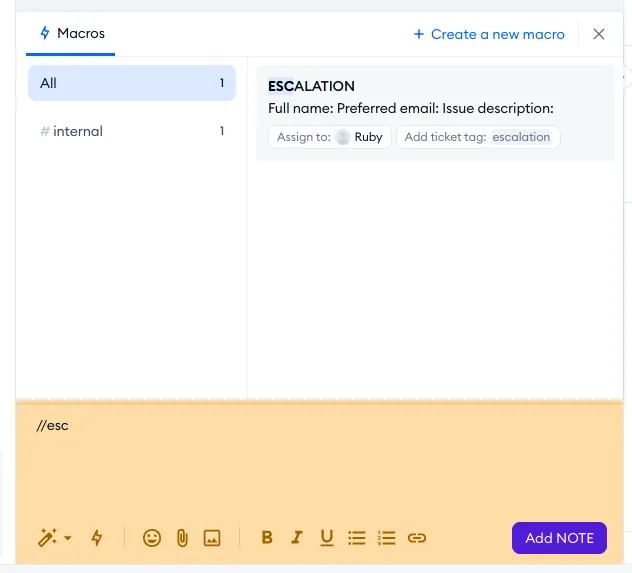
When browsing your macros, the associated actions will be listed along with it:
The macro's actions will be visible above your input field as well, under Actions on send:, while you are composing your note or response. If you don't want one of them to run this time, click on the X next to it to remove it before sending:
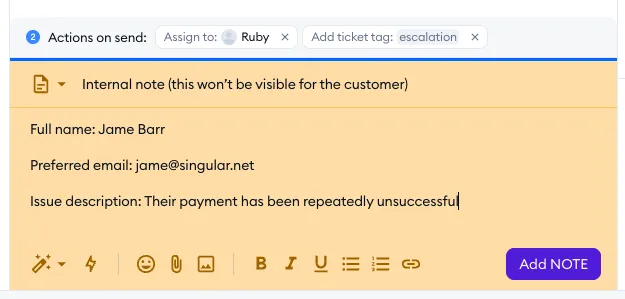
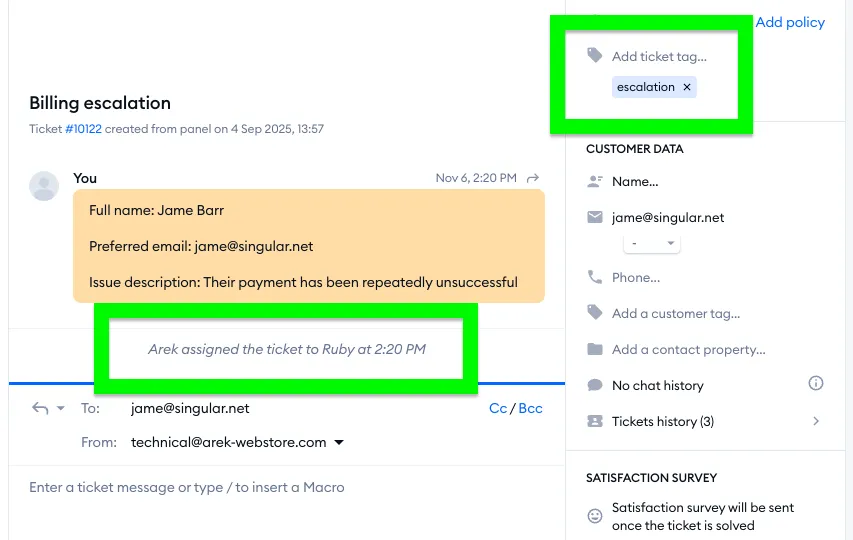
Once the macro is used, all of its actions will be carried out at the same time. In our current example, the macro assigned the ticket to another agent and added a ticket tag:
Starting a flow manually
It is possible to start a flow inside a live conversation you're currently in - this may be helpful if you had prepared an automation that would help you or your customer during your interaction. Please note that this feature is not related to macros directly; it's simply an alternative option you might like, available through a similar menu, and using similar methods.
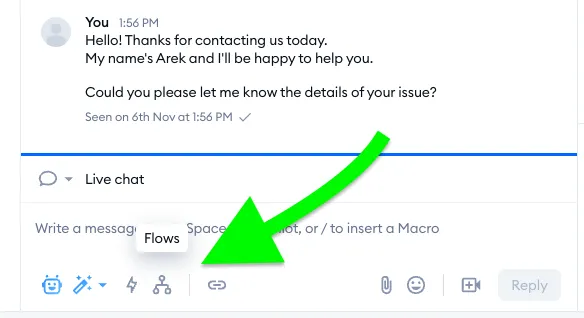
You can trigger a flow while you chat by opening the Flows list at the bottom:
A window will pop up, and you can then choose a flow from the list, if any such flow is available:
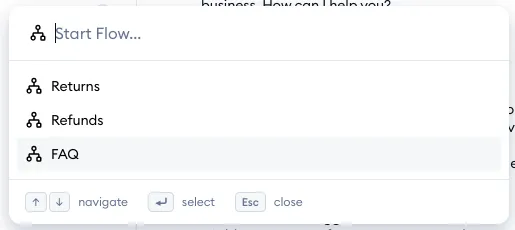
The general use method is the same as with macros; you browse a basic list of all flows that use the trigger called 'Agent starts the flow', and you can search for specific flows by name for quicker navigation.
Please note: once you click on a flow, it will be executed immediately!
If you'd like to learn more about creating such flows, you can see our article about flows in live conversations.
Further reading
- Permissions
- Keyboard shortcuts and the Search actions menu
- Internal notes and mentions
- Which upgrades do I need?
