If you're subscribed to one of our paid plans, you can manage and edit your subscription details (as well as the available packages) anytime in Tidio's Billing section. If you're using Tidio for free, you can still access this section to see more details about your usage.
In this article, you'll learn:
- How to navigate the Billing section
- How to check and modify your subscription (paid packages)
- How to add or change add-ons
- How to check your Tidio usage over time
- How to change your billing details (invoicing and card) and download invoices
- How to cancel your subscription
Please note: if you're on the Plus or Premium plan (or another custom plan), your subscription is managed by our dedicated team, so you won't see the Cancel subscription button. Instead, the Subscription tab may show Need to make changes to your plan? Contact your Customer Success Manager to cancel, upgrade, or modify your subscription - just click on Contact us to email our Customer Success team. You can also reach out to your dedicated manager directly, or to the Tidio support team at support@tidio.net.
Navigating the Billing section
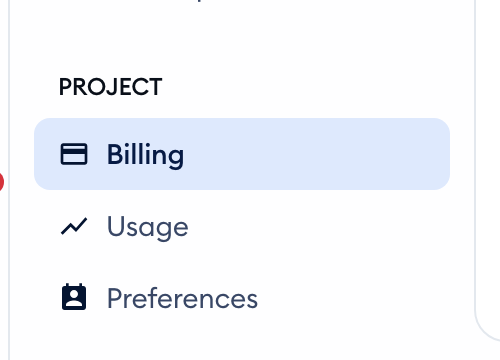
To manage your Tidio subscription details, head over to the Settings > Billing section:
Inside, you will find two tabs, each responsible for different aspects of your subscription:
- Subscription (current packages, quotas, status, billing date, and add-ons)
- Billing details (invoicing, card details, and US residency information) - you won't see this tab if you pay for Tidio through Shopify
Your usage over time has its own page: Usage, right below Billing in the Project section of Settings. You can also open it from the Usage and plan menu at the top of the panel - just click on View usage details.

Please note: Billing and Usage are only available to the project owner and agents with the Billing permission (see Permissions). Other agents don't see them in Settings.
Checking and modifying your subscription
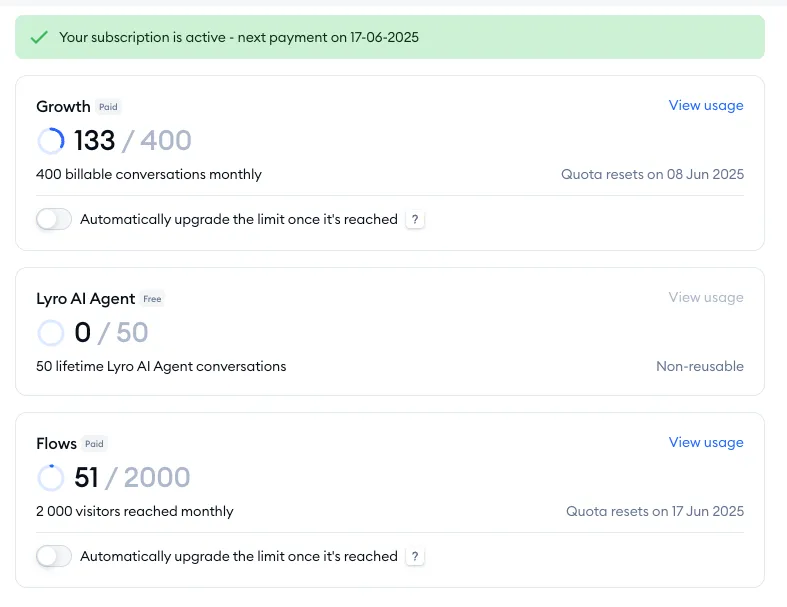
In the Settings > Project > Billing section, you can view your current subscription status and package details - open the Subscription tab for that. Inside you will find the three separate packages listed along with their current quotas and quota reset dates (if applicable):
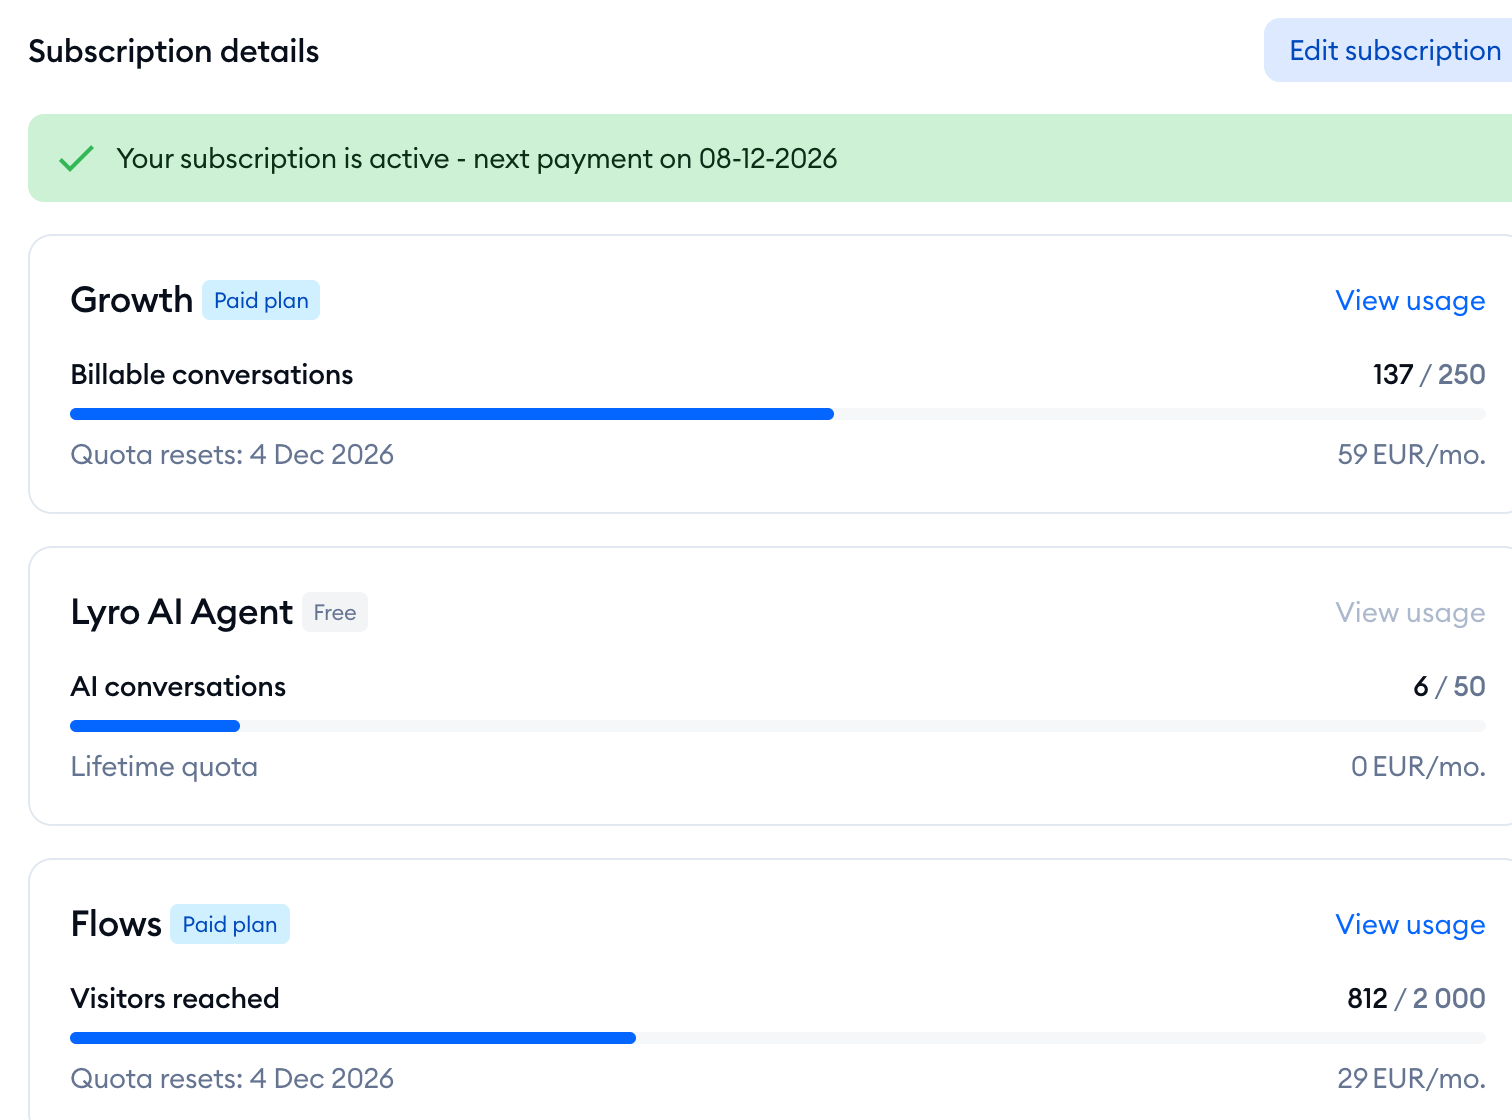
If you're already subscribed to any paid package, the Subscription tab will include a clear indication about your subscription's current status as well as its next billing date. Where applicable, you will also see the Automatically upgrade the limit once it's reached switch under a package, to enable/disable automatic upgrades (it isn't shown if you pay annually; please see this guide for more details on how this works):
Of course, you also get the option to modify your subscription. To do that, click on the Edit subscription button on the right:
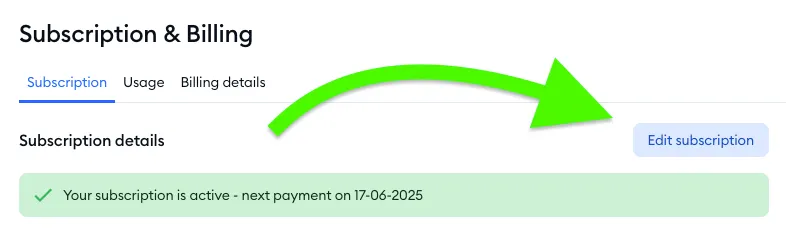
This will allow you to select new packages to purchase, or upgrade/downgrade any current packages you may already have. For the steps, please see Upgrading your Account.
During the 7-day full-featured trial, the Subscription tab also shows how many days you have left, along with the Downgrade button at the bottom - in case you'd like to switch to the free version right away.
Managing your add-ons
Below your packages, the Subscription tab lists your add-ons. An add-on you already have shows the Paid add-on badge, your next billing date and the Edit add-on button. The ones you can still get are listed in the Add-ons section, each with its own Upgrade button:
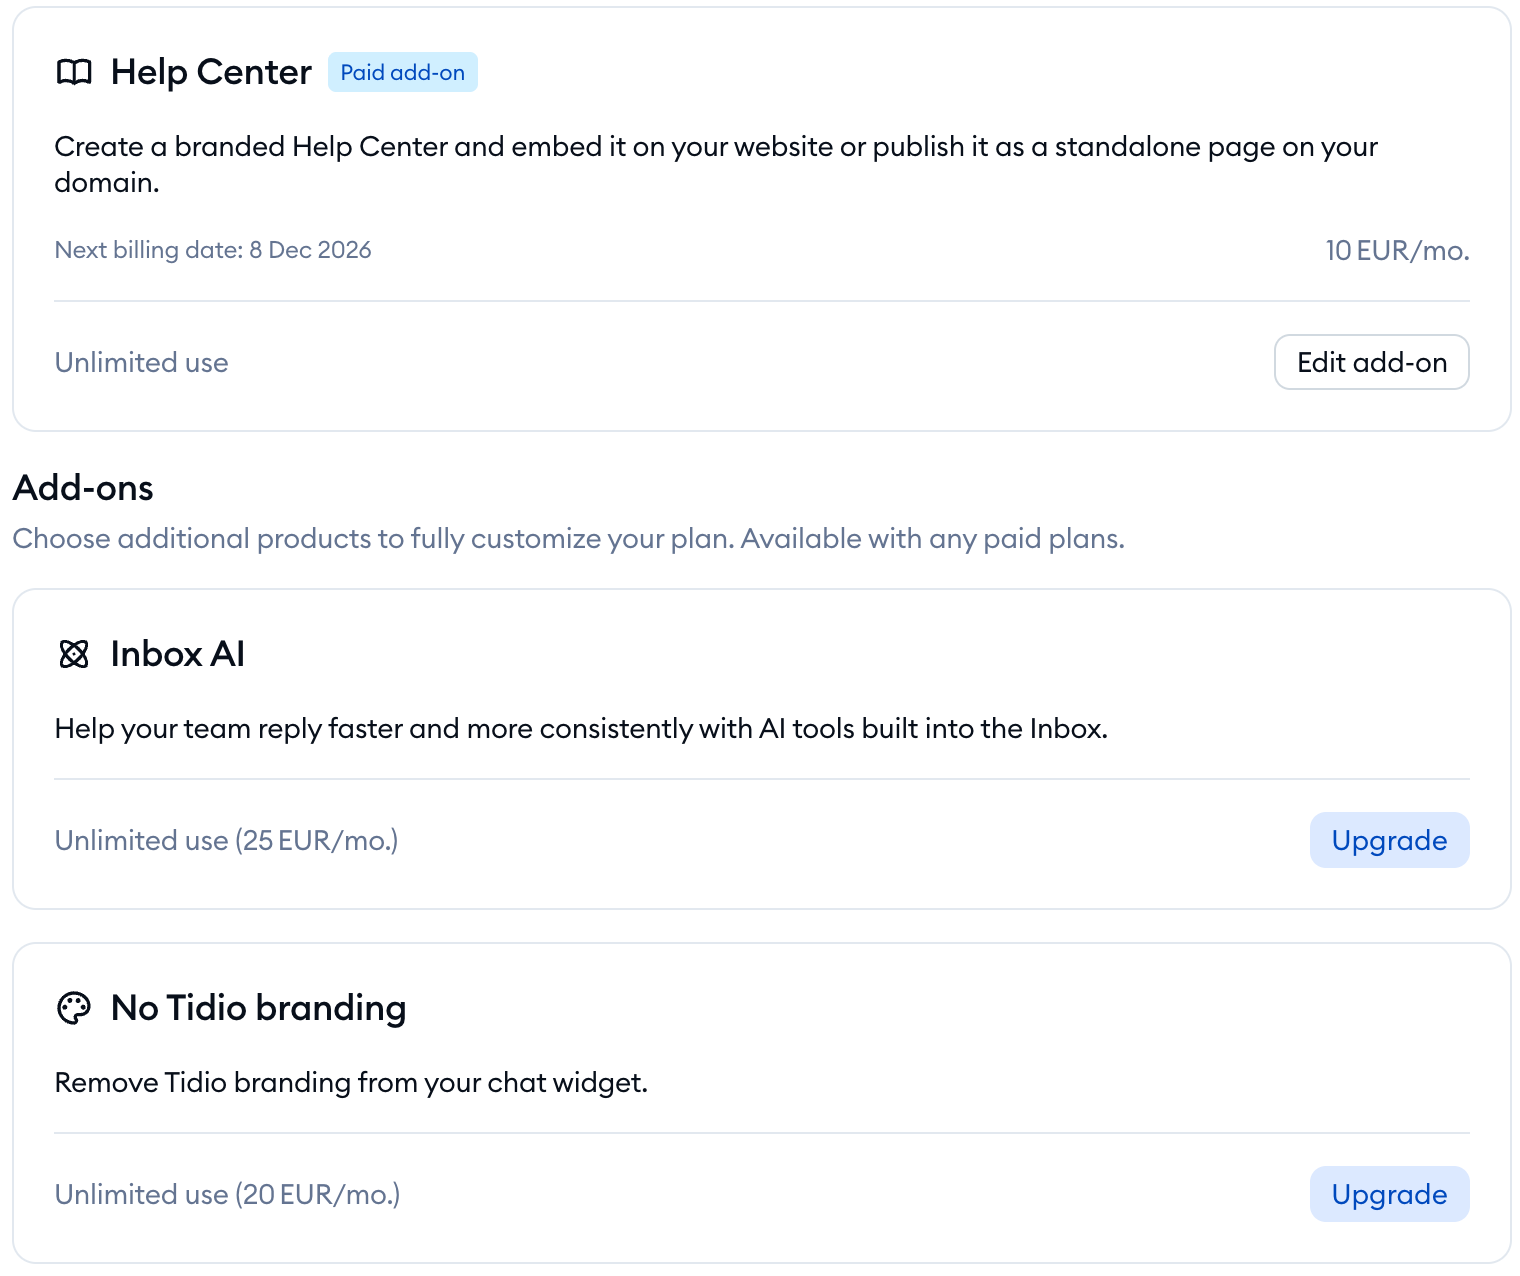
Add-ons are available with paid plans. To learn how to add, change or remove one, please see Add or change add-ons on your subscription.
Checking your Tidio usage over time
When you open the Usage page (Settings > Usage), you'll be able to see your overall Tidio usage historically - which can be especially useful when you want to learn how different aspects of your Tidio project are being utilized over time. It can provide you with insight into what package upgrades (or downgrades) you might want to consider.
Just like the Subscription tab, the Usage page lists three separate packages, and visualizes their quotas as charts:
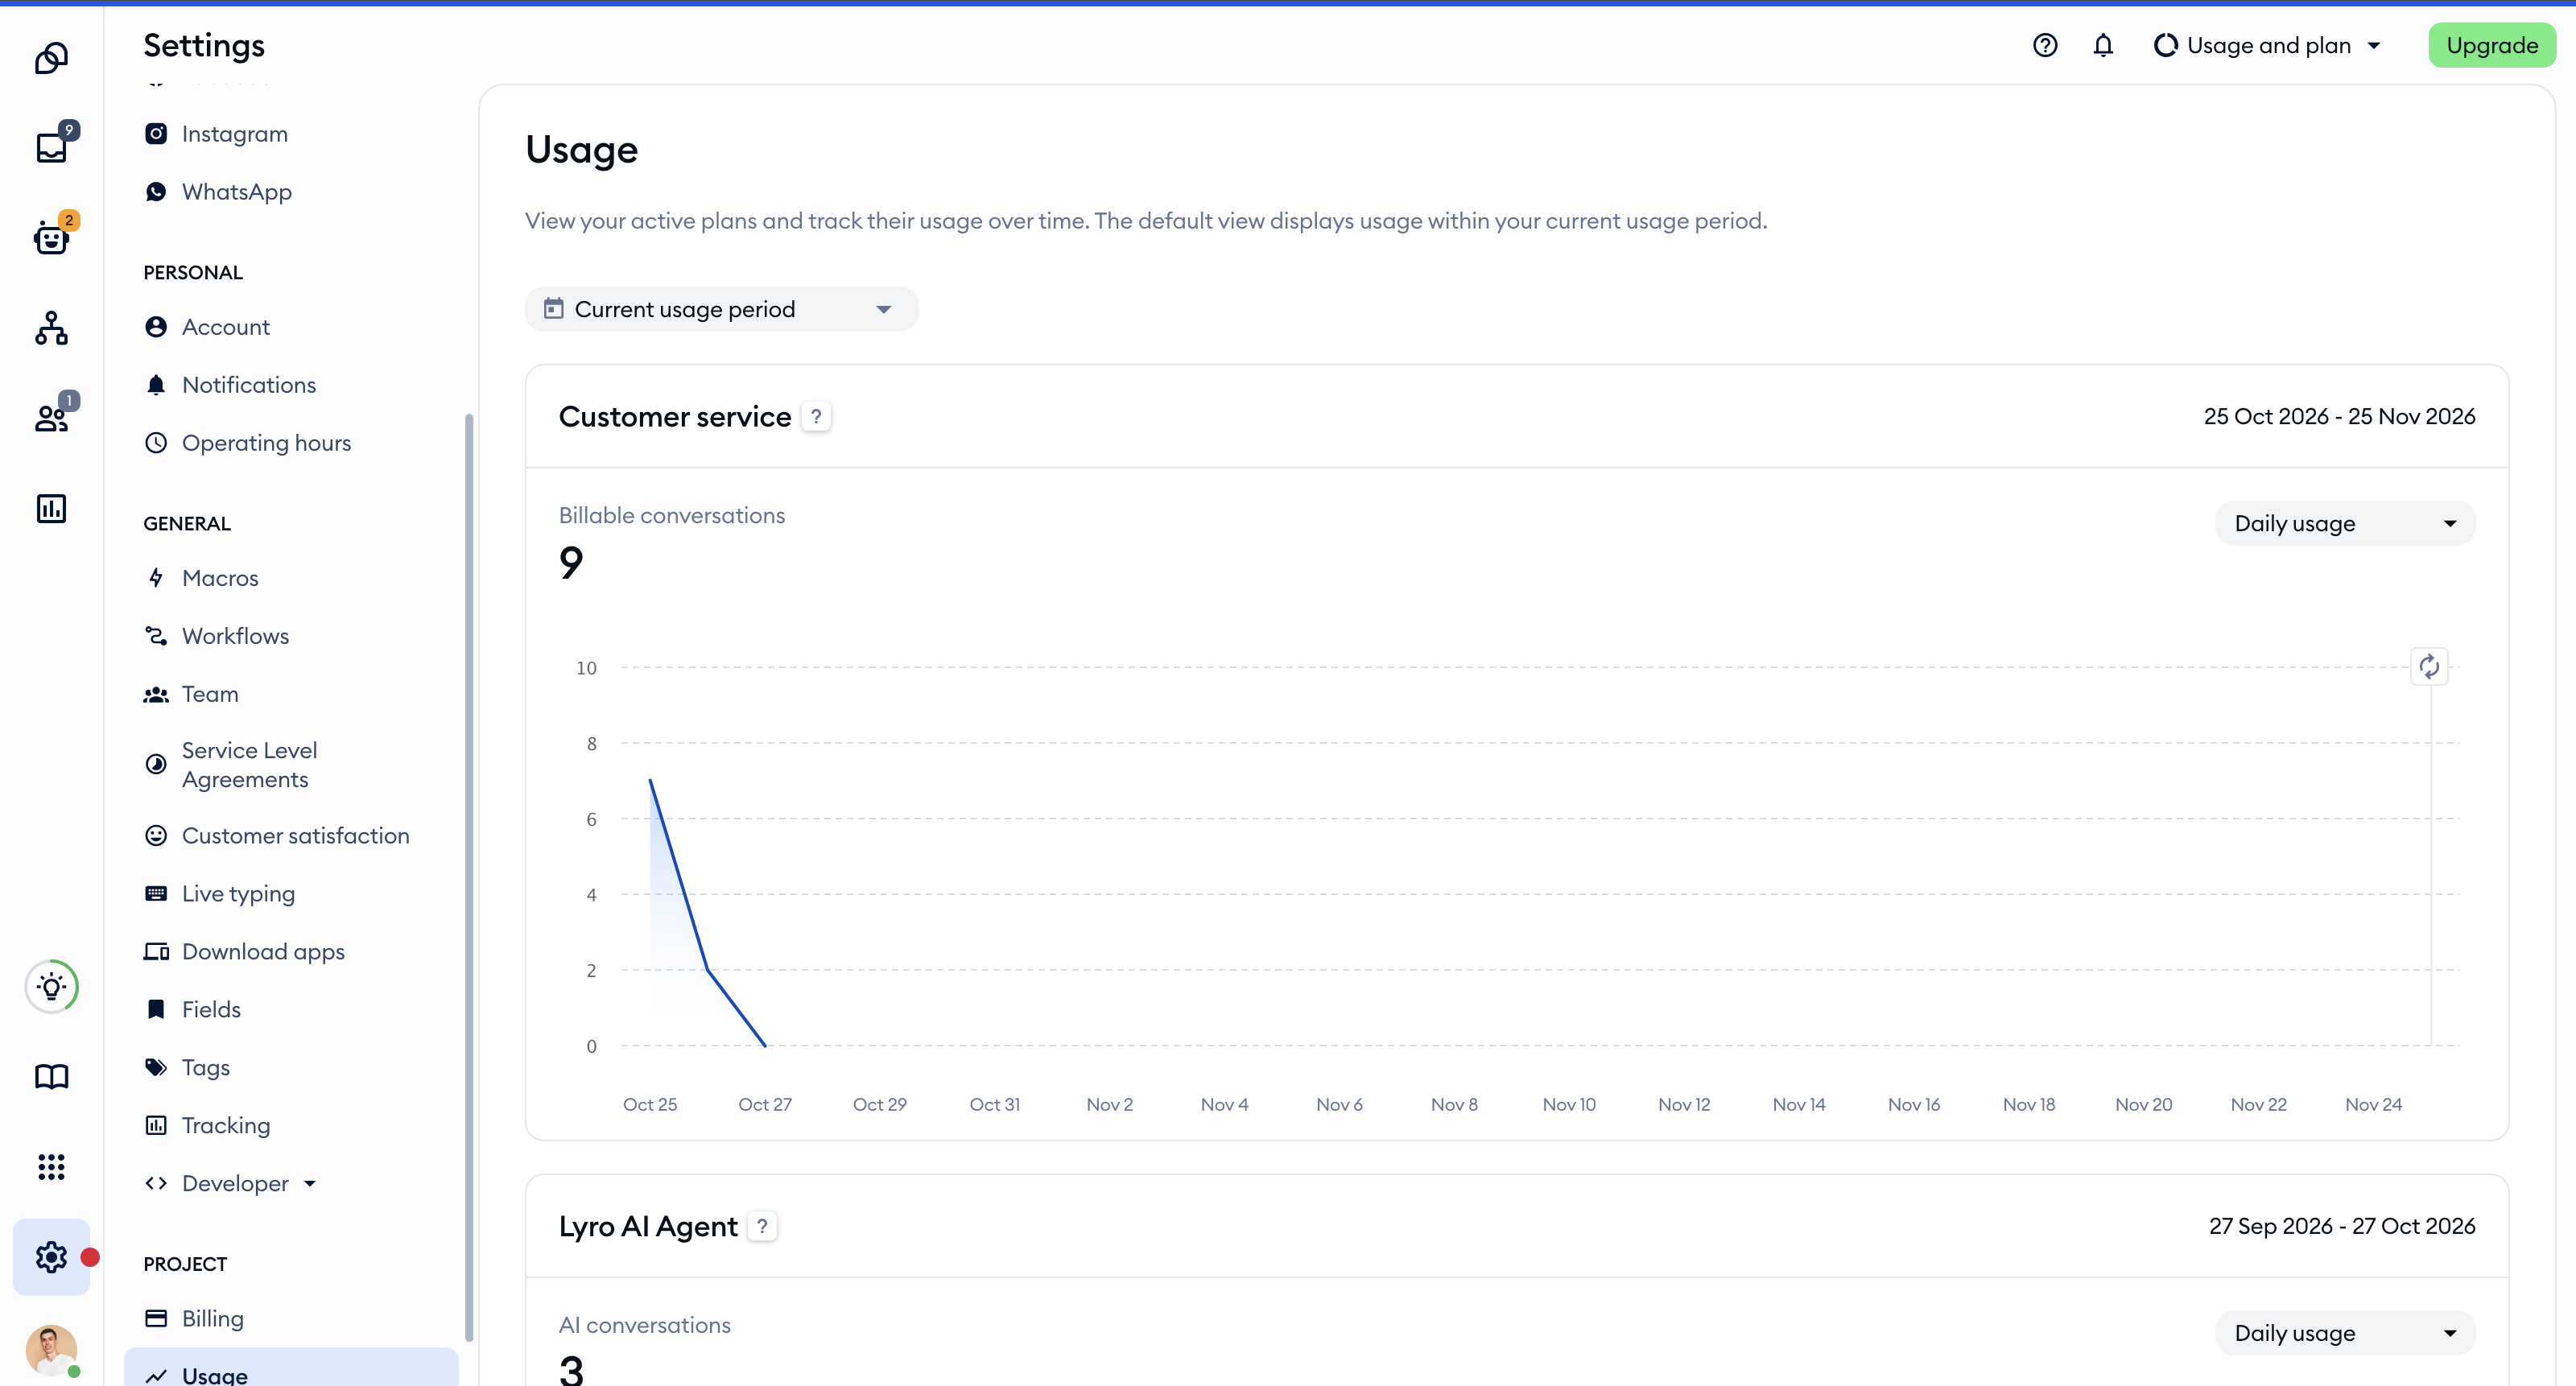
Make sure you select the period of time you're interested in checking, by using the date picker in the upper-left. By default, it shows your Current usage period.
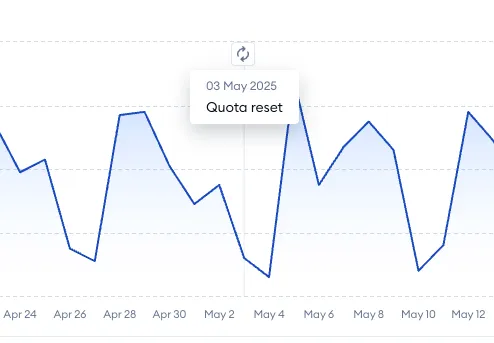
Please note that the charts also include important events, e.g. quota reset dates, package upgrades/downgrades, or cancellations:
Customer service usage
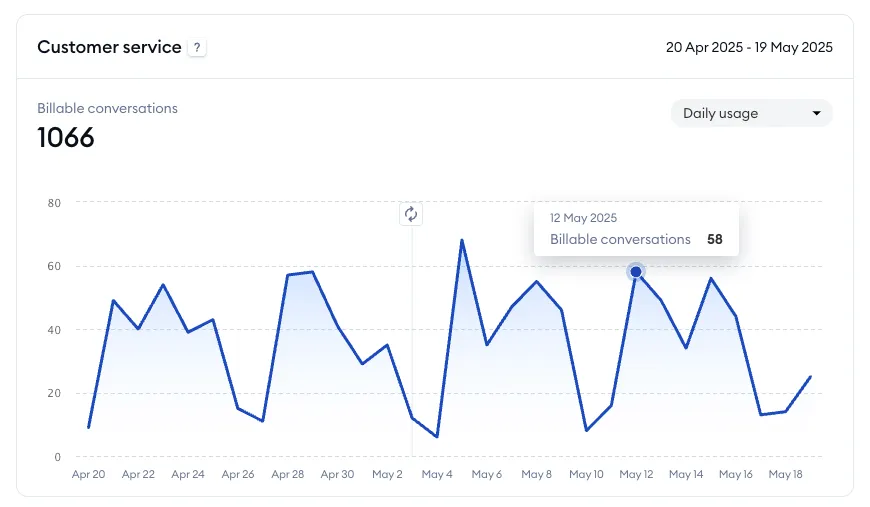
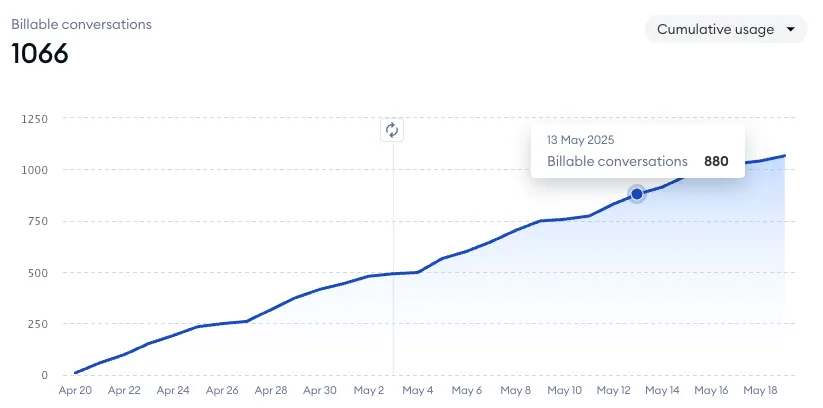
This chart shows your billable conversations over time. This refers to all person-to-person communication in Tidio, such as live chat conversations, tickets, and incoming social media messages. Hover your cursor over a specific point in the chart to see more details.
If you'd like to learn more about how the monthly billable conversations quota is calculated, please see this dedicated guide.
Lyro AI Agent usage
This chart shows your Lyro AI Agent usage over time, meaning the number of times Lyro has been activated for unique visitors. Hover your cursor over a specific point in the chart to see more details.
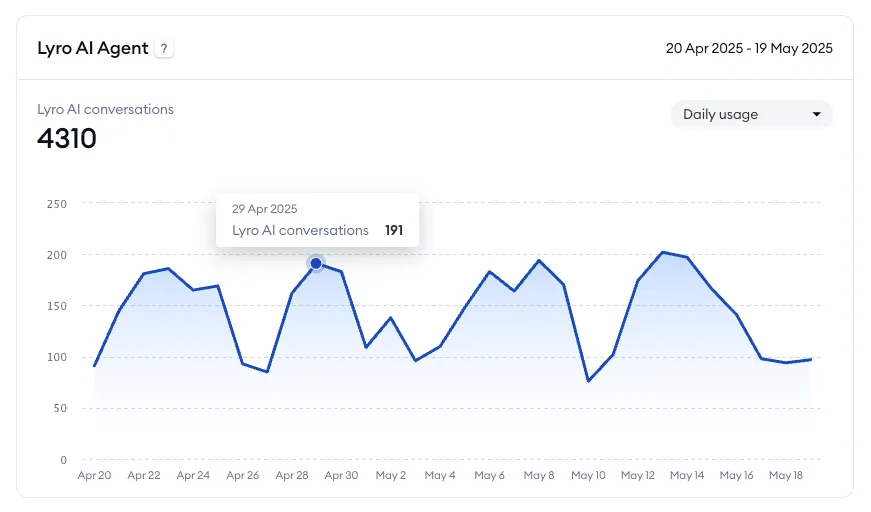
If you'd like to learn more about how the Lyro quota is calculated, please see this dedicated guide.
Flows usage
This chart shows your Flows quota usage over time, meaning the number of unique visitors your flows have reached. Hover your cursor over a specific point in the chart to see more details.
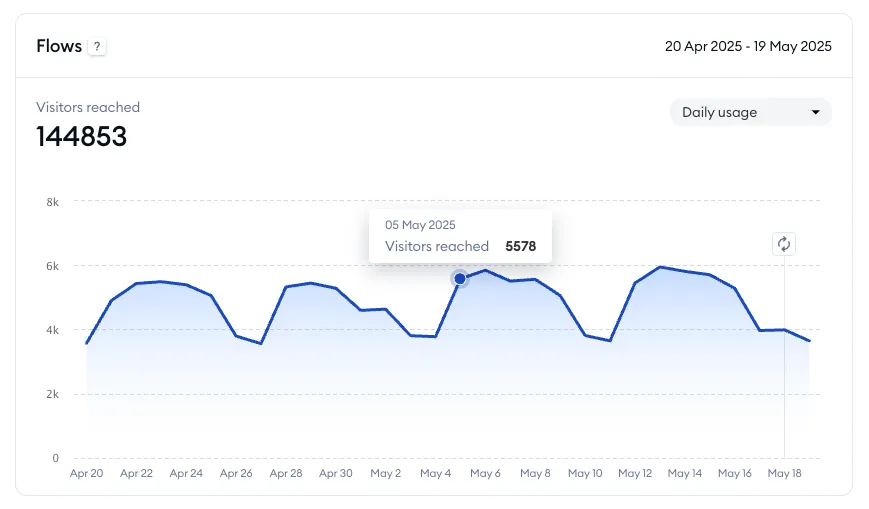
If you'd like to learn more about how the monthly Flows limit is calculated, please see this dedicated guide.
Switching between daily usage and cumulative usage
In the upper-right of each chart you can select either the Daily usage or Cumulative usage mode:
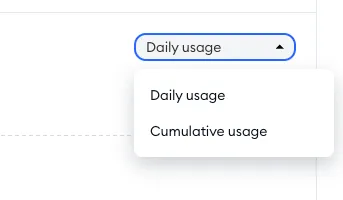
The daily usage mode is the default, showing you the amount of usage for each individual day only:
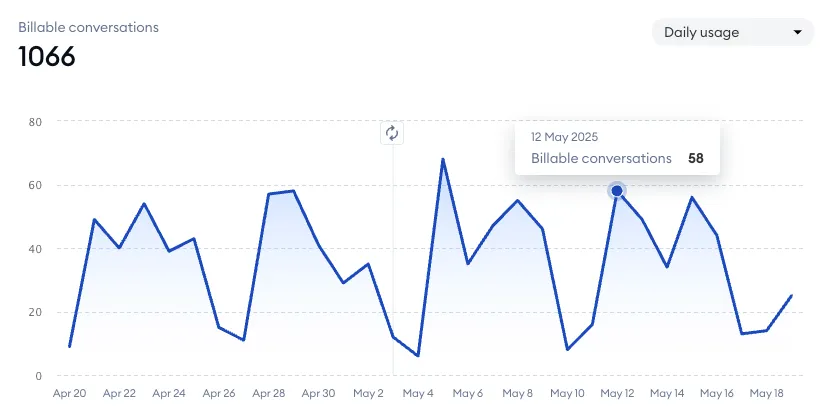
The cumulative usage mode, on the other hand, shows you how the usage adds up over time, day by day:
Editing your billing details and downloading invoices
If you want to change your current invoicing details, update your card information, edit your US residency details, or download your existing invoices - head over to the Settings > Project > Billing section:
... and open the Billing details tab (if you pay for Tidio through Shopify, you won't see this tab). In there, you will find your current invoice and card details, your US residency information (if applicable), as well as your invoices available for download:
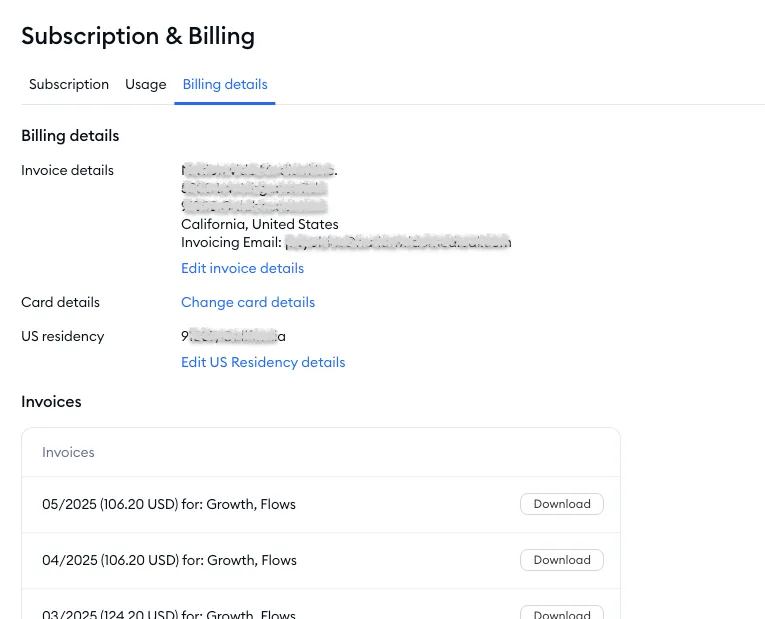
Naturally, you can modify the available information here as well, e.g. if you'd like to change the card you've been using so far, or update your business' invoicing information.
Change invoice details
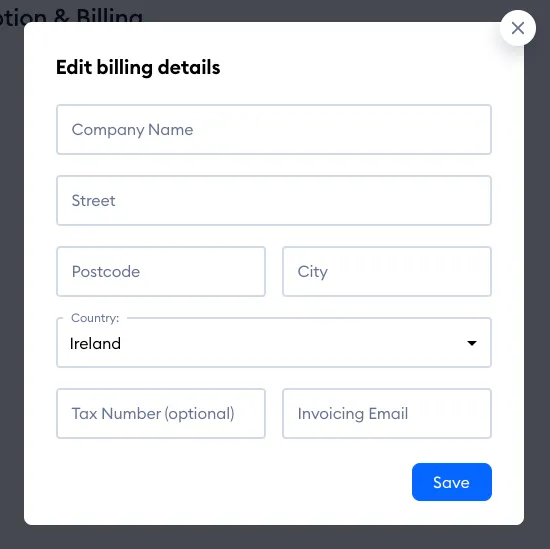
If you want to add your tax ID to the invoice, or modify any other details, click on the Edit invoice details link (Add invoice details, if you haven't added any yet). You can also add the invoicing email if you'd like to have your invoices sent to a particular mailbox.
If you would like to learn more, check our article about invoices.
Change card details
After clicking on the Change card details link (shown while you have a paid subscription) you'll be able to update your card information. Fill in your new card data and save your changes; the card details will be updated, and the next billing will be charged through the new card.
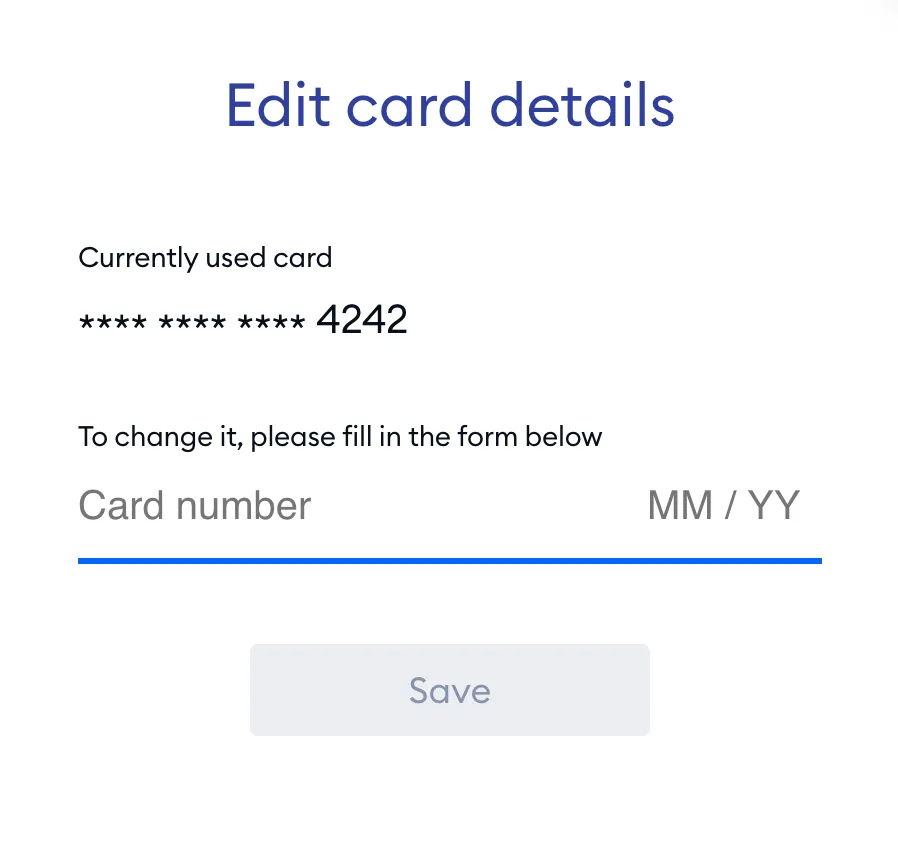
Please note: if you're having trouble with paying for your active subscription, you can put your current card details in here once again. This can help in some cases, as a new charge attempt will be made immediately upon providing the card details, even if it's the same card as before.
Change US residency details
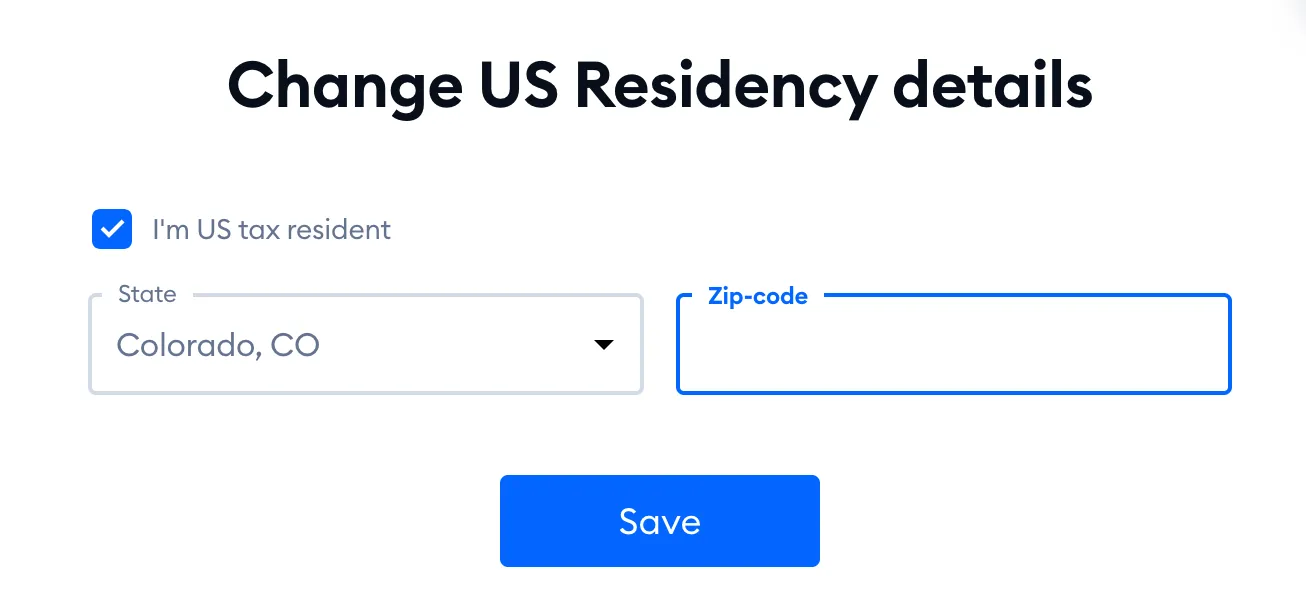
By clicking on the Edit US Residency details link, you can add your US tax residency data (state and zip code), if necessary:
Cancelling your subscription
To entirely cancel your subscription, go to the Settings > Billing section:
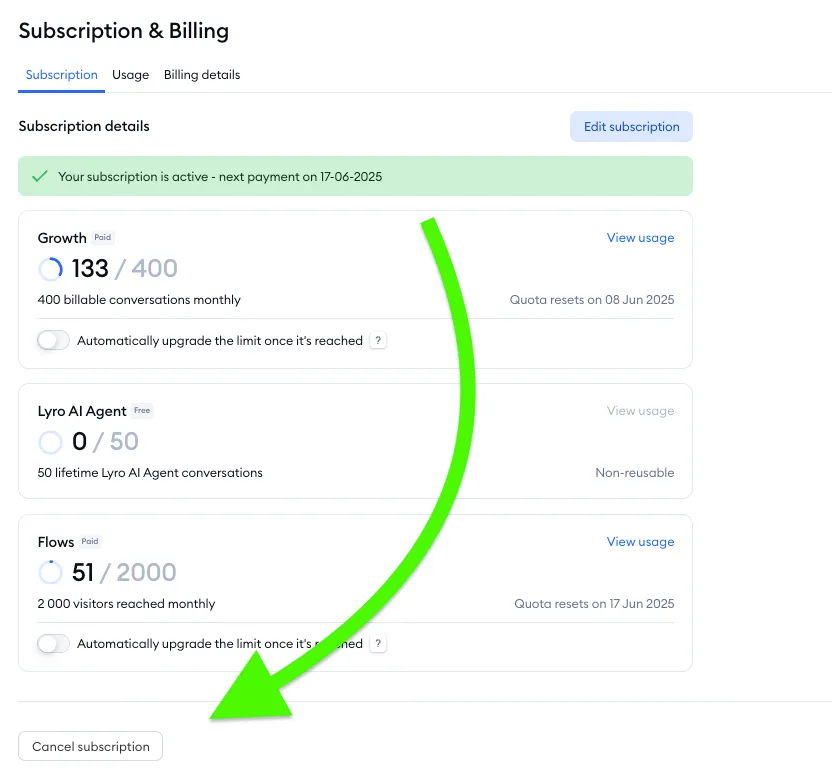
... and open the Subscription tab. You will find the Cancel subscription button at the bottom:
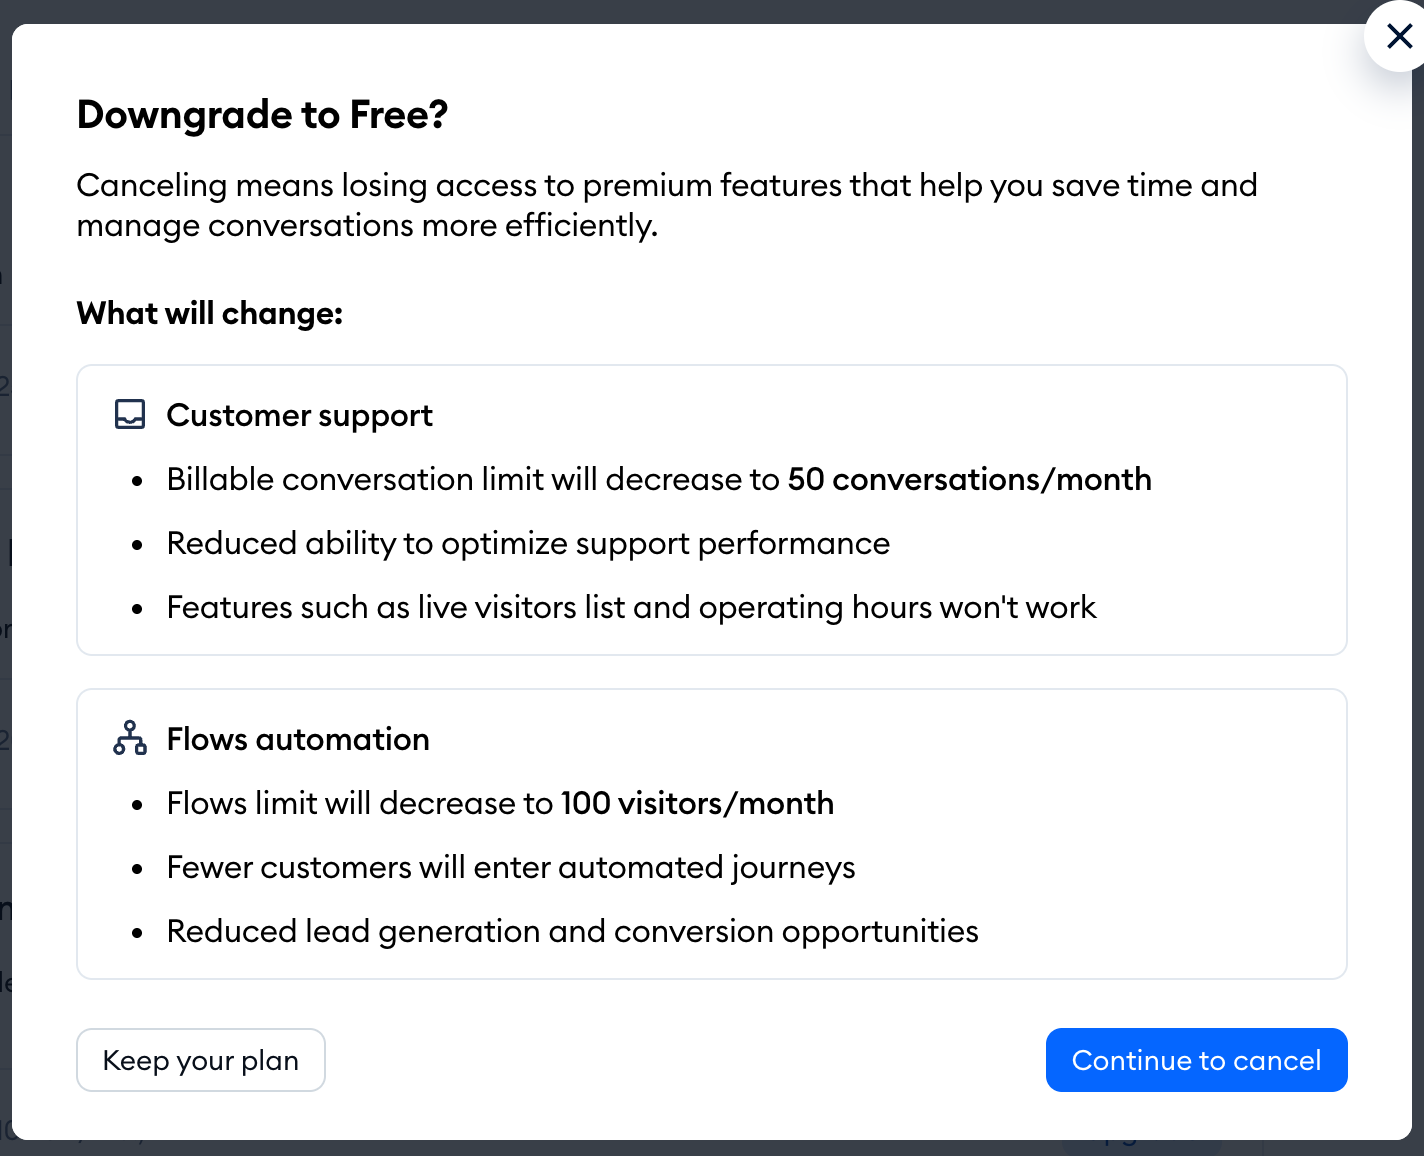
First, the Downgrade to Free? window shows what will change - for example, your billable conversation limit and Flows limit will decrease, and features such as the live visitors list and operating hours won't work. Click on Keep your plan if you change your mind, or Continue to cancel:
Next, in the We're sorry to see you go window, choose the reason you're leaving (and add a comment if you'd like - it really helps us improve), then click on Continue to cancel again. Depending on your reason, we may offer you a discount to stay - hit Claim your offer to take it, or Continue to cancel to finish.
Once the process is done, no new charges will take place. You keep your paid features until the end of your current billing period, and the Subscription tab says Your subscription is cancelled - your PRO features will end on [date]. After that date, your project continues on the free version.

Changed your mind before that date? Simply click on Resume subscription in the same message.
If you also want to remove Tidio from your website, you can check our article about uninstallation.
