Categories are the shelves of your Help Center. They group your articles by topic - like Getting started, Account & billing or Troubleshooting - so your customers can find the right answer in a couple of clicks.
Each category has a name, a short description and an icon, and you can change their order at any time. Categories are one level deep: every article sits directly in a category, and there are no subcategories.
In this article, you'll learn:
- How to add a category
- How to choose an icon for a category
- How to check whether a category is visible
- How to edit a category
- How to reorder categories and articles
- How to delete a category
Adding a category
Head over to the Help Center section in the main menu, and click on the Help Center you'd like to work on. It opens on the Content tab, which lists your categories with their articles inside.
Click on the Add content button on the right of the search bar, and choose Add category:

In the Add a new category window, fill in:
- Icon - the small picture shown next to the category (see the next section).
- Language - the language you're writing this category's name and description in.
- Category name - up to 255 characters.
- Category description - a short line that helps visitors understand what the category contains. It appears on the category's tile in your published Help Center (up to 1,024 characters).
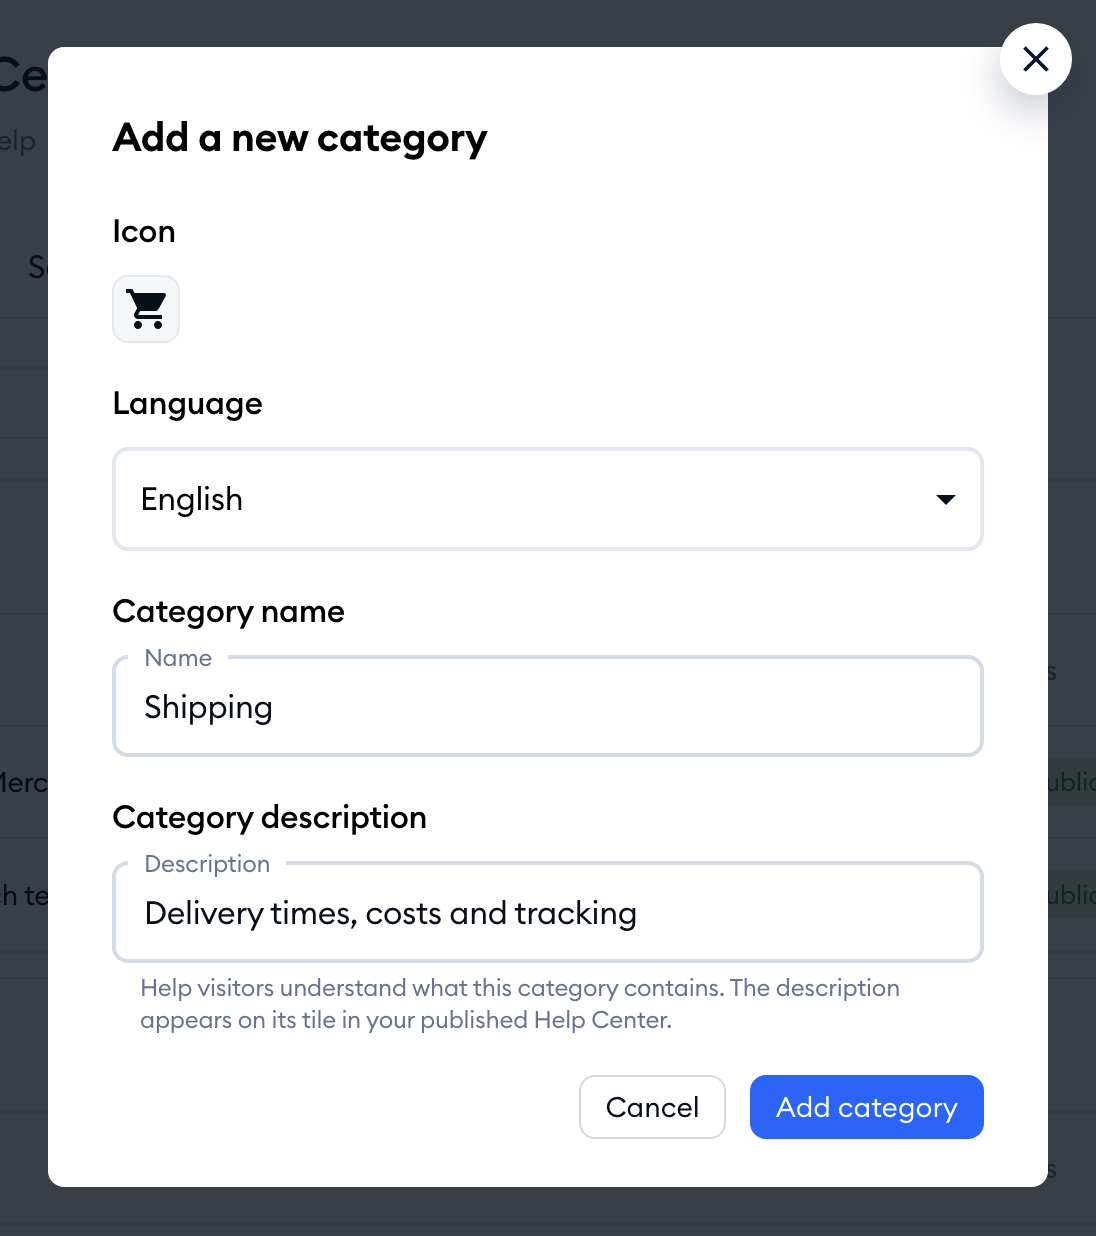
Hit the Add category button, and you'll see the "Category created successfully." message. That's it! Your new category is now in the list, ready for articles.
You can also add a category while writing an article: open the Category dropdown in the article's sidebar and pick New category at the bottom of the list. The new category is selected for the article straight away.
Please note: if you picked popular categories (like General, FAQs or Getting started) when you created your Help Center, they're already in the list. You can edit or delete them like any other category. See Create and manage your Help Centers for more.
Choosing an icon for a category
In the Add a new category window, click on the square under Icon. A small picker opens with 16 ready-made icons (a folder, a book, a cart, a rocket, a light bulb and more) - simply click on the one you like:
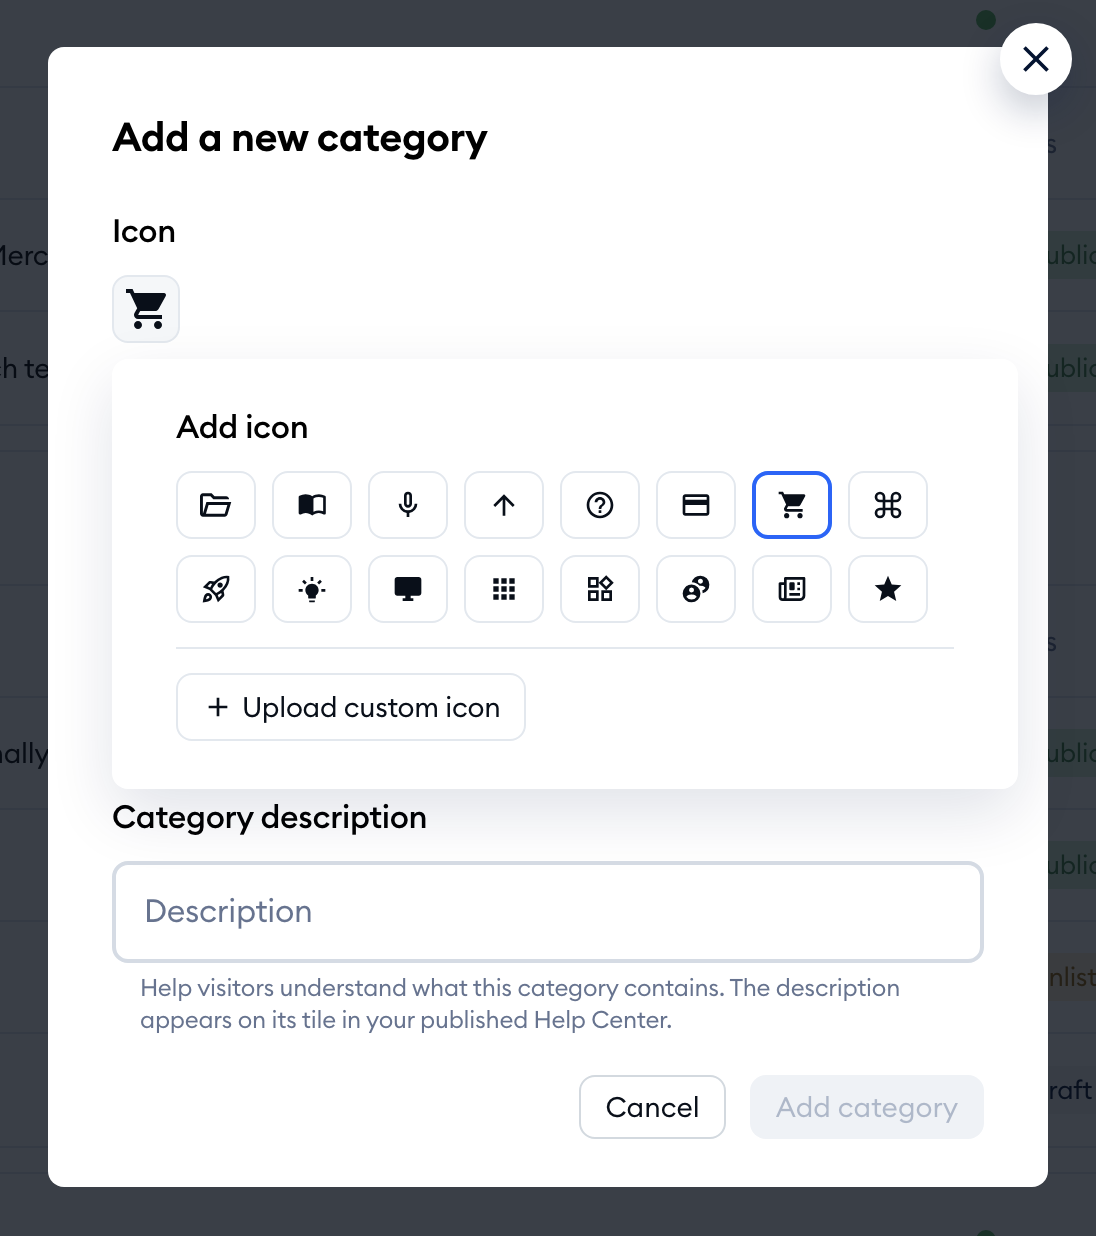
Prefer your own image? Click on Upload custom icon and pick a PNG, JPG or WebP file up to 1 MB. Once it's uploaded, the picker shows two small buttons next to it, to replace or remove your image.
To change the icon of an existing category later, click on the icon next to the category's name in the list. The same picker opens, and the change is saved right away ("Category icon updated.").
Whether your customers see these icons, uploaded images or neither on your Help Center depends on the Category visual setting in the Appearance tab - see Customize your Help Center's appearance.
Checking whether a category is visible
A category shows up in your published Help Center once it holds at least one published, Public article. Next to each category's name, you'll see a colored dot - hover over it to see what it means:
- A green dot: Public category.
- An orange dot: Add at least one public article to publish a category.
- Category not translated to this language - the category has no name yet in the language you're viewing.

Articles that aren't in any category are listed at the bottom, under Unassigned articles. As the note there says, these articles won't appear in your Help Center until you put them in a category.
Editing a category
To rename a category or change its description, click on the three-dots menu on the right of the category, and choose Edit category:

The Edit category window has the same fields as when you added it. Make your changes and hit Save changes.
The same menu also has Add article, which opens a new article that's already filed in this category. An empty category has its own Add article button, too.
Running your Help Center in more than one language? Use the Language field in the Edit category window to write the category's name and description in each language. See Run your Help Center in several languages for the details.
Reordering categories and articles
Every category and every article in the list has a drag handle (the six dots) on its left. To change the order of your categories, grab a category by its handle and drop it where you want it:
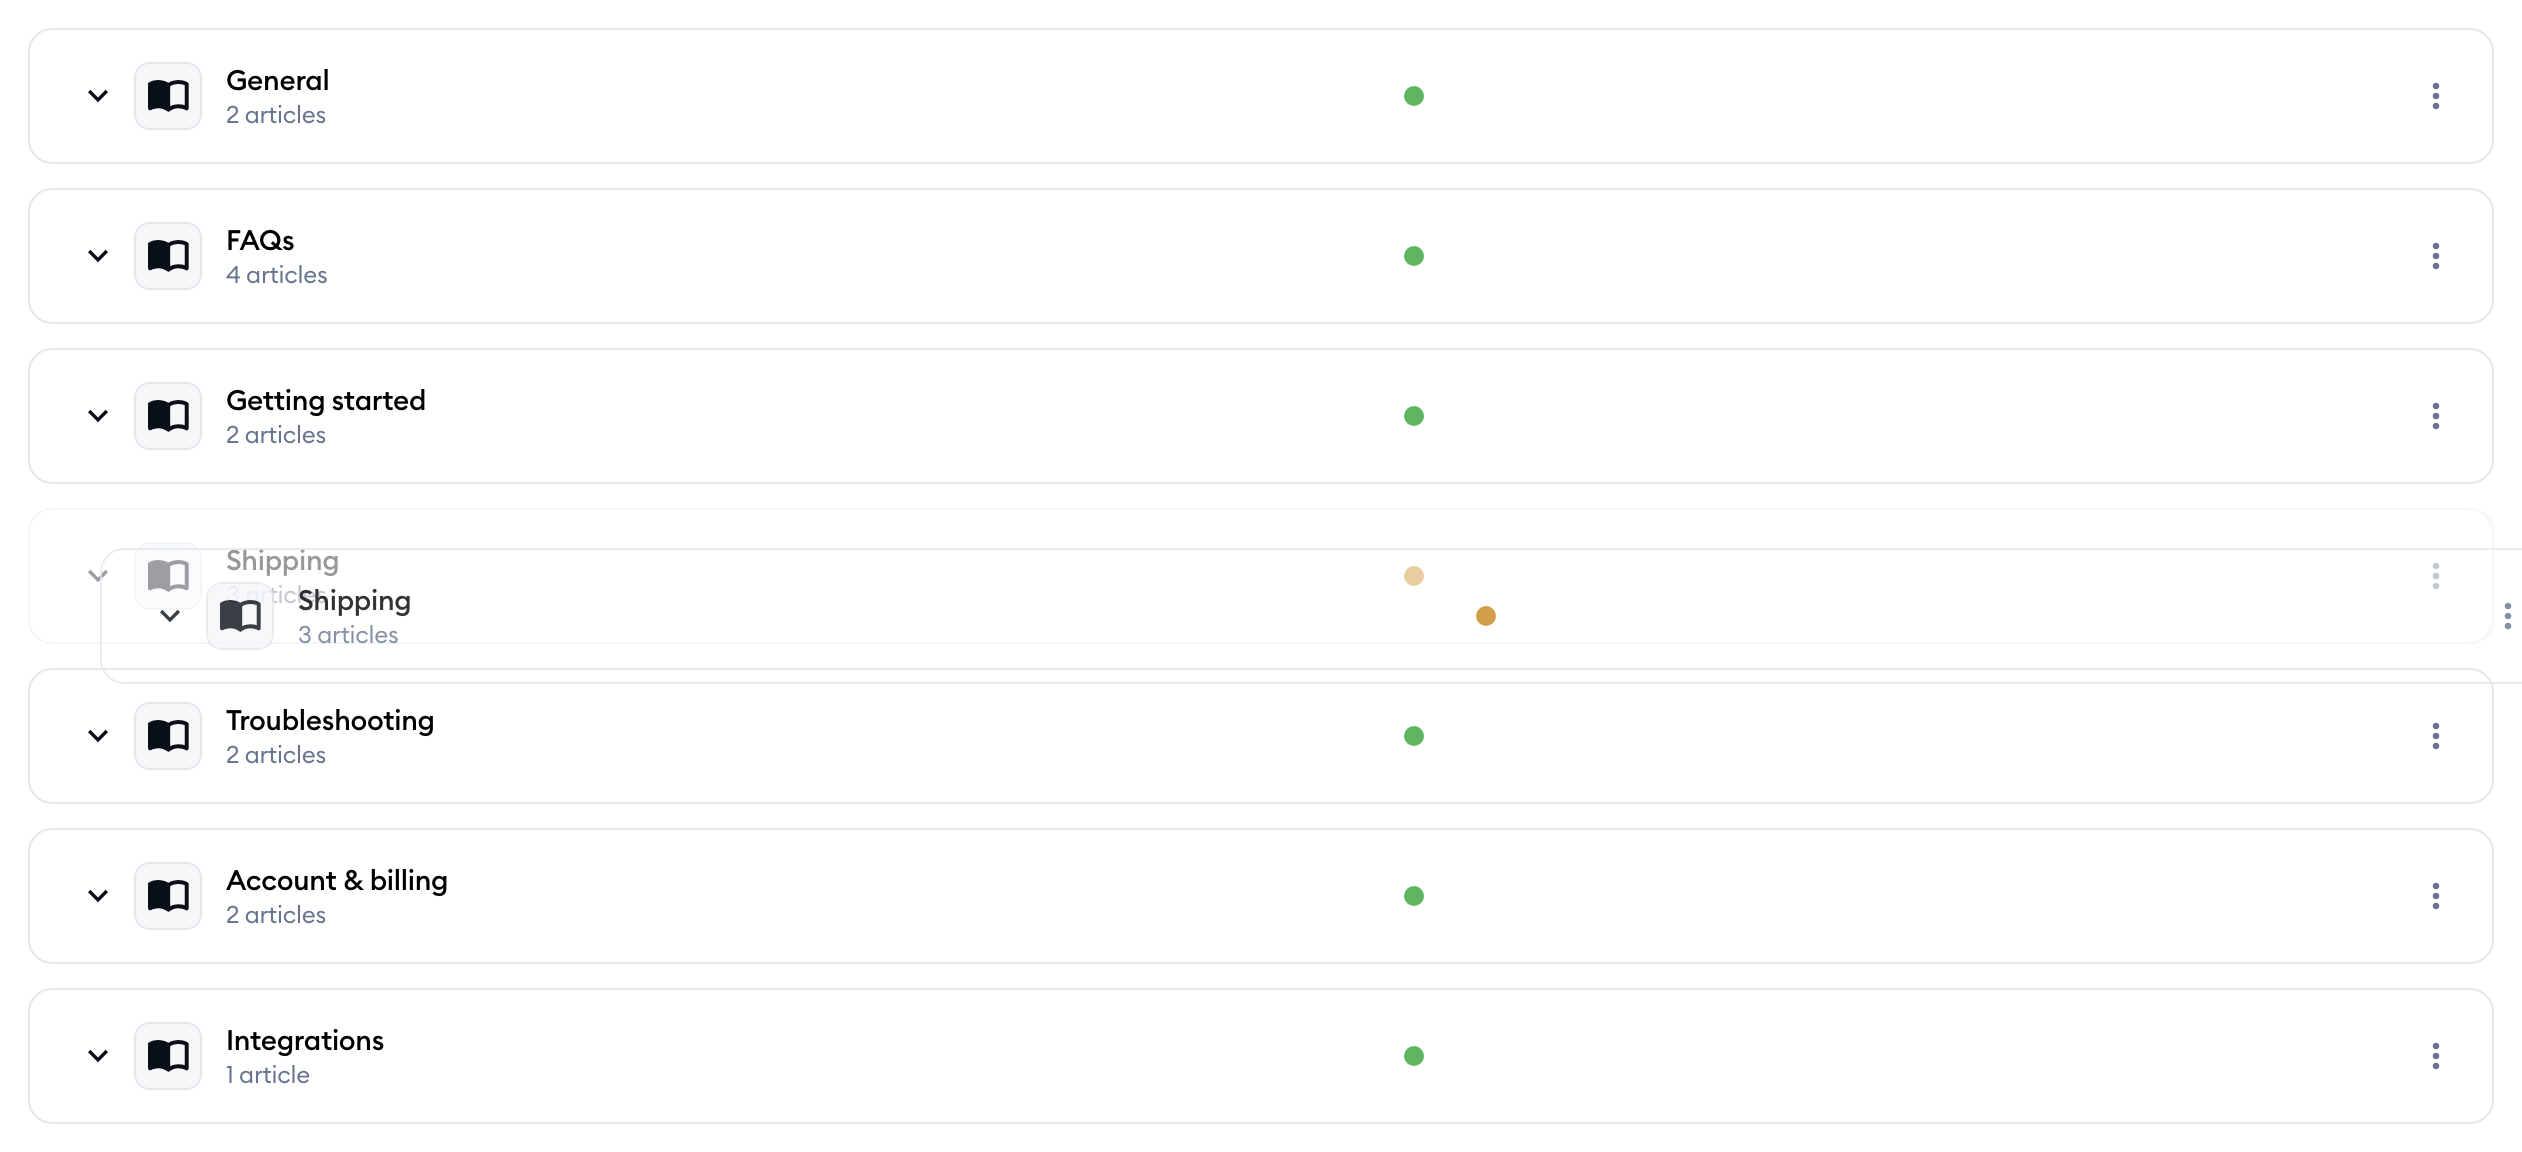
You can drag articles the same way:
- Within a category, to change their order.
- Into another category, to move them there - even into an empty one. If the category is collapsed, hold the article over it for a moment and it opens.
- Out of Unassigned articles and into a category.
An article can't be dragged back into Unassigned articles. To take an article out of its category, use Remove from category in the article's three-dots menu. This option is only there while the article is a draft in every language - a published article always has to stay in a category.
Please note: dragging is turned off while you're searching the list, and articles can't be dragged while a status filter is on. Hovering over a handle then shows "Reordering is off while the list is filtered." Clear the search and filters to reorder again.
Deleting a category
Click on the three-dots menu on the right of the category, and choose Delete category. What happens next depends on what's inside:
- The category is empty: confirm with the Delete button, and it's gone for good.
- It holds articles, and you have other categories: pick where the articles go in the Move articles to dropdown. It suggests the first category from the top, and also offers Unassigned articles - as long as none of the articles is published.
- It holds only draft articles, and it's your only category: the articles move to Unassigned articles.
- It holds published articles, and it's your only category: the Delete button stays disabled. Unpublish those articles first (or add another category to move them to).
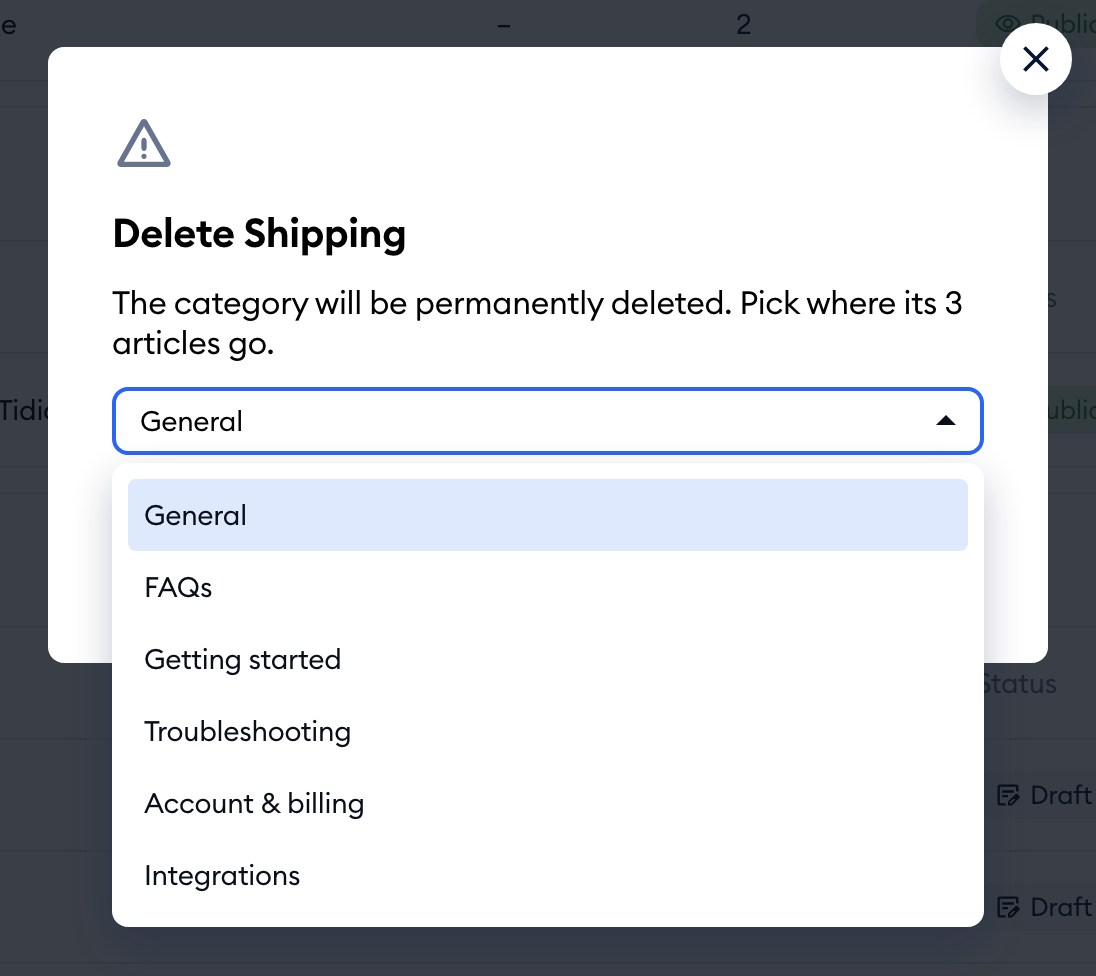
Deleting a category never deletes its articles - they're always moved somewhere first. The category itself, however, can't be brought back.
Please note: adding, editing, reordering and deleting categories needs the Help center content permission set to Able to edit. Teammates who are Able to view can browse the list and open articles, but can't add, change, move or delete anything.
