Your Help Center and your chat work best together. If a customer can't find the answer in an article, they can start a chat with you (or Lyro) right from the Help Center page. And instead of sending customers to a separate site, you can show your whole Help Center on a page of your own website or Shopify store.
Both options are in the Setup tab of your Help Center.
In this article, you'll learn:
- How to show the chat widget on your Help Center
- How to add your Help Center to your trusted domains
- How to embed your Help Center on your website
Please note: the Setup tab is only visible to team members with the Help center settings permission.
Showing the chat widget on your Help Center
Head over to the Help Center section, open your Help Center, and go to the Setup tab. In the Chat widget card, switch on Show the Tidio chat widget on your Help Center:
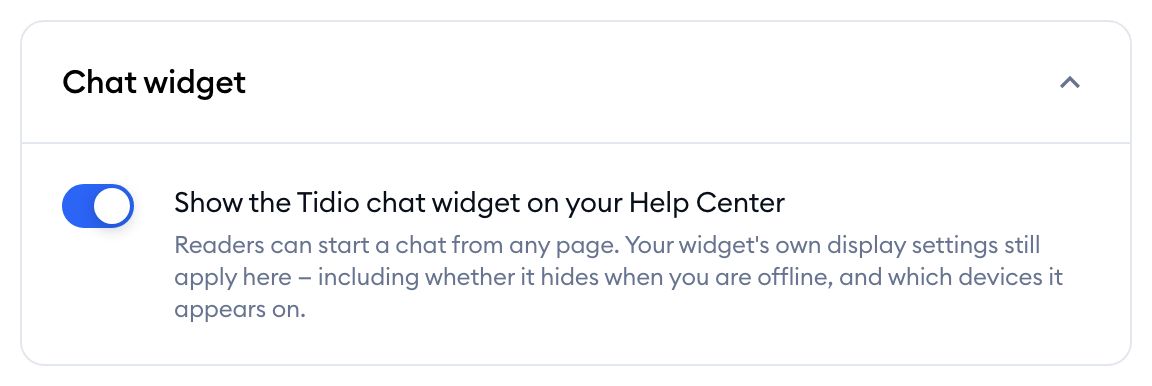
Then hit the Save changes button at the bottom of the tab. That's it! Your visitors can now start a chat from any page of your Help Center.
The widget on your Help Center is the same chat widget you use on your website, so you don't need to install anything. Its own display settings still apply here - including whether it hides when you're offline, and which devices it appears on. You can change them in Settings > Live Chat > Appearance, as described in Customize your chat widget.
Adding your Help Center to your trusted domains
In your chat widget settings, you can choose to Show only on listed domains (under Visibility and position > Trusted domains). If you do, your Help Center's address has to be on that list too - otherwise, the widget won't appear on your Help Center.
Tidio checks this for you. When you switch the widget on, and your Help Center's address (or your custom domain, once it's verified) isn't on the list, you'll see a warning in the Chat widget card. Simply click on Add to trusted domains in the warning:
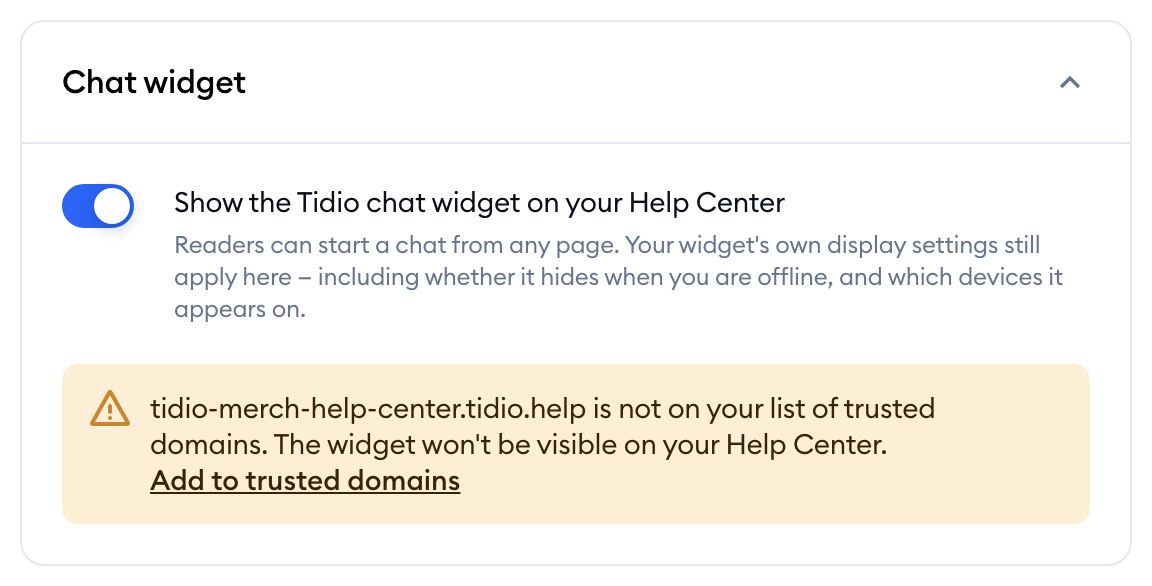
You'll see an Added to your trusted domains. confirmation, and the warning disappears. Now you can save your changes.
Please note: while the warning is shown, the Save changes button stays inactive, so you can't turn on a widget that your visitors wouldn't see. The same goes for the moment Tidio is checking your trusted domains - and if the check fails, the card will say so, and you can simply try again in a moment.
If you'd rather manage the list yourself, add your Help Center's address in Settings > Live Chat > Appearance, under Visibility and position > Trusted domains. Remember to add your custom domain as well if you've connected one.
Embedding your Help Center on your website
Want your customers to find answers without leaving your website? You can place your whole Help Center on any page of your website or Shopify store with a single line of code.
In the Setup tab, go to the Embed Help Center card. Under Embed with code, you'll find your snippet - click on the copy icon on its right (Copy to clipboard) to copy it:
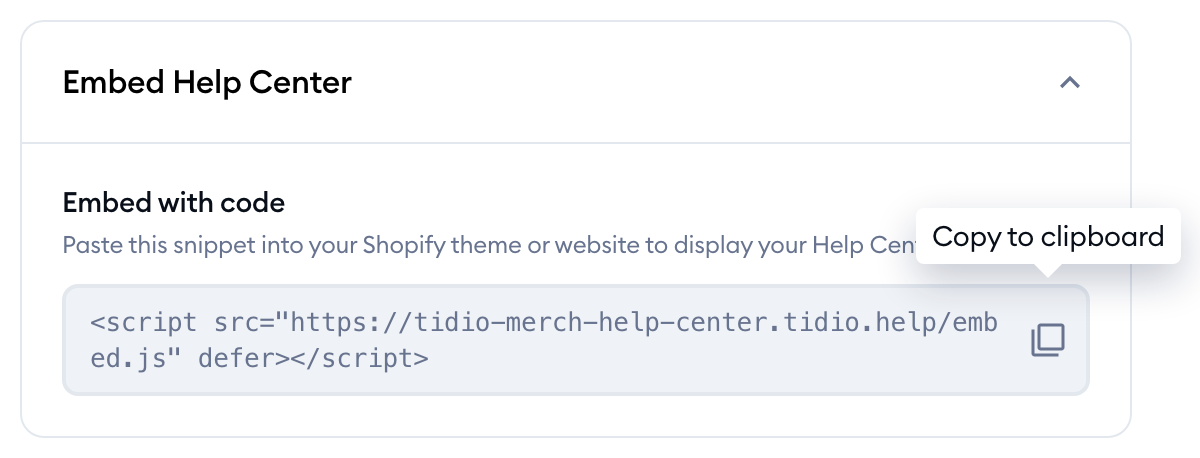
Then paste the snippet into the HTML of the page where you'd like your Help Center to appear - for example, a page of your Shopify theme, or of your website. Your Help Center will show up in that spot, across the full width of the page.
If you'd like to choose the exact spot on the page, add an empty element with the id tidio-help-center (for example, <div id="tidio-help-center"></div>), and your Help Center will be placed inside it.
Your visitors can browse the Help Center right on your page, and the page address keeps track of where they are - so they can share a link to an article, or use the browser's Back button as usual.
Please note: the snippet only works once your Help Center is published. Before that, you'll see the code, but you won't be able to copy it - hover over it to see why. Publishing your Help Center requires the Help Center add-on (see The Help Center add-on).
The snippet always points to your Help Center's current address. If you connect a custom domain or change your tidio.help address later, simply copy the new snippet and replace the old one on your website (see Your Help Center's address and custom domain).
