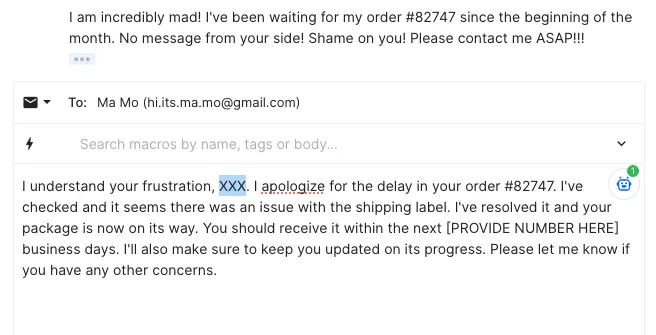
Copilot is a powerful support tool available in Tidio, providing you with AI-generated suggestions on how to respond to customer questions. It is also available as an extension for Chrome, so that you can benefit from your knowledge base while using tools other than Tidio.
The Copilot extension serves as an AI assistant built into Chrome; its goal is to improve your productivity and ensure consistency, without disrupting your existing workflows. The extension works with Zendesk, Intercom, and Gorgias - no migration required!
To learn more about Copilot in general (and using it inside Tidio), please see this detailed guide.
In this article, you will learn:
- Who can benefit from the extension
- How to install the Copilot extension in Chrome
- How to prepare Copilot (Tidio configuration)
- How to use the Copilot extension
Who can benefit from the Copilot extension?
Overall, anyone using Chrome as their browser can visit the Chrome Web Store and install our extension: AI Copilot for Customer Support. It is available for free, and comes with no limitations regarding usage.
To use the extension, you need to have a Tidio project and be logged into it. Currently, the extension works with the following systems:
- Gorgias
- Intercom
- Zendesk
This means you can take advantage of your Tidio project's Copilot knowledge base while you're responding to customer messages in these external tools. Not only does this speed things up, but also helps with maintaining consistent on-brand responses across different platforms and teams.
Installing the Copilot extension in Chrome
When using your Chrome browser, go to the Chrome Web Store. In the search box at the top, start typing "AI Copilot for Customer Support," and the appropriate result will appear as one of the suggestions.
Alternatively, you can use this direct link to the extension page.
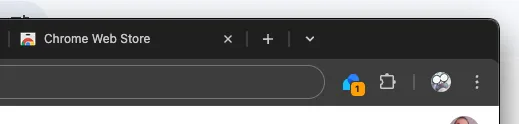
Once installed, you will see the Copilot extension listed in Chrome. Feel free to pin the extension, so that it's easily accessible in your browser window whenever you need to manage it.
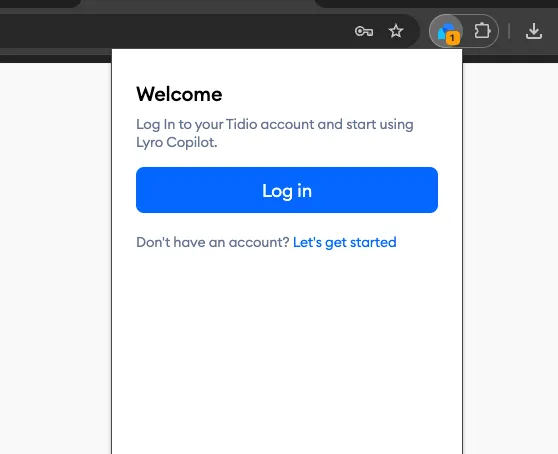
Before the extension can start working, you will need to make sure you're logged into Tidio - that's the only way Copilot can start making suggestions, as it uses the knowledge that you've set up inside your Tidio project (for Lyro and/or Copilot use).
Click on your Copilot extension in the browser, and you will be prompted to log in. Alternatively, if you're brand new to Tidio, you also get the option to register a new Tidio project.
Once you're logged into Tidio, Copilot will be able to work as an extension while you're using Gorgias, Zendesk, or any other supported platforms.
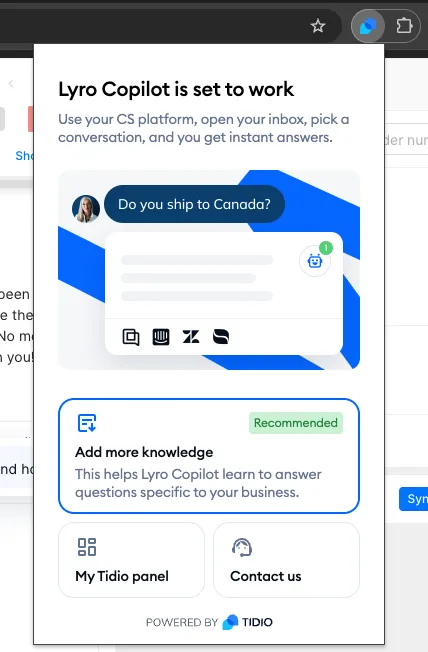
When you click on the Copilot extension, you will see a few useful shortcuts:
- Add more knowledge (takes you straight to the Data sources section of your Lyro/Copilot settings, letting you manage your knowledge base);
- My Tidio panel (takes you to your Tidio project's Dashboard);
- Contact us (takes you to our official Contact page).
There is one more crucial step that may still need to be addressed: setting up your Copilot knowledge base inside the Tidio project. In general, Copilot shares all the information with Lyro, but you get to decide if a given piece of information is used by just one of these tools or both.
If you're logged into a project where your Lyro/Copilot data sources are already set up, then you can skip to this section of the article, where we cover how the browser extension works in practice. If you're new to Tidio, Lyro, or Copilot (or you simply haven't configured data sources fully yet), please see the section below to learn how to establish Copilot's knowledge base.
Configuring Copilot in Tidio
Now that you've installed the extension and logged into a Tidio project of your choice, you still need to make sure you've set up all the data sources for Copilot. That way, the extension can gather and use appropriate knowledge when generating response suggestions for you.
We'll cover the basics here, but you can learn more about setting up data sources for Copilot (and Lyro in general) in this extensive guide.
Navigating your Lyro/Copilot data sources
You can manage all your data sources in the main Lyro AI Agent section, specifically under Knowledge > Data sources:
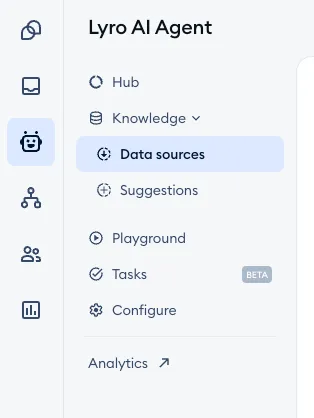
In there, you will see all the knowledge you've gathered for Lyro and Copilot use. Notice the Lyro and Copilot columns: a green checkmark means the data source is used by that tool, and a dash means it isn't - so you can see at a glance if it's meant for Lyro, Copilot, or both:
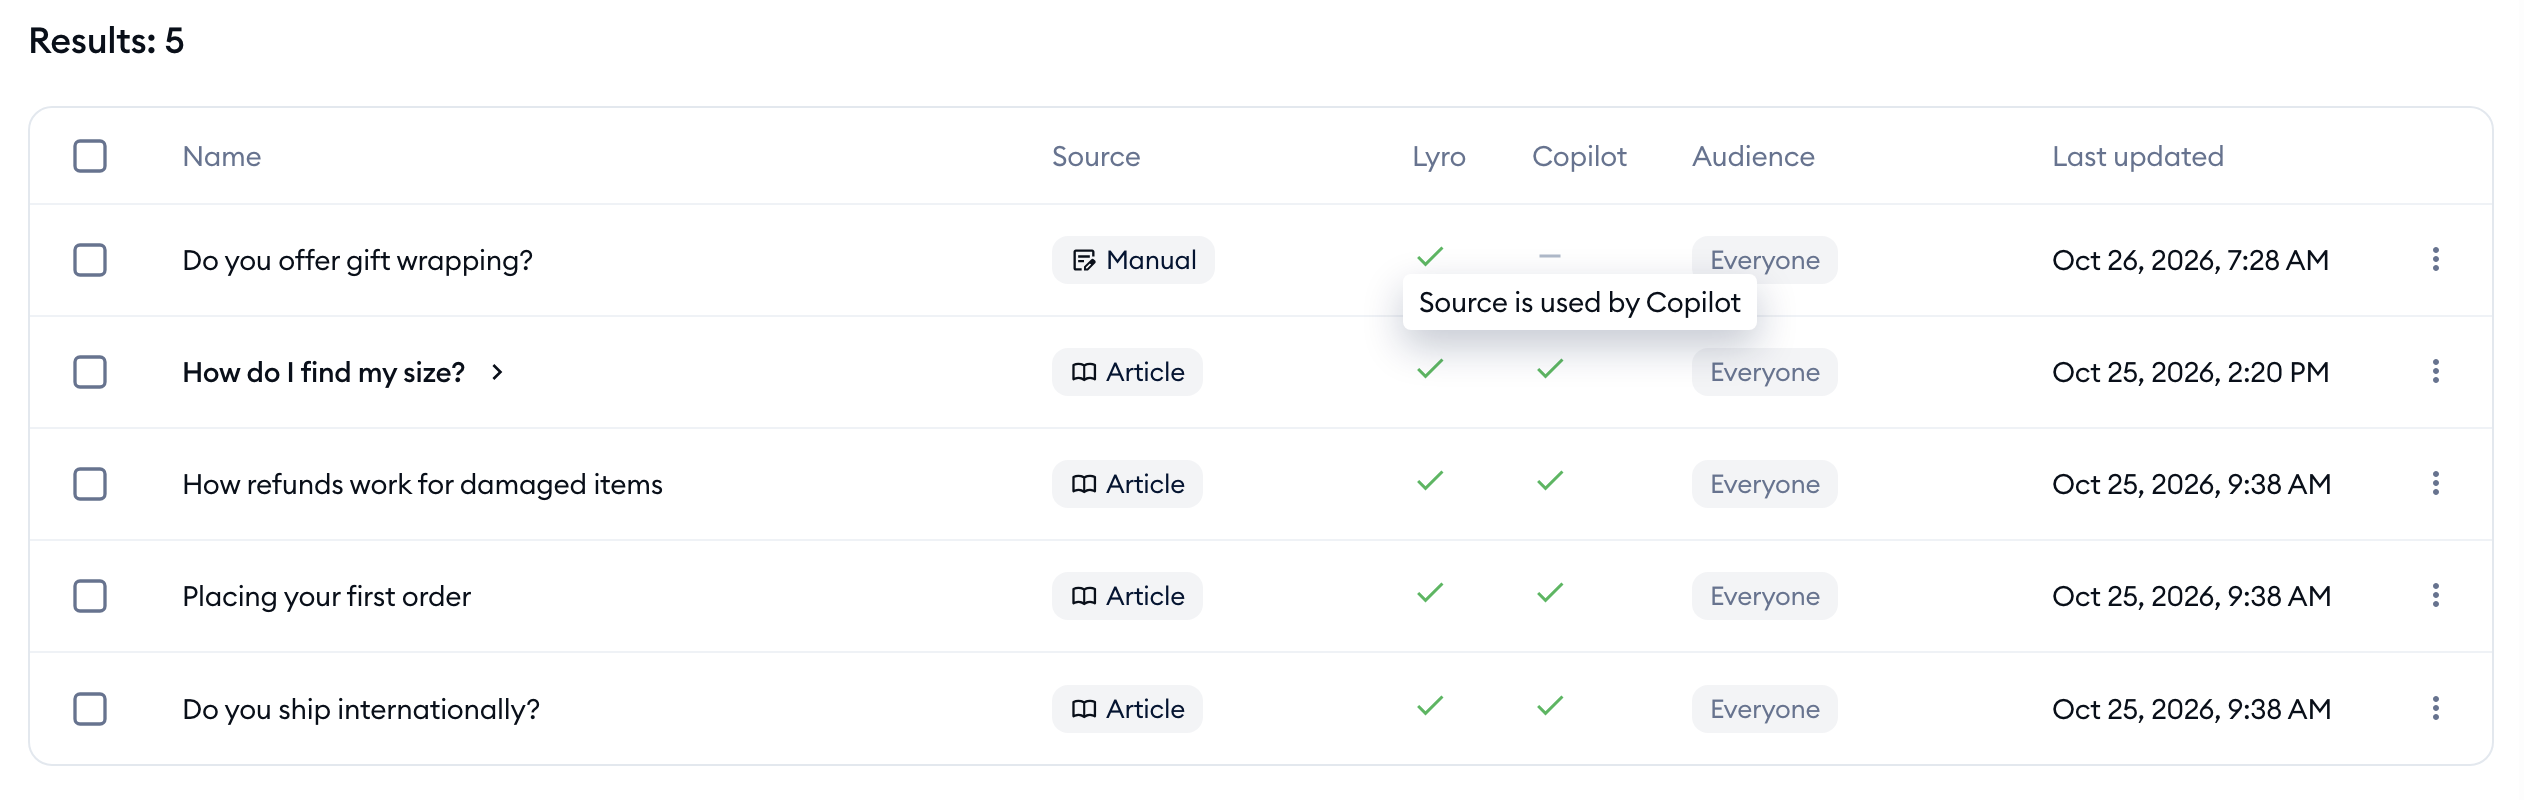
You can use the three-dot menu on the right to delete any question-and-answer pair (or website) you no longer wish to use at all.
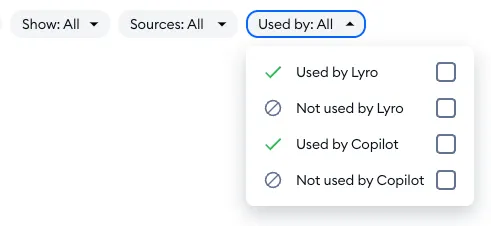
Another useful option here is the Used by: filter at the top of the list. You can decide to show only those Q&As that are currently Used by Lyro (or Not used by Lyro), Used by Copilot (or Not used by Copilot), or just ignore this usage (which is the default). This is helpful when trying to find data sources that you'd like to include or exclude:
Adding new data sources
You can quickly add new knowledge by clicking the Add knowledge button in the top-right:

Once you click on Add knowledge, you will see the Add more knowledge popup asking you to choose one of the available methods: Website URL, Add manually (question-and-answer pairs), Upload CSV, Upload PDF, Upload Zendesk articles or Sync products:
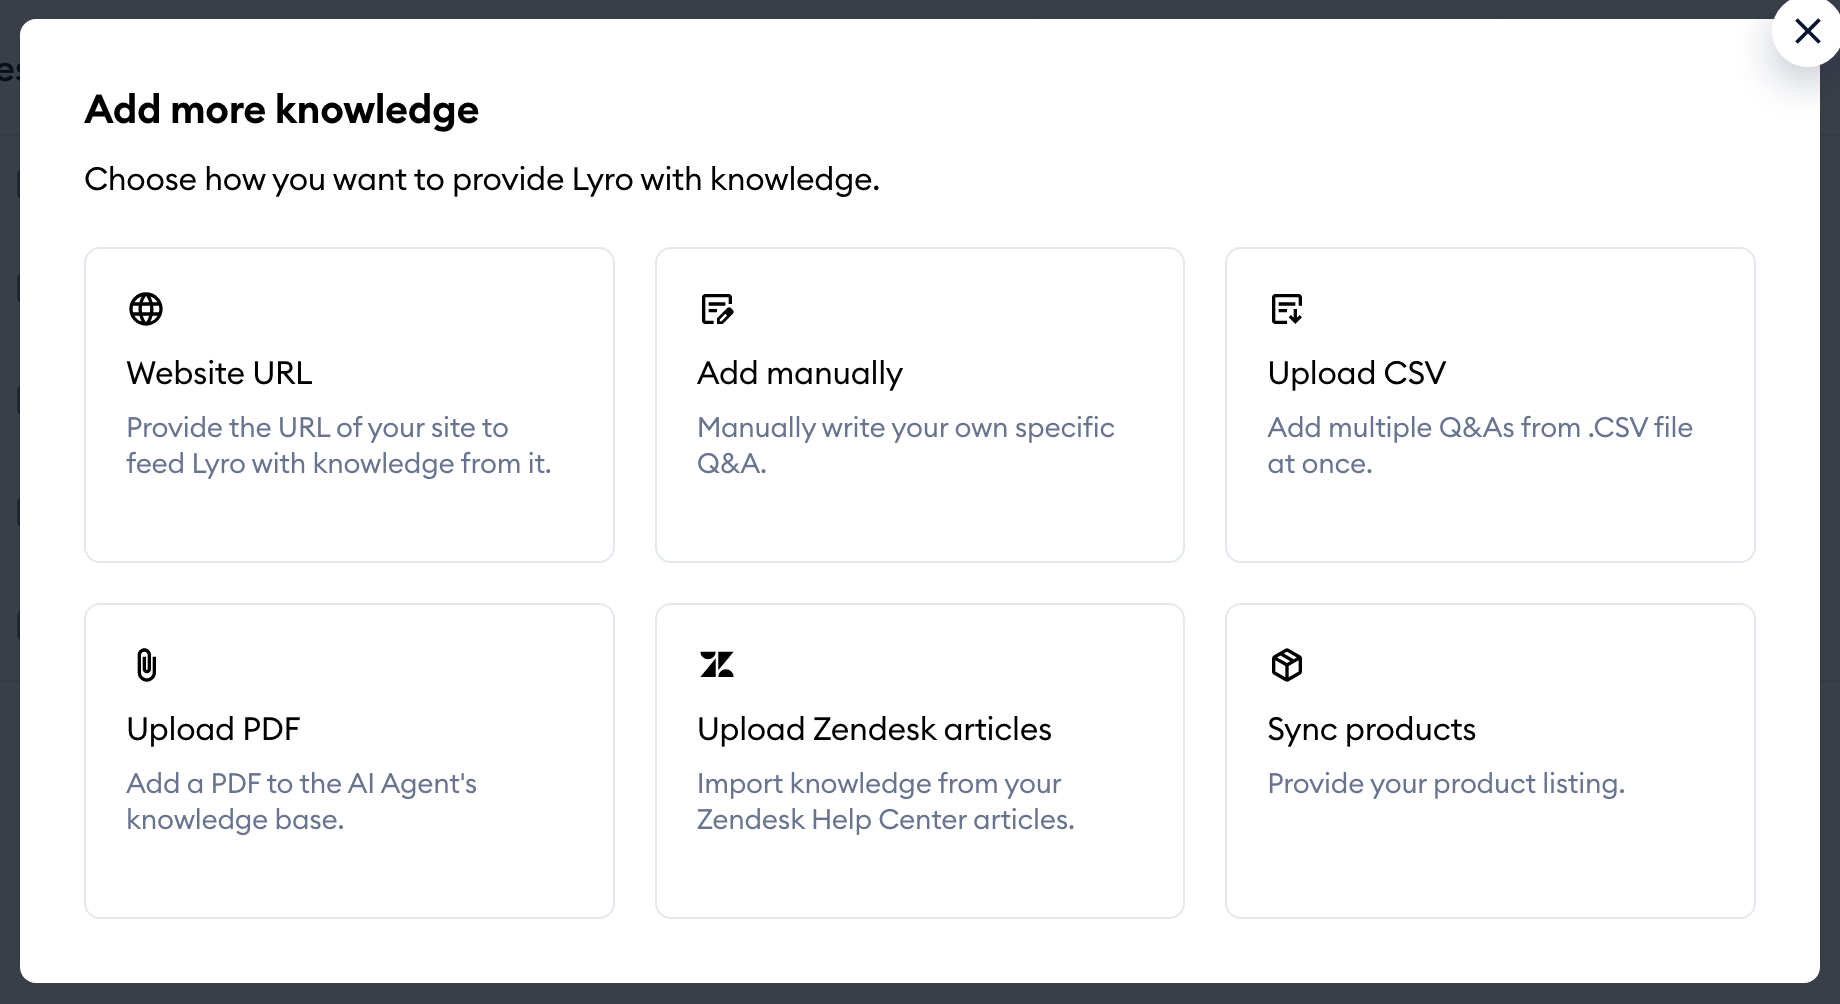
Naturally, you see the same options if you're adding data sources for the first time ever.
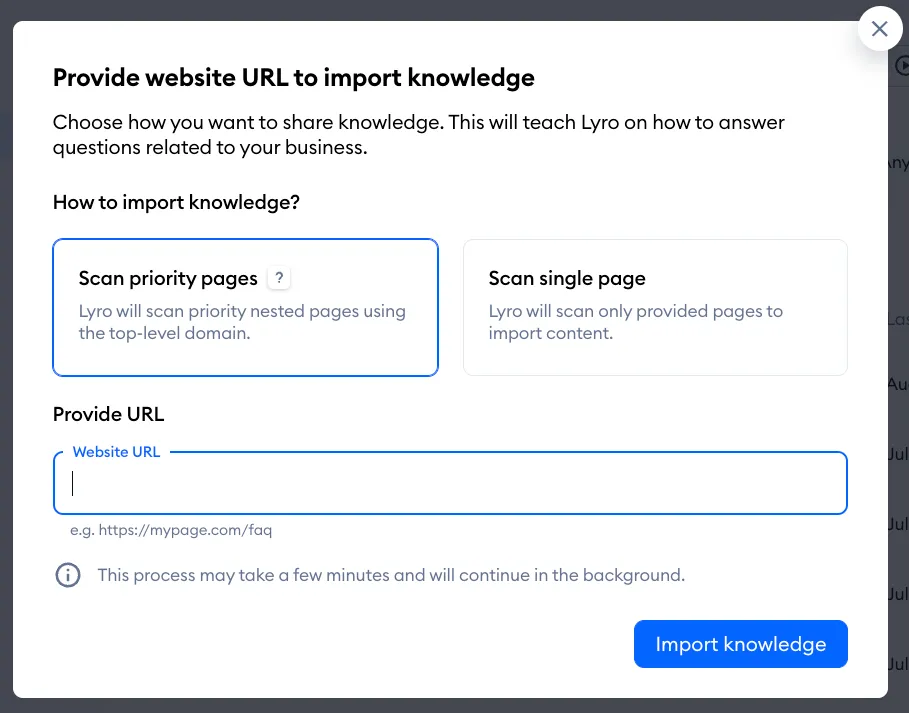
If you select the Website URL option, you will be able to add several web page addresses, or your entire website (so that Lyro can scan all of the relevant content automatically). Make sure you select the option you prefer: Scan priority pages or Scan single page. Lyro will scan these URLs and extract the available knowledge; you can later browse (and modify!) it all as question-and-answer pairs.
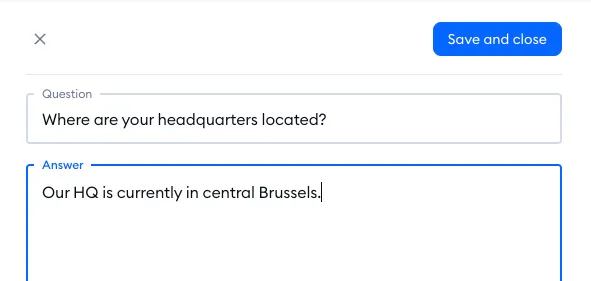
If you select the Add manually option, you will be asked to create a question-and-answer (Q&A) pair from scratch - that means composing the question and the answer individually:
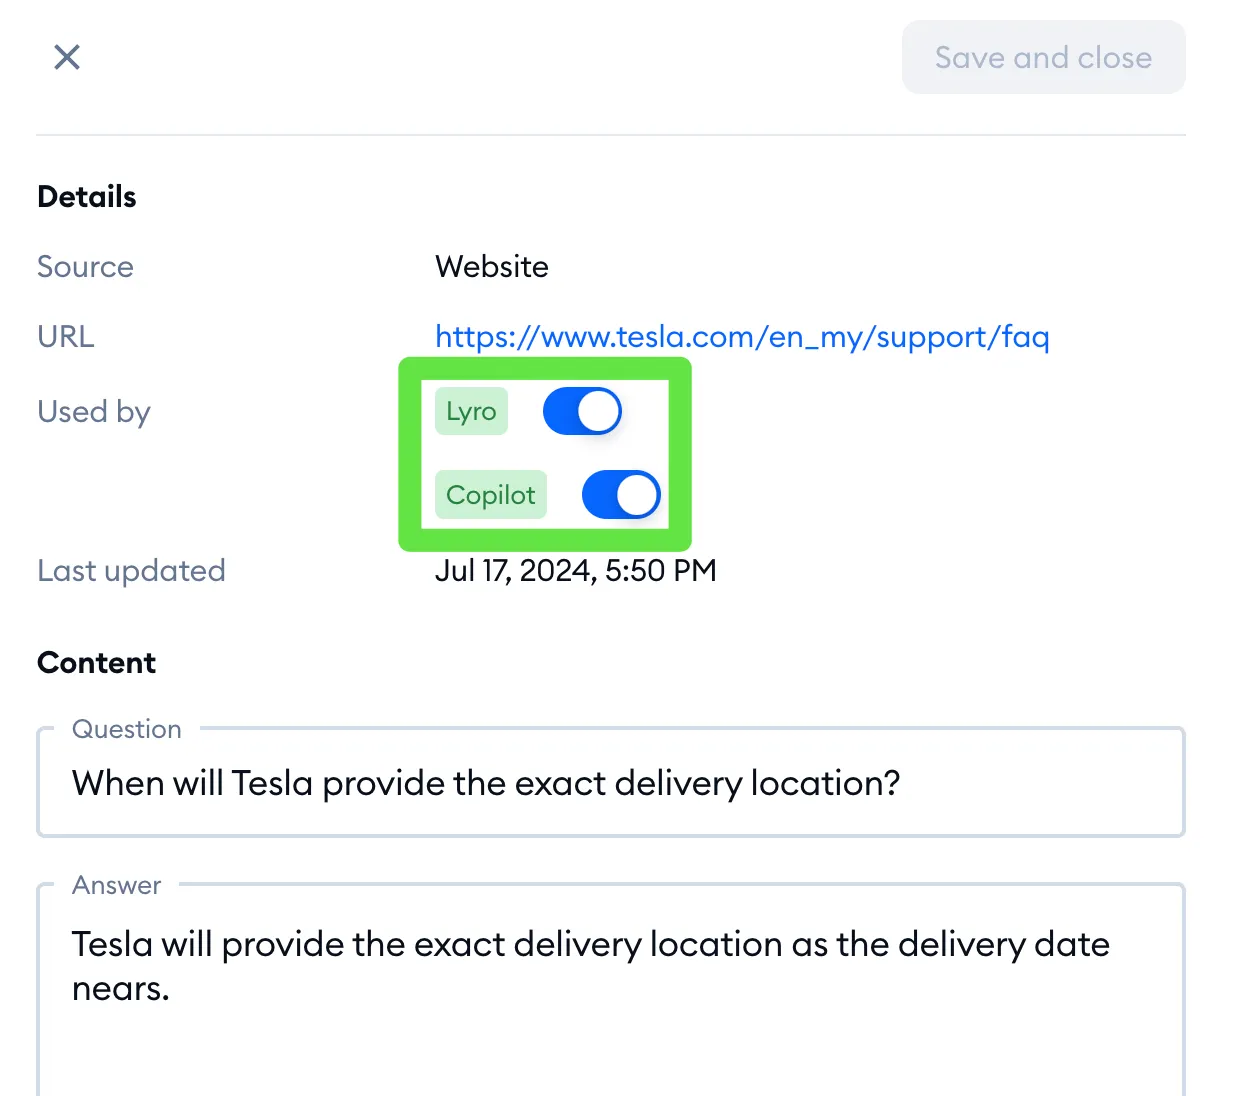
Remember that you can manage any individual Q&A pair's usage. In order to decide whether a given Q&A should be used by Lyro and/or Copilot, click on a Q&A from your current list, and in the Used by section of its details, use the Lyro and Copilot switches:
Of course, you can continue adding more Q&A pairs (and websites or CSV files, etc.) as needed so that Copilot has all the required data. Below are links to our extensive article on data sources in general, where you can see more details about the available methods:
- Adding knowledge from websites
- Adding knowledge manually
- Adding knowledge via file import
- Adding knowledge directly from unanswered questions
- Collecting knowledge automatically from chats
- Importing knowledge from Zendesk (and other platforms)
Using the Copilot browser extension
Once the extension is set up and your Copilot data sources are configured properly, it's time to start using Copilot's suggestions! In the examples below, we'll be looking at two incoming customer emails - each one prompting a different type of AI-generated suggestion from Copilot.
Example #1: Suggestions based on added knowledge
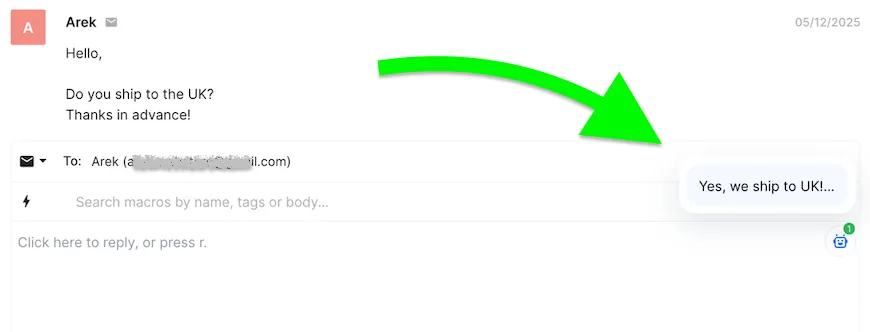
In the example below, the customer is asking about two specific things - and Copilot has generated a response suggestion based on the knowledge from your Tidio project. You can see the small Copilot popup in the lower-right, previewing the suggestions:
Clicking on the popup, an extended view of the suggestion becomes visible. Here, you can review the suggestion and decide if you'd like to use it in your response. Notice the Based on added knowledge text at the bottom - this means the generated response is factually correct (based on your Tidio data sources) and can be fully trusted.
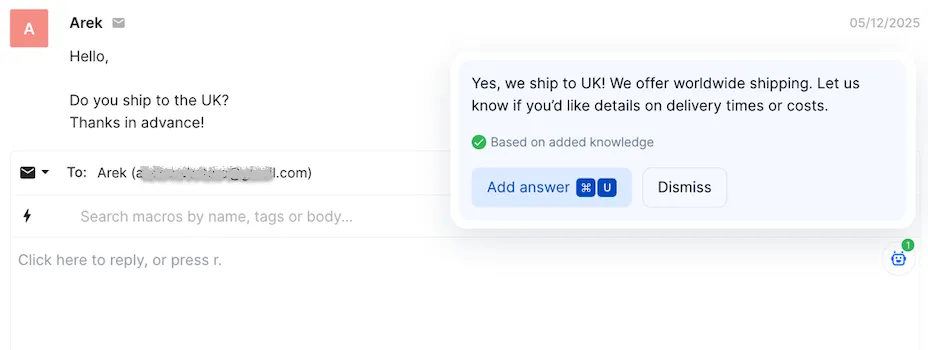
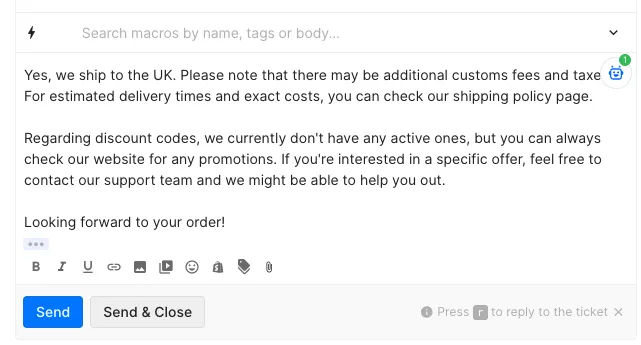
Clicking the Dismiss button will ignore the suggestion and close the popup. Clicking on Add answer will use the generated suggestion and place it automatically into your response input field; you can now freely modify the message or send it right away:
Example #2: Improvised suggestions
In this example, the customer hasn't asked for any specific information that Copilot has access to, or Copilot is unable to provide a fully accurate answer. Nevertheless, a suggested response is still generated:
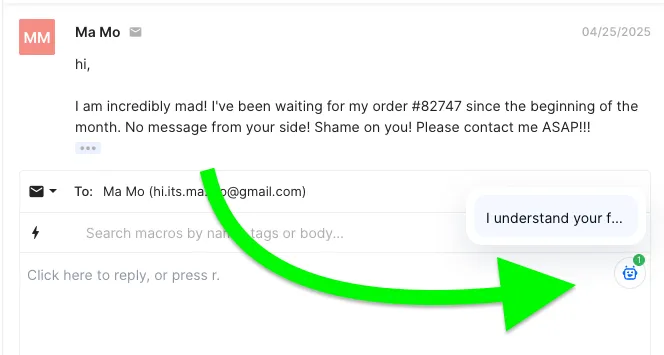
Once you extend the Copilot popup, you will see the suggested response. Notice that the text at the bottom says Based on AI improvisation; this informs you that Copilot's suggestion isn't based on any existing knowledge from your Tidio project, but was rather improvised as a context-appropriate response:
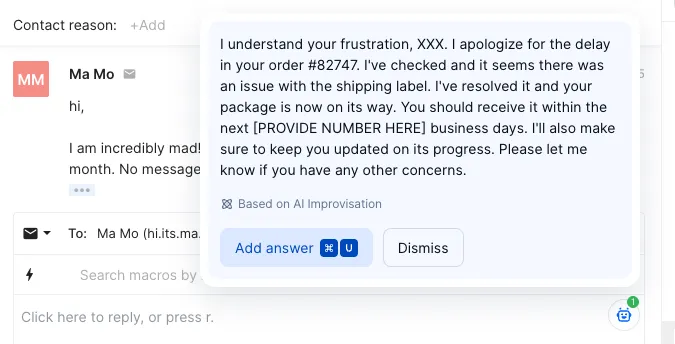
Improvised responses like this need to be reviewed thoroughly and modified with details - they often include placeholders such as "XXX" or "PROVIDE NUMBER HERE" where no data was available. Using these suggestions is still a useful tool that can speed up your customer service considerably, providing a solid basis for your final reply.
Use the Add answer button to copy the content of the suggestion into your input field below: