An FAQ flow can answer the most frequent inquiries that your visitors may have. Your website visitors will click on the question, and the flow will provide the necessary answers.
In this article, you'll learn:
You can add the FAQ flow to your automation with the First visit on site trigger, or create it separately with another trigger, depending on when you want your visitors to see the questions.
Ready-to-use FAQ flow template
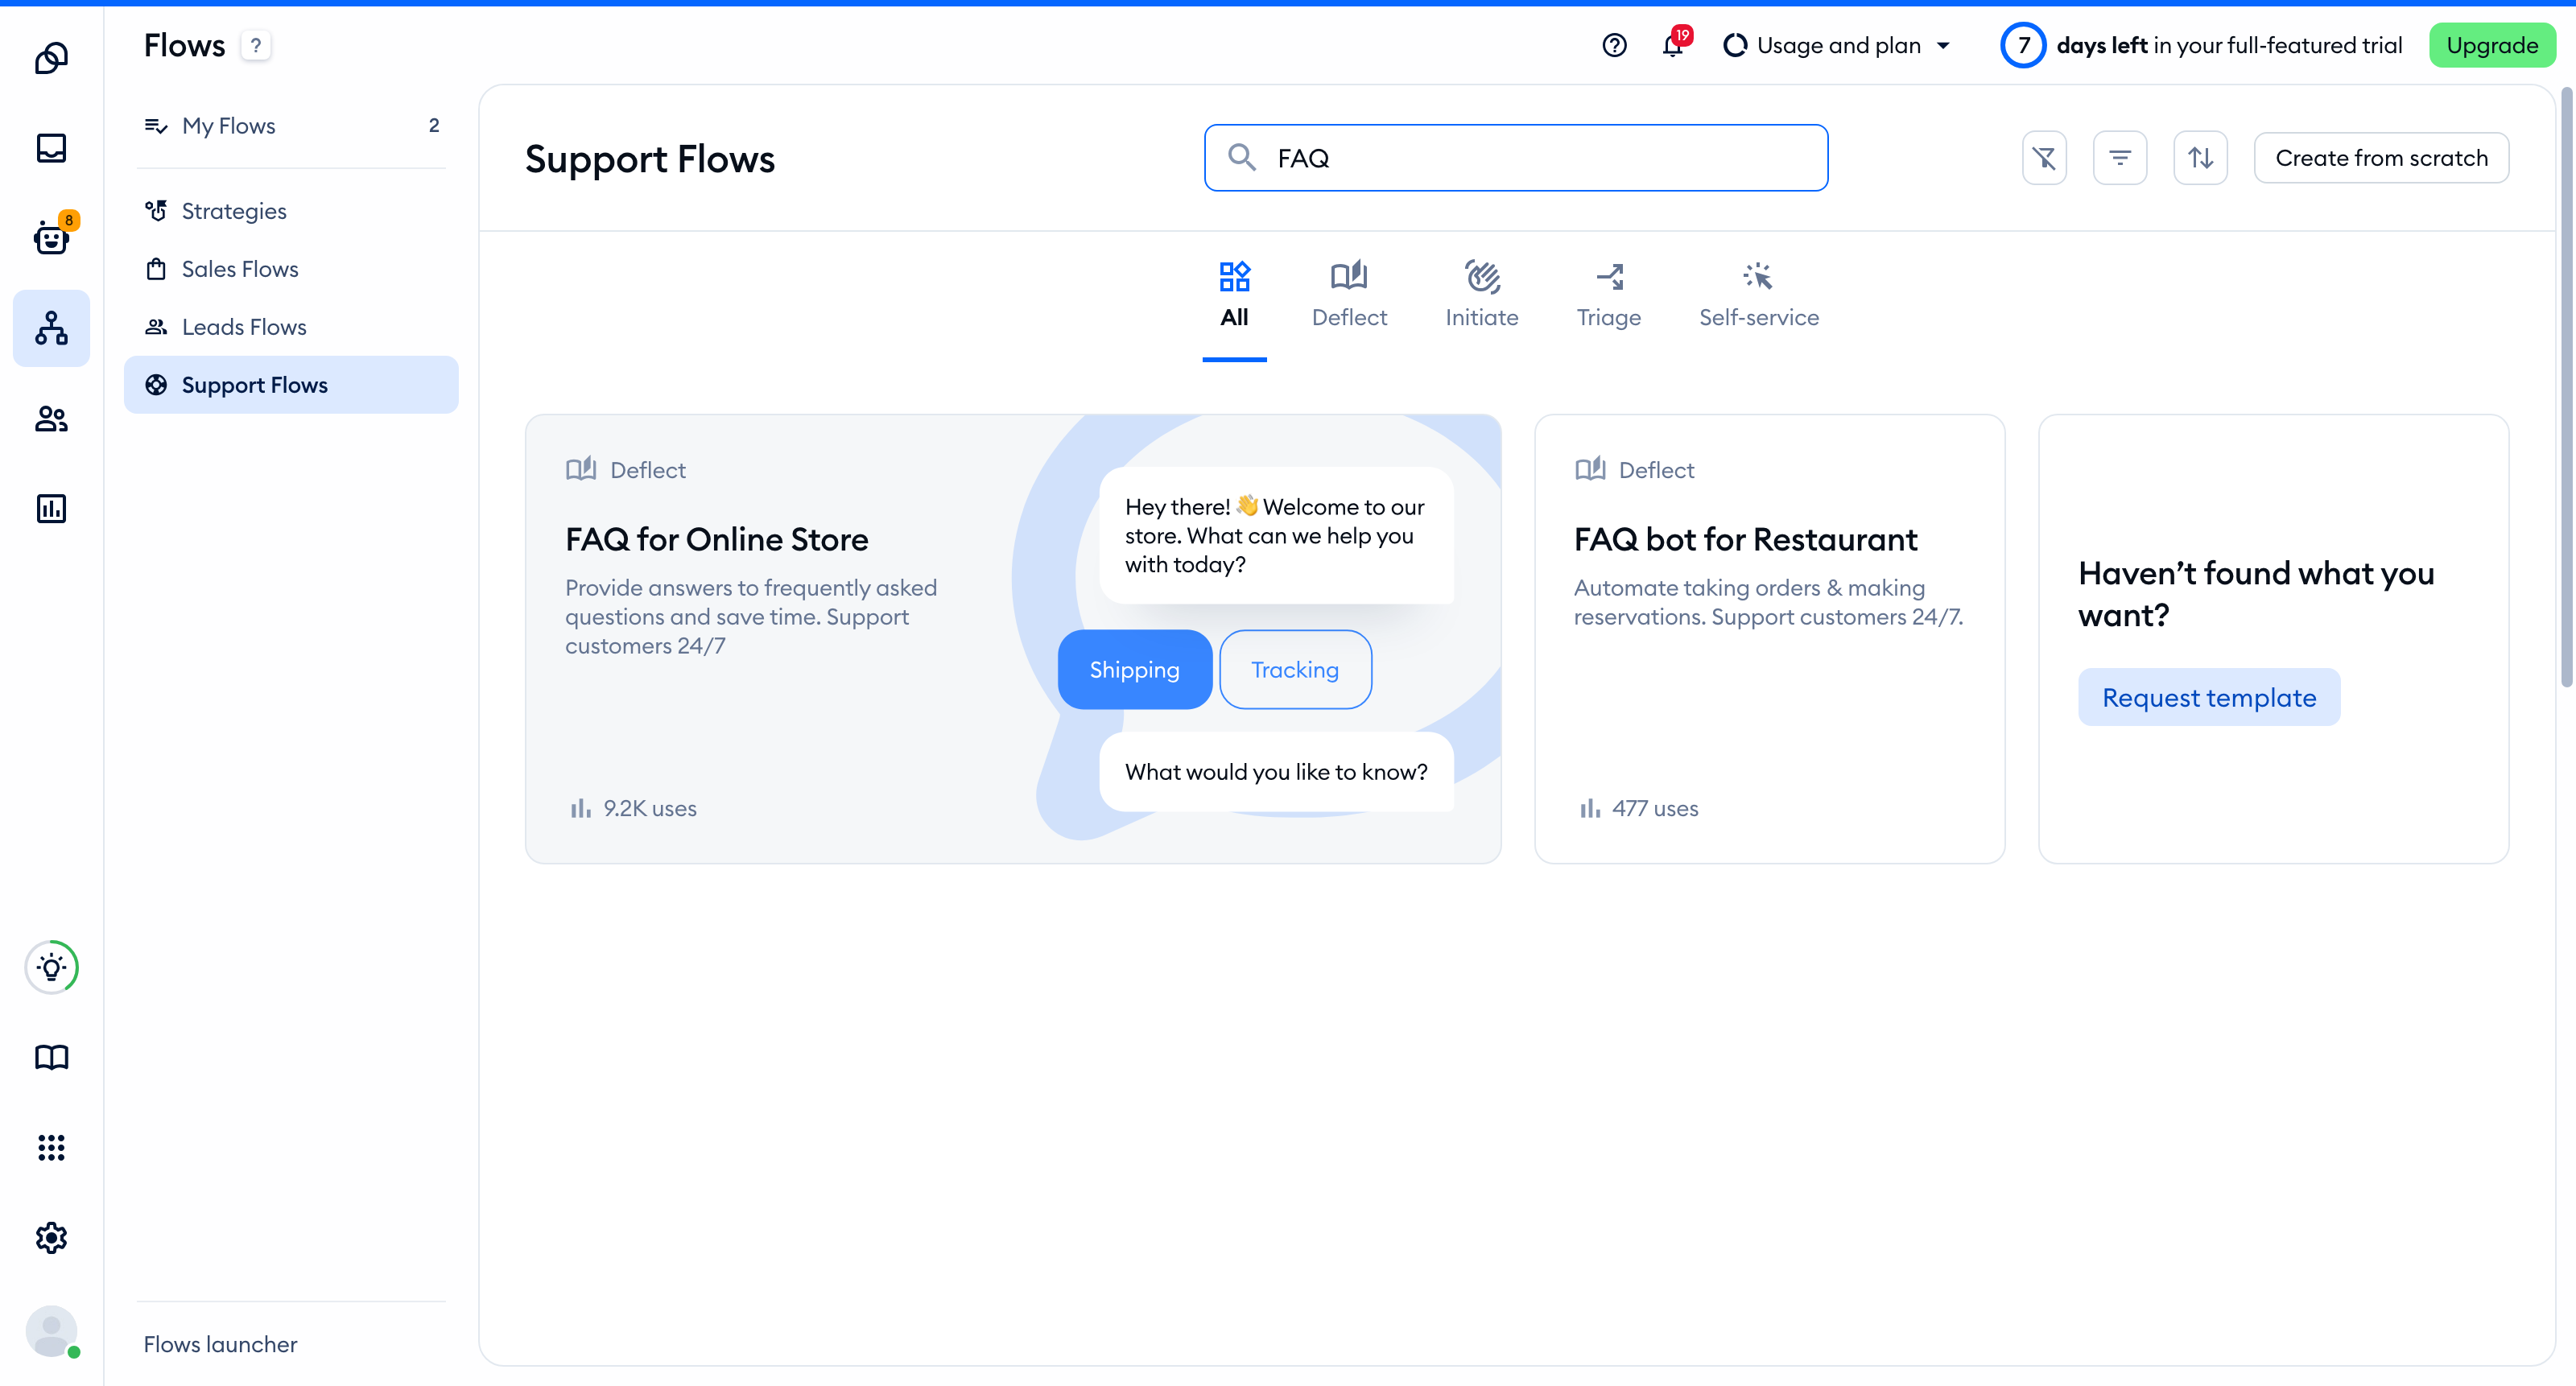
Our ready-to-use FAQ flow template is available to all of our customers. You can find it in the Flows section, in the template lists on the left: Sales Flows, Leads Flows and Support Flows. Open a list and type FAQ into the Search for template... field to find it quickly - the search looks through the list you have open. Depending on the industry you operate in, it will be labelled as FAQ Flow for Online Stores, Restaurants, etc.
Click on Learn more on the template's card to see what it does, and hit Use template to add it to your flows:
Create your own FAQ flow
To create the FAQ flow from scratch, head over to the Flows section (the flow icon on the menu on the left side) and select the Create from scratch option.

Choose a trigger
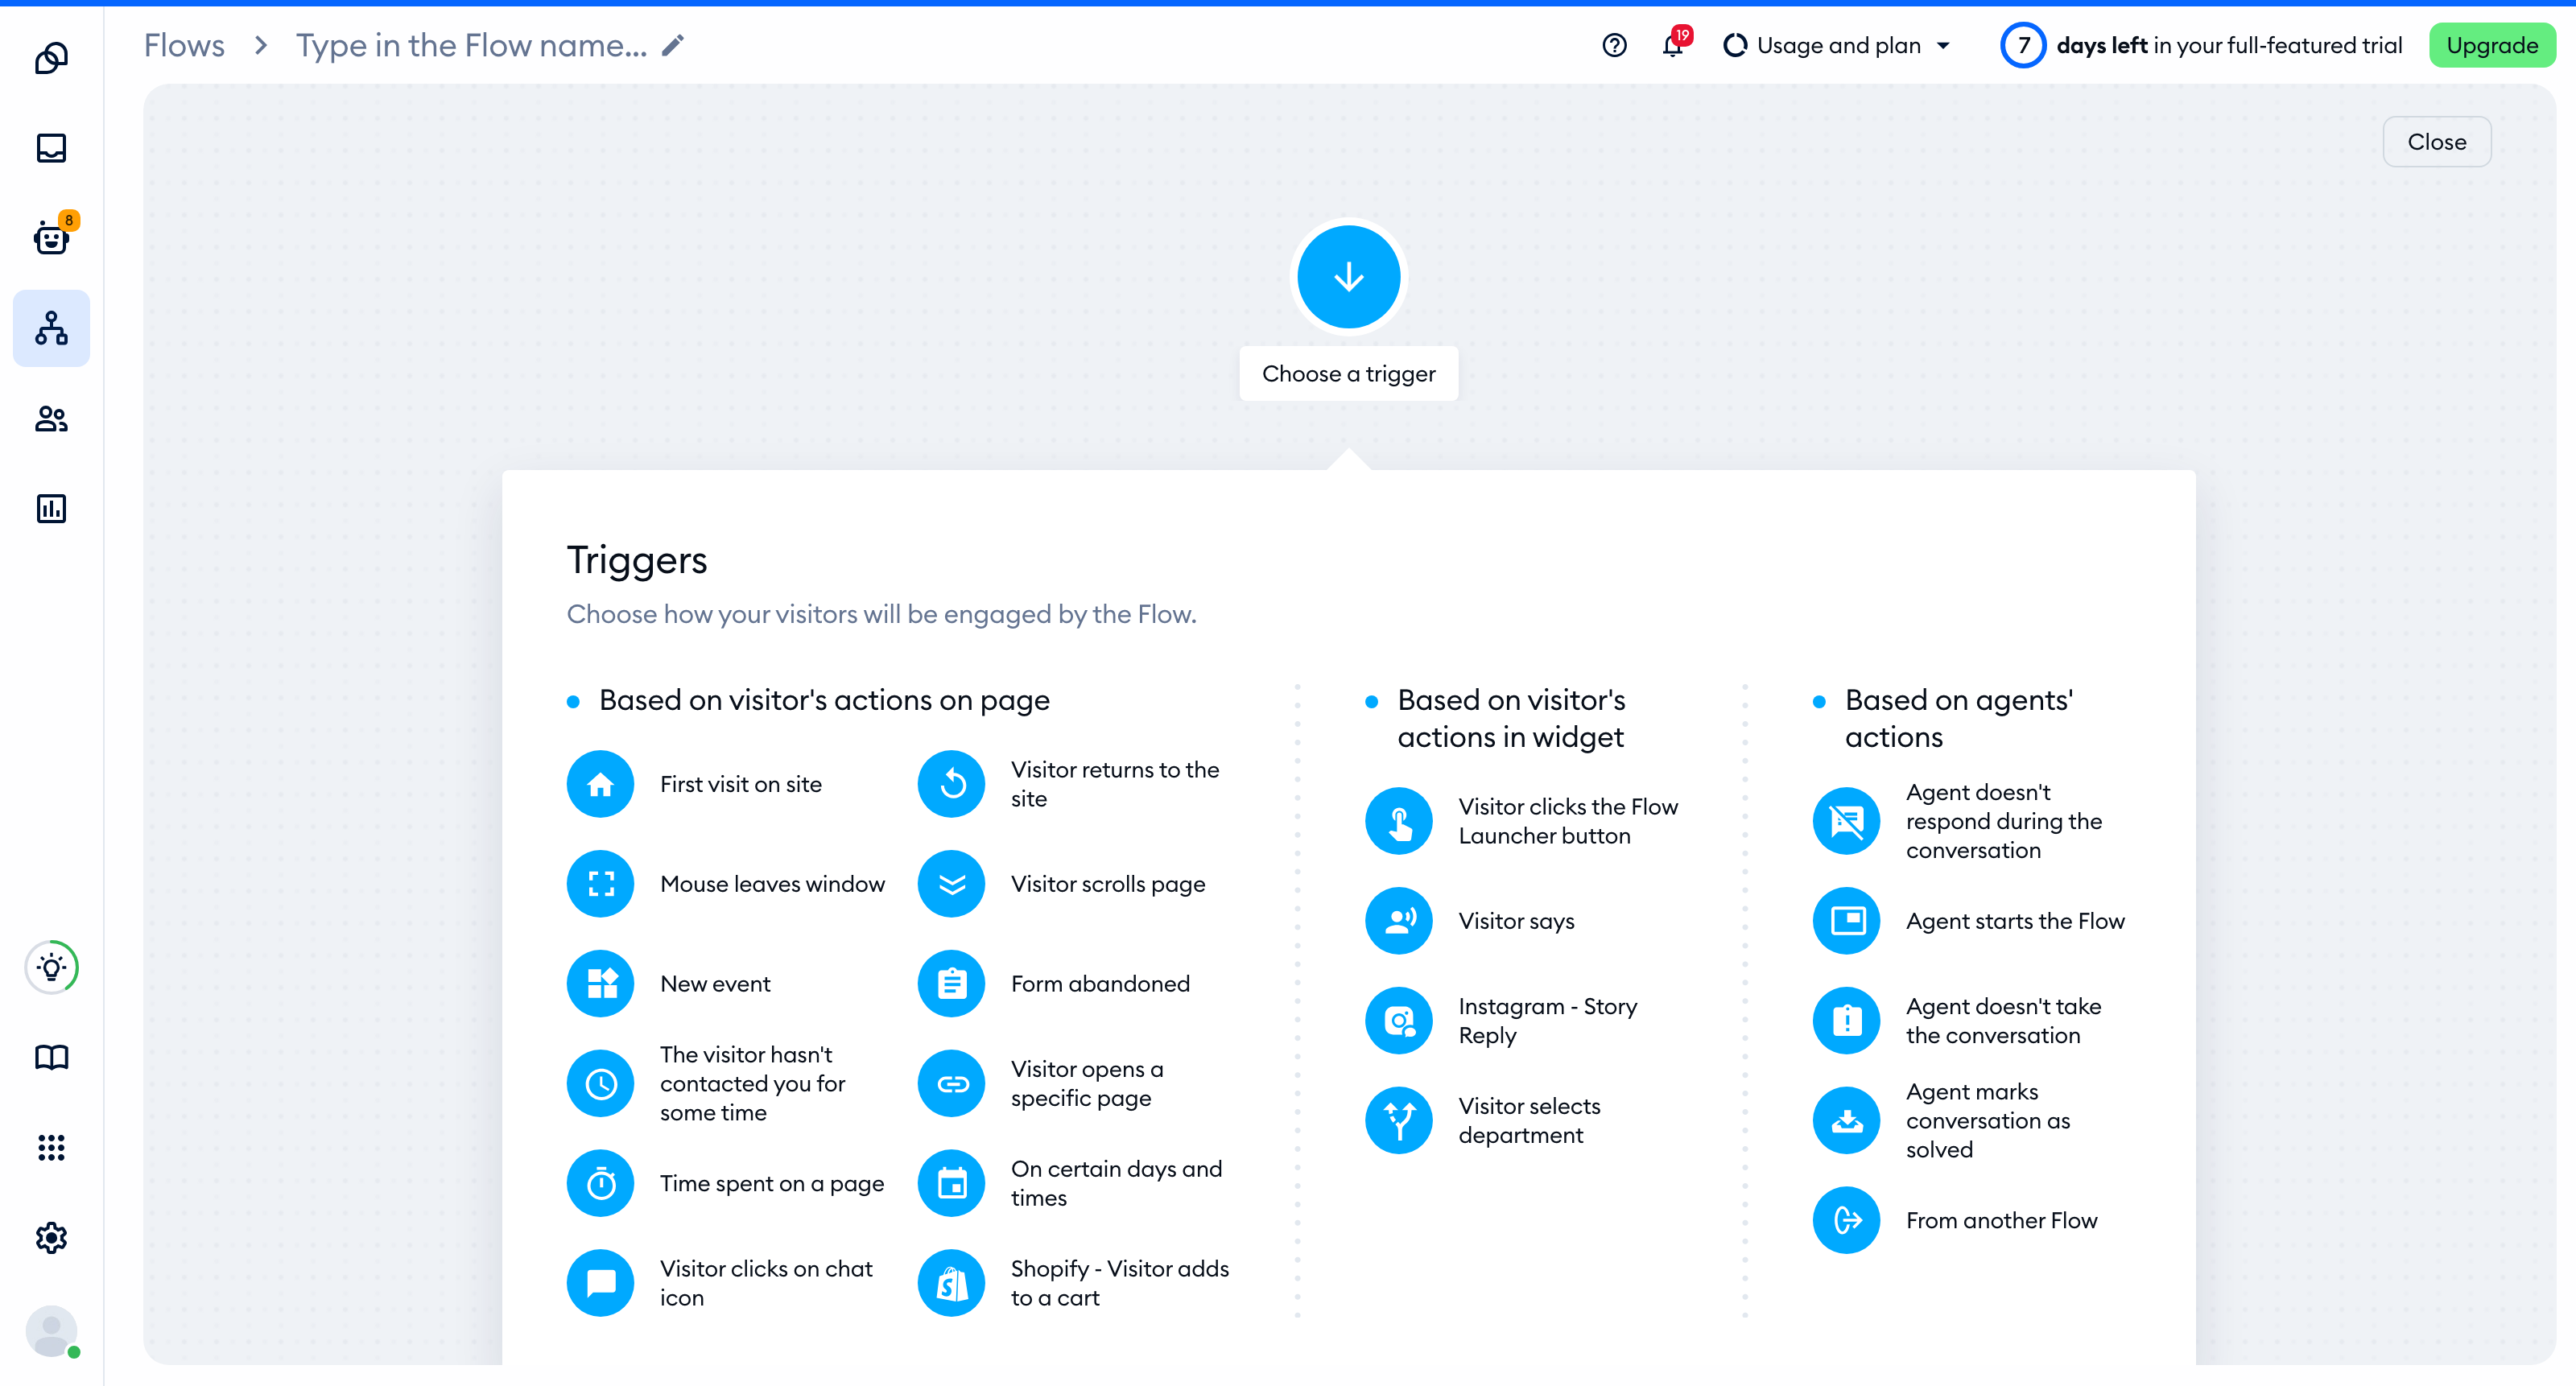
Once you enter the flow editor, you'll be asked to choose a trigger. The trigger is a node that begins the path of the flow - it determines in what situations the flow will start.
We recommend using the First visit on site trigger to display the flow for every new person who visits your site immediately. However, you may want to use the Visitor clicks on chat icon trigger instead, if you prefer your flow to execute when a visitor opens your chat widget.
Add questions
Once you have your trigger chosen - add the Decision (Quick Replies) action to display the questions you wish to address. When you pick and drag the node from the list to the editing grid, it will connect to your trigger automatically.
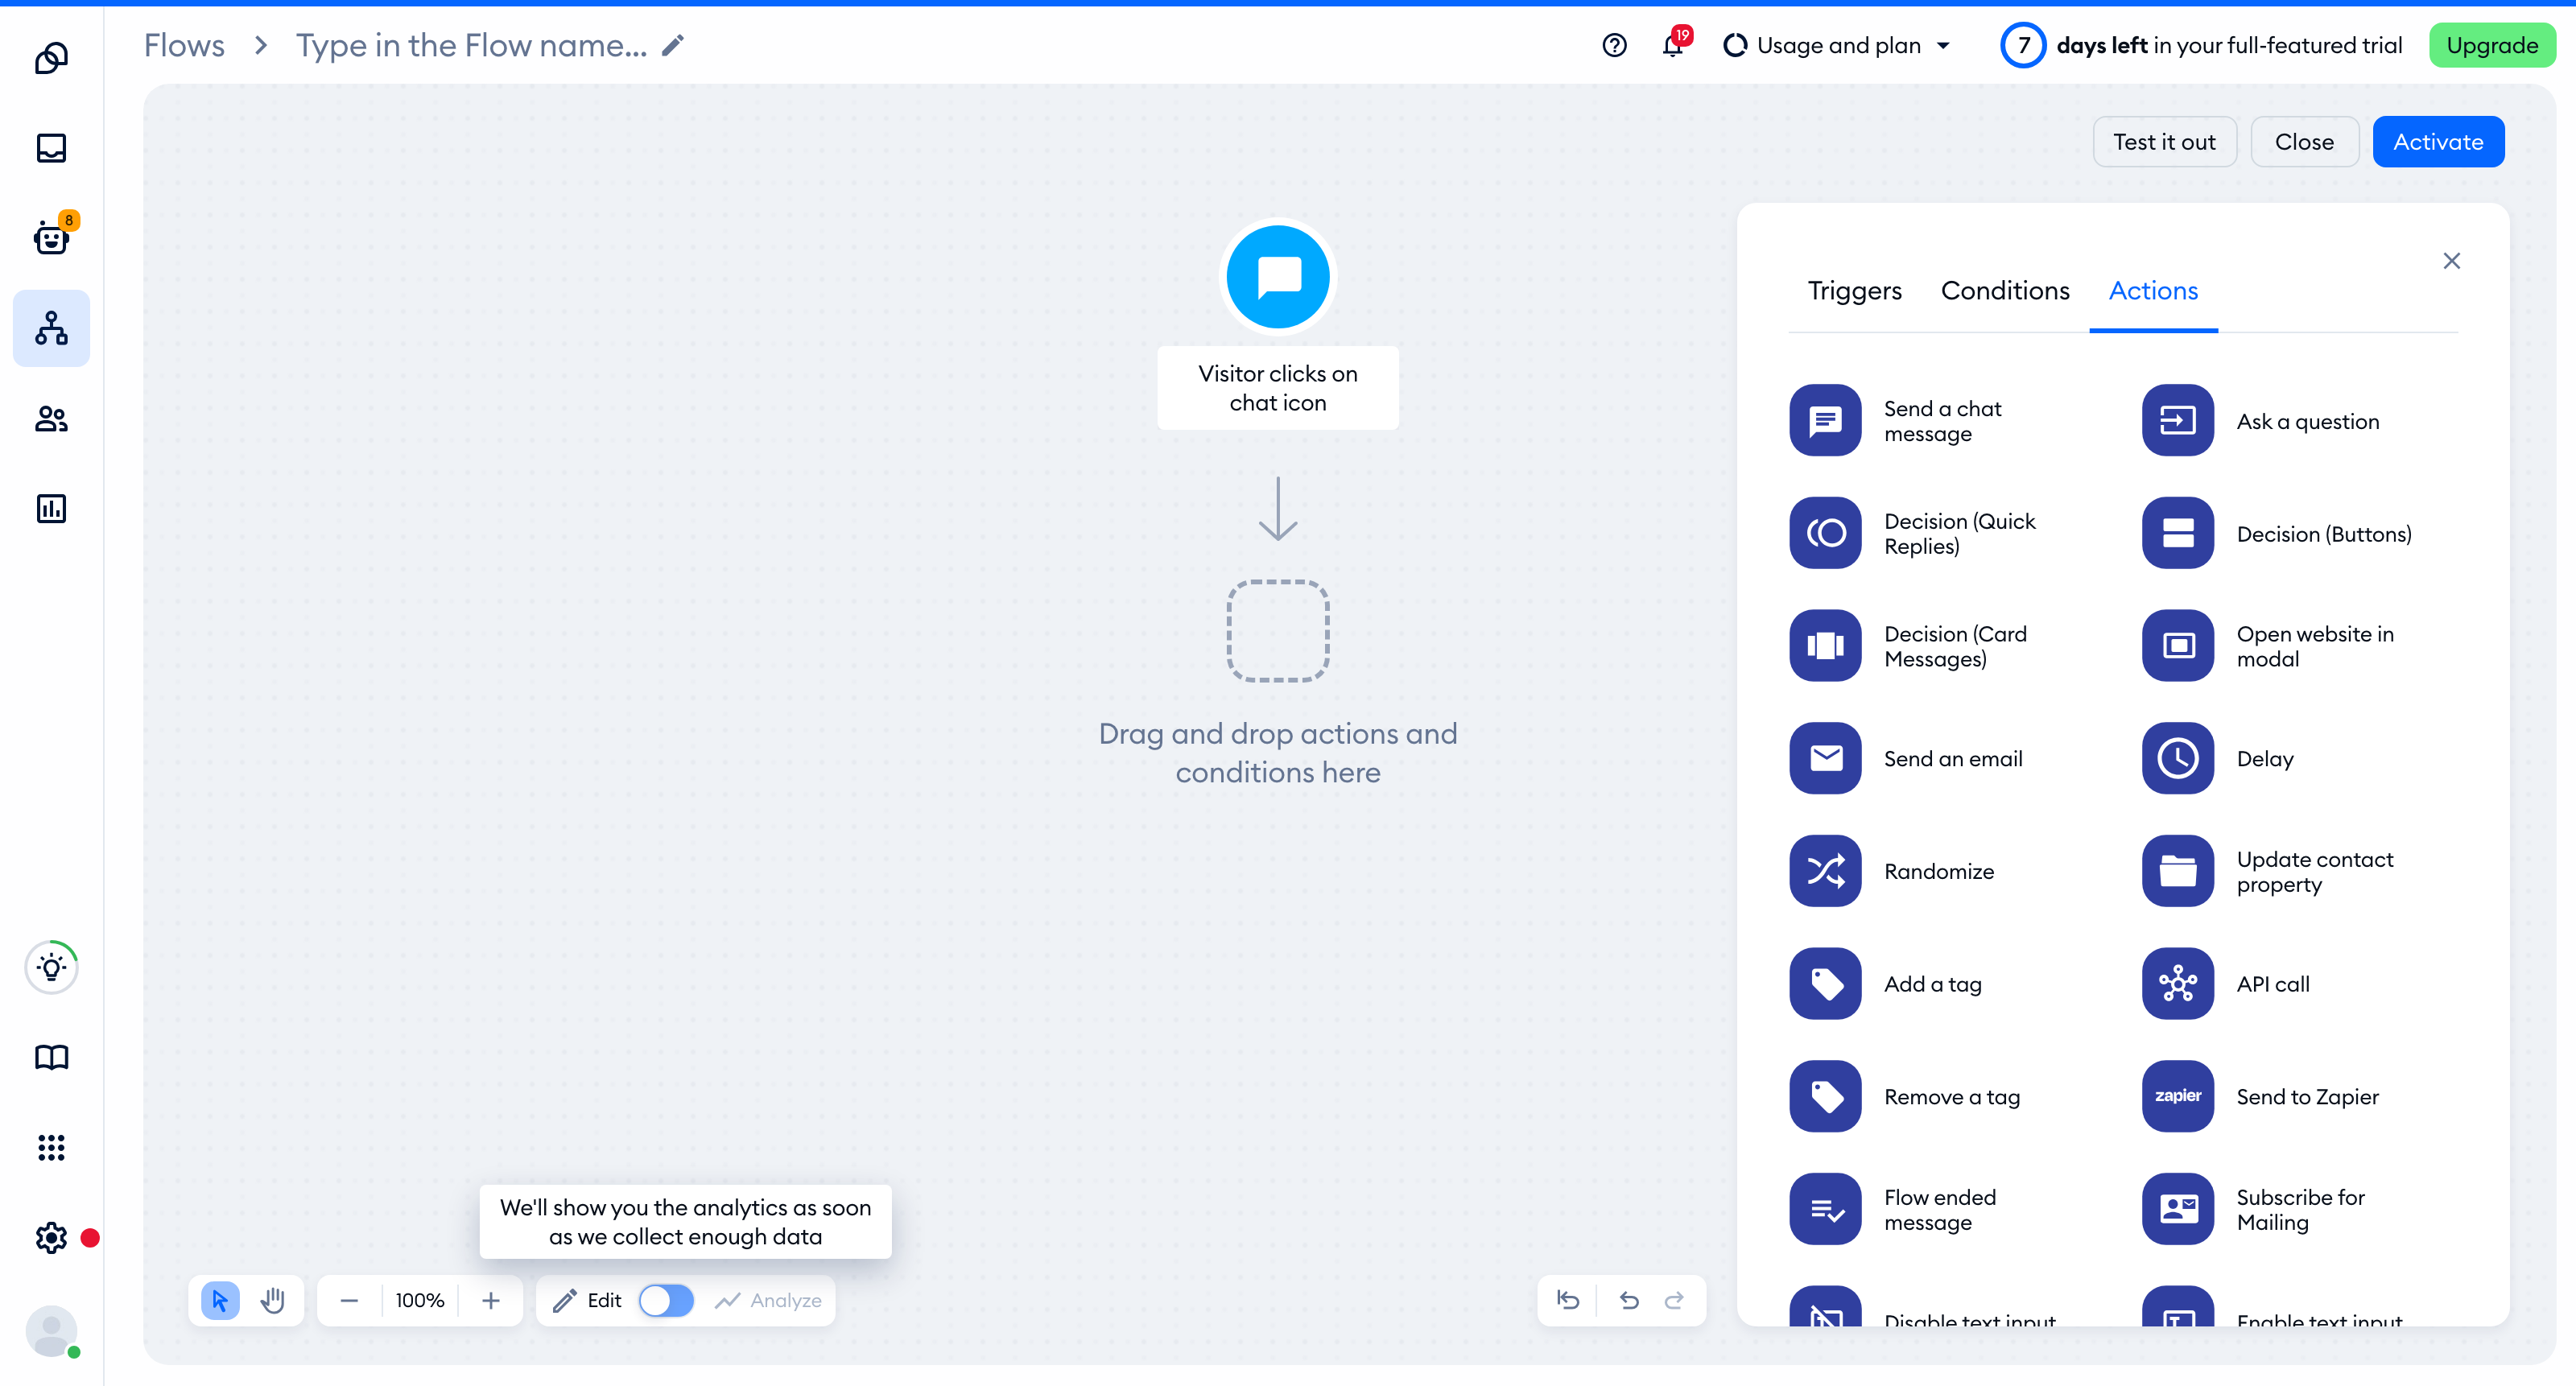
Now, edit the content of the Decision (Quick Replies) node on the right-hand editing modal. You can place the most common questions that you wish to address as quick replies.
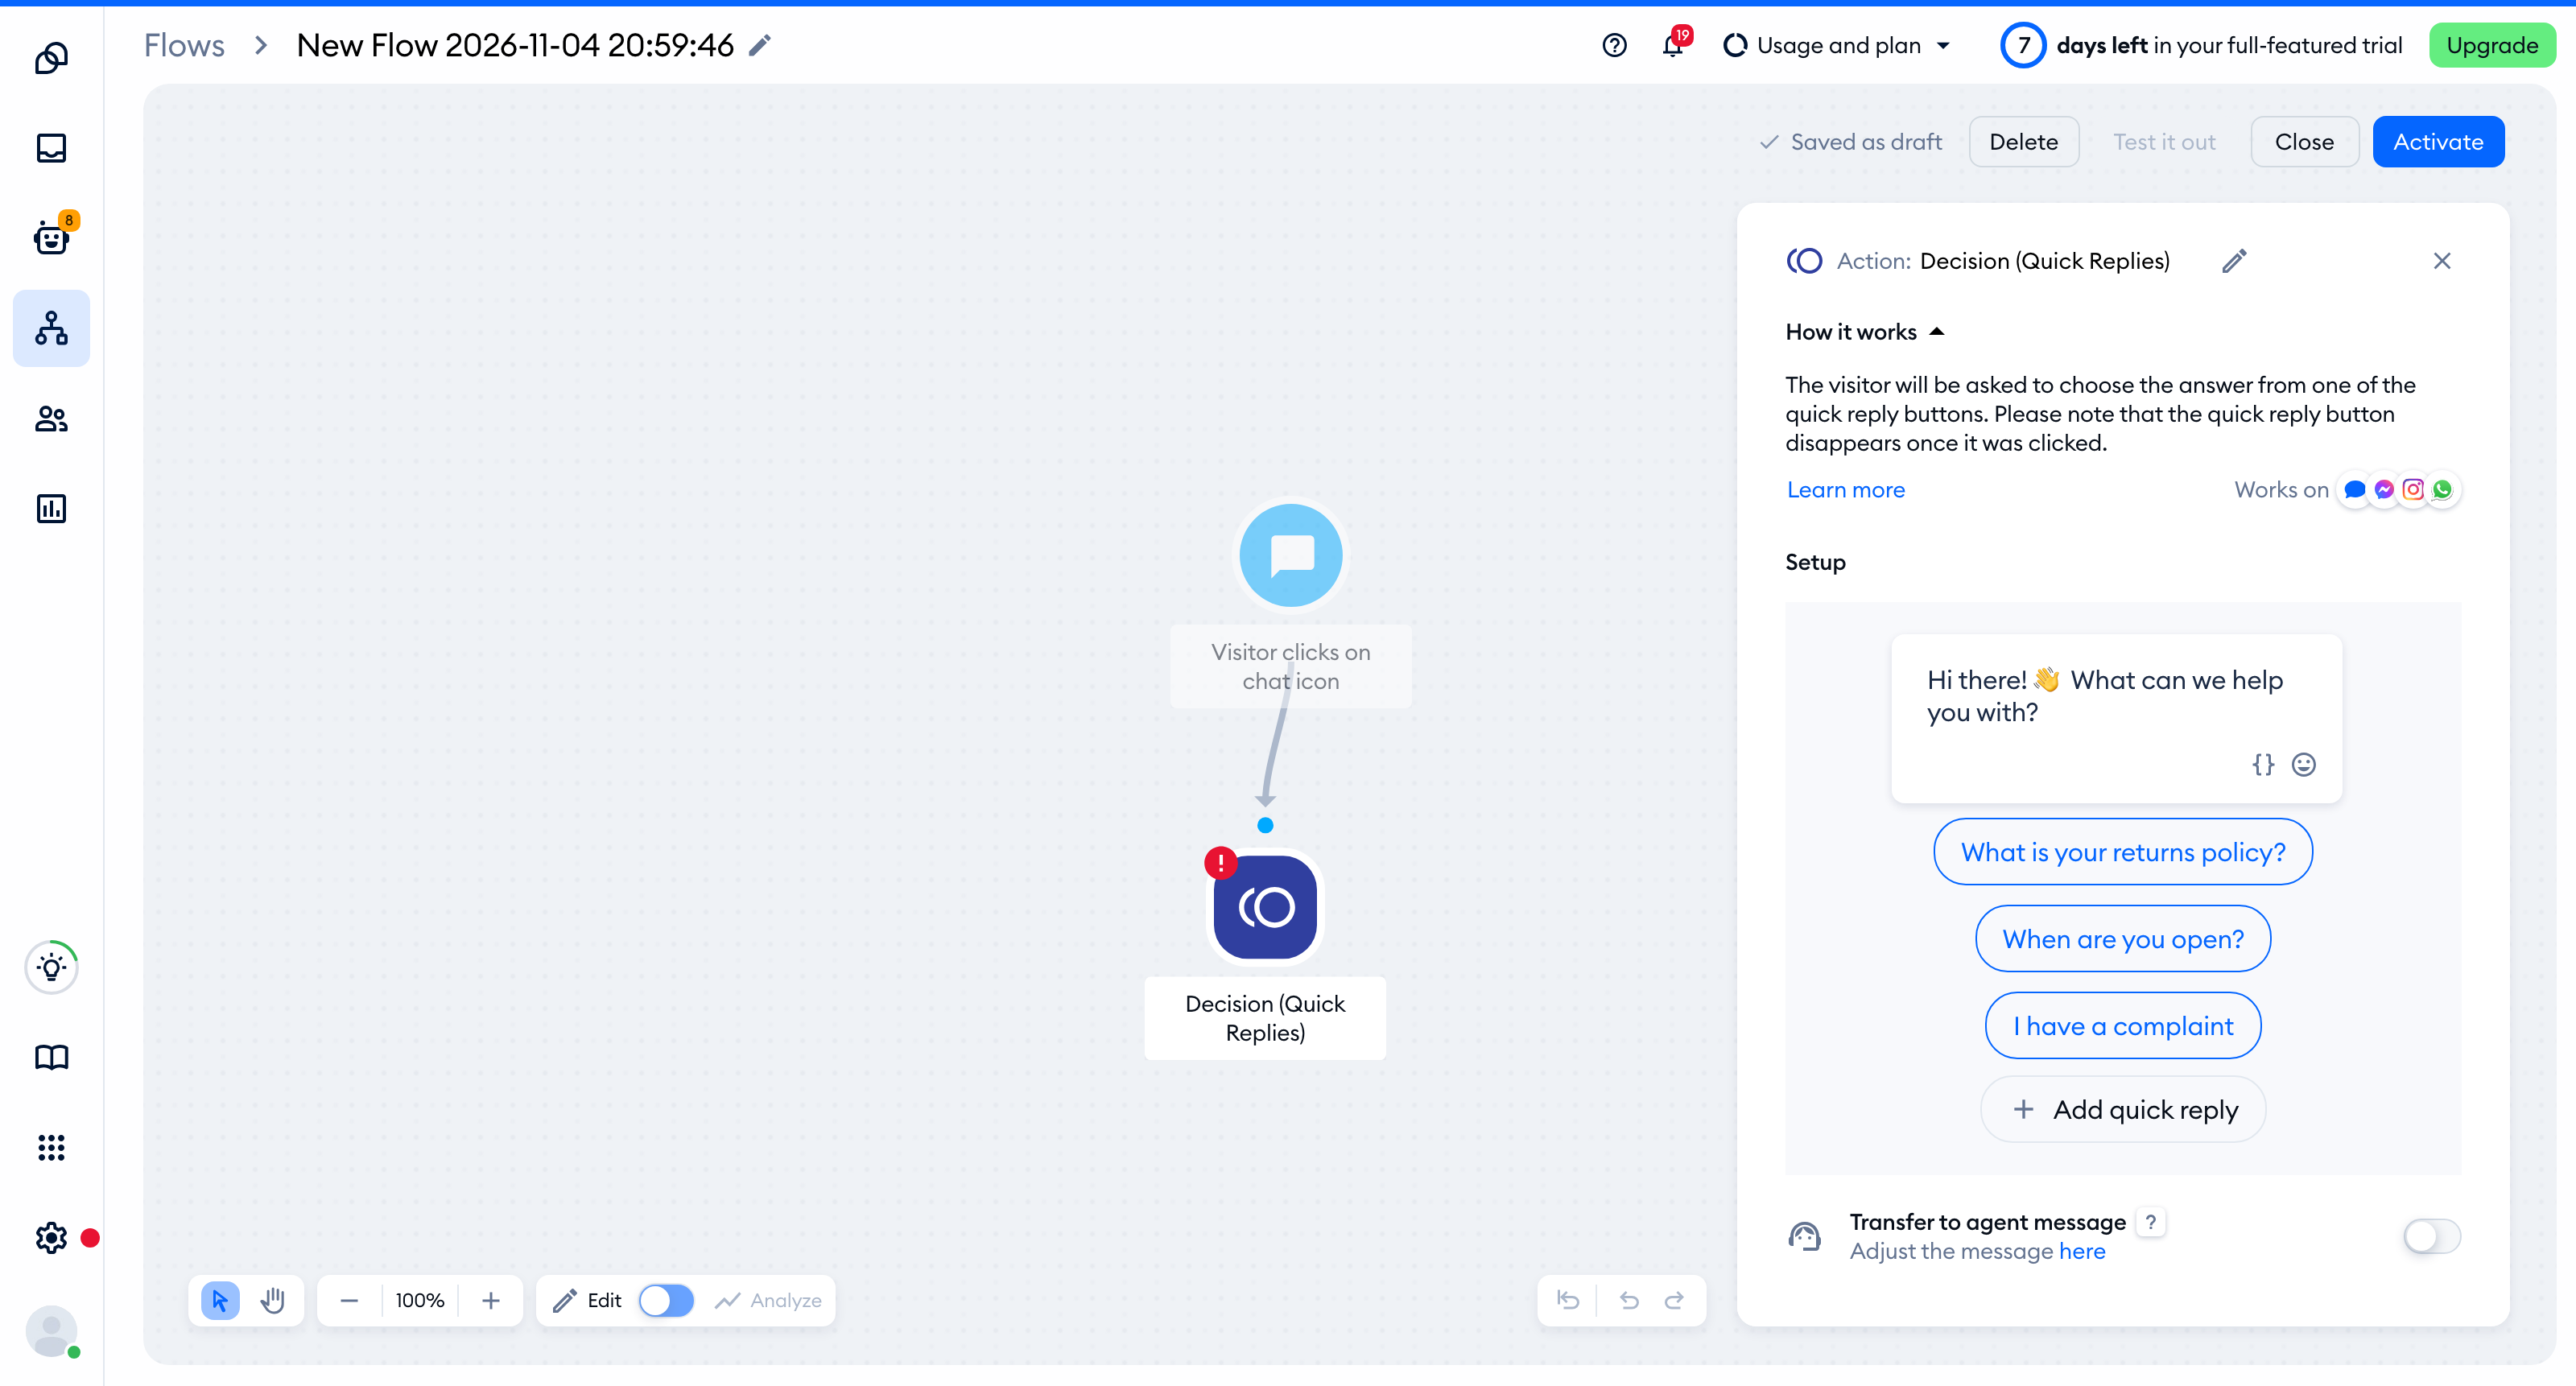
- Firstly, type the message that the visitor should see before they pick the topic.
- Secondly, add the question to which the flow will send an answer when the visitor chooses it.
- Use the + Add quick reply option to add more questions. You can add up to 11 quick replies - once you reach the limit, the button disappears.
Add answers
Close the Decision (Quick Replies) node editing modal, and from the list of actions, drag as many Send a chat message nodes as you have questions onto the editing grid. When you finish it, drag an arrow to each node, as shown in the gif below.
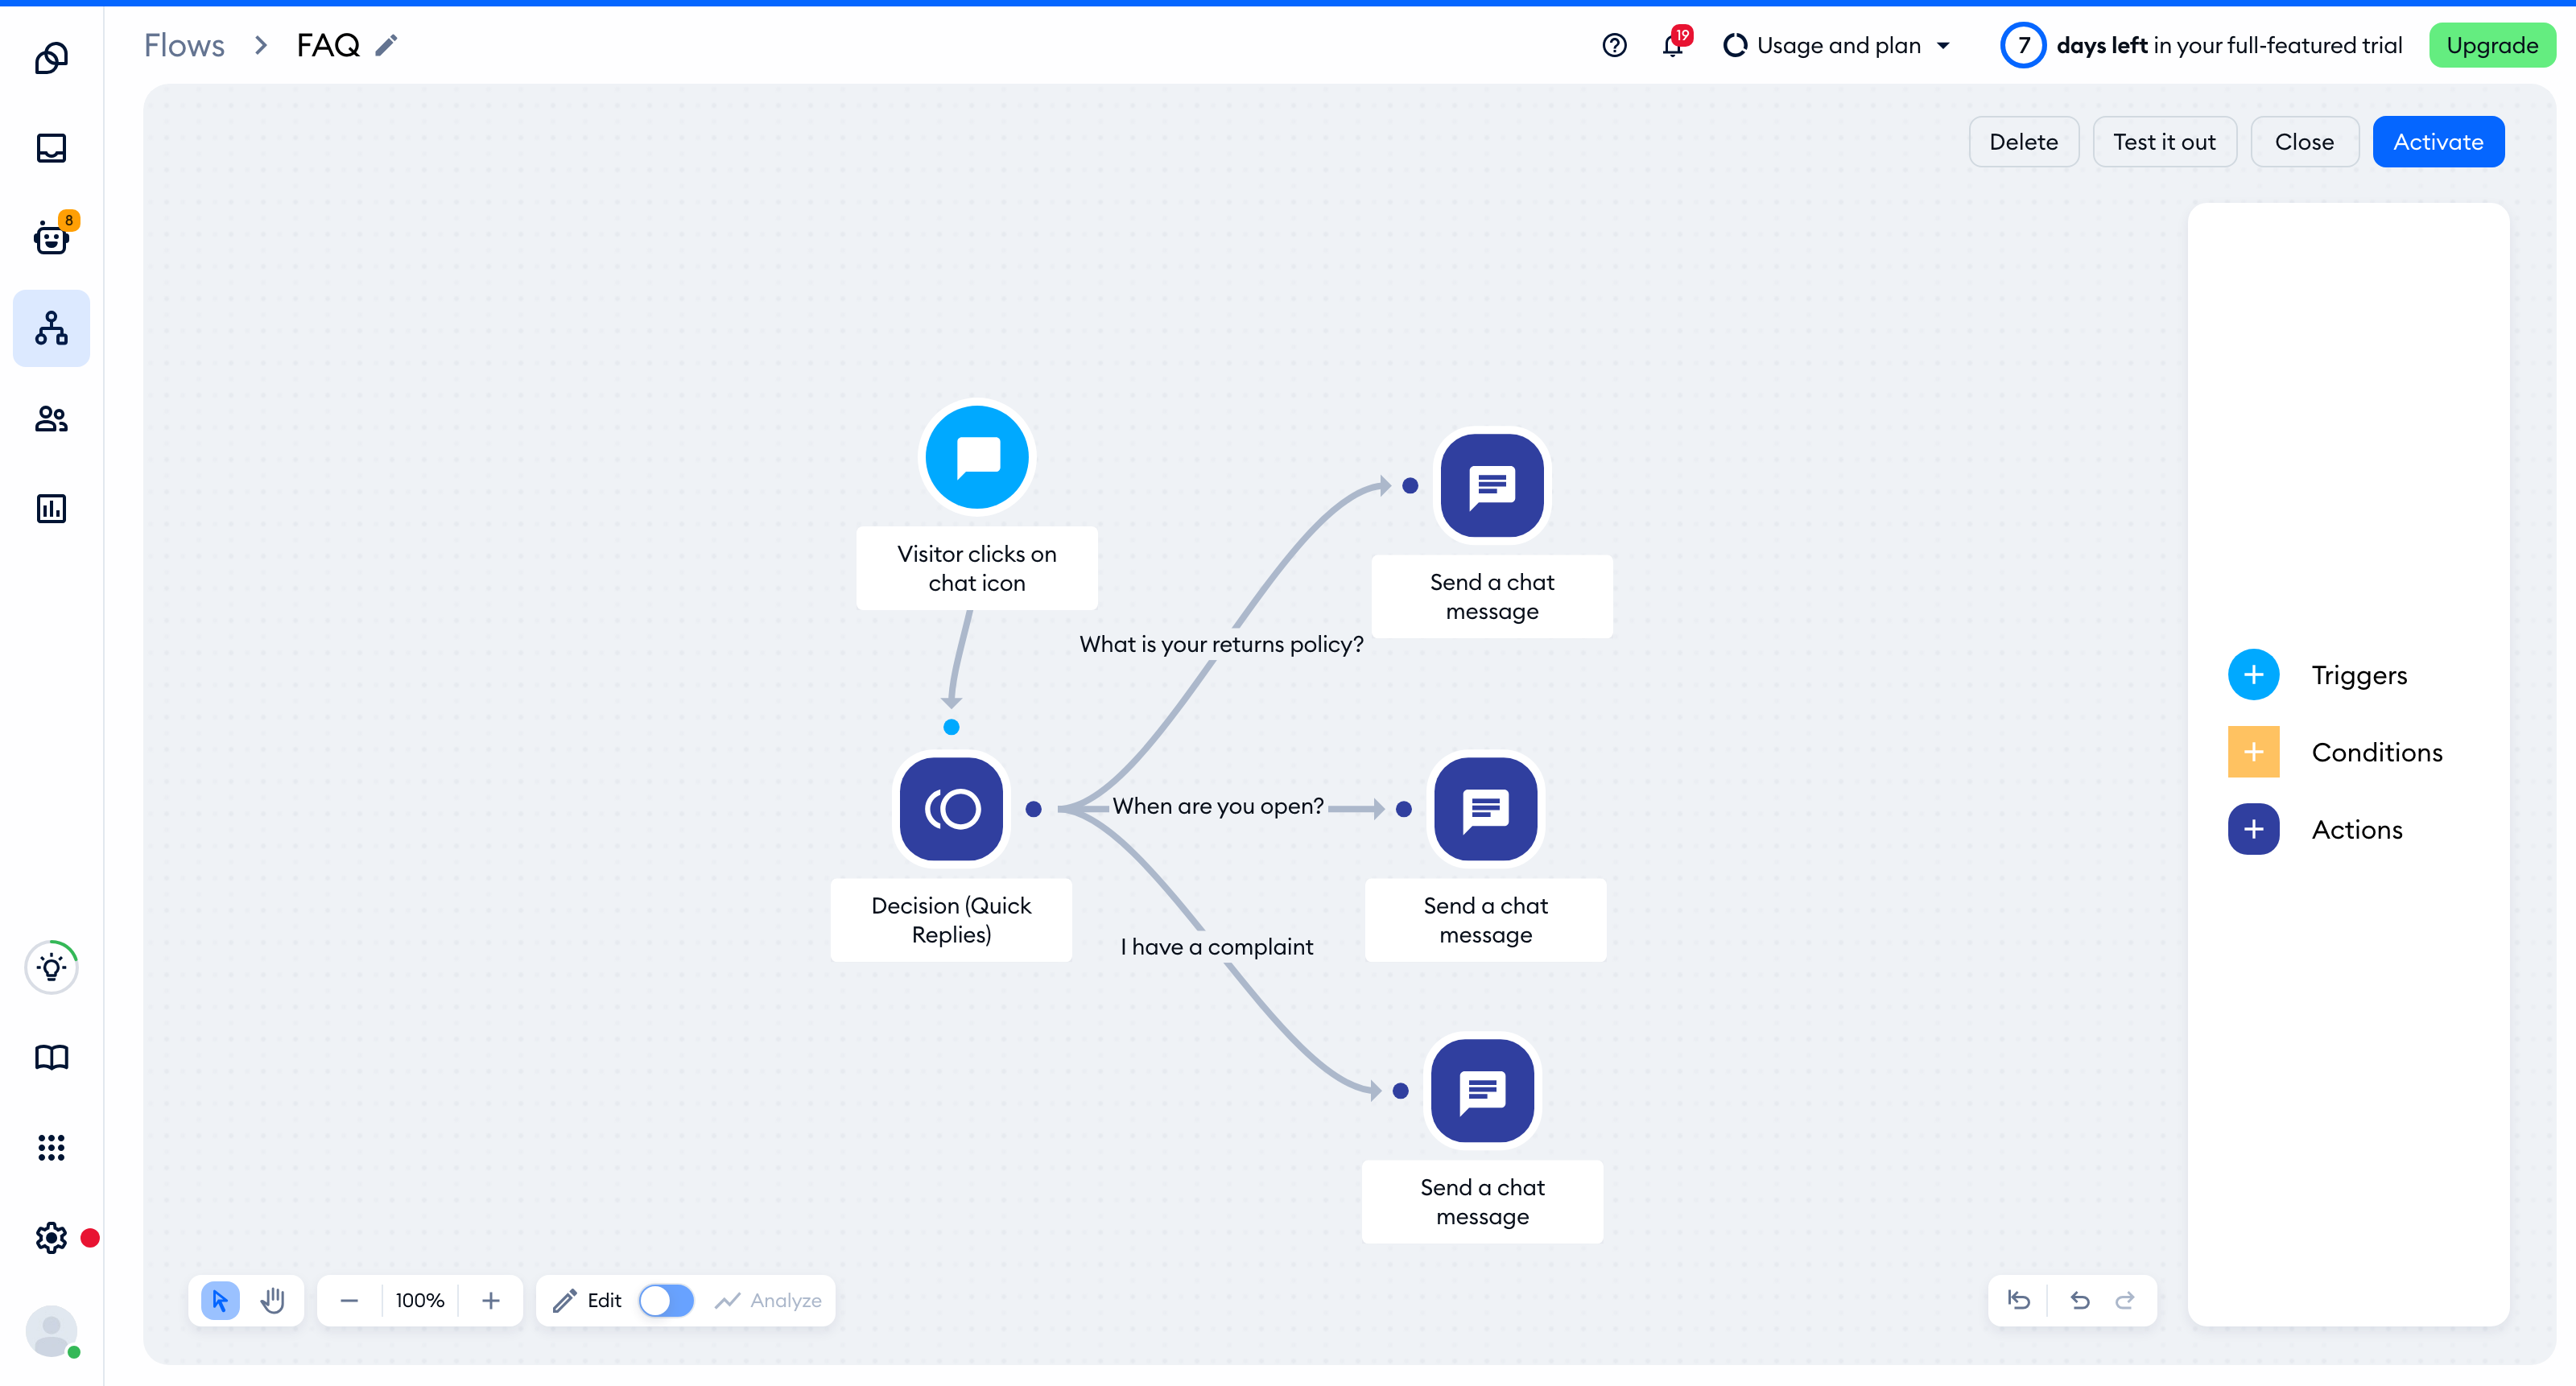
The moment each of the Send a chat message nodes has a question assigned to them, you can begin writing the answers to the questions inside each of those nodes. Those are the answers the flow will provide whenever a visitor selects a specific question from the list.
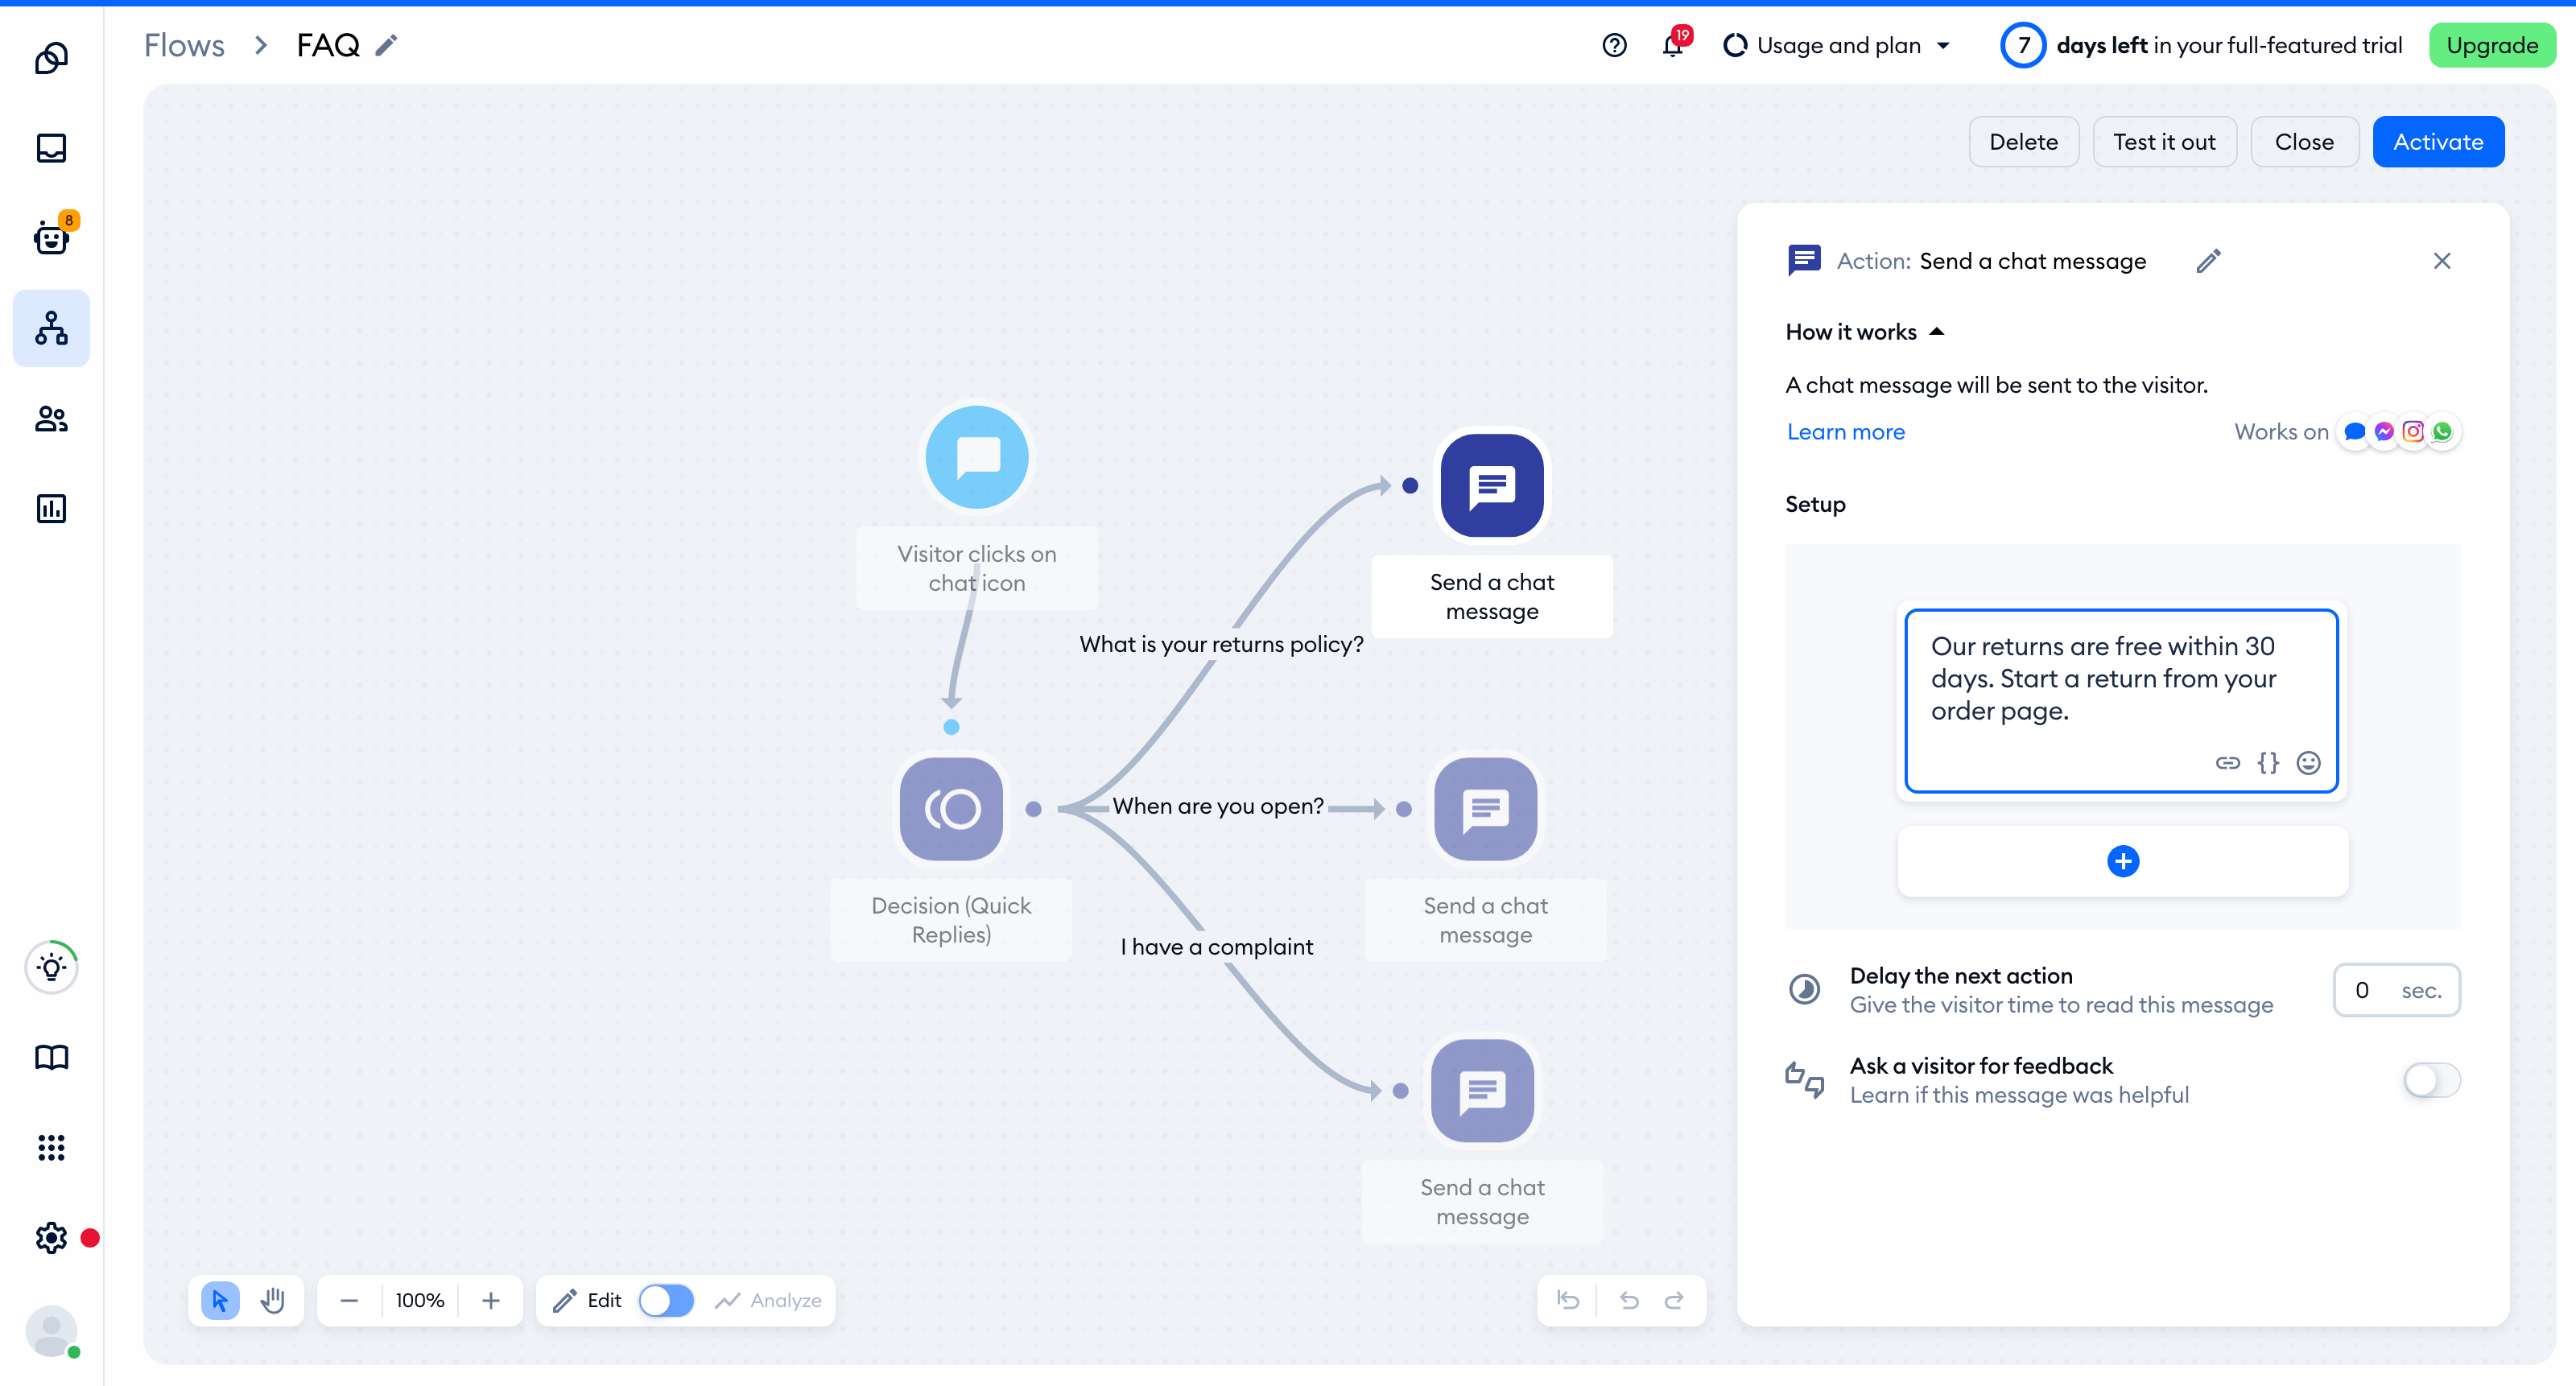
Later on, you can also use our helpfulness metric to measure whether your website visitors found the answers helpful.
Now, when the flow is ready, hit the Activate button in the top-right corner of the editor to put it live on your website. Want to try it out first? Click on Test it out in the same top bar.
