At Tidio, you can change the widget's position between the right and left sides in your Tidio settings. If you wish to move and display the widget a bit higher or lower, it can be done using the custom code implementation that we explain in this article.
Please note that separate options are available for different versions of your Tidio widget: the desktop version, the mobile version, and the sidebar.
In this article, you'll learn:
- How to change widget position horizontally (left/right)
- How to change widget position vertically (higher/lower)
- How to switch to the sidebar and change its position
- How to do advanced styling modifications
- How to migrate your styling from CSS (old) to JavaScript (new)
Horizontal position (left/right)
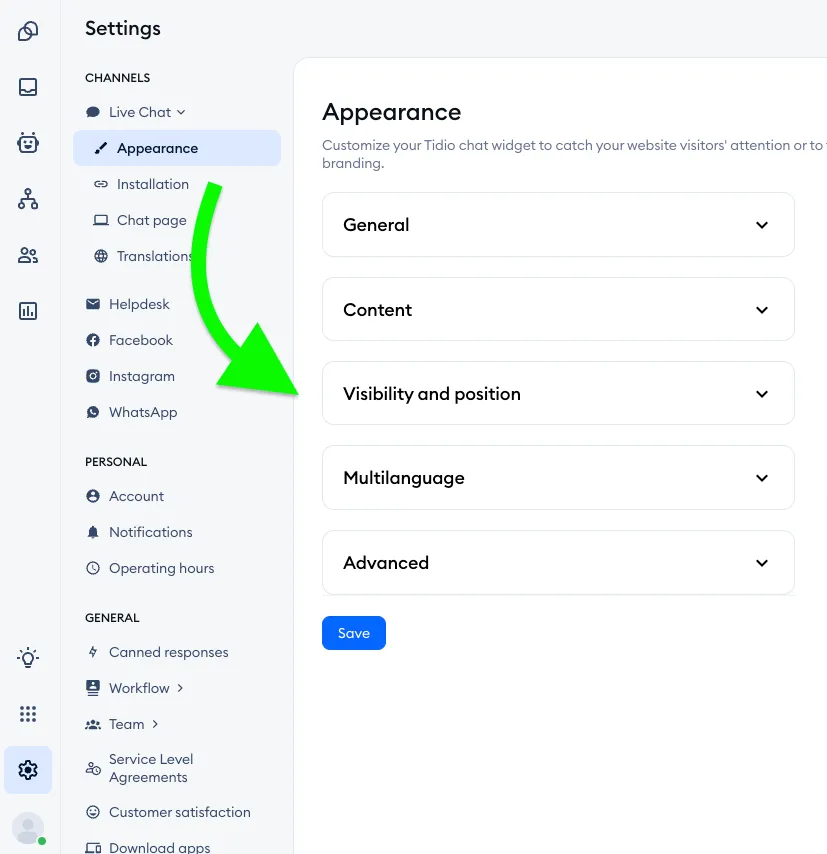
Please note that the position options show up only while the Display switch is on for that device, on the Desktop or the Mobile tab.
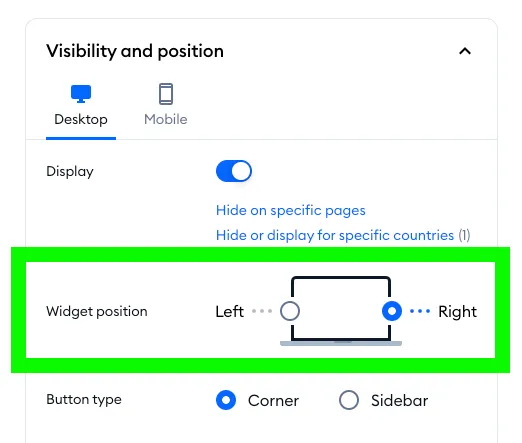
This option lets you decide if the widget is displayed in the bottom-right corner of your website, or the bottom-left corner.
Use the corresponding Button position option for the mobile version:
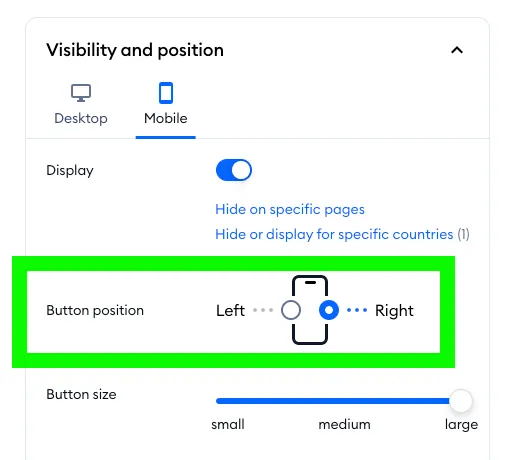
On the Mobile tab, you can also make the chat button smaller or bigger with the Button size slider - small, medium or large:
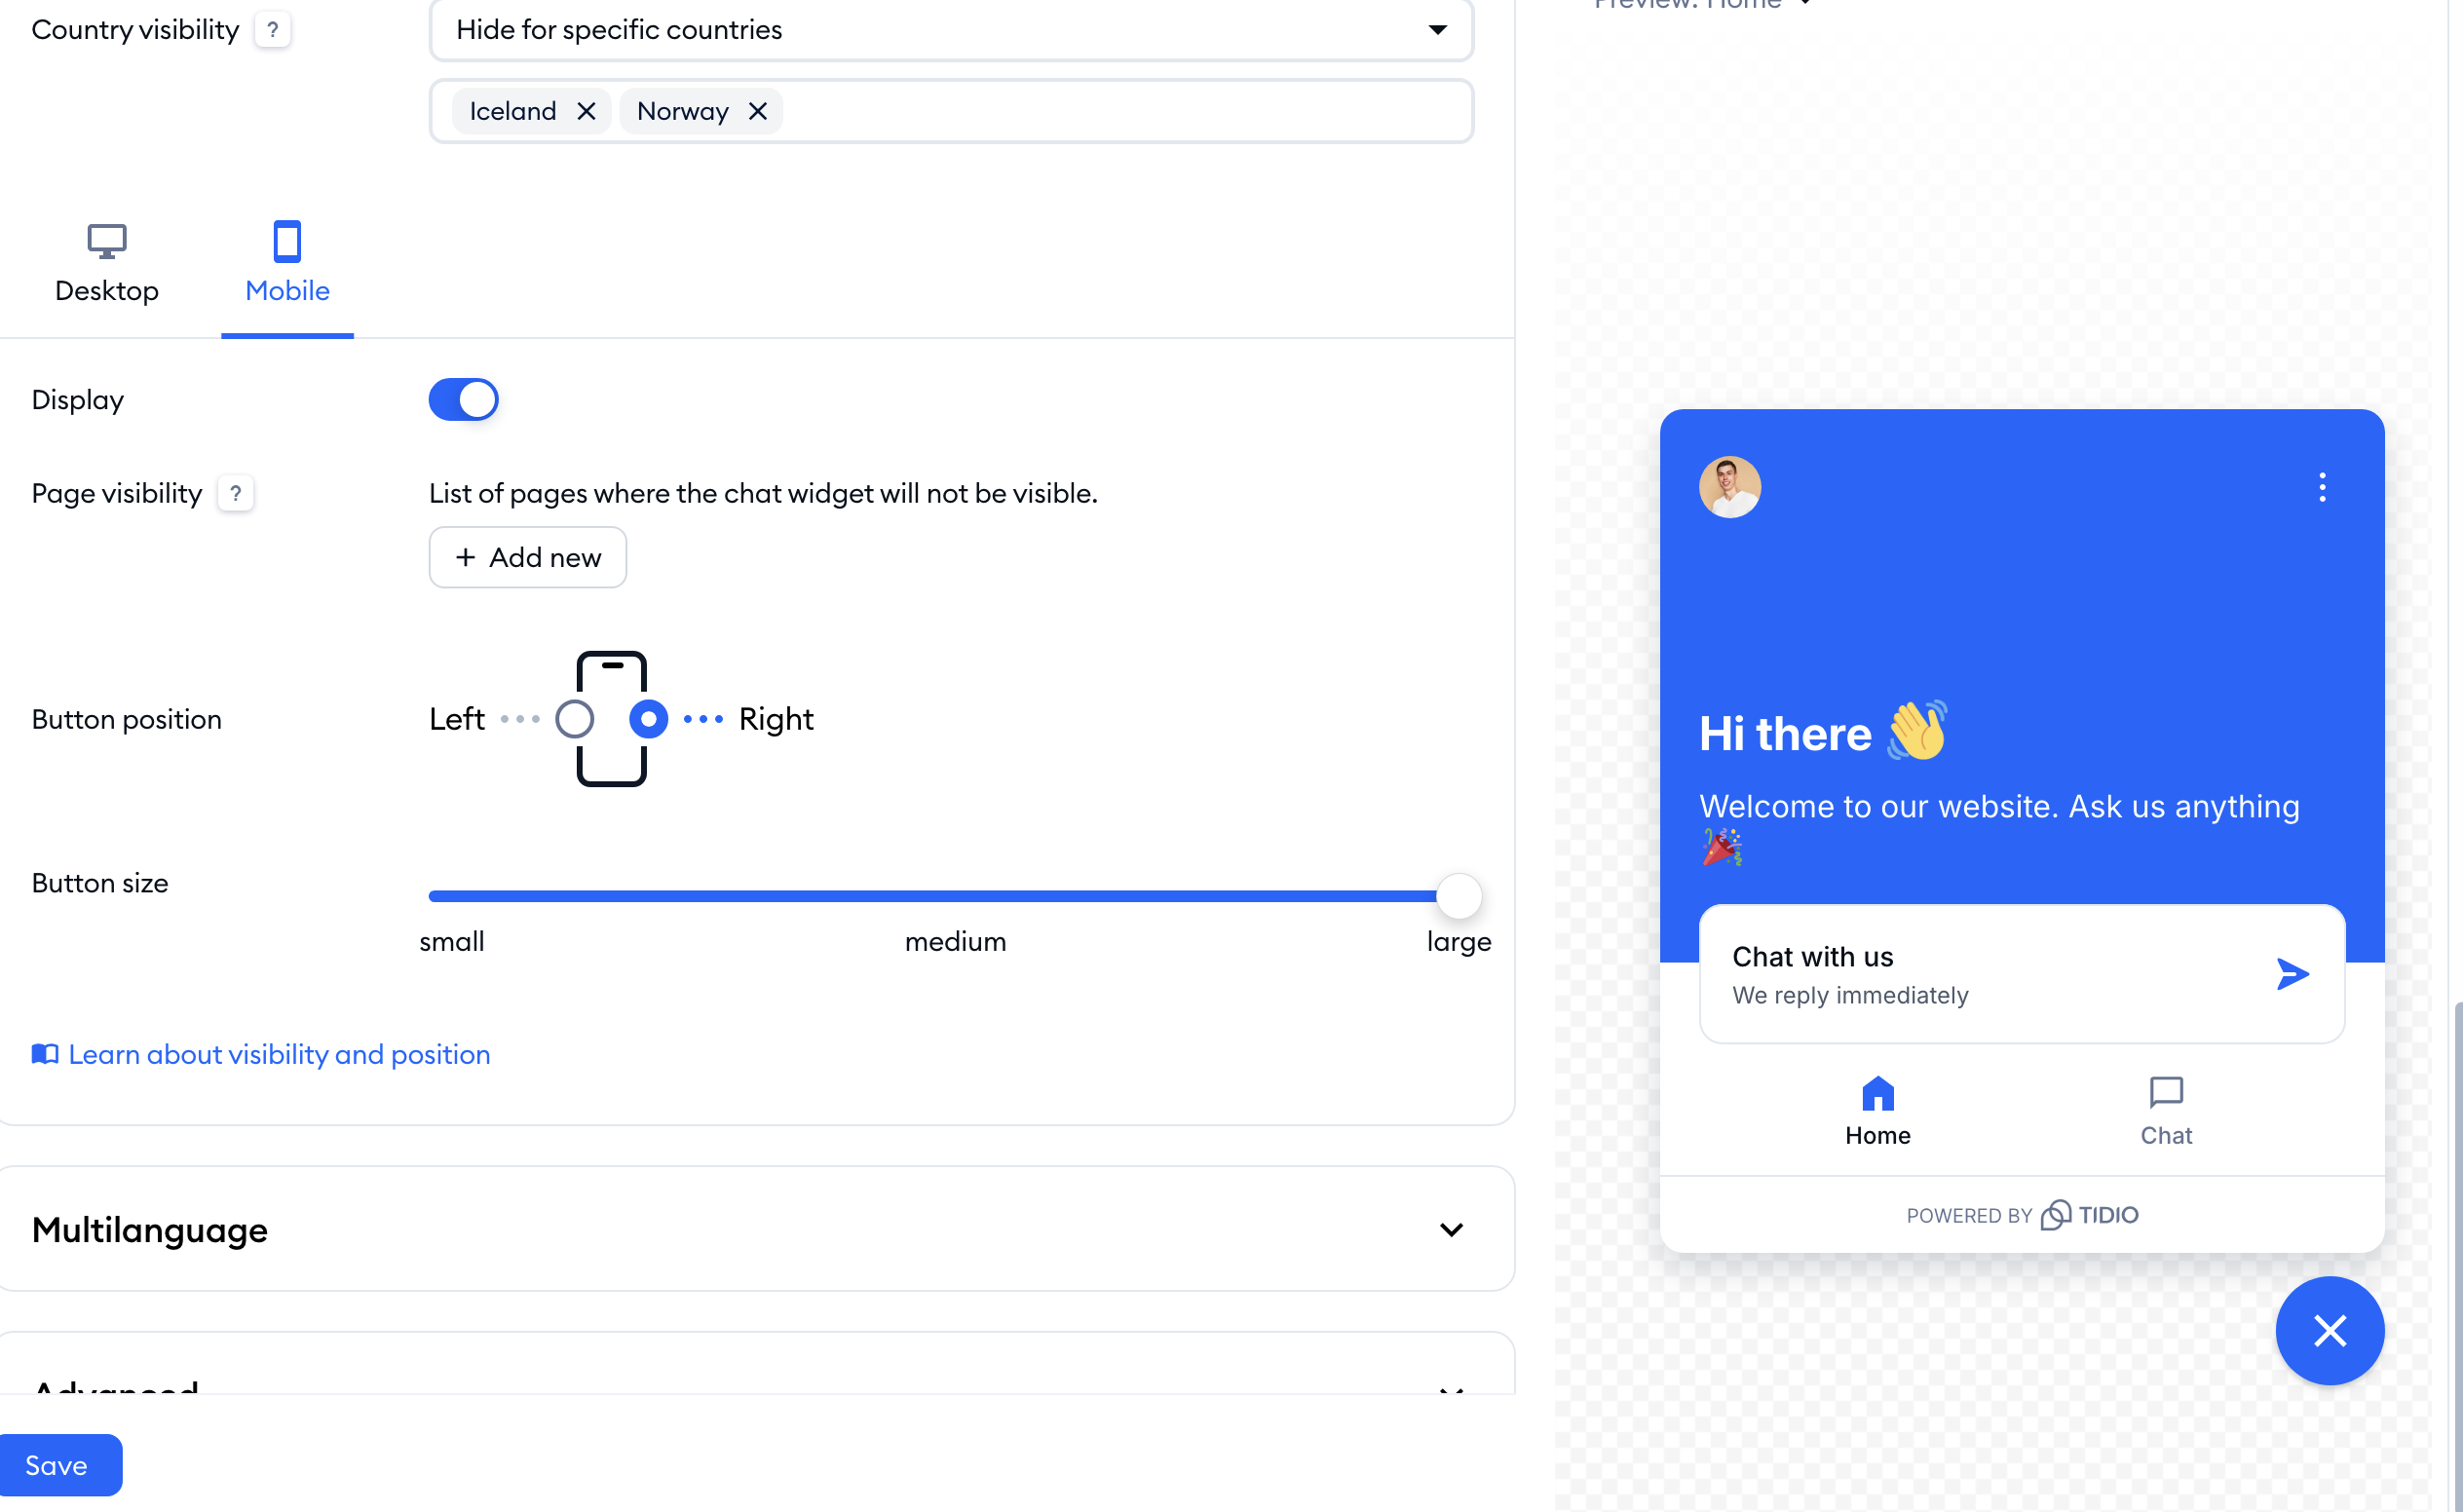
When you're happy with the position, hit Save.
Sidebar position (desktop)
On desktop, the closed widget can also be a Sidebar - a small tab with its own label and color on the side of the page - instead of the round button in the corner. On the Desktop tab of the Visibility and position section, set Button type to Sidebar:
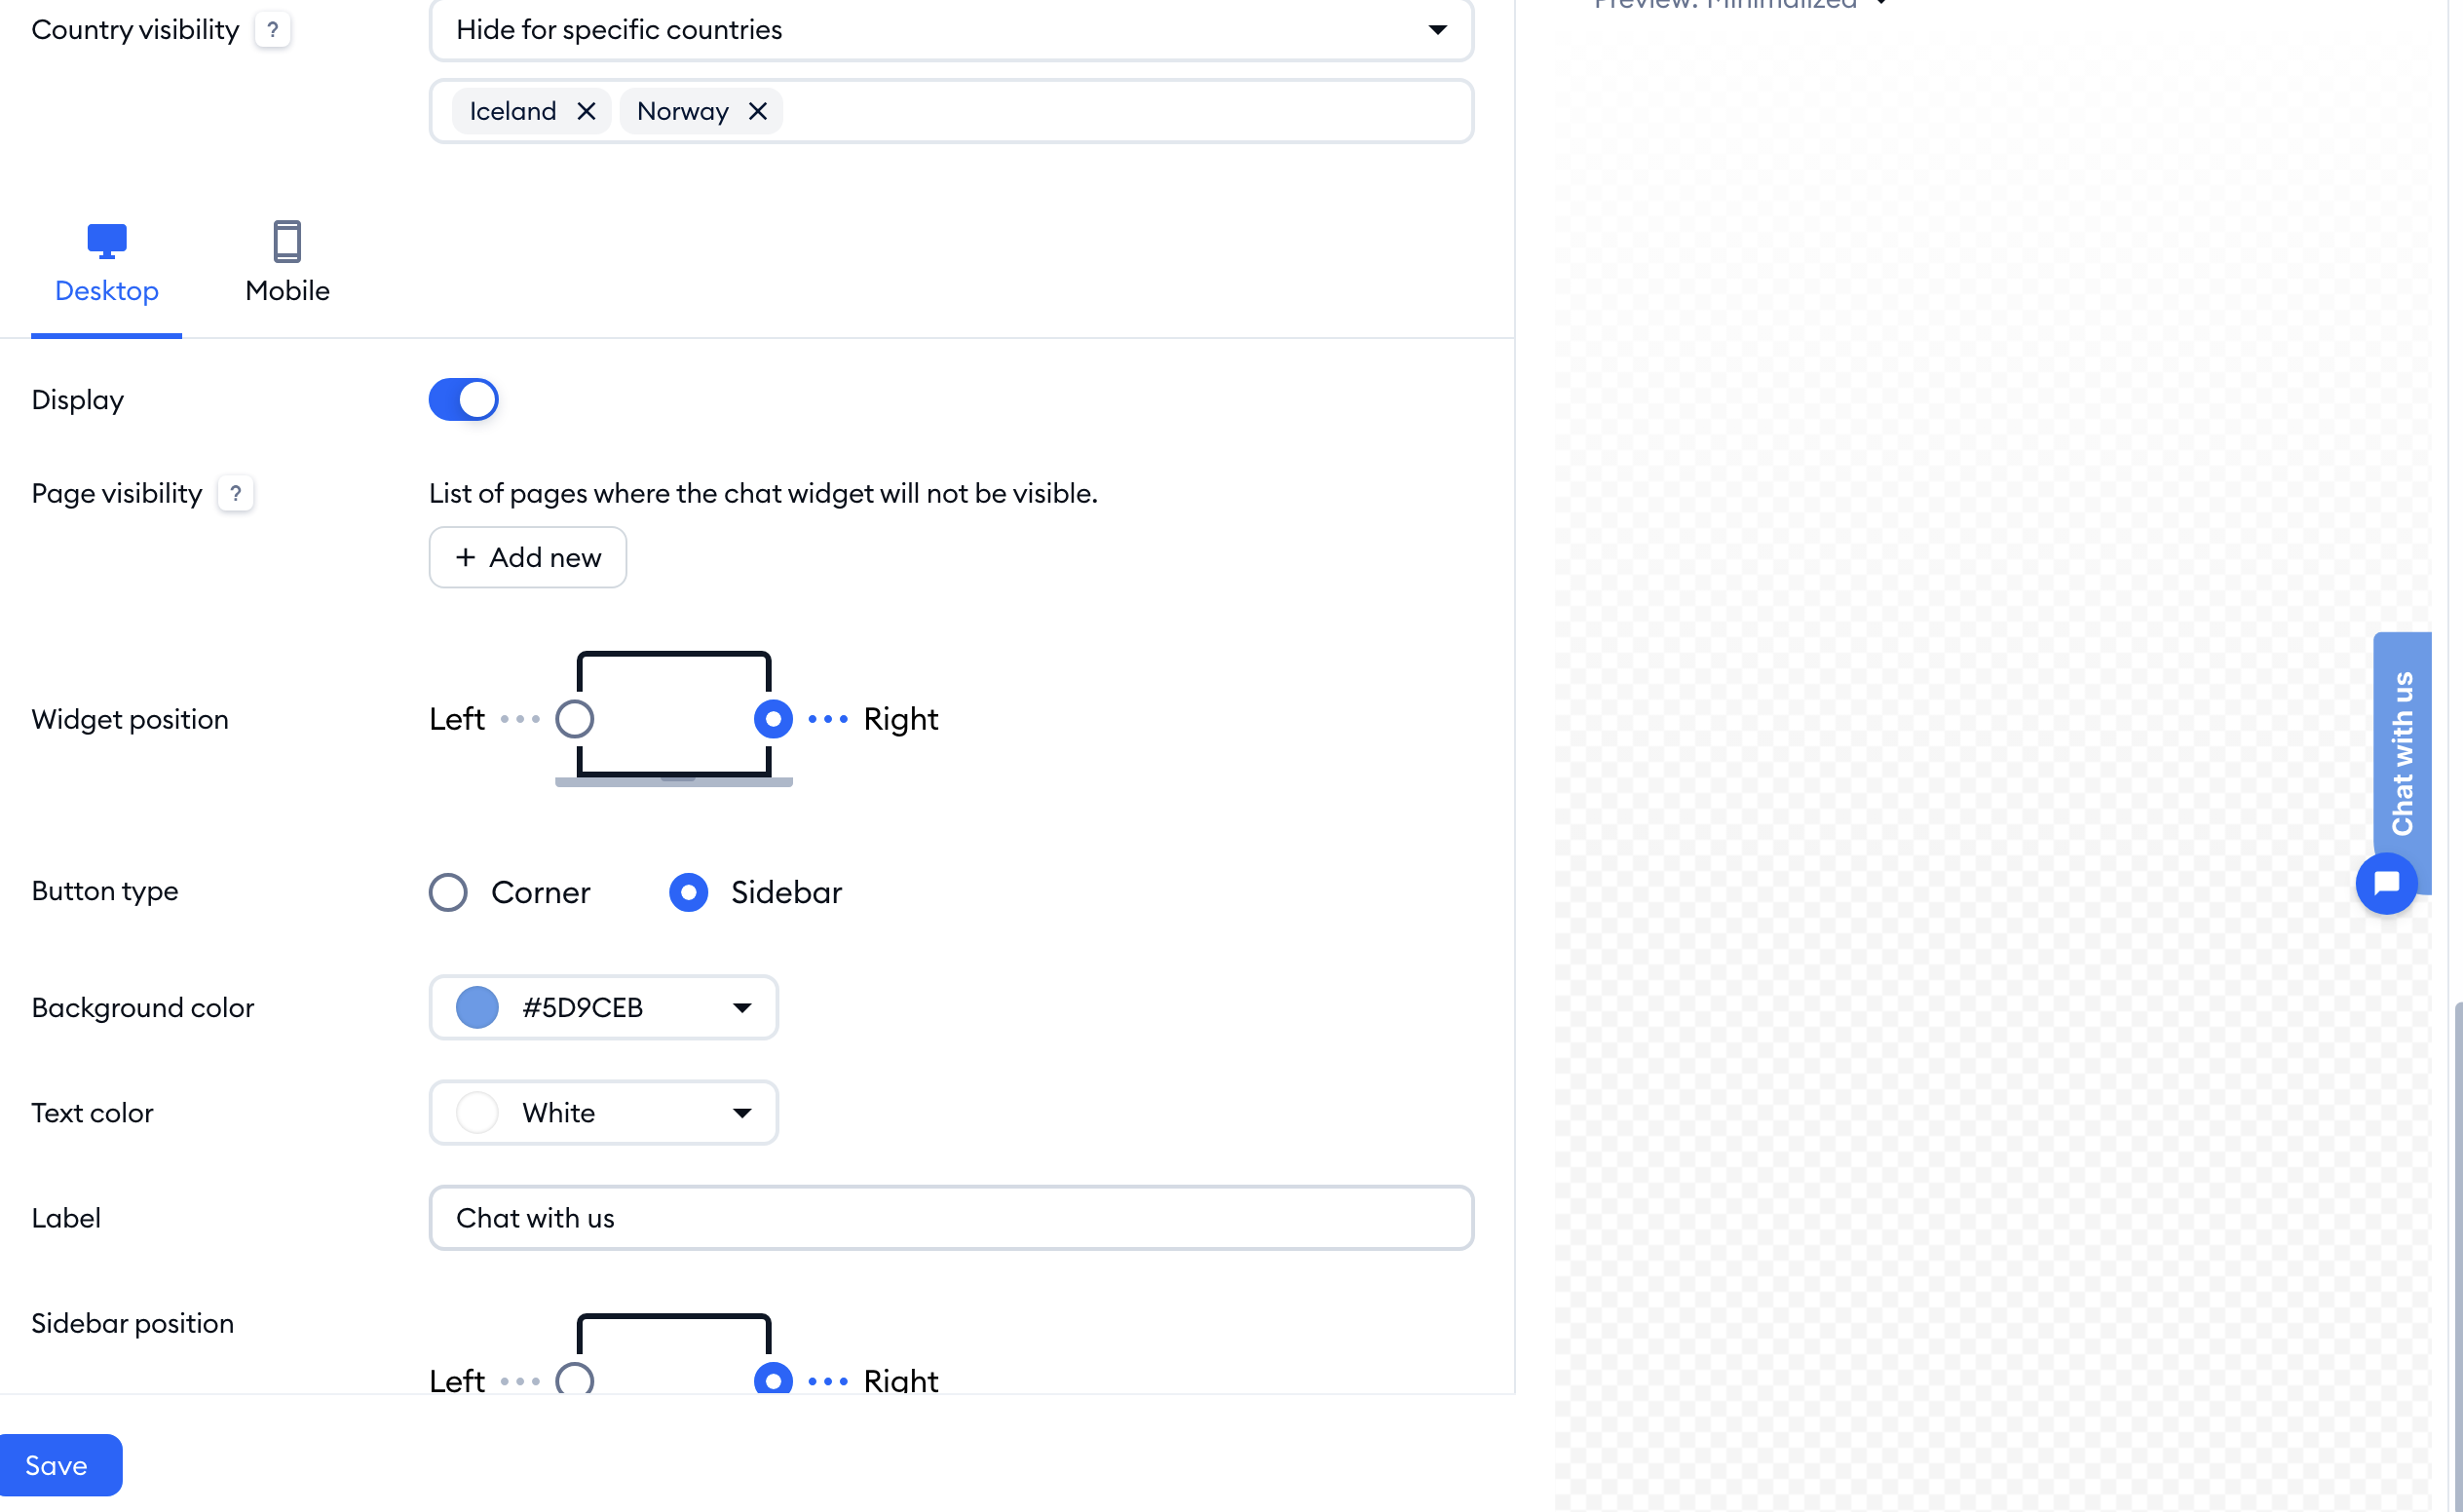
A few more options appear underneath:
- Background color - the color of the sidebar
- Text color - Black or White
- Label - the text on the sidebar
- Sidebar position - the Left or Right side of the page
Hit Save to apply the changes. To go back to the round button, simply choose Corner.
Vertical Position (higher/lower)
A custom code implementation is required if you would like to move our chat icons a bit higher or lower. The implementation of the code will allow you to move the chat widget by a custom amount of space.
If you are unsure where to place the code or access your code source, we recommend contacting your web developer to help you with the implementation.
How to use the JavaScript code
To move the widget, add the code shown below into the body of the website, directly before the closing </body> tag.
<script>
function onTidioChatApiReady() {
tidioChatApi.adjustStyles('#tidio { bottom: 50px !important; }');
tidioChatApi.adjustStyles(
'@media only screen and (max-width: 980px) { #tidio { bottom: 50px !important;} }',
);
}
if (window.tidioChatApi) {
window.tidioChatApi.on('ready', onTidioChatApiReady);
} else {
document.addEventListener('tidioChat-ready', onTidioChatApiReady);
}
</script>
The first tidioChatApi.adjustStyles call controls the placement of the widget on both desktop and mobile devices.
The second call to tidioChatApi.adjustStyles controls the movement of the widget only on mobile devices (it overrides the first rule), allowing to specify the target screen size using media queries known from CSS styling. If you just want to move the widget for mobile devices, only change those lines; or modify the code above them if you want to move the chat only on desktop.
The value of the movement is represented by 'px'.
The direction of the movement is set by the first value in the { } brackets:
top - means 'away from the top'
bottom - means 'away from the bottom'
left - means 'away from the left'
right - means 'away from the right'
Using a negative px value (e.g. setting it to -100px) will move it in the opposite direction, so e.g. if you'll type in bottom: -100px the code, the chat will go downwards for 100pix on the website.
Advanced JavaScript styling: removing styles
The tidioChatApi.adjustStyles function provides an additional capability for more dynamic styling control. When you call tidioChatApi.adjustStyles , it returns a unique string identifier, known as a styleHash . This styleHash allows you to later remove specific styles that you've applied.
If you need to dynamically remove styling from the widget, you can store the styleHash returned by tidioChatApi.adjustStyles and then pass it to tidioChatApi.removeStyles to delete that particular styling rule.
An example
Let's say you want to just temporarily apply a style or change it later. By utilizing styleHash and removeStyles, you gain finer control over the lifecycle of your widget's custom styling, allowing for more dynamic and interactive user experiences.
See the example below:
<script>
let desktopStyleHash;
let mobileStyleHash;

function onTidioChatApiReady() {
// Apply desktop style and store its hash
desktopStyleHash = tidioChatApi.adjustStyles(
'#tidio { bottom: 50px !important; }',
);

// Apply mobile style and store its hash
mobileStyleHash = tidioChatApi.adjustStyles(
'@media only screen and (max-width: 980px) { #tidio { bottom: 50px !important;} }',
);

// Example of how you might remove a style later (e.g., after a certain event)
// For demonstration purposes, we'll remove it after 5 seconds
setTimeout(() => {
console.log('Attempting to remove desktop style with hash:', desktopStyleHash);
tidioChatApi.removeStyles(desktopStyleHash);
}, 5000);
}

if (window.tidioChatApi) {
window.tidioChatApi.on('ready', onTidioChatApiReady);
} else {
document.addEventListener('tidioChat-ready', onTidioChatApiReady);
}

// You can also call removeStyles outside of onTidioChatApiReady
// as long as the tidioChatApi object is available and the style has been applied.
// For example, if you had a button that removes a style:
// document.getElementById('myRemoveButtonStyle').addEventListener('click', () => {
// if (window.tidioChatApi && desktopStyleHash) {
// tidioChatApi.removeStyles(desktopStyleHash);
// }
// });
</script>

<!-- Example button to demonstrate removal (not part of the core migration) -->
<!-- <button id="myRemoveButtonStyle">Remove Desktop Style</button> -->
Migration guide: update your Tidio widget styling
This guide is specifically for users who are currently styling their Tidio widget using CSS code directly in their website's header. Our new, backward-compatible and future-proof method to customize your widget's appearance uses JavaScript instead.
Migrating to this new JavaScript-based method is essential for ensuring continued functionality. The previous CSS styling method will no longer be supported and will cease to work with future major updates to the Tidio widget.
Previous CSS styling method
Previously, you may have adjusted your Tidio widget position using CSS similar to the one below:
<style>
#tidio-chat-iframe {
bottom: 50px !important;
}
@media only screen and (max-width: 980px) {
#tidio-chat-iframe {
bottom: 50px !important;
}
}
</style>
New JavaScript styling method
We now support styling the Tidio widget via JavaScript using the tidioChatApi.adjustStyles function. This method offers greater flexibility and is designed to work seamlessly with future updates to the Tidio widget.
How to migrate your existing CSS styles to JavaScript
To migrate your existing CSS styles, you will need to:
-
Remove your old CSS styling
Locate and remove the <style> block that targets #tidio-chat-iframe from your website's header.
-
Add the new JavaScript code
Place the JavaScript code (shared below) into your website, ideally just before the closing </body> tag.
Inside the onTidioChatApiReady function, you will call tidioChatApi.adjustStyles for each of your existing CSS rules.
Here's the general structure of the new JavaScript code:
<script>
function onTidioChatApiReady() {
// Paste your existing CSS rules here,
// each within a separate tidioChatApi.adjustStyles call.
// Example:
// tidioChatApi.adjustStyles('#tidio { bottom: 50px !important; }');
// tidioChatApi.adjustStyles(
// '@media only screen and (max-width: 980px) { #tidio { bottom: 50px !important;} }',
// );
}
if (window.tidioChatApi) {
window.tidioChatApi.on('ready', onTidioChatApiReady);
} else {
document.addEventListener('tidioChat-ready', onTidioChatApiReady);
}
</script>
A step-by-step example of migrating the previous CSS to JavaScript
Given that your previous CSS looked like this:
#tidio-chat-iframe {
bottom: 50px !important;
}
@media only screen and (max-width: 980px) {
#tidio-chat-iframe {
bottom: 50px !important;
}
}
... Your new JavaScript code will look like this:
<script>
function onTidioChatApiReady() {
tidioChatApi.adjustStyles('#tidio { bottom: 50px !important; }');
tidioChatApi.adjustStyles(
'@media only screen and (max-width: 980px) { #tidio { bottom: 50px !important;} }',
);
}
if (window.tidioChatApi) {
window.tidioChatApi.on('ready', onTidioChatApiReady);
} else {
document.addEventListener('tidioChat-ready', onTidioChatApiReady);
}
</script>
Important notes
-
Selector change
Notice that the CSS selector has changed from #tidio-chat-iframe to #tidio. Please ensure you update your selectors accordingly when migrating your styles.
-
Separate calls
For each distinct CSS rule (or media query block), you should use a separate tidioChatApi.adjustStyles call.
-
Placement
The JavaScript code should be placed directly above the closing </body> tag.
- If you used !important in your CSS, you can continue to use it within the adjustStyles function to ensure your styles override default Tidio styles.
By following these steps, you will successfully migrate your Tidio widget styling to the new JavaScript-based method, ensuring compatibility and continued customization for your widget.
