# Install Tidio on Ruby on Rails
Section: Install Tidio
Description: Add Tidio to Ruby on Rails with full page navigation, identify signed-in visitors and hide the widget on checkout.
Verified against Tidio panel 12.331.0
Last updated: 2026-11-19
Source: https://help.tidio.com/articles/install-rails/
Add Tidio to your Ruby on Rails app through its shared layout. You do not need a package for Tidio. Checked with Rails 8.1.4.1 and Turbo Drive.
**In this article, you'll learn:**
- [How to find your Public key](https://help.tidio.com/articles/install-rails/#public-key)
- [How to add the widget to Ruby on Rails](https://help.tidio.com/articles/install-rails/#install)
- [How to check the installation](https://help.tidio.com/articles/install-rails/#check)
- [How to identify logged-in visitors](https://help.tidio.com/articles/install-rails/#identify-visitors)
- [How to hide the widget on some pages](https://help.tidio.com/articles/install-rails/#hide-on-pages)
- [How to troubleshoot the installation](https://help.tidio.com/articles/install-rails/#troubleshooting)
## Find your Public key
Log in to your Tidio panel and go to **Settings > Developer > Project data**. Click the **Public key** field to select its value, then copy it.
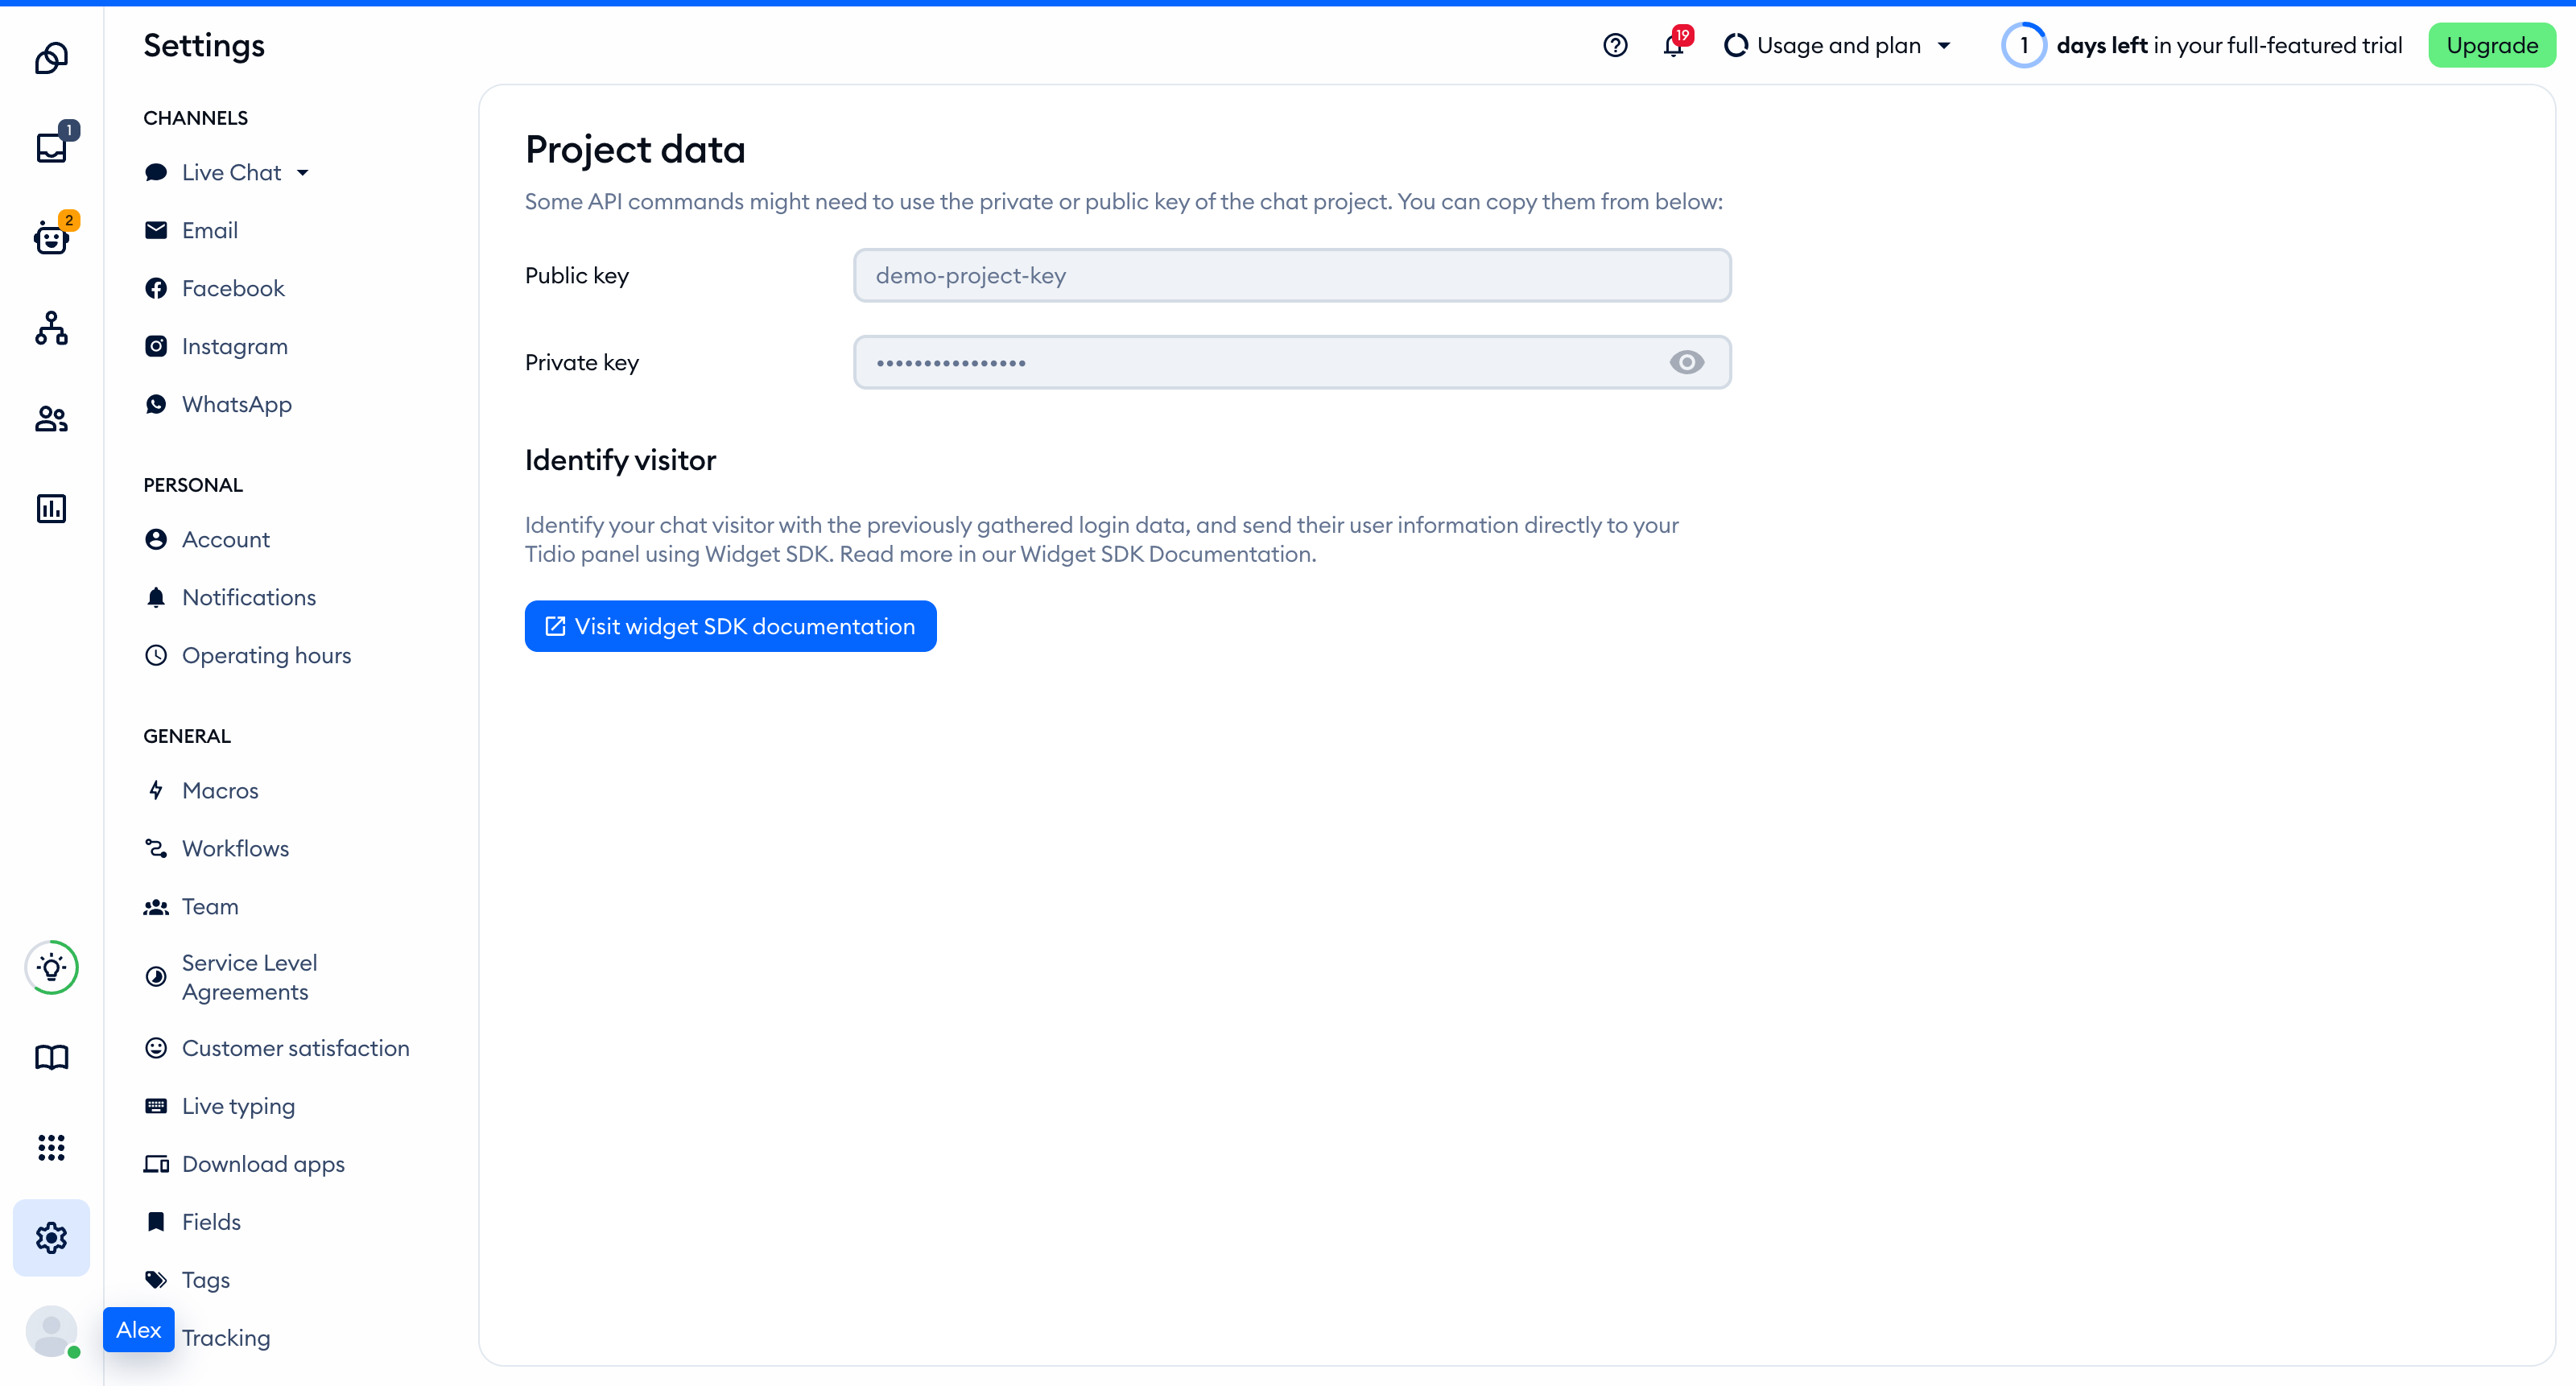
The Public key is part of the script address that every visitor's browser loads, so you can keep it in front-end code. The private key on the same page is different: never put it in your website.
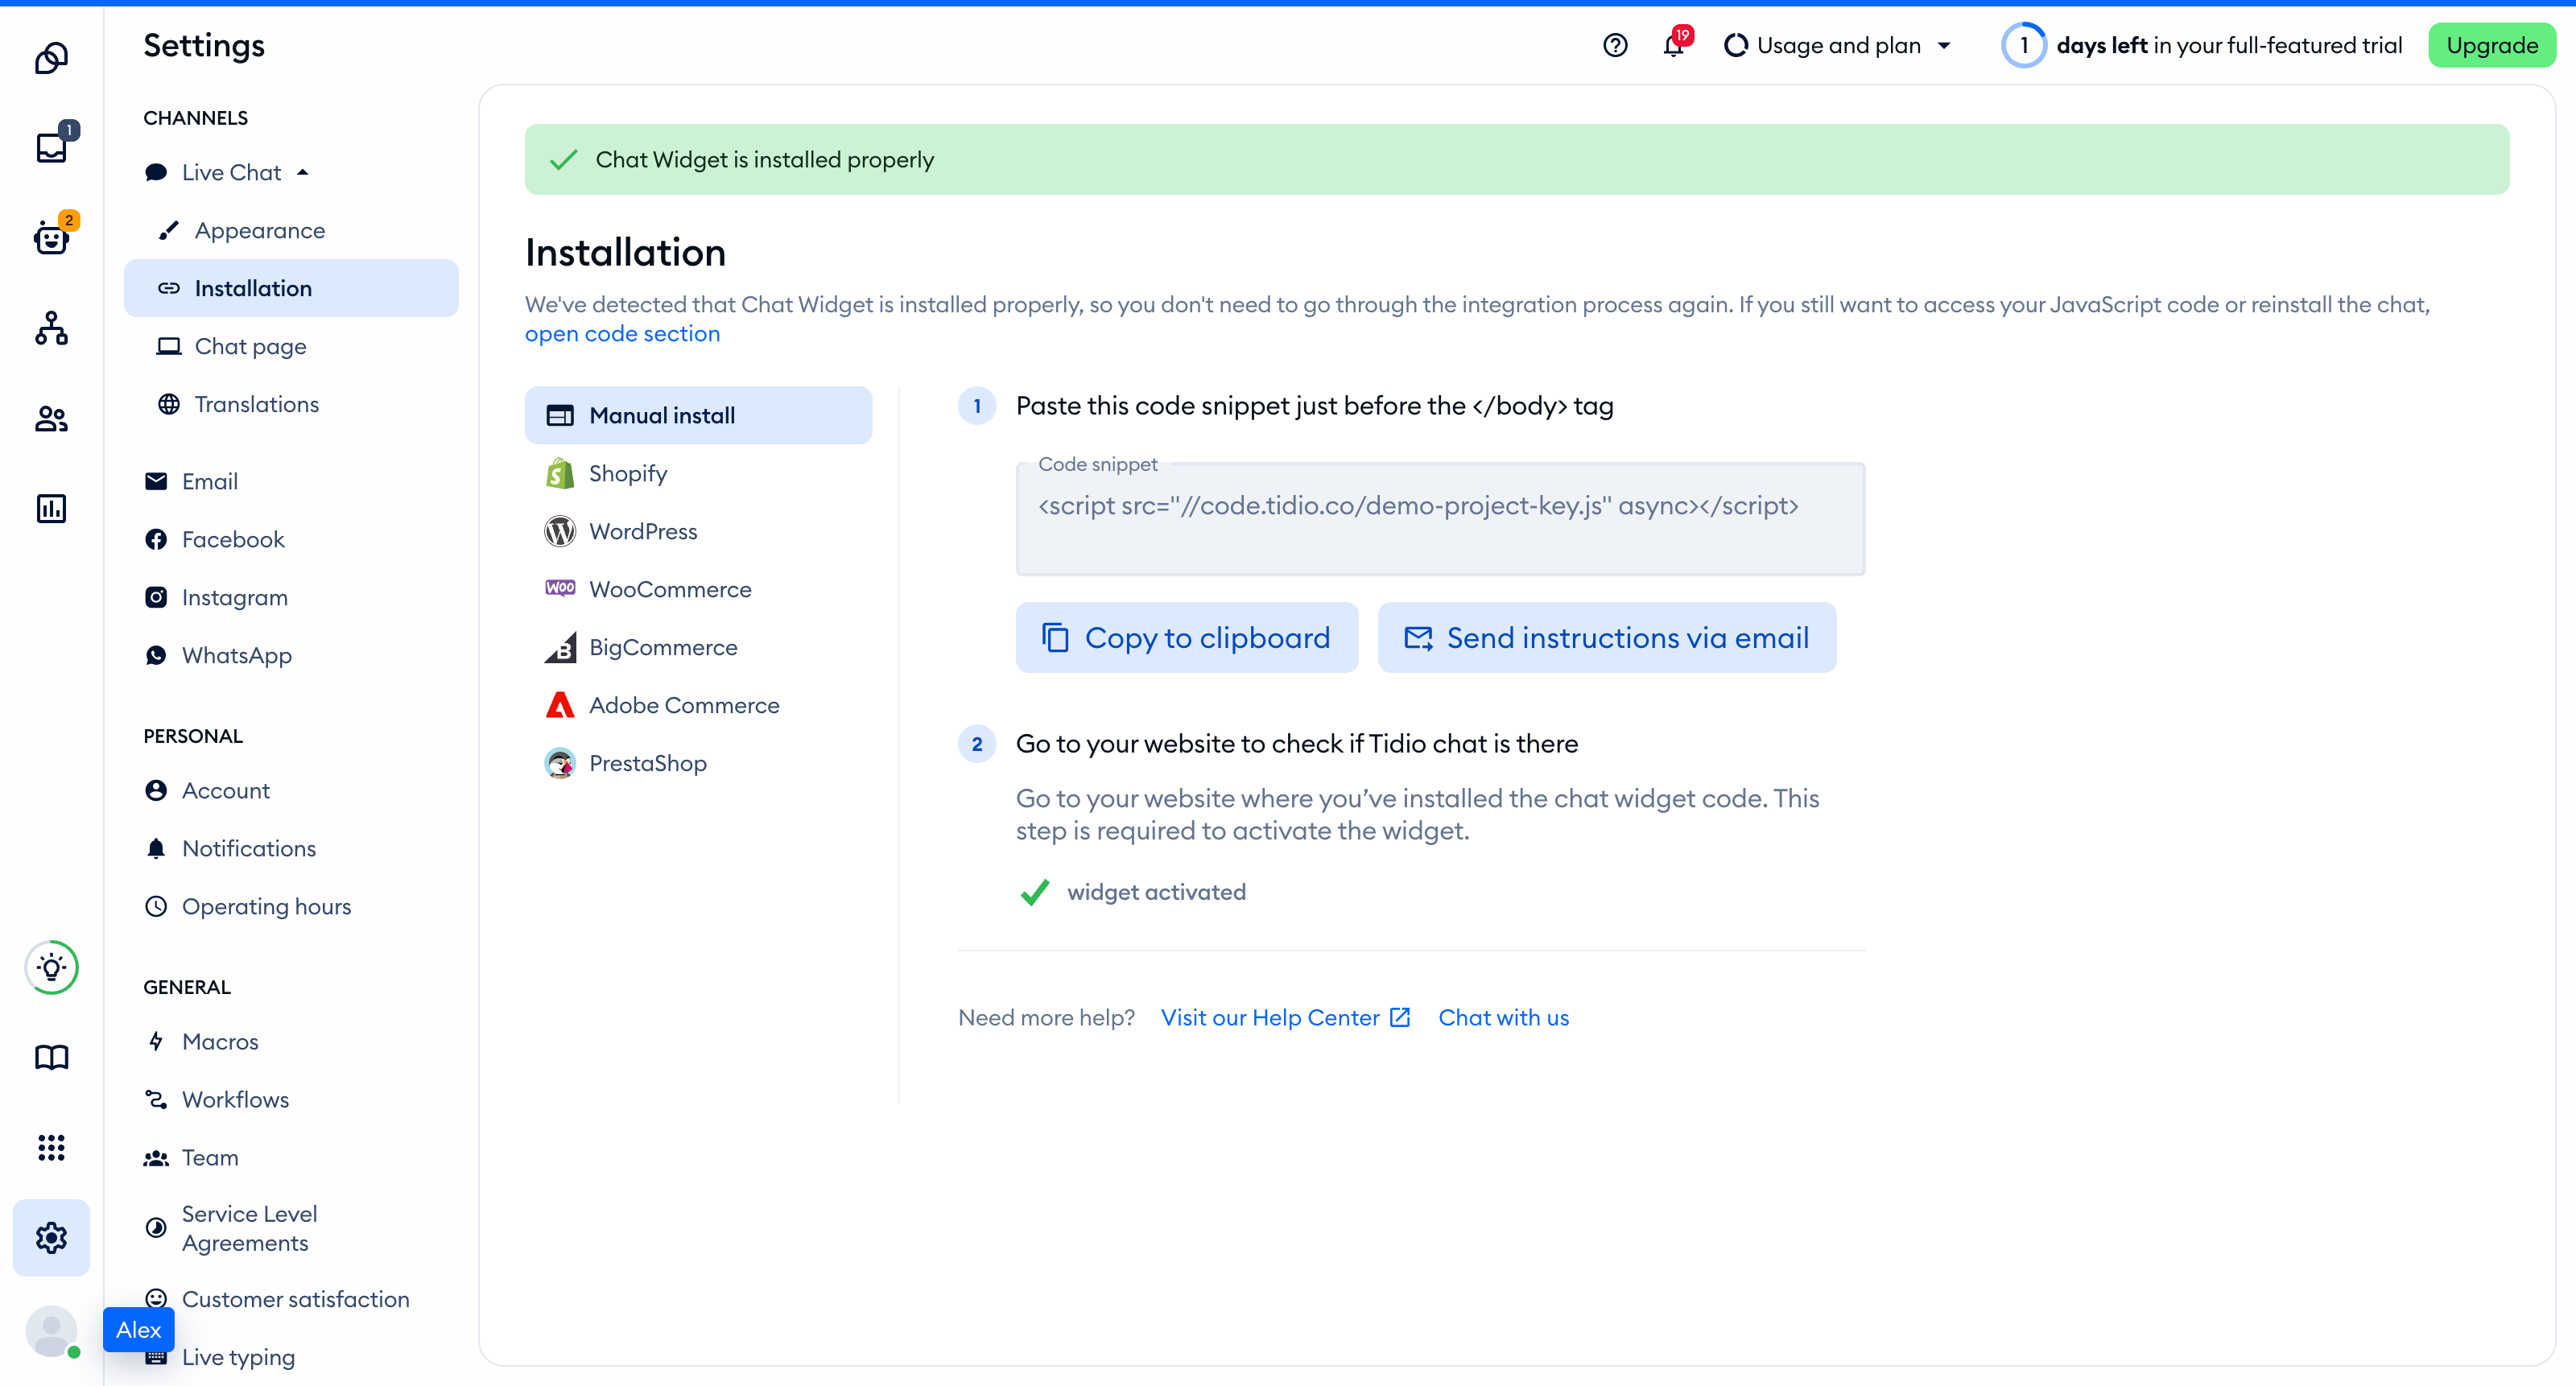
You'll find the same key inside the installation code in **Settings > Live Chat > Installation**, under **Manual install**:
```
```
## Add the widget to Ruby on Rails
Set ` TIDIO_PUBLIC_KEY=YOUR_PUBLIC_KEY ` in your server's environment, replacing the placeholder with your Public key. Restart the Rails server after changing it. This example reads the variable when Rails renders the layout.
Add this meta tag inside the head of ` app/views/layouts/application.html.erb `. Keep it on every page that uses this layout:
```
```
Add the Tidio script once at the end of the same layout's body, after ` <%= yield %> `. Keep your existing styles, metadata and JavaScript helpers:
```
```
In the checked Rails app, the widget disappears after the first Turbo Drive visit and does not return on the next visit. A ` data-turbo-permanent ` placeholder does not fix this because Tidio replaces that element. This guide uses full page navigation instead of modifying Tidio's own elements.
Visits under this layout reload the full page instead of using Turbo Drive. Each page loads one widget in a new document. If only part of your site uses Tidio, keep the script and reload meta tag in that part's layout. Do not add another installation to individual views.
If an AI coding assistant edits this project for you, give it the prompt from [Install Tidio with an AI coding agent](https://help.tidio.com/articles/install-ai-coding-agents/).
## Check the installation
Open your site in a regular browser window. The chat widget appears in the corner of the page and stays there when you move between pages. Headless and automated browsers may not show the widget, so do not rely on them for this check.
Loading a page with the widget is what activates it. After that, **Settings > Live Chat > Installation** in your Tidio panel says **Chat Widget is installed properly**.
[Video](https://help.tidio.com/article-media/install-rails/walkthrough.mp4)
Silent walkthrough. A demo Ruby on Rails site with the Tidio chat widget in the corner. Each page loads the widget, and the Checkout page hides it.
## Identify logged-in visitors
Use your authentication system's ` current_user ` helper. Insert this inline script immediately before the Tidio script in the layout's body. Adapt the fields to your user model. It sets ` document.tidioIdentify ` only for a signed-in visitor and before inserting the Tidio script.
```
```
` to_json ` serializes the selected fields, and ` raw json_escape ` safely embeds that JSON in JavaScript. Do not concatenate user values into JavaScript strings. Initial identification can merge conversations for the same visitor.
Never cache a page containing a visitor's identity for other visitors. For authenticated pages, also add ` ` to the head so Turbo does not restore old identity markup.
For a later login without a full reload, call this from your login handler after the widget is ready, using your signed-in visitor's data. This updates visitor data but does not merge conversations:
```
window.tidioChatApi.setVisitorData({
email: 'visitor@example.com',
name: 'Example visitor'
});
```
After logout, remove the identification data before resetting the widget. Run this in your logout handler after the widget is ready, then clear Turbo's cached pages. Use a full page reload when switching accounts so the server renders the new identity.
```
delete document.tidioIdentify;
window.tidioChatApi?.resetVisitor();
Turbo.cache.clear();
```
## Hide the widget on some pages
Add this code before the Tidio script in the layout's body. It hides the widget on ` /checkout ` and ` /checkout/ `, and shows it elsewhere. Each full page load installs its own ready callback. The ` turbo:load ` listener also applies the rule when Turbo initializes.
```
```
Hiding the widget does not stop Flows from triggering. To load the widget only on a list of addresses instead, see [Show the widget only on specific pages](https://help.tidio.com/articles/show-widget-only-on-specific-pages/).
## Troubleshooting
- If Rails reports a missing environment variable, set ` TIDIO_PUBLIC_KEY ` in the environment that starts your server.
- If the widget disappears after a link click, check that the destination uses the layout with ` turbo-visit-control ` set to ` reload `. This installation requires full page navigation.
- If you see duplicate script requests within one document, remove any other installation from your views, tag manager or layout.
- If Rails reports an undefined ` current_user `, use the helper supplied by your authentication system. Rails does not create this helper for this example.
- If your Content Security Policy blocks Tidio, allow ` code.tidio.co ` in ` script-src ` and follow the [full Tidio security policy](https://developers.tidio.com/docs/widget-security-policy). Authorize inline code with a nonce or hash.
## Further reading
- [Install Tidio on a website](https://help.tidio.com/articles/install-website/)
- [Widget SDK](https://help.tidio.com/articles/widget-sdk/)
- [Building your Turbo application](https://turbo.hotwired.dev/handbook/building)
- [Rails JSON escaping](https://api.rubyonrails.org/classes/ERB/Util.html#method-c-json_escape)