# Install Tidio on Jekyll
Section: Install Tidio
Description: Add Tidio to your Jekyll layout, configure the Public key, identify signed-in visitors and hide the widget on selected pages.
Verified against Tidio panel 12.331.0
Last updated: 2026-11-19
Source: https://help.tidio.com/articles/install-jekyll/
Add Tidio to your Jekyll site with a Liquid include in your shared layout. You do not need a package for Tidio. Checked with Jekyll 4.4.1.
**In this article, you'll learn:**
- [How to find your Public key](https://help.tidio.com/articles/install-jekyll/#public-key)
- [How to add the widget to Jekyll](https://help.tidio.com/articles/install-jekyll/#install)
- [How to check the installation](https://help.tidio.com/articles/install-jekyll/#check)
- [How to identify logged-in visitors](https://help.tidio.com/articles/install-jekyll/#identify-visitors)
- [How to hide the widget on some pages](https://help.tidio.com/articles/install-jekyll/#hide-on-pages)
- [How to troubleshoot the installation](https://help.tidio.com/articles/install-jekyll/#troubleshooting)
## Find your Public key
Log in to your Tidio panel and go to **Settings > Developer > Project data**. Click the **Public key** field to select its value, then copy it.
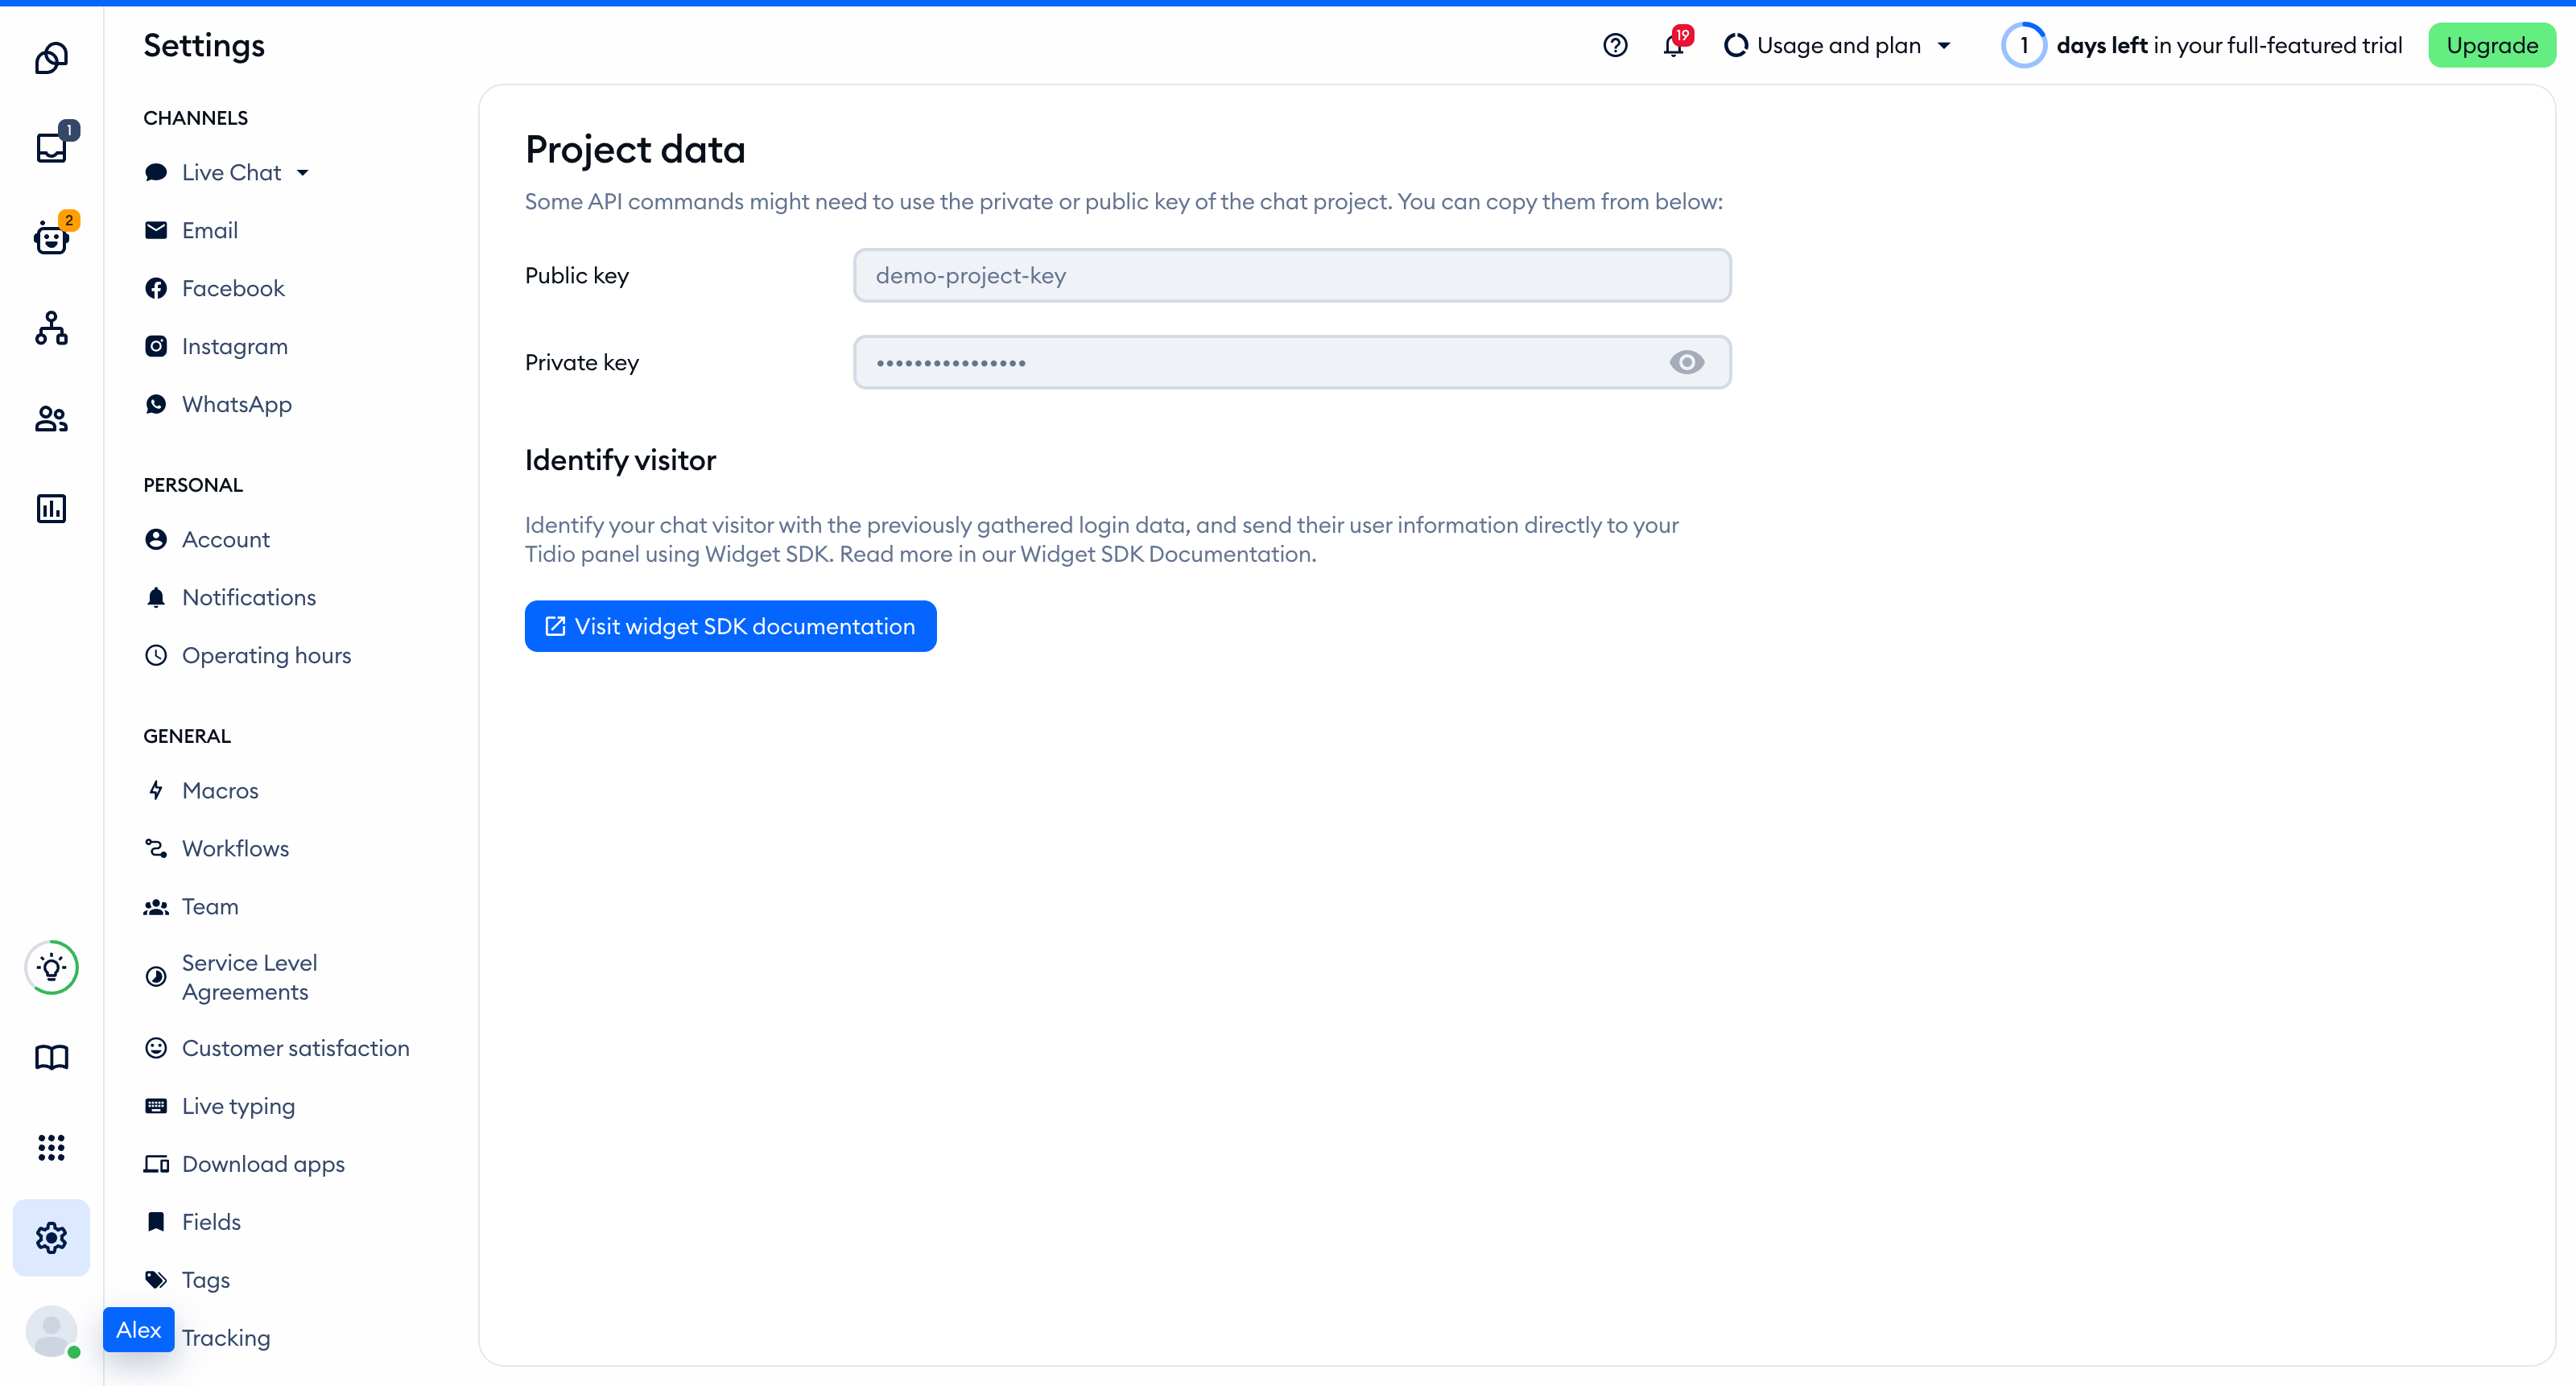
The Public key is part of the script address that every visitor's browser loads, so you can keep it in front-end code. The private key on the same page is different: never put it in your website.
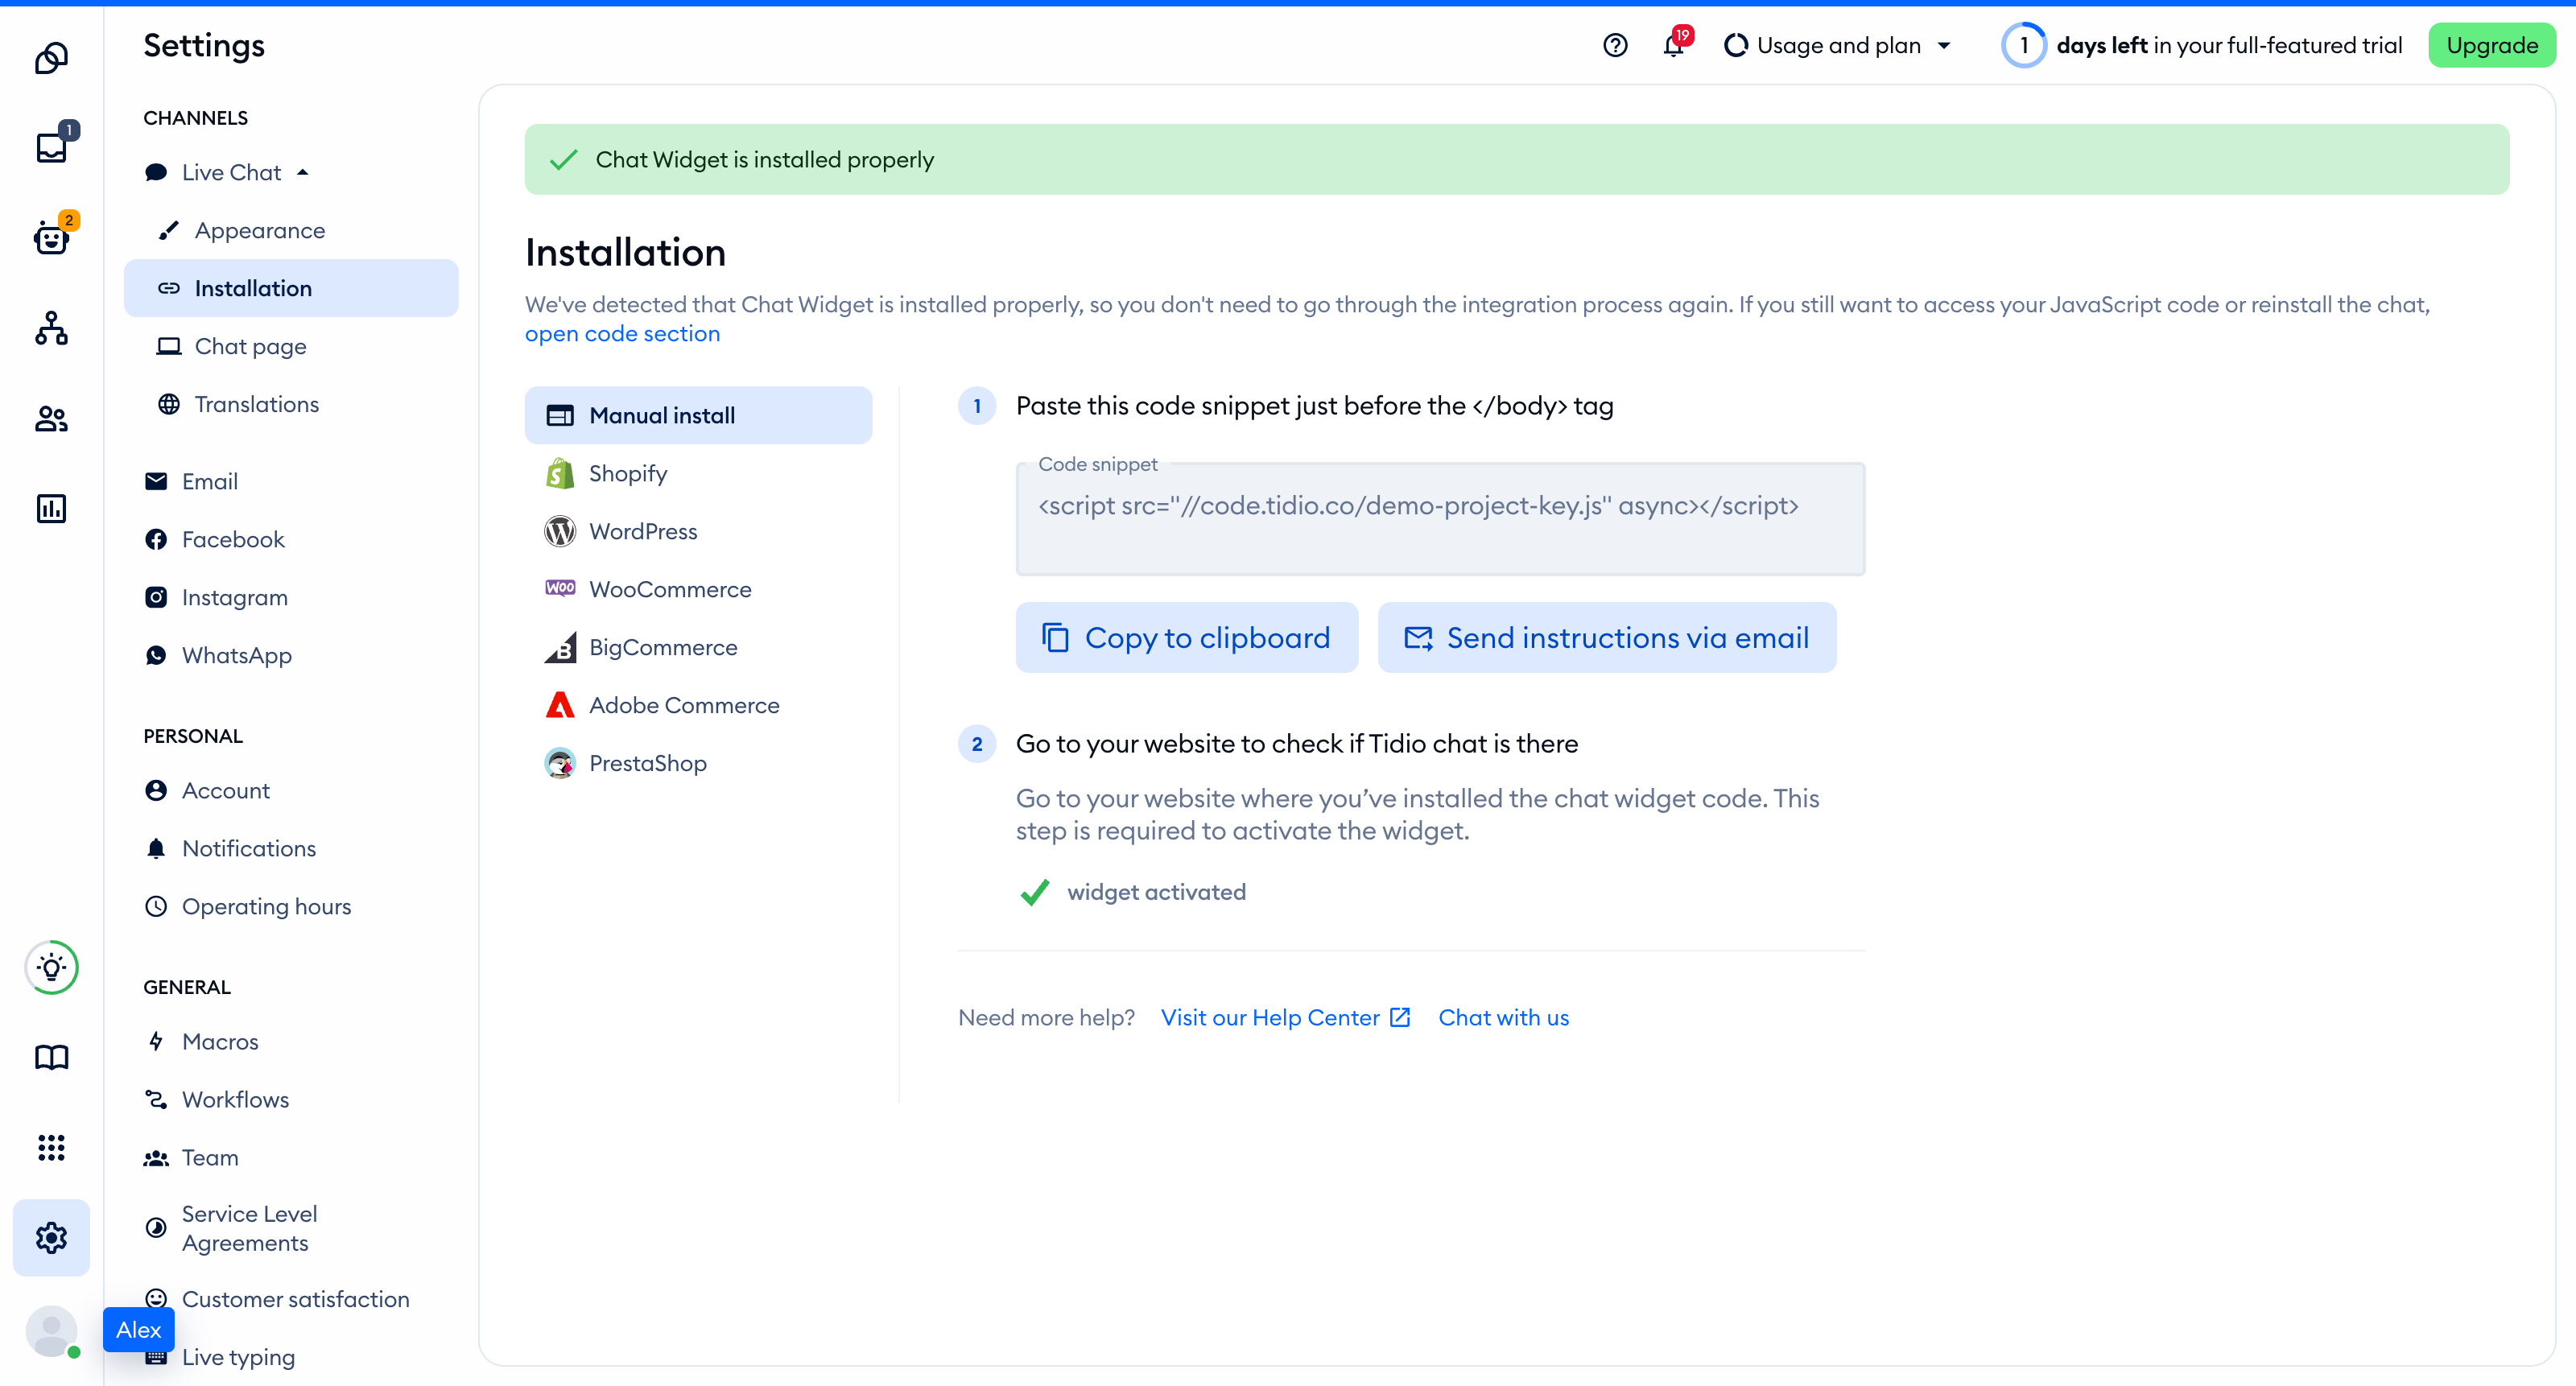
You'll find the same key inside the installation code in **Settings > Live Chat > Installation**, under **Manual install**:
```
```
## Add the widget to Jekyll
Add your Public key to ` _config.yml ` at the site root:
```
tidio_public_key: YOUR_PUBLIC_KEY
```
Create ` _includes/tidio.html ` with this code. Liquid reads the key from your site configuration:
```
```
Include it once, just before ` ` in ` _layouts/default.html `. Keep the existing layout content:
```
{% include tidio.html %}
```
If you use a gem-based theme such as Minima, the layout may live in the theme gem rather than your site. Run ` bundle info --path minima ` to find it. Copy its ` _layouts/default.html ` into your site's ` _layouts ` folder, then add the include to that copy. Your local file overrides the theme file, so review future theme changes yourself.
Use ` layout: default ` in page front matter, or a theme layout that inherits from it. Pages without that layout do not receive the include. Do not add another Tidio script to posts or individual pages.
Run ` JEKYLL_ENV=production bundle exec jekyll build ` and deploy the generated ` _site ` directory. Rebuild and redeploy after changing the key. If you configured another destination, deploy that directory instead.
Jekyll produces static pages. With ordinary links, each page opens a new document and loads the widget once. This example does not use a client-side router or a theme extension that replaces the page body.
If an AI coding assistant edits this project for you, give it the prompt from [Install Tidio with an AI coding agent](https://help.tidio.com/articles/install-ai-coding-agents/).
## Check the installation
Open your site in a regular browser window. The chat widget appears in the corner of the page and stays there when you move between pages. Headless and automated browsers may not show the widget, so do not rely on them for this check.
Loading a page with the widget is what activates it. After that, **Settings > Live Chat > Installation** in your Tidio panel says **Chat Widget is installed properly**.
On this static site, the next page loads its own widget rather than retaining the previous document's widget.
[Video](https://help.tidio.com/article-media/install-jekyll/walkthrough.mp4)
Silent walkthrough. A demo Jekyll site with the Tidio chat widget in the corner. Each page loads the widget, and the Checkout page hides it.
## Identify logged-in visitors
Do not store visitor identity in ` _config.yml `, front matter or generated HTML. Jekyll builds shared files, not a separate page for each signed-in visitor. Get the current visitor from your existing browser authentication code instead.
Replace the original script in ` _includes/tidio.html ` with this loader. Call ` startTidio(user) ` after authentication resolves on each page. Pass the signed-in visitor's data, or ` null ` when signed out. Never pass session tokens.
```