# Install Tidio on Bolt
Section: Install Tidio
Description: Add the Tidio chat widget to your Bolt website with a copyable prompt, manual installation steps, and a documentation MCP connector.
Verified against Tidio panel 12.331.0
Last updated: 2026-11-18
Source: https://help.tidio.com/articles/install-bolt/
Add Tidio to your Bolt website by asking Bolt to place the widget script in your app's shared document or layout. Bolt supports frontend JavaScript frameworks and Node.js backends, so the prompt below does not assume a specific stack.
**In this article, you'll learn:**
- [How to find your Public key](https://help.tidio.com/articles/install-bolt/#public-key)
- [How to ask Bolt to add the widget](https://help.tidio.com/articles/install-bolt/#prompt)
- [How to add the script yourself](https://help.tidio.com/articles/install-bolt/#manual)
- [How to give Bolt the Tidio documentation](https://help.tidio.com/articles/install-bolt/#docs-for-ai)
- [How to check the installation](https://help.tidio.com/articles/install-bolt/#check)
- [How to troubleshoot the widget](https://help.tidio.com/articles/install-bolt/#troubleshooting)
[Video](https://help.tidio.com/article-media/install-bolt/walkthrough.mp4)
Silent walkthrough. Open Developer settings and select your project's Public key.
## Find your Public key
Log in to your Tidio panel and go to **Settings > Developer > Project data**. Click the **Public key** field to select its value, then copy it.
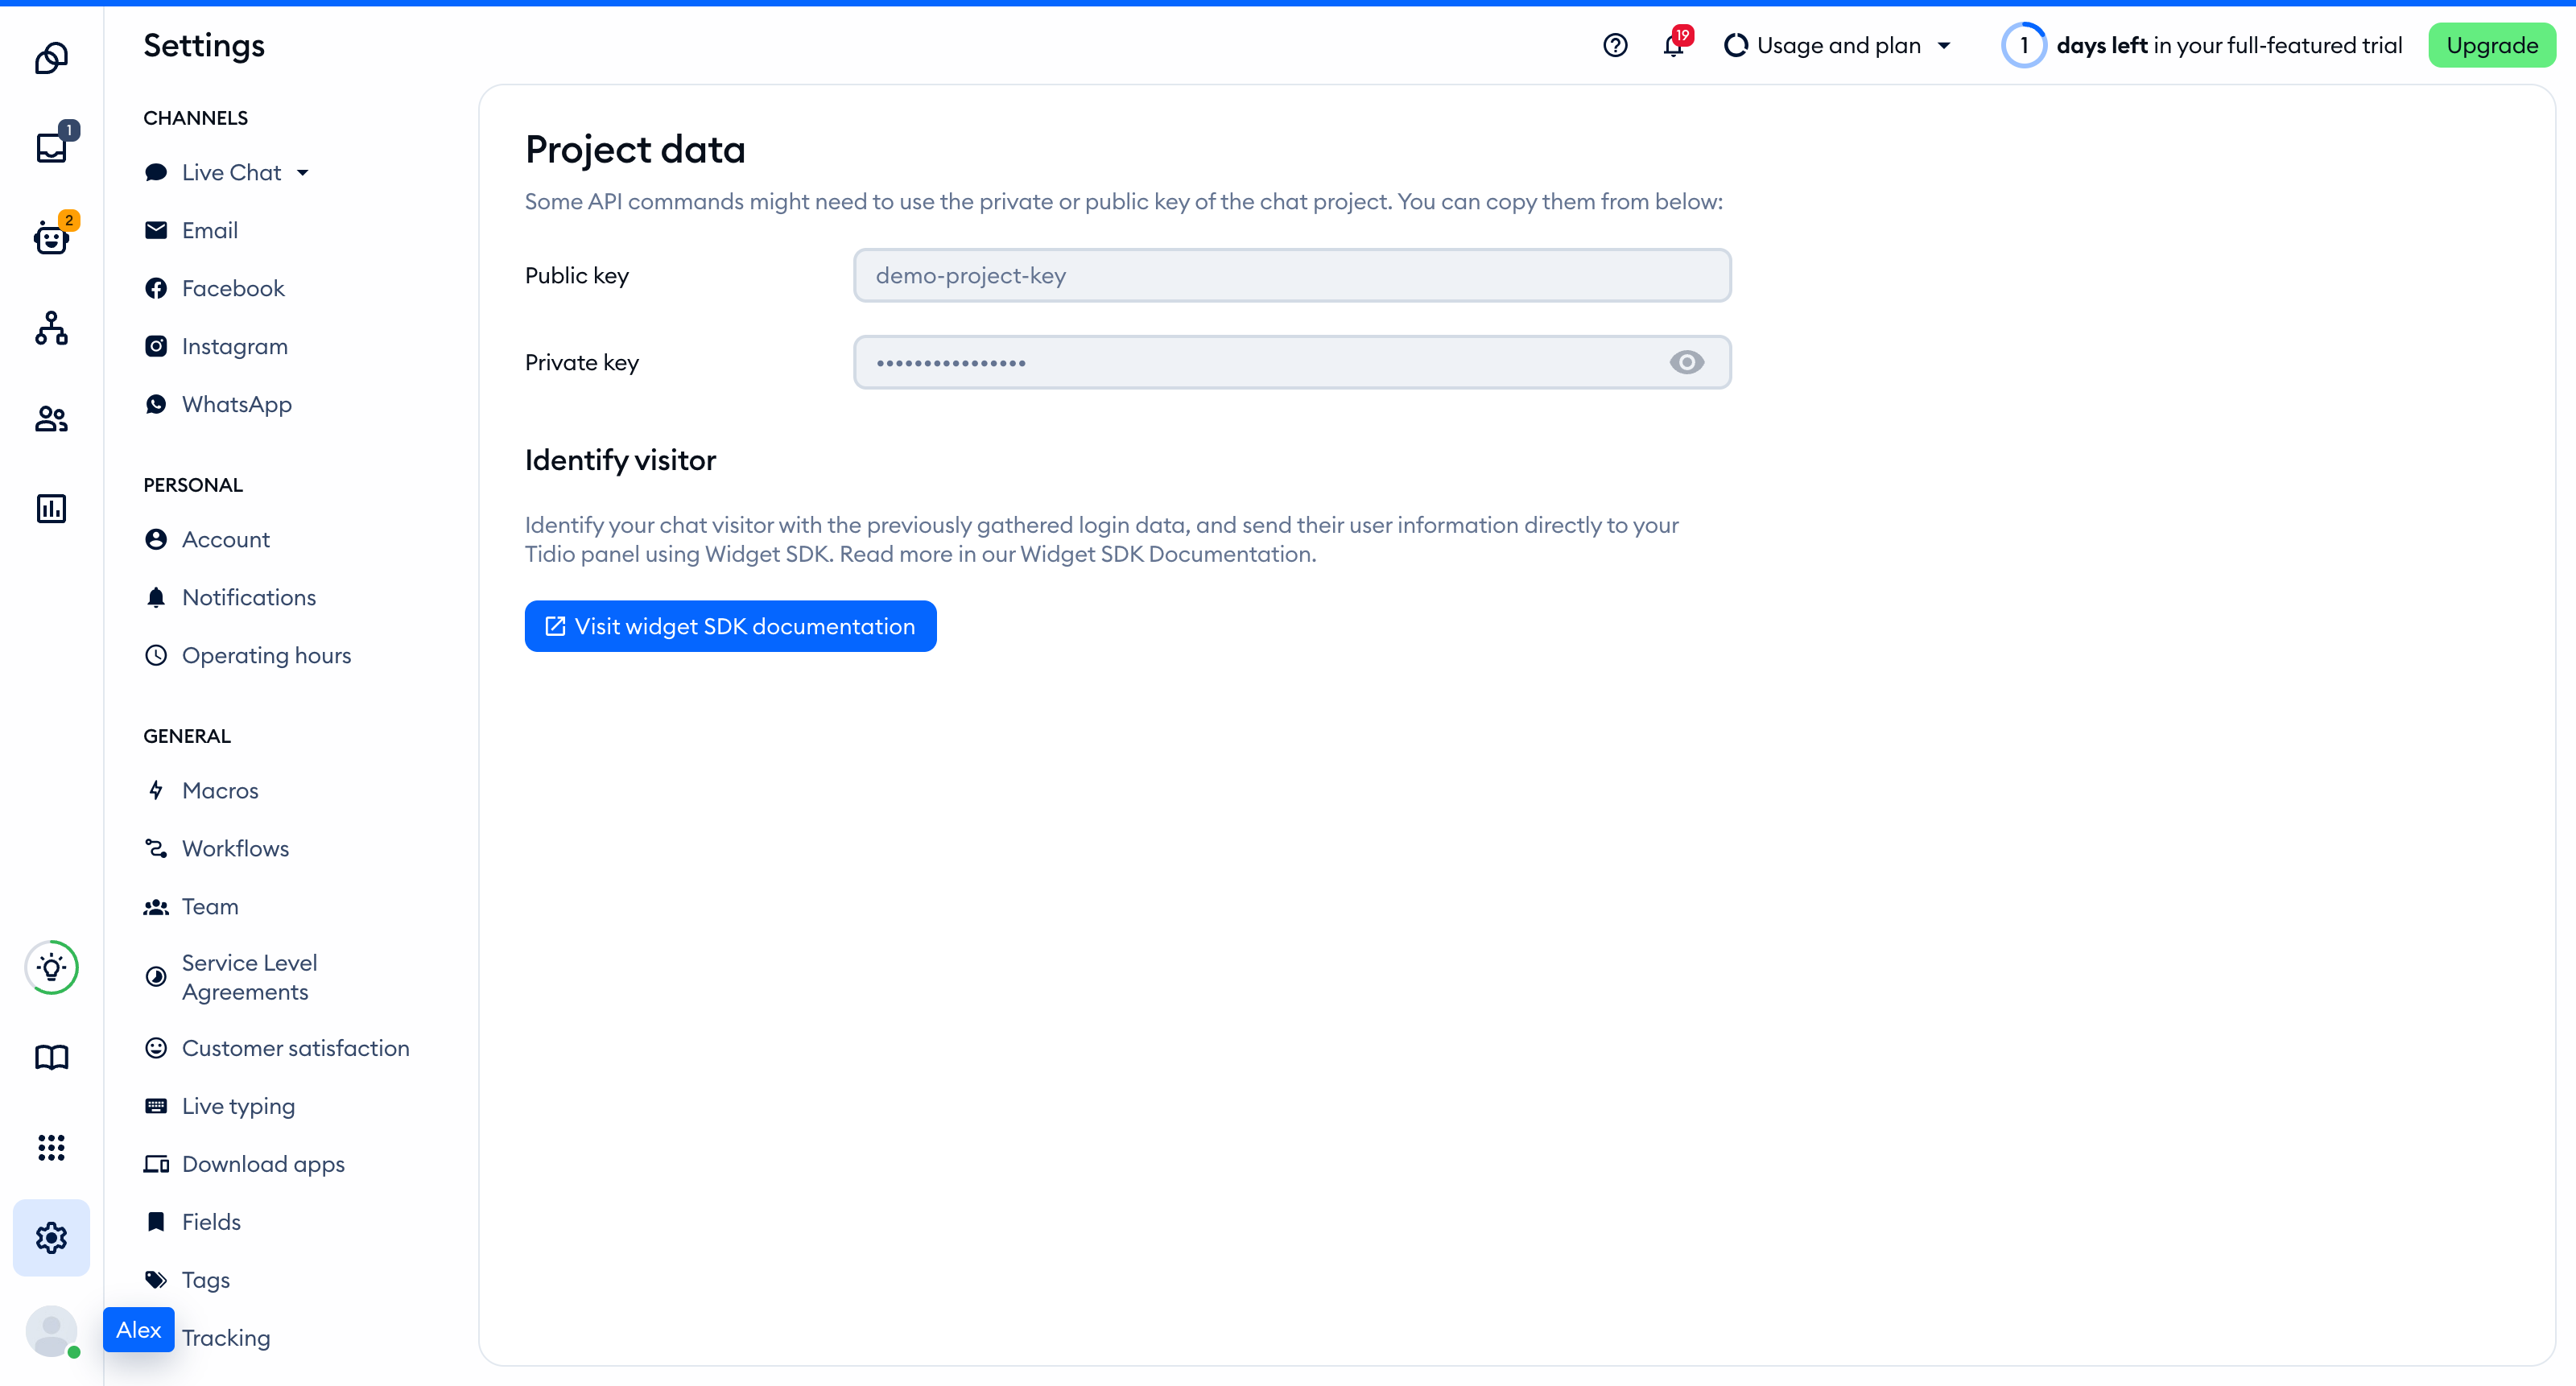
The Public key is part of the script address that every visitor's browser loads, so you can keep it in front-end code. The private key on the same page is different: never put it in your website.
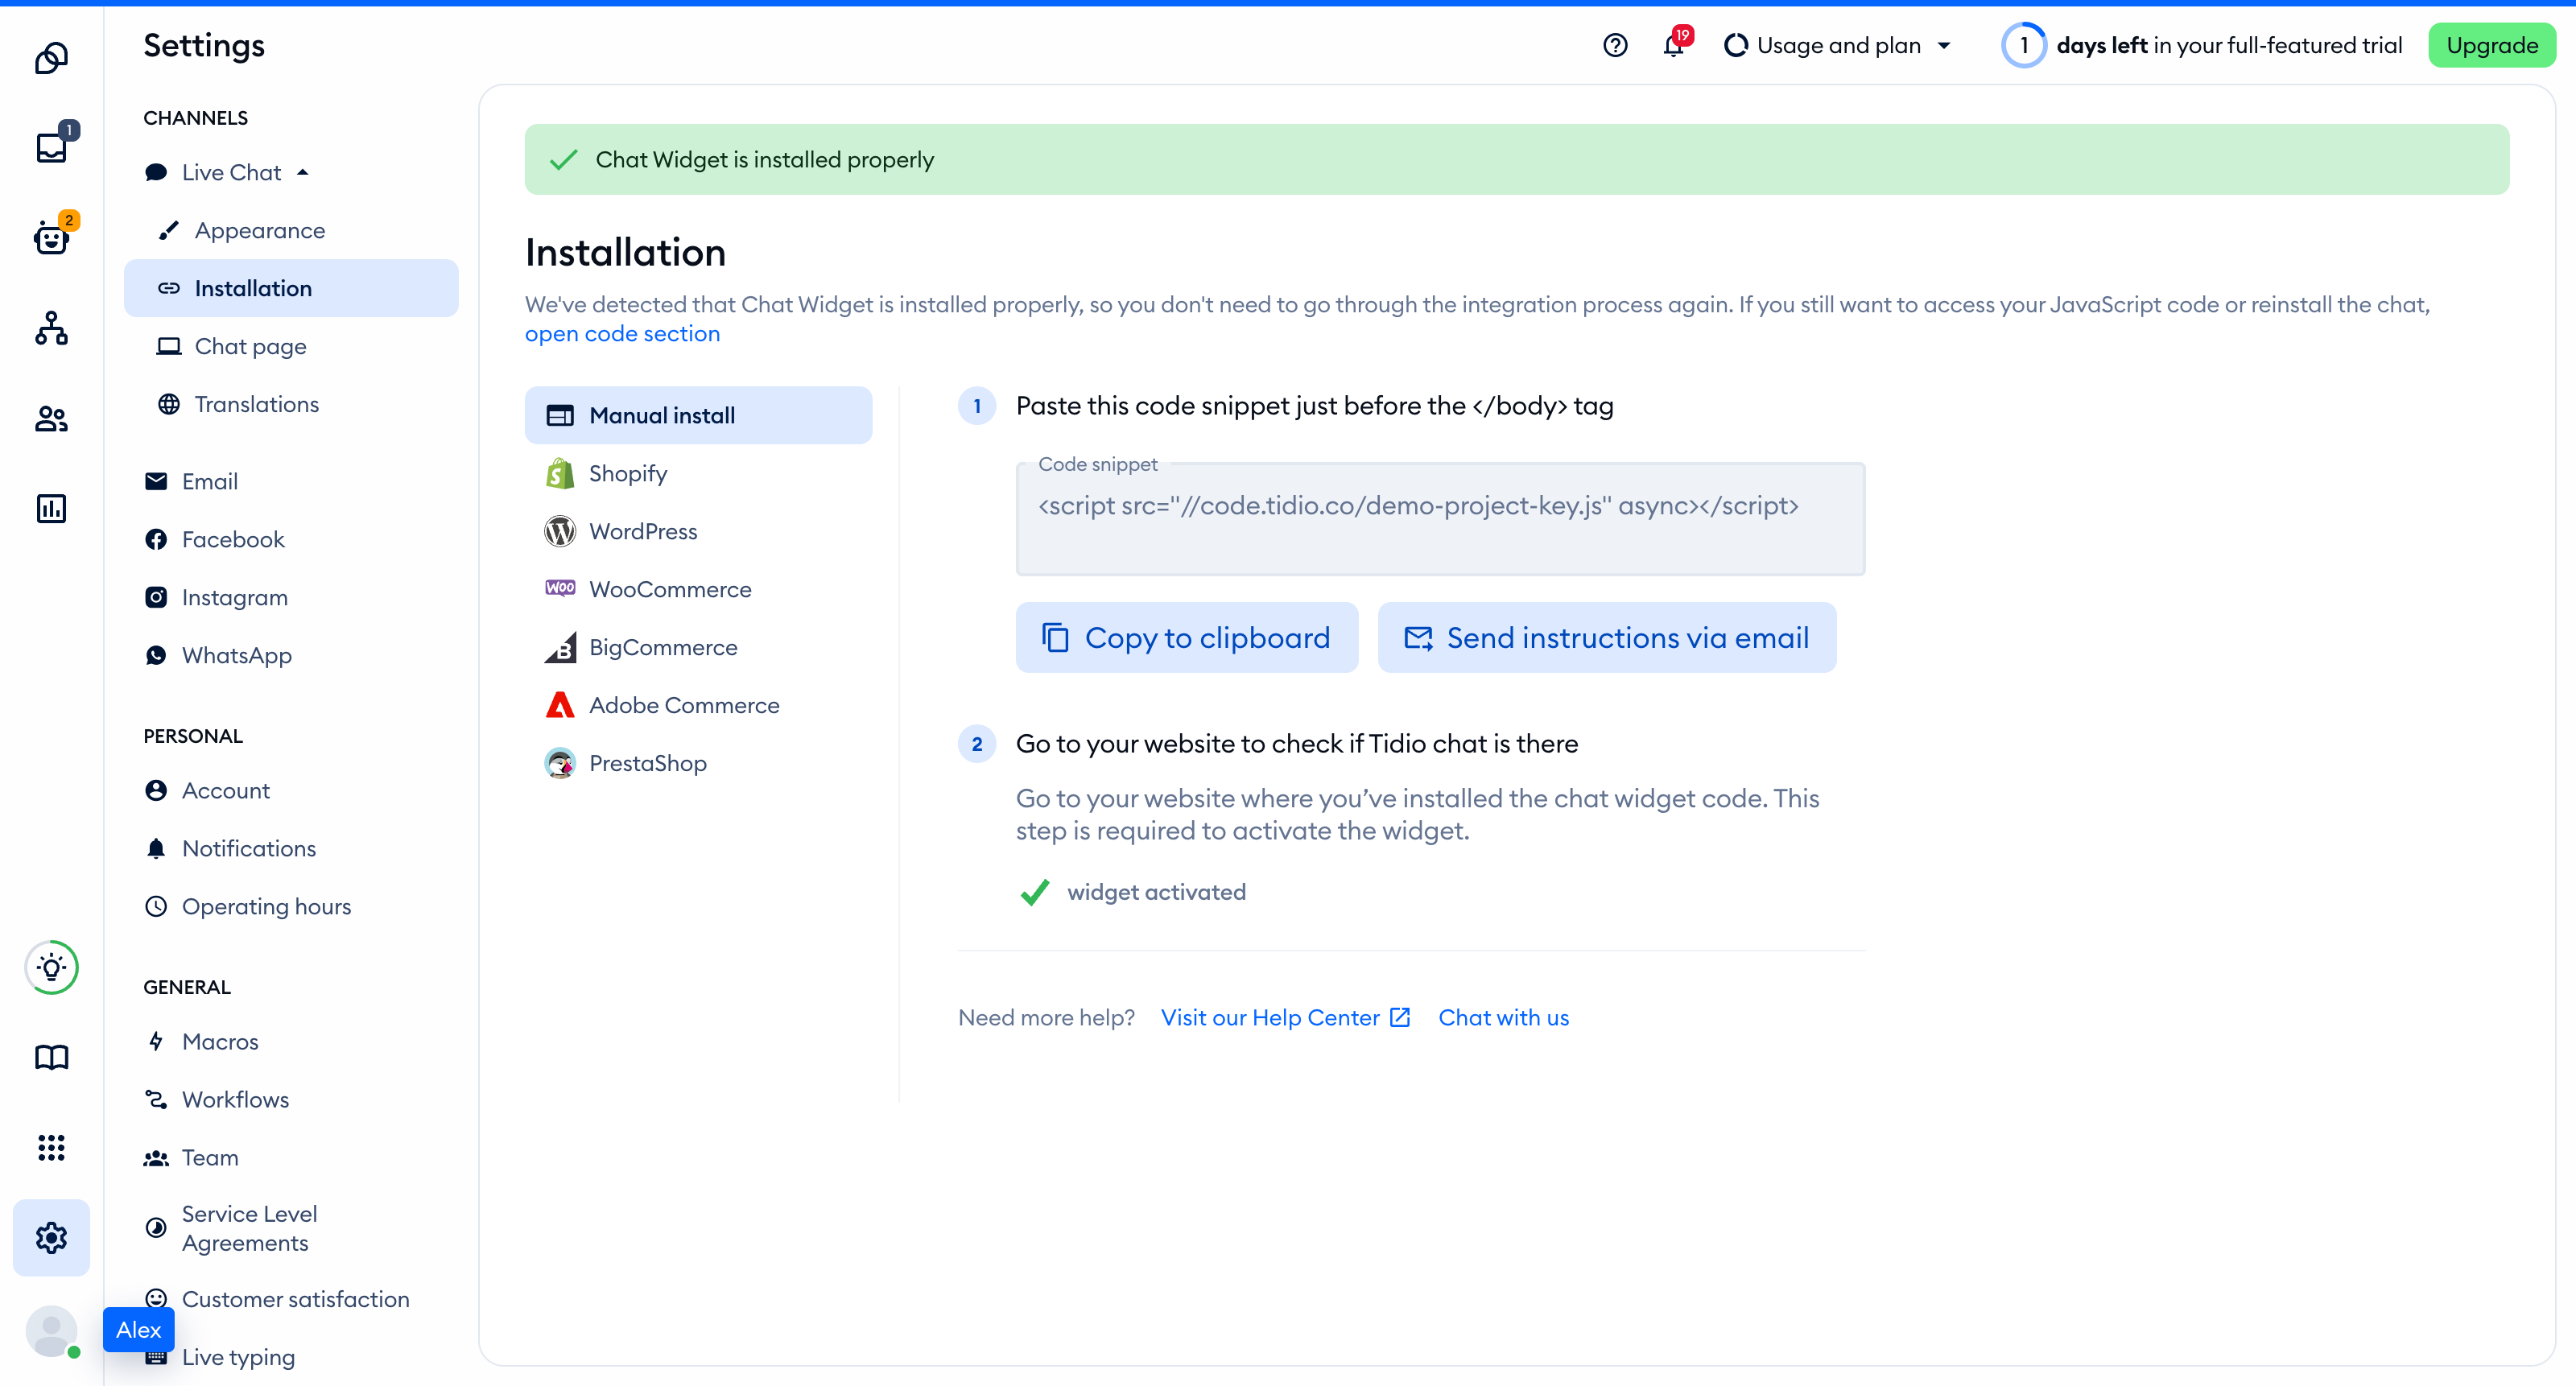
You'll find the same key inside the installation code in **Settings > Live Chat > Installation**, under **Manual install**:
```
```
## Ask Bolt to add the widget
Open your existing project and paste this request into the Bolt chat. Replace ` YOUR_PUBLIC_KEY ` before sending it.
```
Add the Tidio live chat widget to this project.
1. Load this script once on every page, at the end of the body, with async:
2. Put it in the root HTML document or the root layout, so it loads once and stays loaded during client-side navigation. Do not add it to single pages or to a component that mounts more than once.
3. Do not install an npm package for Tidio. The script tag is the whole installation.
4. Do not use window.tidioChatApi on the server. Use it only in the browser, after the "tidioChat-ready" event fires on document.
5. Change nothing else, then tell me which file you edited.
Reference: https://help.tidio.com/articles/install-ai-coding-agents/
```
Review the file Bolt names. The installation needs one script, not a separate copy for every page.
If you know your stack, use the guide for [Next.js](https://help.tidio.com/articles/install-nextjs/), [React](https://help.tidio.com/articles/install-react/), [React Router and Remix](https://help.tidio.com/articles/install-react-router/), [TanStack Start](https://help.tidio.com/articles/install-tanstack-start/), [Vue](https://help.tidio.com/articles/install-vue/), [Nuxt](https://help.tidio.com/articles/install-nuxt/), [SvelteKit](https://help.tidio.com/articles/install-sveltekit/), [Astro](https://help.tidio.com/articles/install-astro/), [Angular](https://help.tidio.com/articles/install-angular/), [Gatsby](https://help.tidio.com/articles/install-gatsby/), [SolidStart](https://help.tidio.com/articles/install-solidstart/), [Qwik](https://help.tidio.com/articles/install-qwik/), or [Eleventy](https://help.tidio.com/articles/install-eleventy/).
## Add the script yourself
Use Code view on a desktop Chromium-based browser, such as Chrome. Bolt's Code view is read-only in Safari.
1. Click the code icon at the top center of the project.
2. In **Files**, open your root HTML document or the framework's shared layout.
3. For a plain HTML document, put the script below just before ` `. For a framework layout, follow the matching framework guide above.
4. Click **Save**.
```